> ## Documentation Index
> Fetch the complete documentation index at: https://support.i.moneyforward.com/llms.txt
> Use this file to discover all available pages before exploring further.
# Invite members and set roles
> Learn how to invite members to your AI Helpdesk organization and assign Admin or Operator roles.
Invite other members to your organization and assign appropriate roles so your team can use AI Helpdesk together.
## Role types
| Role | Target users | Key permissions |
| ------------ | --------------------------------- | ----------------------------------------------------------------------------------- |
| **Admin** | IT administrators, service owners | Organization settings, member management, integration configuration, all operations |
| **Operator** | Helpdesk staff | Handling inquiries, editing playbooks, day-to-day operations |
## Invite a member
Only **Admins** can invite members.
Invited members must sign in with their Money Forward ID (MFID) before accepting the invitation.
Select **Settings** from the left navigation and open the **Admin** tab.
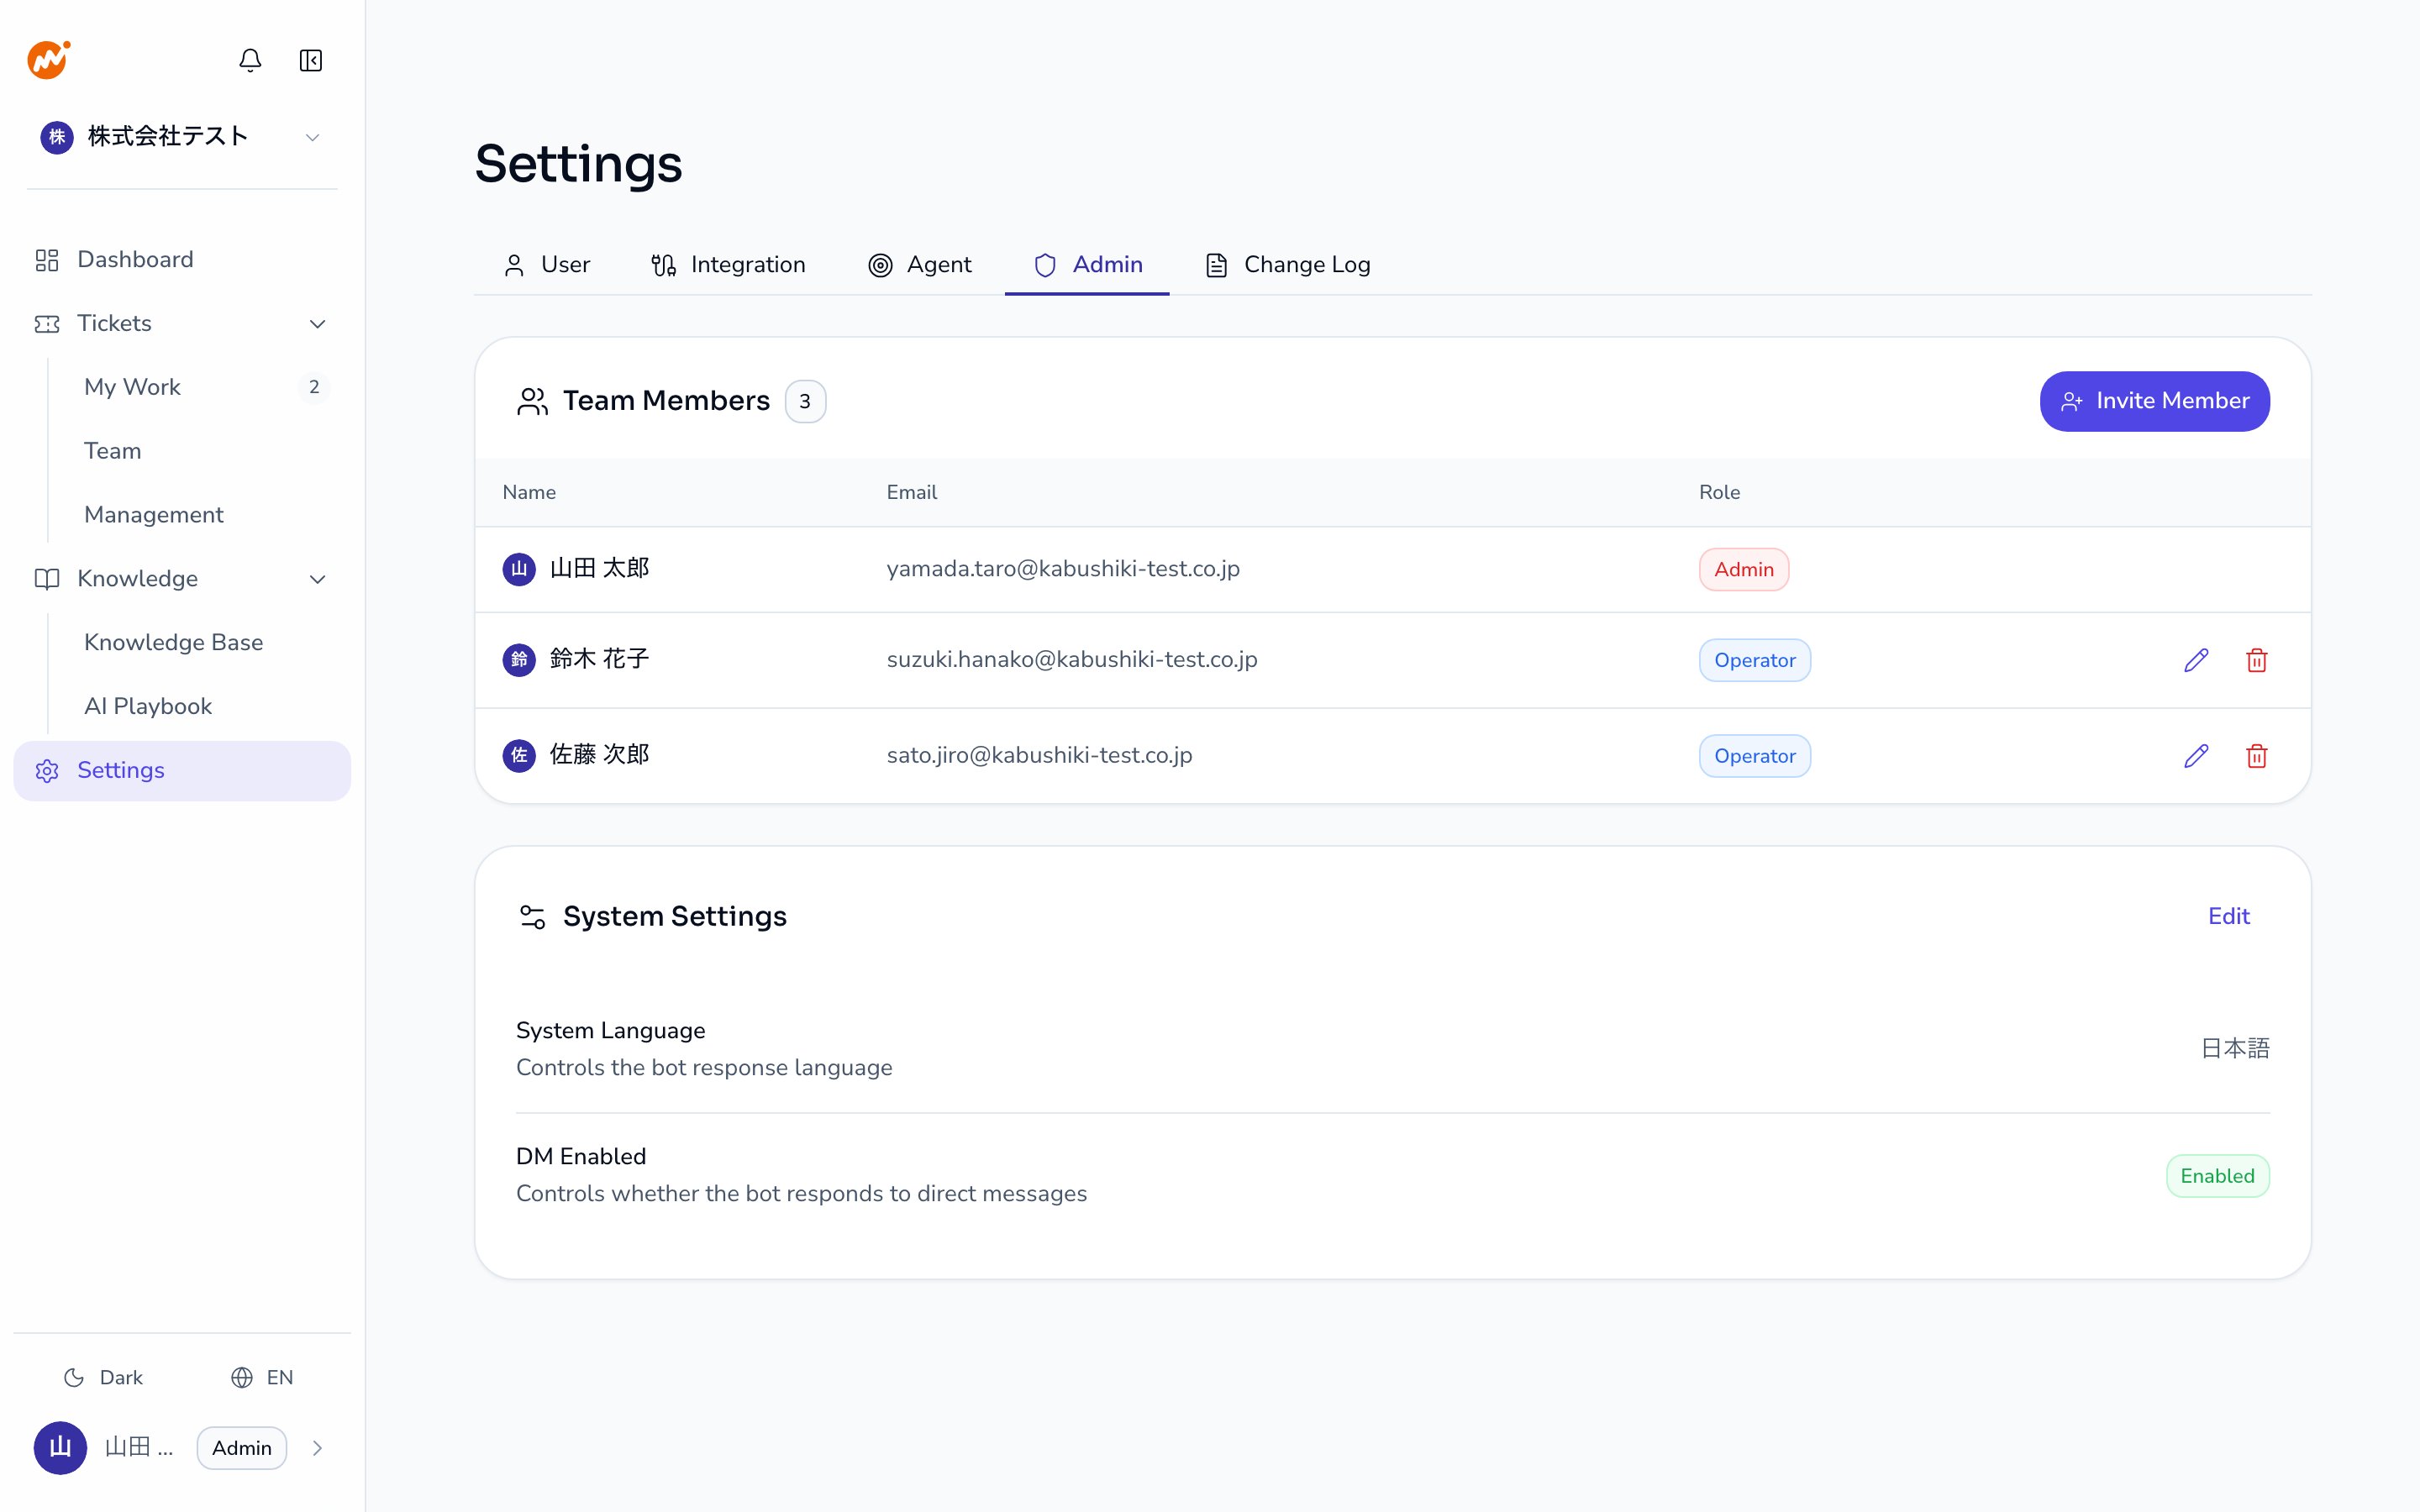 Click the **Invite member** button in the upper-right area of the **Team members** section.
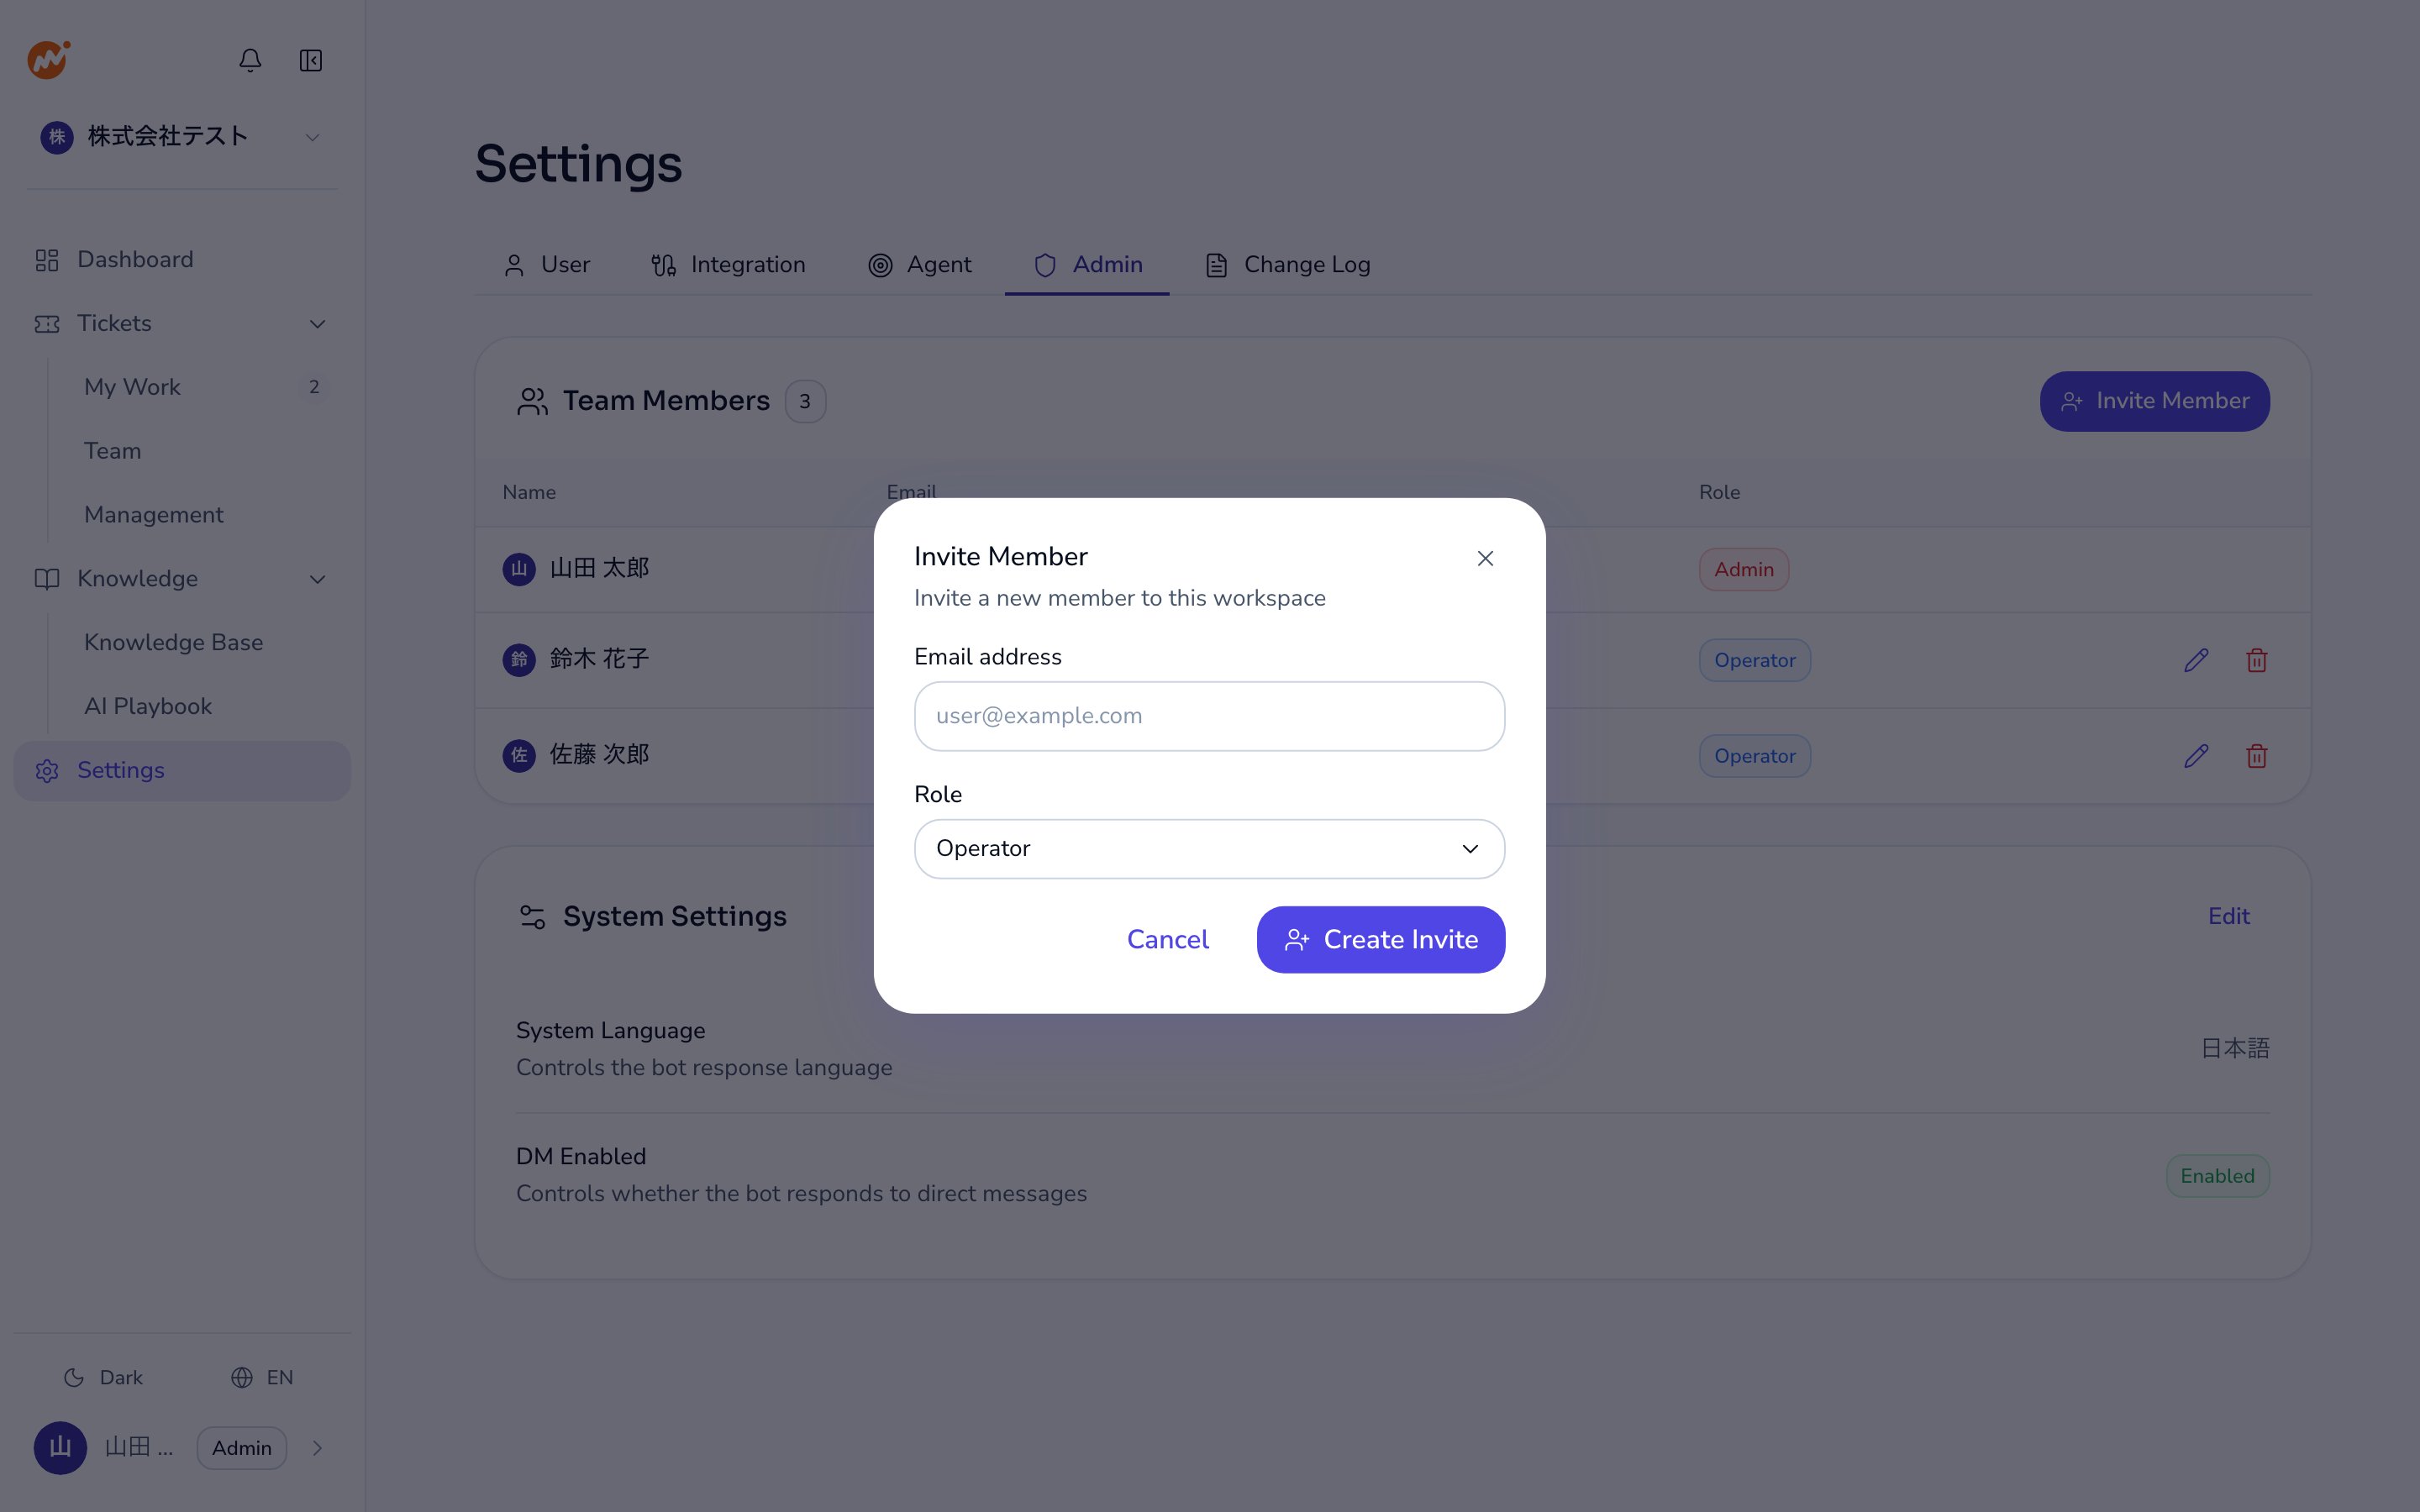 Configure the following settings.
* **Email address** (required): Enter the email address of the person you want to invite.
* **Role**: Select **Admin** or **Operator** from the dropdown.
The invitation is valid only for the specified email address.
The MFID account used to sign in must match the invited email address.
Once created, an invitation link is generated.
Click the copy icon on the pending invitation row in the team member list, then send the link to the invitee.
Invitation links expire after **72 hours**.
Configure the following settings.
* **Email address** (required): Enter the email address of the person you want to invite.
* **Role**: Select **Admin** or **Operator** from the dropdown.
The invitation is valid only for the specified email address.
The MFID account used to sign in must match the invited email address.
Once created, an invitation link is generated.
Click the copy icon on the pending invitation row in the team member list, then send the link to the invitee.
Invitation links expire after **72 hours**.
 ## Accept an invitation (for invited members)
Open the invitation link sent by the admin in your browser.
If you are not already signed in, you are redirected to the Money Forward ID login screen.
Sign in with your MFID account.
If the invitation specifies an email address, the MFID account you sign in with must match that email address.
The organization name and a consent checkbox are displayed.
Review the content, check the checkbox, and click **Accept Invitation**.
After joining, a confirmation screen appears. Click **Go to Dashboard** to go to the organization dashboard.
{/*  */}
## Change a member's role
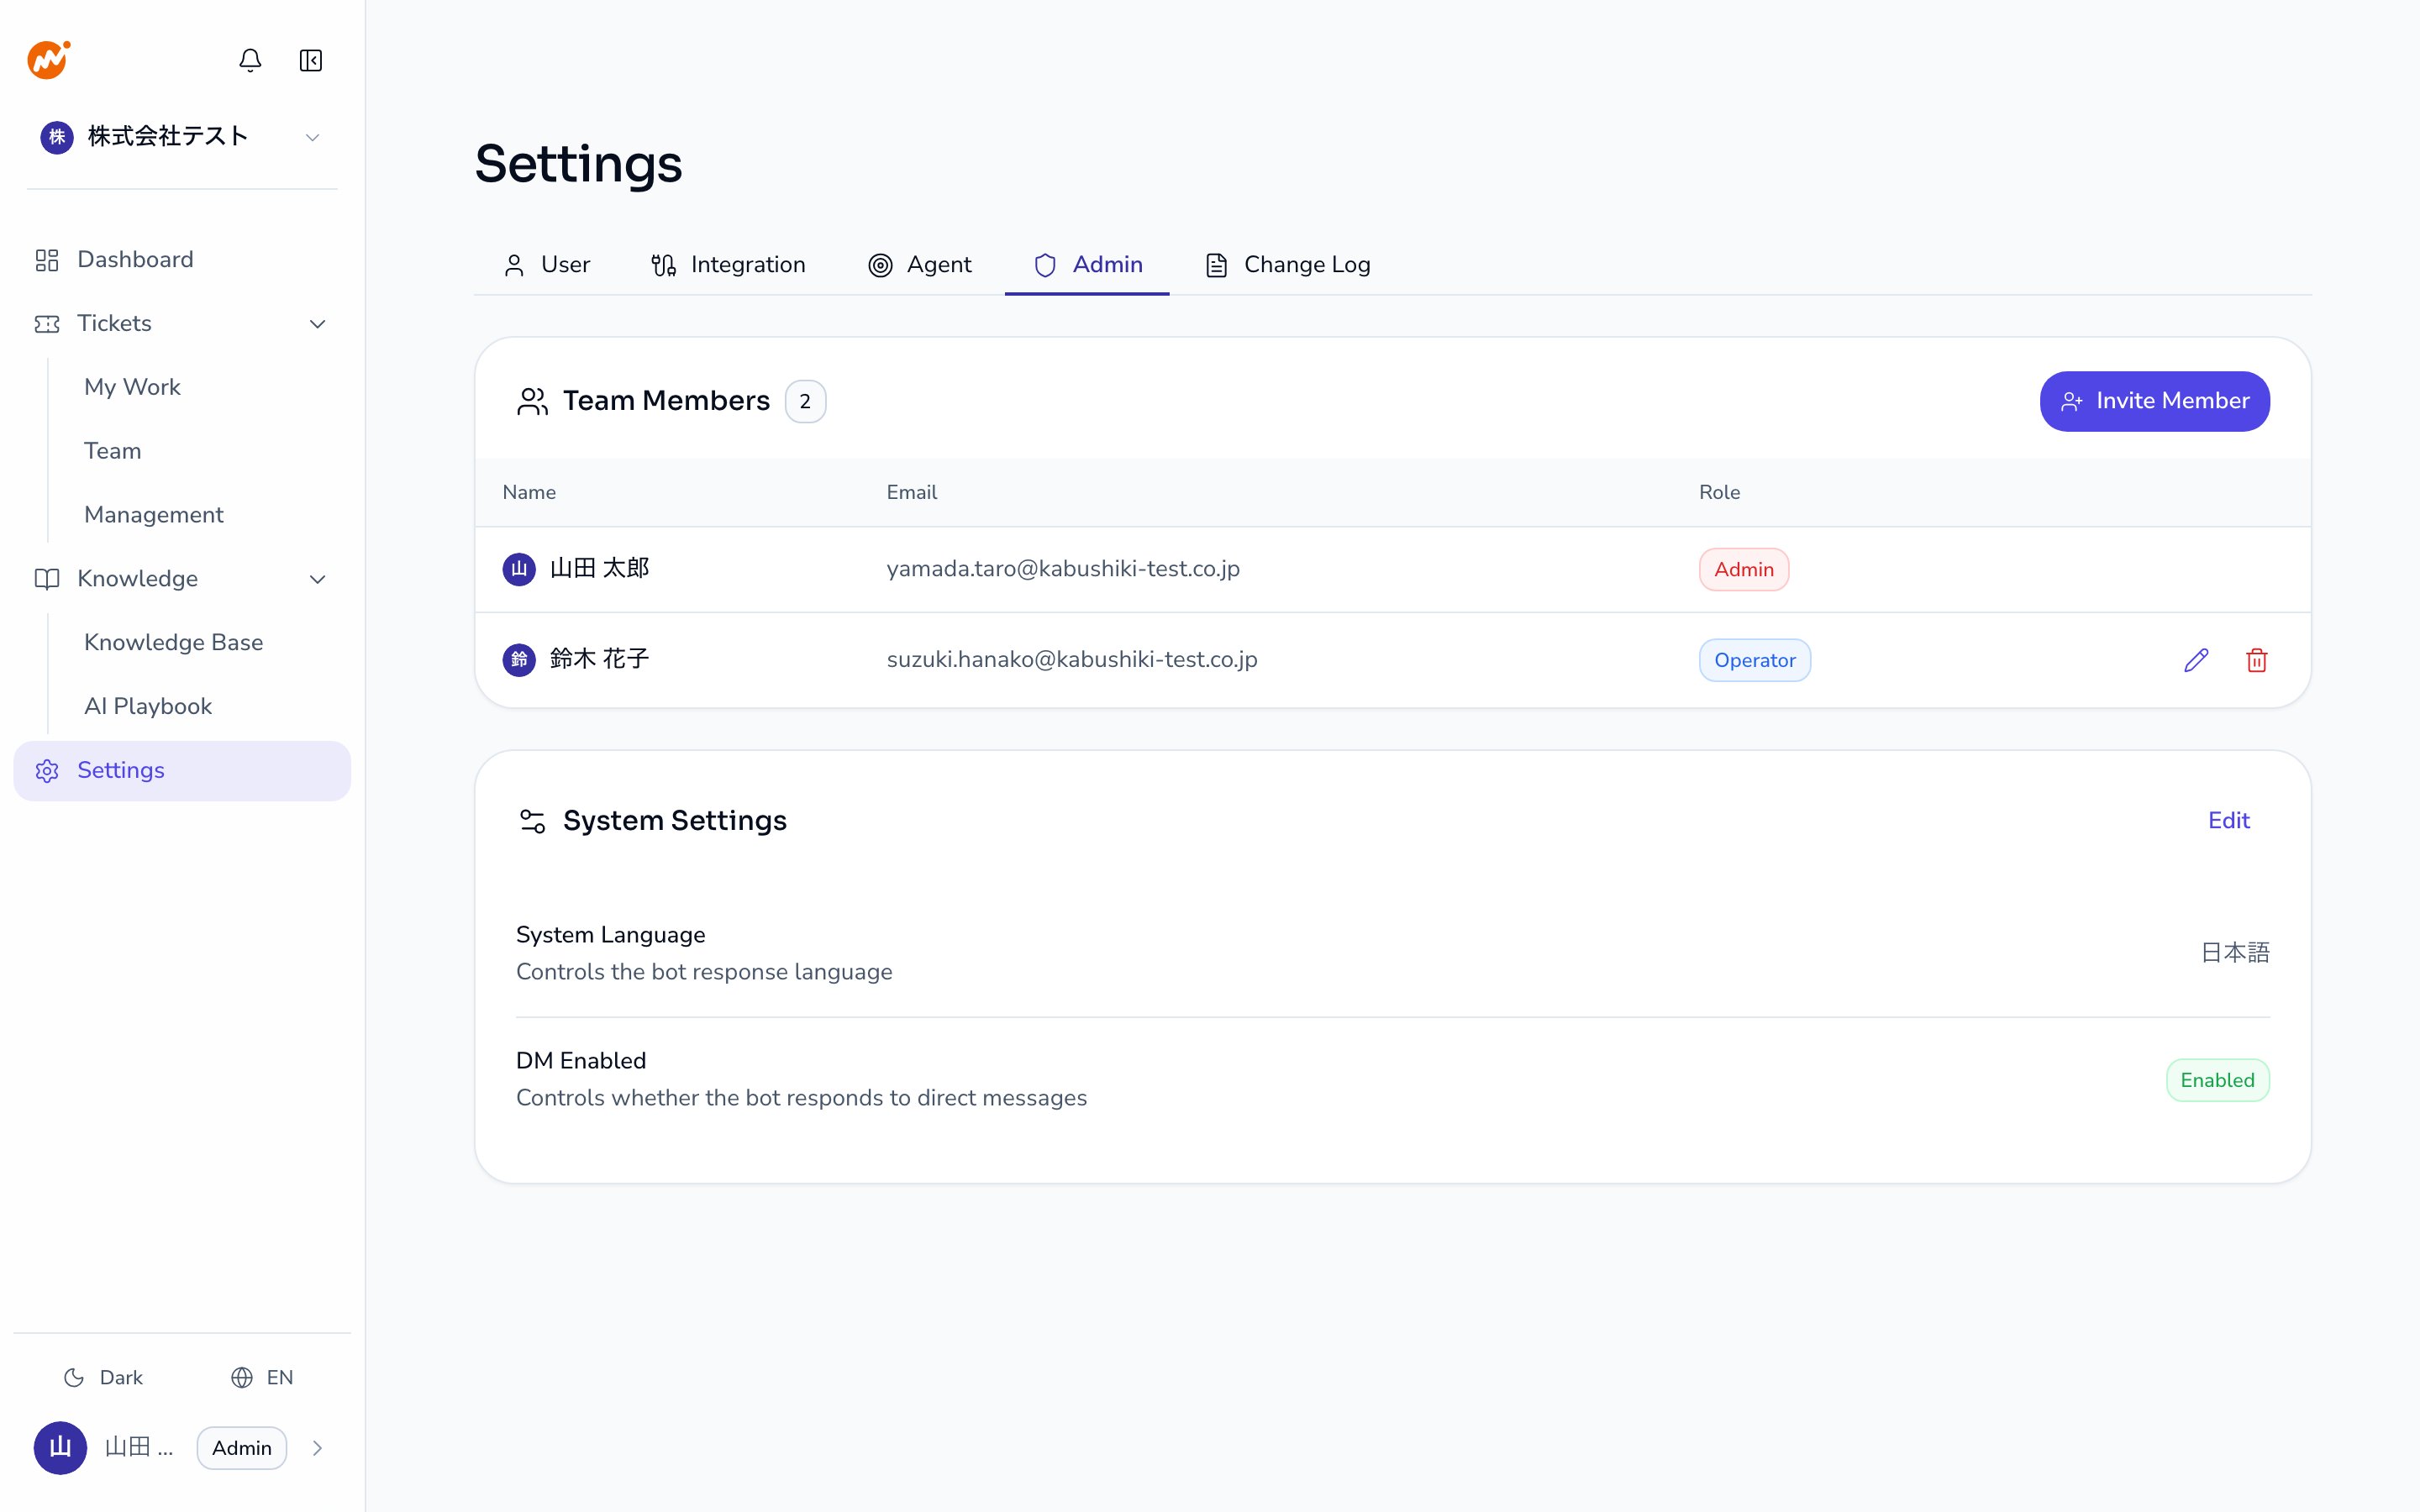
Open the **Team members** section under **Settings > Admin**.
Click the edit icon on the target member's row.
Use the **Admin** and **Operator** checkboxes to select which roles to assign.
An existing member can hold both roles at the same time.
At least one role must always be assigned. You cannot remove all roles.
Click the save icon to apply the changes.
## Remove a member
Open the **Team members** section under **Settings > Admin**.
Click the trash icon on the target member's row.
A confirmation dialog appears — review the content and click **Confirm**.
You cannot remove yourself from the organization.
## Cancel a pending invitation
You can cancel an invitation while it is still within the expiry period.
Click the trash icon on the pending invitation row in the **Team members** section, then confirm the cancellation in the dialog.
## Related pages
* [Creating an organization](/en/ai-helpdesk/onboarding/organization)
* [Slack integration](/en/ai-helpdesk/integrations/slack)
* [Microsoft Teams integration](/en/ai-helpdesk/integrations/teams)
* [LINE WORKS integration](/en/ai-helpdesk/integrations/line-works)
* [Google Chat integration](/en/ai-helpdesk/integrations/google-chat)
## Accept an invitation (for invited members)
Open the invitation link sent by the admin in your browser.
If you are not already signed in, you are redirected to the Money Forward ID login screen.
Sign in with your MFID account.
If the invitation specifies an email address, the MFID account you sign in with must match that email address.
The organization name and a consent checkbox are displayed.
Review the content, check the checkbox, and click **Accept Invitation**.
After joining, a confirmation screen appears. Click **Go to Dashboard** to go to the organization dashboard.
{/*  */}
## Change a member's role
Open the **Team members** section under **Settings > Admin**.
Click the edit icon on the target member's row.
Use the **Admin** and **Operator** checkboxes to select which roles to assign.
An existing member can hold both roles at the same time.
At least one role must always be assigned. You cannot remove all roles.
Click the save icon to apply the changes.
## Remove a member
Open the **Team members** section under **Settings > Admin**.
Click the trash icon on the target member's row.
A confirmation dialog appears — review the content and click **Confirm**.
You cannot remove yourself from the organization.
## Cancel a pending invitation
You can cancel an invitation while it is still within the expiry period.
Click the trash icon on the pending invitation row in the **Team members** section, then confirm the cancellation in the dialog.
## Related pages
* [Creating an organization](/en/ai-helpdesk/onboarding/organization)
* [Slack integration](/en/ai-helpdesk/integrations/slack)
* [Microsoft Teams integration](/en/ai-helpdesk/integrations/teams)
* [LINE WORKS integration](/en/ai-helpdesk/integrations/line-works)
* [Google Chat integration](/en/ai-helpdesk/integrations/google-chat)