> ## Documentation Index
> Fetch the complete documentation index at: https://support.i.moneyforward.com/llms.txt
> Use this file to discover all available pages before exploring further.
# Miro
> Steps for integrating with Miro.
## Supported Features
Account Deletion Account Creation
## Connecting with Miro
The integration method differs between the Enterprise plan and other plans. If you are on the Enterprise plan, use the Enterprise (OAuth) integration. For all other plans, use the standard (ID/Password) integration.
### Standard Integration (Non-Enterprise)
With ID/Password integration, external authentication accounts such as Google or SSO cannot be used. For details, see [\[Restriction\] Integration Failure with Google Authentication or SSO External Authentication Accounts](/en/it-management/faq/7gbneu0vz5-auth-error).
#### Prerequisites
**Obtaining the Workspace Key**
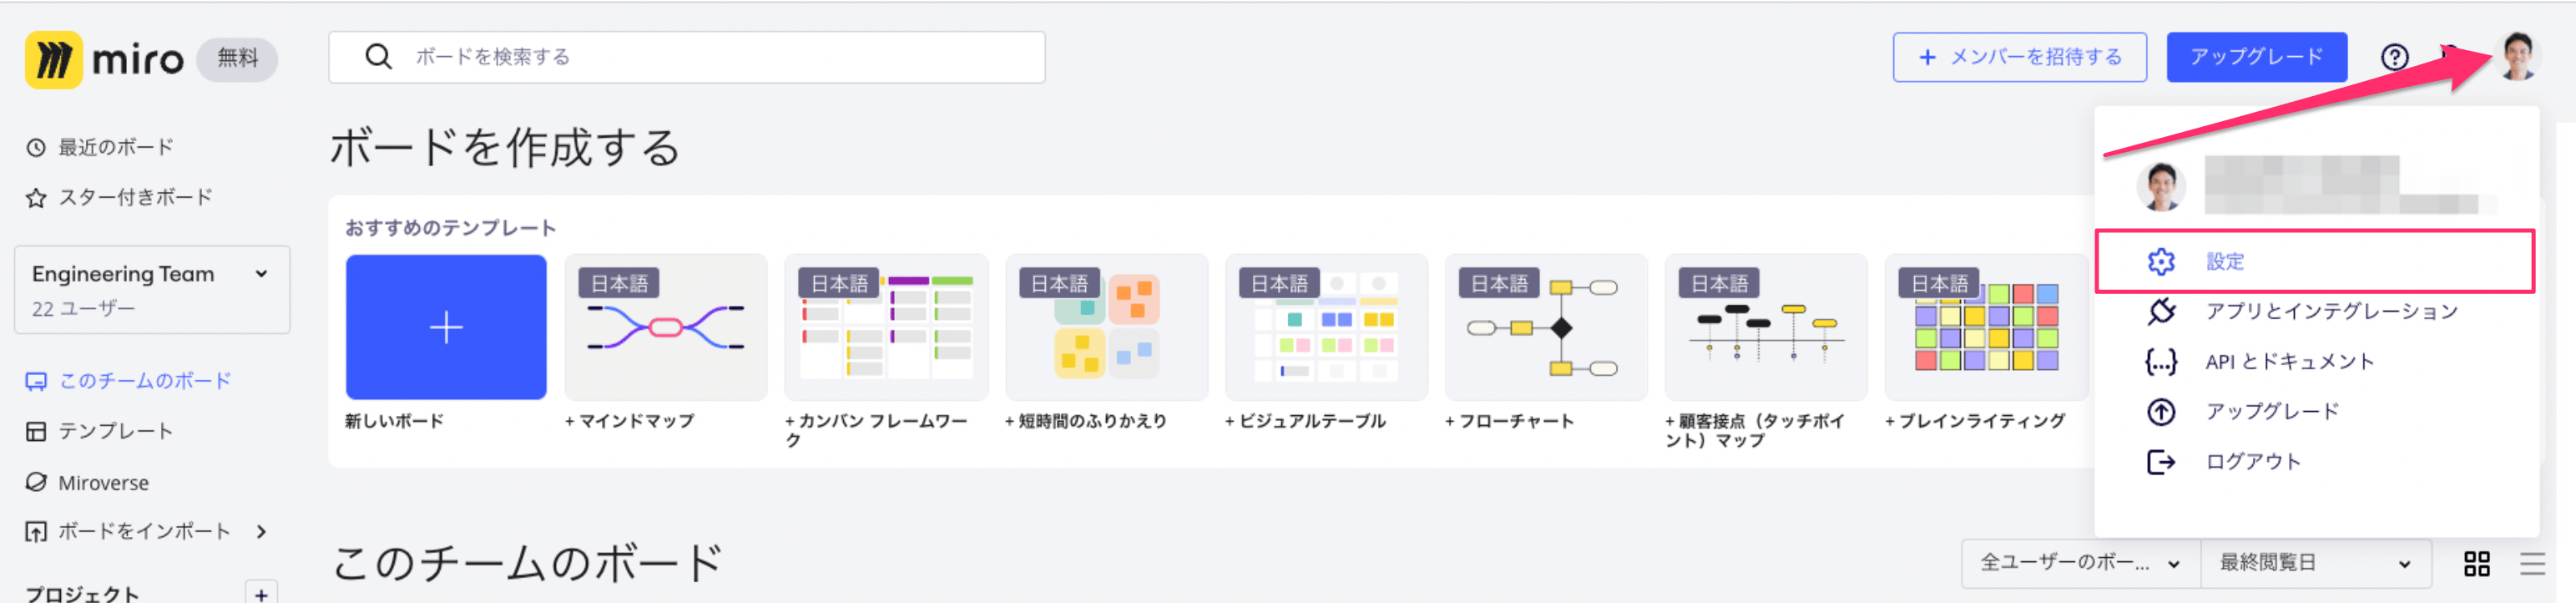
After logging in to Miro, click the icon in the upper right and click **Settings**.
 Select the organization (Company) you want to connect, then navigate to the Profile page. Part of the URL is a number — this is your workspace key. Save it for later.
```
https://miro.com/app/settings/company/{workspace-key}/user-profile
```
Select the organization (Company) you want to connect, then navigate to the Profile page. Part of the URL is a number — this is your workspace key. Save it for later.
```
https://miro.com/app/settings/company/{workspace-key}/user-profile
```
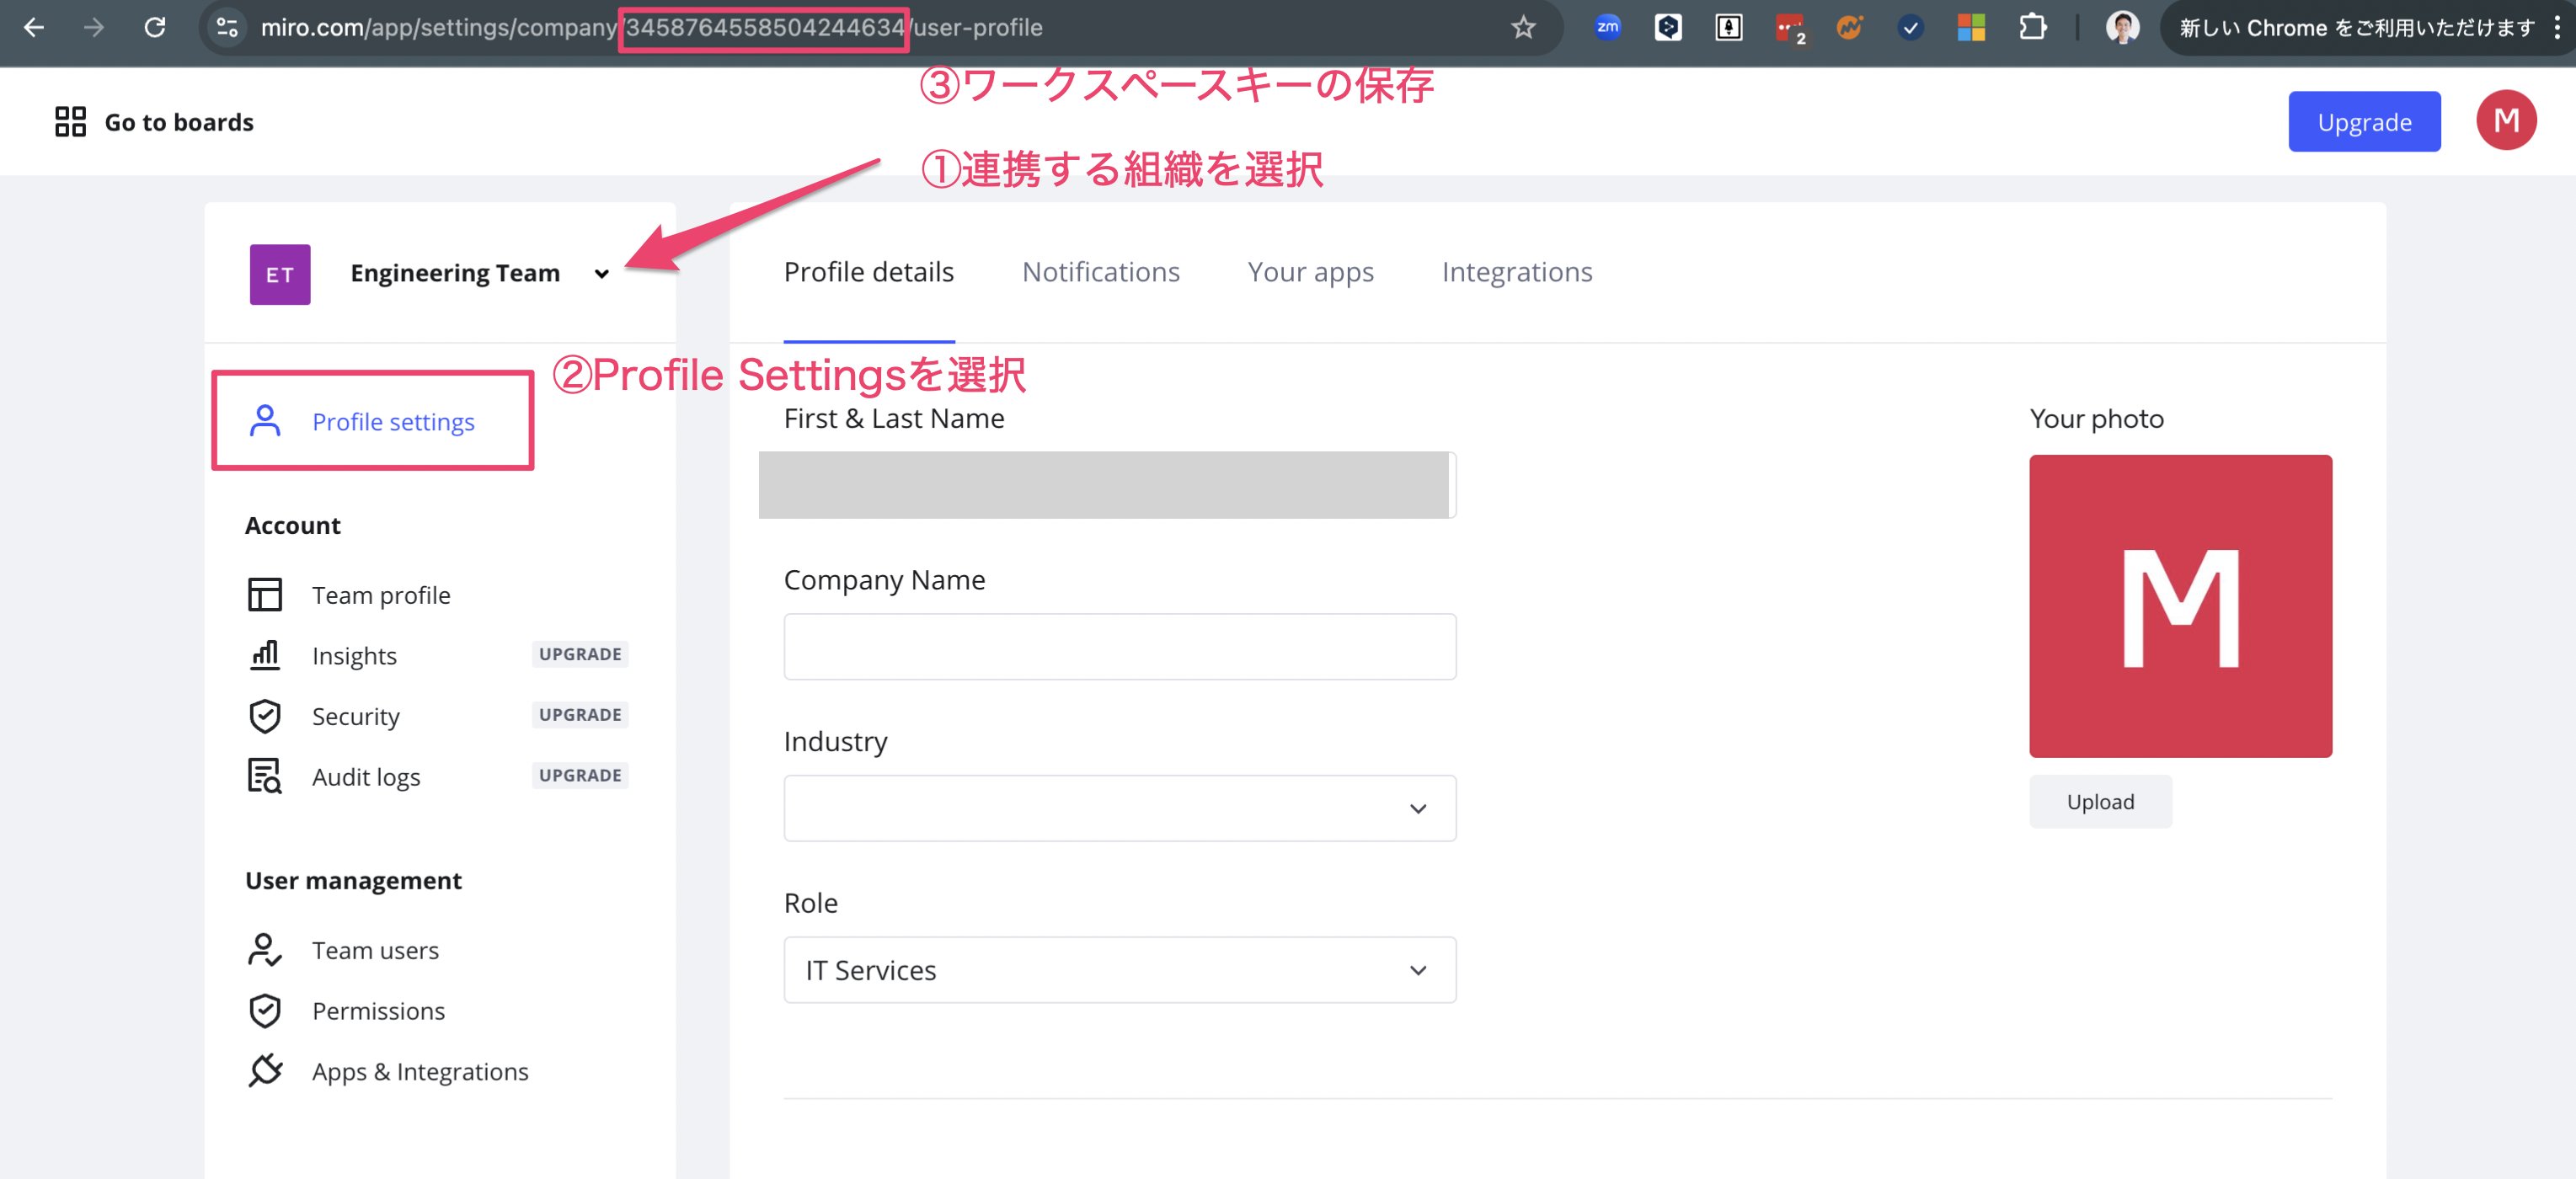 If you have multiple organizations, the workspace key differs per organization. Save each workspace key separately.
#### Integration Setup
In the Admina integrations screen, search for **Miro** and select `ID/Password`.
Enter your Miro login email address, password, and the workspace key you obtained, then click **Connect**.
Due to the following restriction, external authentication accounts such as Google or SSO cannot be used. Please prepare an administrator account that can log in with an email address and password before proceeding.
[\[Restriction\] Integration Failure with Google Authentication or SSO External Authentication Accounts](/en/it-management/faq/7gbneu0vz5-auth-error)
If you have multiple organizations, the workspace key differs per organization. Save each workspace key separately.
#### Integration Setup
In the Admina integrations screen, search for **Miro** and select `ID/Password`.
Enter your Miro login email address, password, and the workspace key you obtained, then click **Connect**.
Due to the following restriction, external authentication accounts such as Google or SSO cannot be used. Please prepare an administrator account that can log in with an email address and password before proceeding.
[\[Restriction\] Integration Failure with Google Authentication or SSO External Authentication Accounts](/en/it-management/faq/7gbneu0vz5-auth-error)
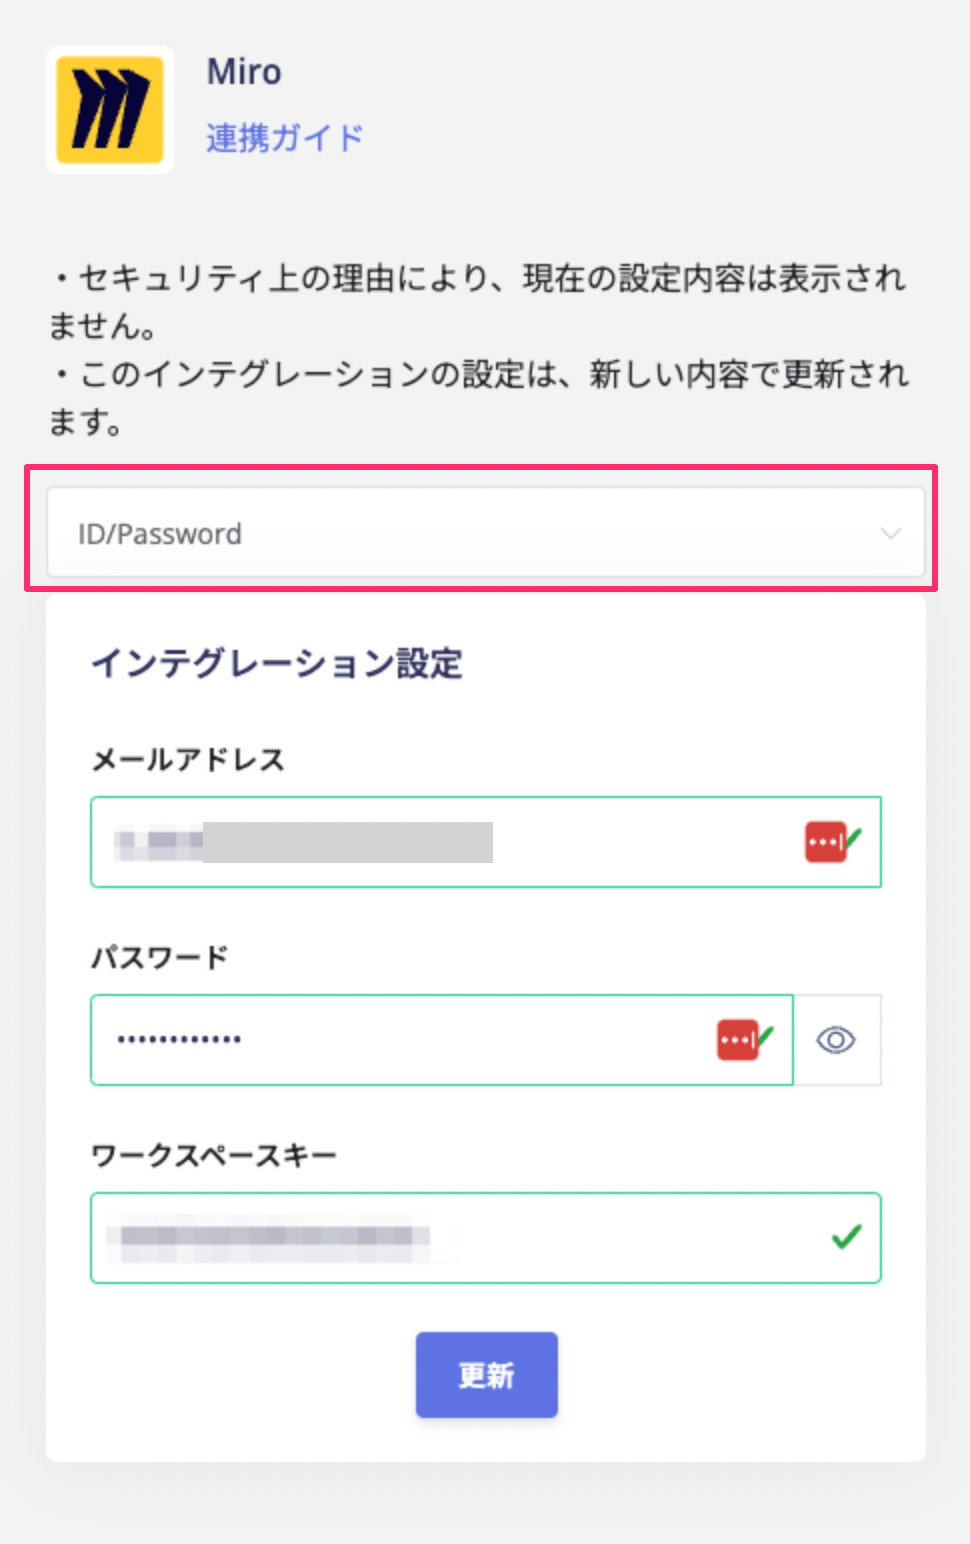 Once the integration with Miro is successful, registered user information will appear in the account list.
If you have multiple teams, the workspace key differs per team. Follow the same steps for each team.
If the process did not complete successfully, go to the Status tab on the integrations screen, click Edit.
Try connecting again.
If the issue persists, please contact us via chat.
For an overview of the Miro integration, see the [integration page](http://admina.moneyforward.com/en/integrations/miro).
### Enterprise Plan Integration
#### How to Obtain the Client ID and Client Secret
1. Follow the instructions at the URL below to **create an OAuth App**.
[https://help.miro.com/hc/en-us/articles/4766759572114](https://help.miro.com/hc/en-us/articles/4766759572114)
2. Add the following **redirect URI**:
```
https://itmc.i.moneyforward.com/oauth/callback
```
Once the integration with Miro is successful, registered user information will appear in the account list.
If you have multiple teams, the workspace key differs per team. Follow the same steps for each team.
If the process did not complete successfully, go to the Status tab on the integrations screen, click Edit.
Try connecting again.
If the issue persists, please contact us via chat.
For an overview of the Miro integration, see the [integration page](http://admina.moneyforward.com/en/integrations/miro).
### Enterprise Plan Integration
#### How to Obtain the Client ID and Client Secret
1. Follow the instructions at the URL below to **create an OAuth App**.
[https://help.miro.com/hc/en-us/articles/4766759572114](https://help.miro.com/hc/en-us/articles/4766759572114)
2. Add the following **redirect URI**:
```
https://itmc.i.moneyforward.com/oauth/callback
```
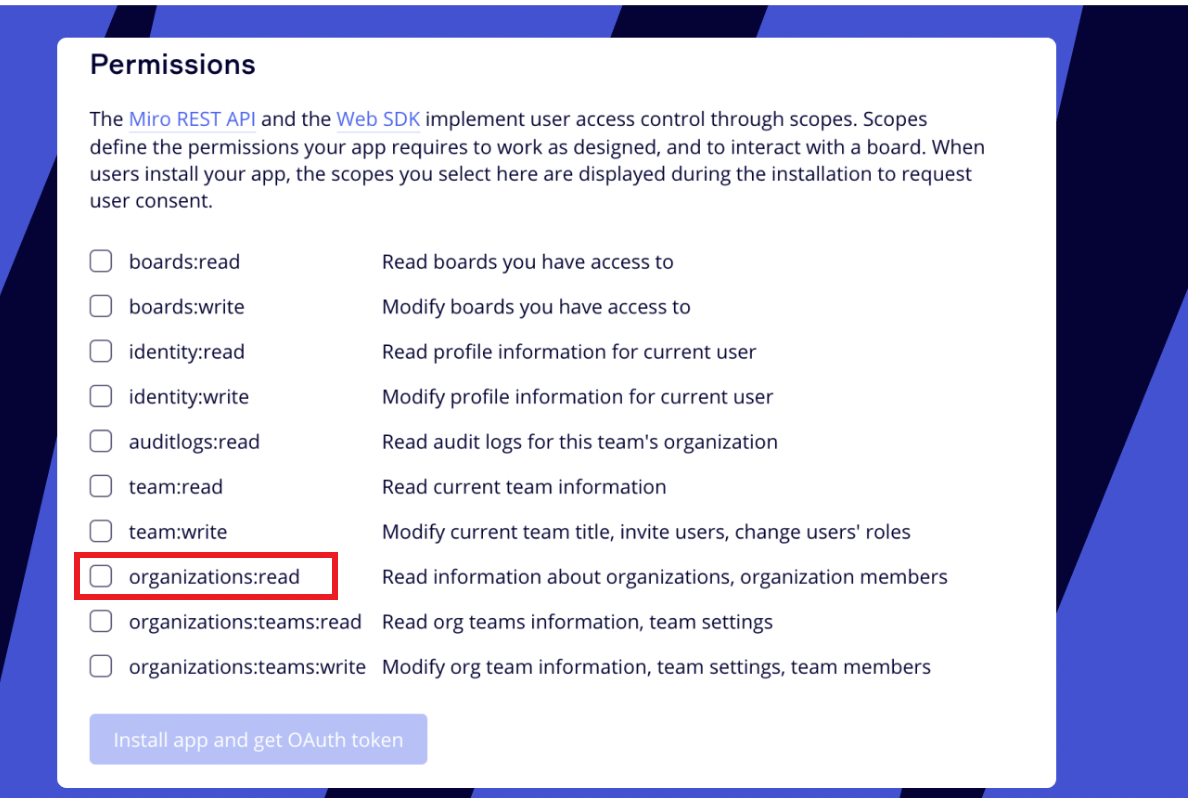
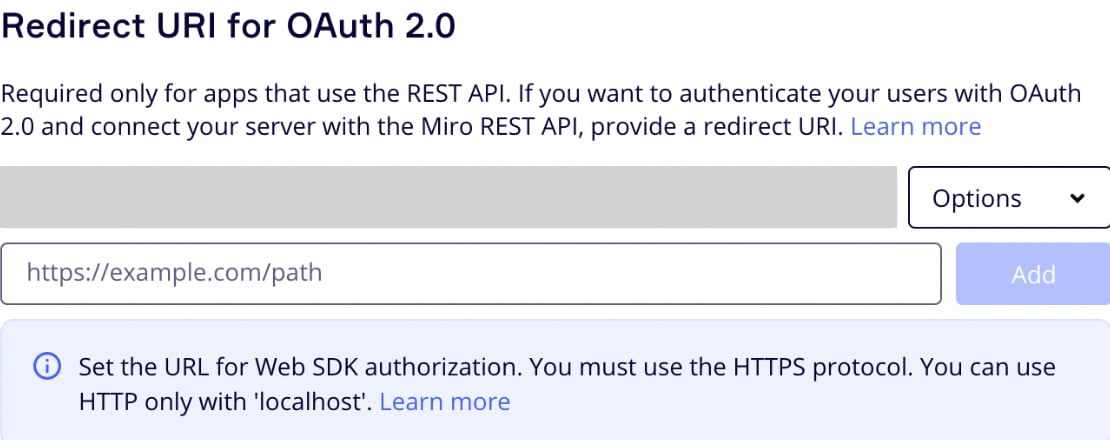 3. For Permissions, select **`organizations:read`**.
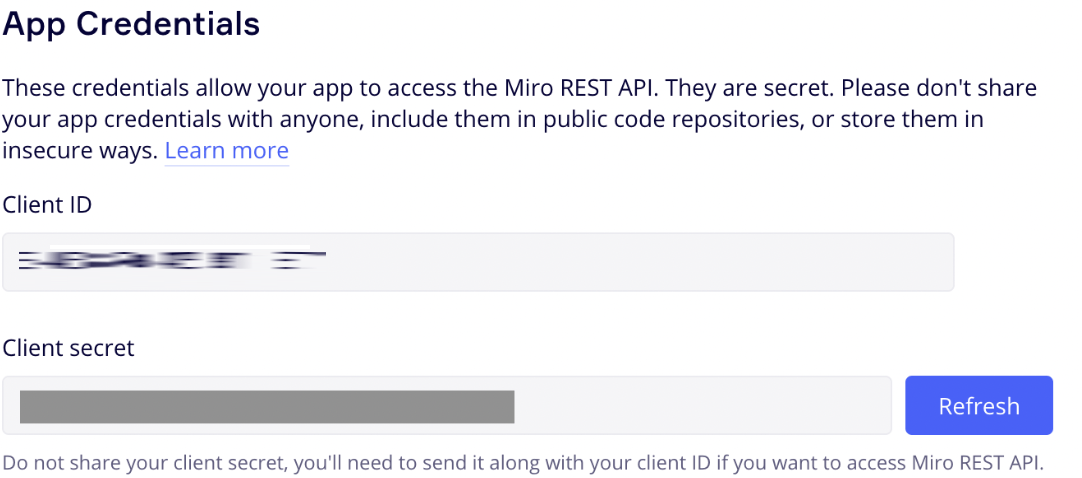
 4. From App Credentials, copy and save the **Client ID and Client secret**.
 #### Integration Setup
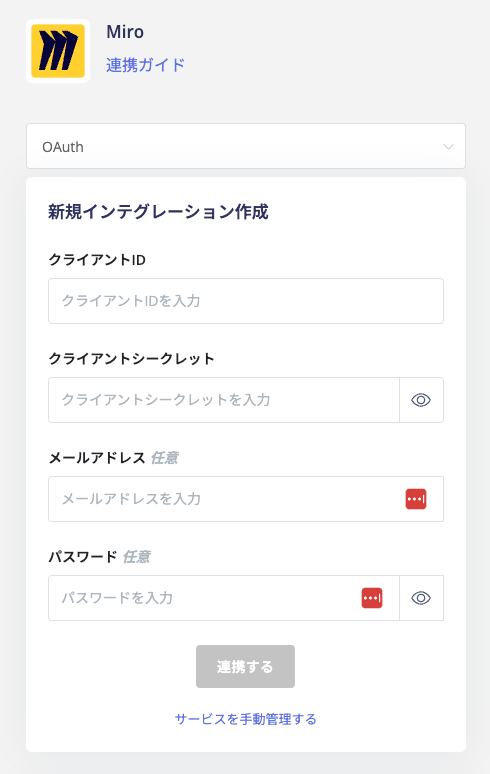
In the Admina integrations screen, search for **Miro** and select `OAuth`.
Enter the **Client ID** in the Client ID field and the **Client secret** in.
The Client Secret field obtained in the previous steps, then click **Connect**.
To retrieve the **last activity date** of each Miro account, enter the email address and password and click Connect.
#### Integration Setup
In the Admina integrations screen, search for **Miro** and select `OAuth`.
Enter the **Client ID** in the Client ID field and the **Client secret** in.
The Client Secret field obtained in the previous steps, then click **Connect**.
To retrieve the **last activity date** of each Miro account, enter the email address and password and click Connect.
 Once the integration with Miro is successful, registered user information will appear in the account list.
If the process did not complete successfully, go to the Status tab on the integrations screen, click Edit.
Try connecting again.
If the issue persists, please contact us via chat.
For an overview of the Miro integration, see the [integration page](http://admina.moneyforward.com/en/integrations/miro).
Once the integration with Miro is successful, registered user information will appear in the account list.
If the process did not complete successfully, go to the Status tab on the integrations screen, click Edit.
Try connecting again.
If the issue persists, please contact us via chat.
For an overview of the Miro integration, see the [integration page](http://admina.moneyforward.com/en/integrations/miro).