> ## Documentation Index
> Fetch the complete documentation index at: https://support.i.moneyforward.com/llms.txt
> Use this file to discover all available pages before exploring further.
# Hubstaff
> How to integrate Hubstaff with Admina using an API key. Admina retrieves data such as user names, email addresses, and roles and supports account creation and deletion.
export const IntegrationCapabilities = ({lang = "ja", modes = "", plan = "", lifecycle = "", automation = "", fetch = "", capabilities = "", memo = ""}) => {
const TEXT = ({
ja: {
rows: {
mode: "連携モード",
plan: "連携確認プラン",
lifecycle: "アカウントライフサイクル",
automation: "自動化",
fetch: "取得データ",
capabilities: "対応機能",
memo: "備考"
},
empty: "-",
more: "各項目の意味は[連携可能SaaS・機能対応一覧](/integrations/supported-saas)をご覧ください。",
mode: {
"API Key": "APIキー"
},
lifecycle: {
provisioning: "アカウント作成",
deactivate: "アカウント無効化",
delete: "アカウント削除"
},
automation: {
provisioning: "アカウント作成",
deactivate: "アカウント無効化",
delete: "アカウント削除"
},
fetch: {
User: "ユーザー名",
Mail: "メールアドレス",
Role: "ロール",
Status: "ステータス",
"2FA": "二要素認証",
LastActivity: "最終利用日",
Licenses: "ライセンス"
},
capabilities: {
"employee-master": "従業員マスター連携",
"identity-provider": "IDプロバイダー連携",
"cost-aggregation": "コスト管理",
"file-aggregation": "ファイル管理",
"file-permissions": "ファイル権限管理",
"device-aggregation": "MDM連携"
}
},
en: {
rows: {
mode: "Integration mode",
plan: "Verified plan",
lifecycle: "Account lifecycle",
automation: "Automation",
fetch: "Fetched data",
capabilities: "Capabilities",
memo: "Notes"
},
empty: "-",
more: "See [Supported SaaS and Capabilities](/en/integrations/supported-saas) for what each item means.",
mode: {},
lifecycle: {
provisioning: "Account creation",
deactivate: "Account deactivation",
delete: "Account deletion"
},
automation: {
provisioning: "Account creation",
deactivate: "Account deactivation",
delete: "Account deletion"
},
fetch: {
LastActivity: "Last Activity"
},
capabilities: {
"employee-master": "HR master",
"identity-provider": "Identity provider",
"cost-aggregation": "Cost management",
"file-aggregation": "File management",
"file-permissions": "File permissions",
"device-aggregation": "MDM integration"
}
}
})[lang === "en" ? "en" : "ja"];
const BADGE_COLORS = {
"ID/Password": "yellow",
"API Key": "cyan",
OAuth: "red",
App: "purple",
User: "blue",
Mail: "cyan",
Role: "orange",
Status: "teal",
"2FA": "pink",
LastActivity: "green",
Licenses: "purple",
provisioning: "green",
delete: "red",
deactivate: "yellow",
"employee-master": "blue",
"identity-provider": "teal",
"cost-aggregation": "yellow",
"file-aggregation": "cyan",
"file-permissions": "orange",
"device-aggregation": "purple"
};
const list = value => String(value || "").split(",").map(item => item.trim()).filter(Boolean);
const badges = (source, labels) => {
const values = list(source);
if (values.length === 0) {
return {TEXT.empty};
}
return values.map(value =>
{labels?.[value] ?? value}
);
};
const text = value => value || {TEXT.empty};
const linkify = value => {
if (!value) return null;
const parts = [];
let rest = String(value);
let key = 0;
for (; ; ) {
const mid = rest.indexOf("](");
if (mid < 0) break;
const open = rest.lastIndexOf("[", mid);
const close = rest.indexOf(")", mid);
if (close < 0) break;
if (open < 0) {
parts.push(rest.slice(0, mid + 2));
rest = rest.slice(mid + 2);
continue;
}
if (open > 0) parts.push(rest.slice(0, open));
parts.push(
{rest.slice(open + 1, mid)}
);
rest = rest.slice(close + 1);
}
if (rest) parts.push(rest);
return parts;
};
const ROWS = [["mode", badges(modes, TEXT.mode)], ["plan", text(plan)], ["lifecycle", badges(lifecycle, TEXT.lifecycle)], ["automation", badges(automation, TEXT.automation)], ["fetch", badges(fetch, TEXT.fetch)], ["capabilities", badges(capabilities, TEXT.capabilities)], ["memo", text(linkify(memo))]];
return
{ROWS.map(([key, value]) =>
- {TEXT.rows[key]}
- {value}
)}
;
};
## Integration Specifications
## Prerequisites
### How to obtain the workspace key (Organization ID)
Log in to [Hubstaff](https://app.hubstaff.com) with an administrator account, then check the URL in the browser address bar. The number after `https://app.hubstaff.com/dashboard/` is the Organization ID.
### How to obtain the access key (API access token)
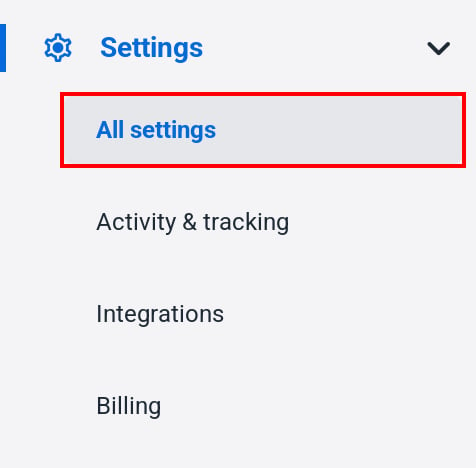
1. In the Hubstaff left menu, select **All settings** under **Settings**.
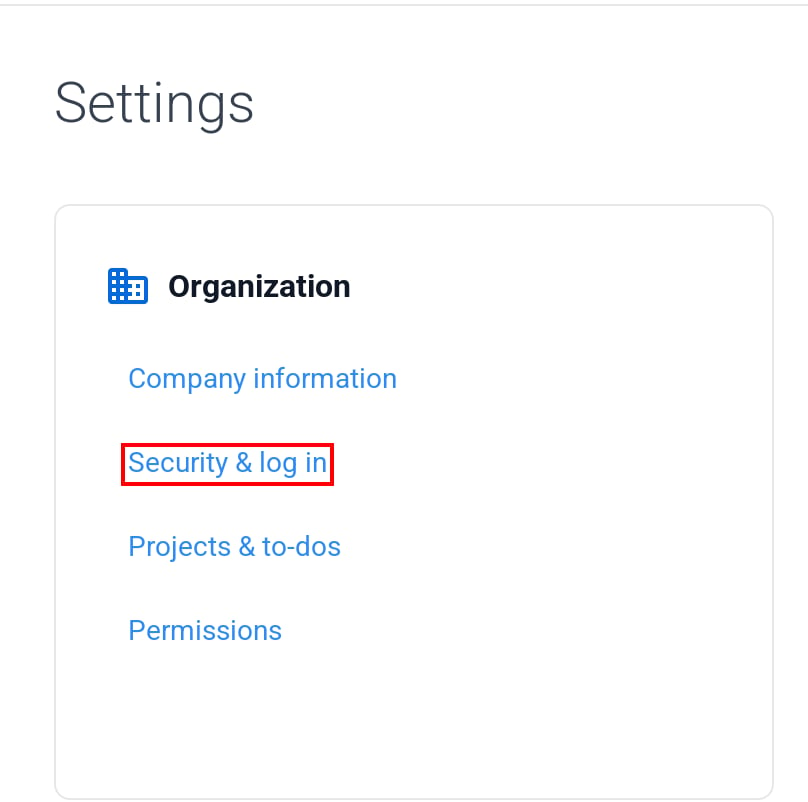
2. Select **Security & log in** under **Organization**.
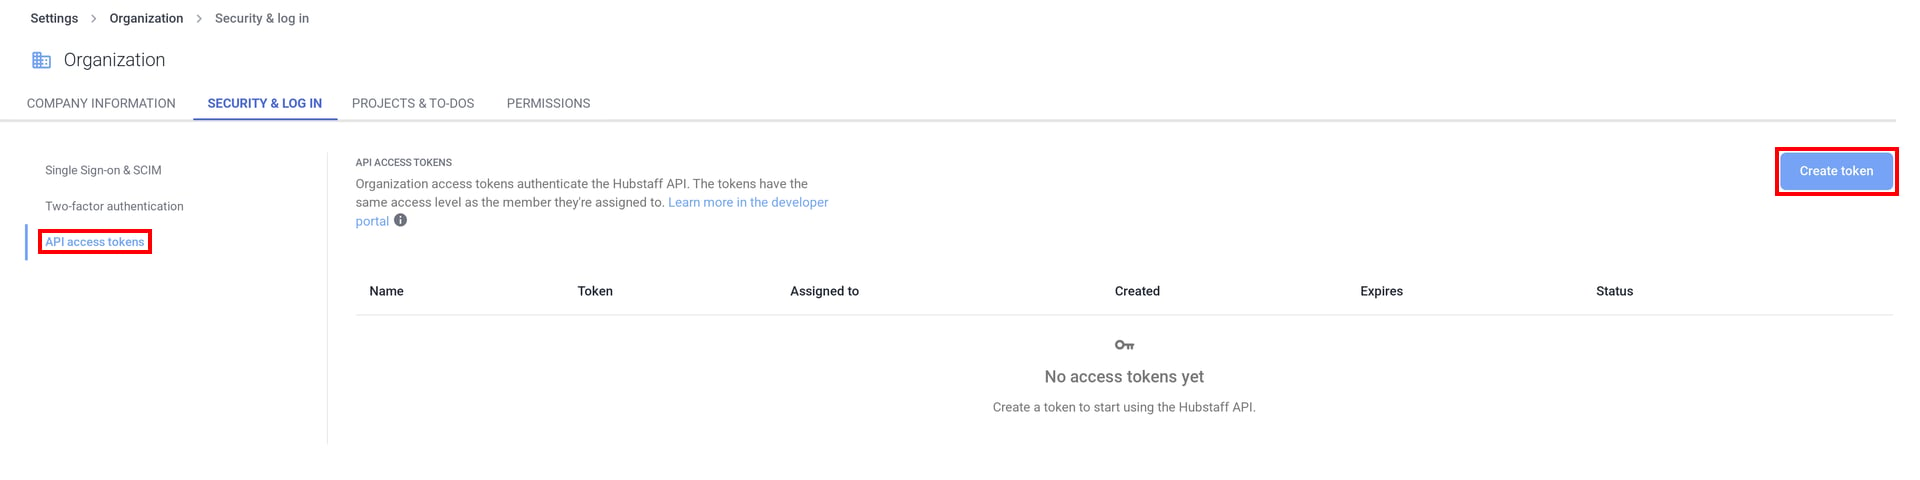
 3. Select **API access tokens**, then click **Create token**.
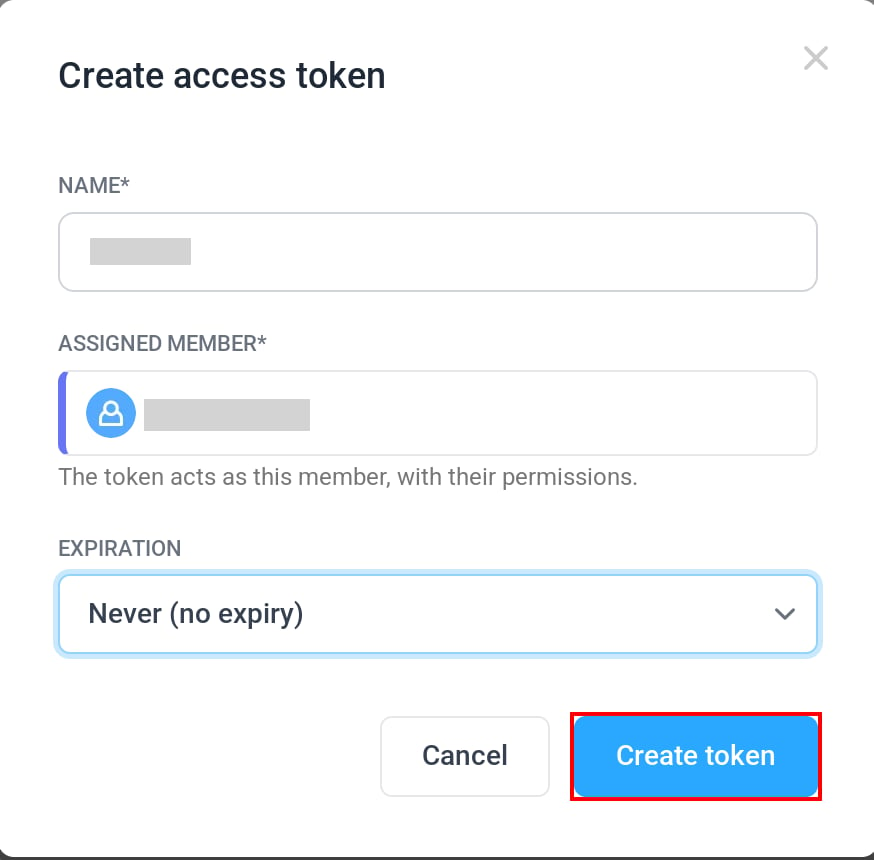
 4. On the **Create access token** screen, enter any name in **NAME**. In **ASSIGNED MEMBER**, select an administrator. The token acts with the permissions of this member. In **EXPIRATION**, select **Never (no expiry)**, then click **Create token**.
 5. Copy the generated token and save it.
## Setting up the integration
1. In the integration screen, search for **Hubstaff**.
2. Enter the Organization ID in **Workspace key** and the API access token in **Access Key**, then click **Integrate**.
5. Copy the generated token and save it.
## Setting up the integration
1. In the integration screen, search for **Hubstaff**.
2. Enter the Organization ID in **Workspace key** and the API access token in **Access Key**, then click **Integrate**.
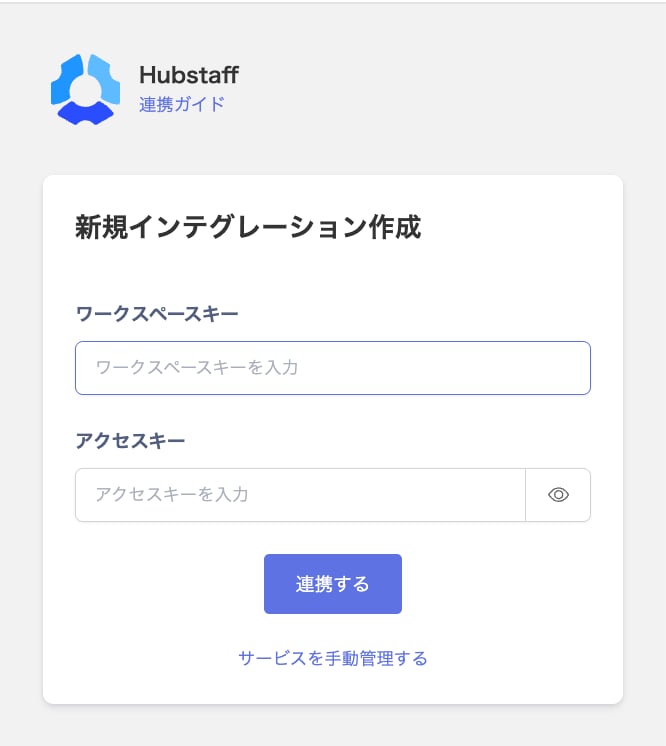 3. When the integration with Hubstaff succeeds, registered user information appears in the account list. If it does not complete successfully, first try the steps in [Troubleshoot SaaS integration errors](/en/it-management/saas-management/93nahw45is-trouble). If the issue persists, check [Information to provide](/en/it-management/saas-management/93nahw45is-trouble#info-to-provide) and contact [Support](/en/contact-support).
This documentation is built and hosted on [Mintlify](https://mintlify.com), a developer documentation platform.
3. When the integration with Hubstaff succeeds, registered user information appears in the account list. If it does not complete successfully, first try the steps in [Troubleshoot SaaS integration errors](/en/it-management/saas-management/93nahw45is-trouble). If the issue persists, check [Information to provide](/en/it-management/saas-management/93nahw45is-trouble#info-to-provide) and contact [Support](/en/contact-support).
This documentation is built and hosted on [Mintlify](https://mintlify.com), a developer documentation platform.