> ## Documentation Index
> Fetch the complete documentation index at: https://support.i.moneyforward.com/llms.txt
> Use this file to discover all available pages before exploring further.
# xMatters
> How to integrate with xMatters. This explains the full process, from getting an API key through to completing the integration.
## Prerequisites
### Checking your workspace key
After logging in to xMatters, the subdomain in the URL is your workspace key. Save it.
```text theme={null}
https://{workspace key}.xmatters.com/
```
### Getting your API key
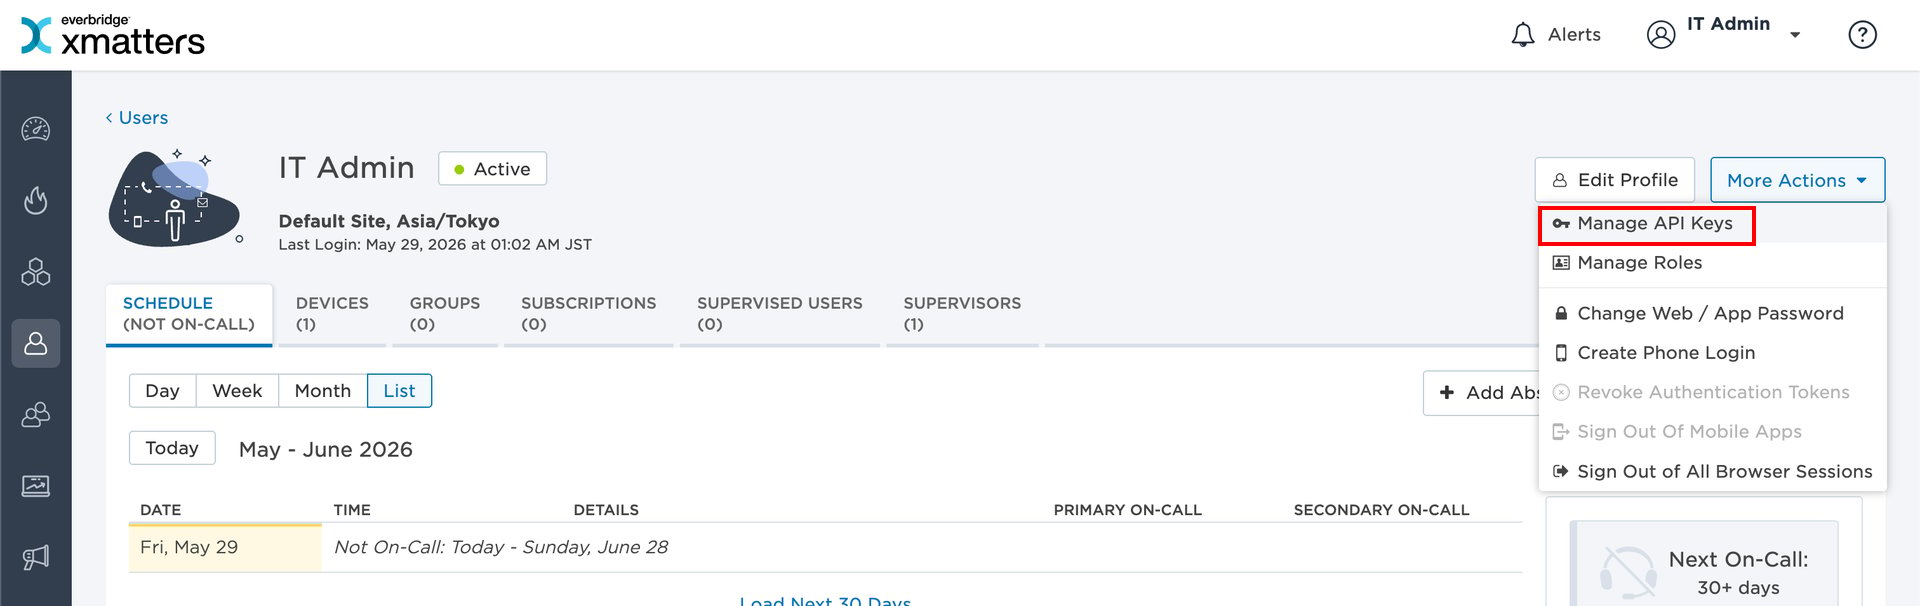
1. On your own profile screen, click **More Actions**, then select **Manage API Keys**.
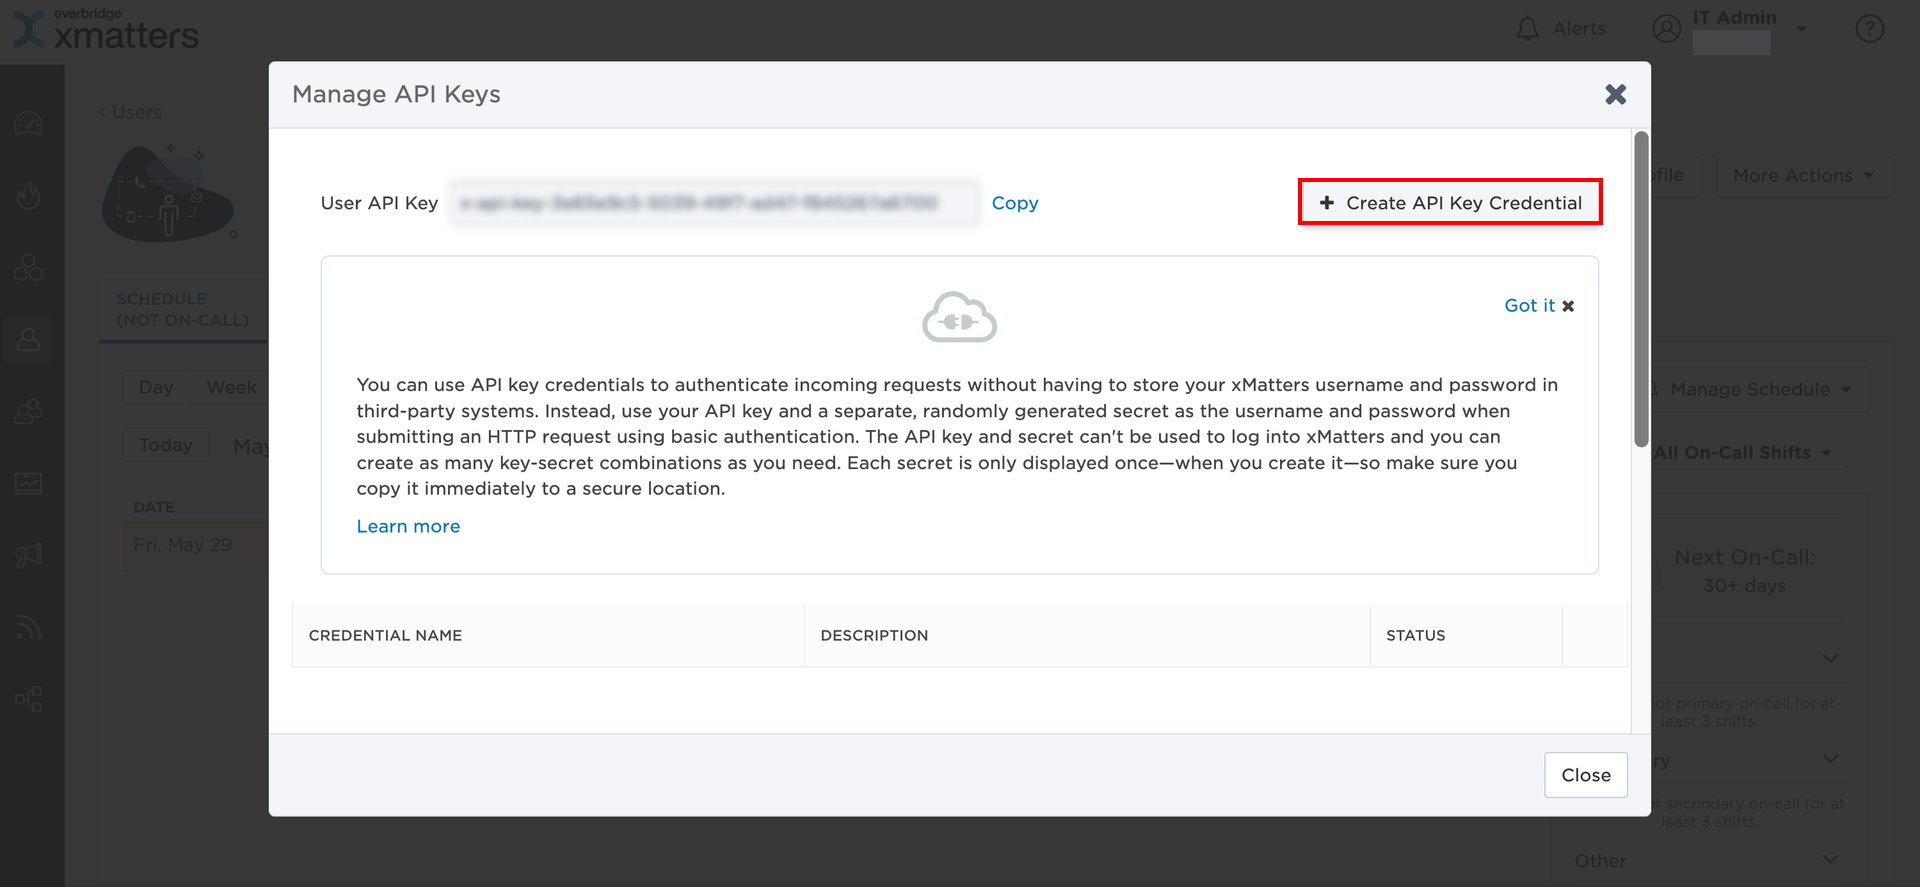
 2. Click **Create API Key Credential**.
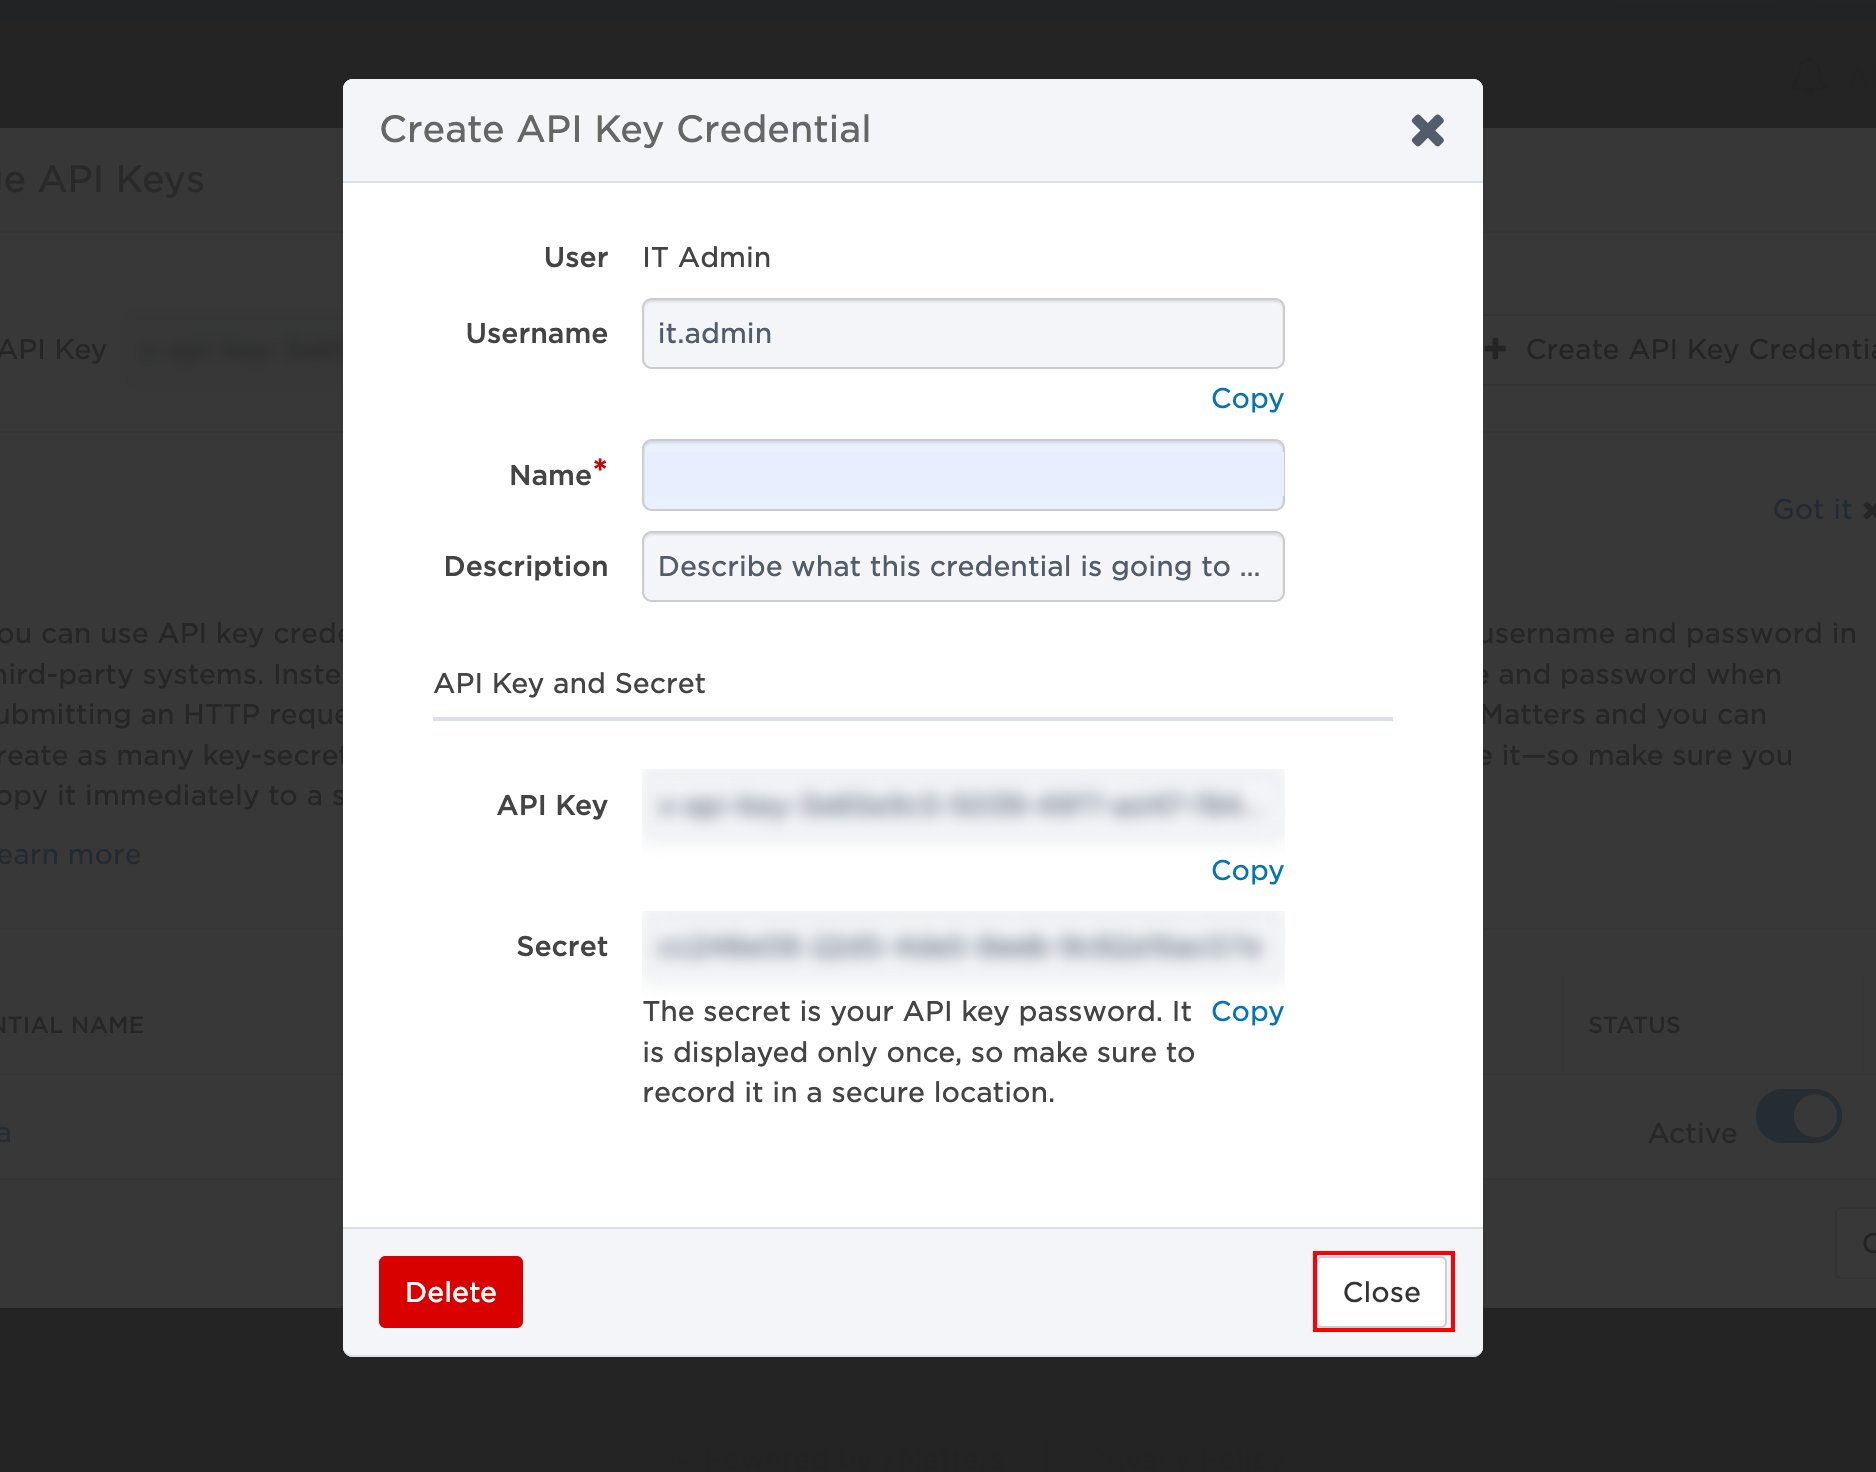
 3. Enter any name for **Name**, then click **Create**.
4. Copy and save the **API Key** and **Secret** shown. The **Secret** is shown only on this screen, so be sure to save it now.
3. Enter any name for **Name**, then click **Create**.
4. Copy and save the **API Key** and **Secret** shown. The **Secret** is shown only on this screen, so be sure to save it now.
 ## Setting up the integration
1. On the integration screen, search for **xMatters**.
2. Enter the workspace key, API key, and API secret key from the previous step, then click **Connect**.
## Setting up the integration
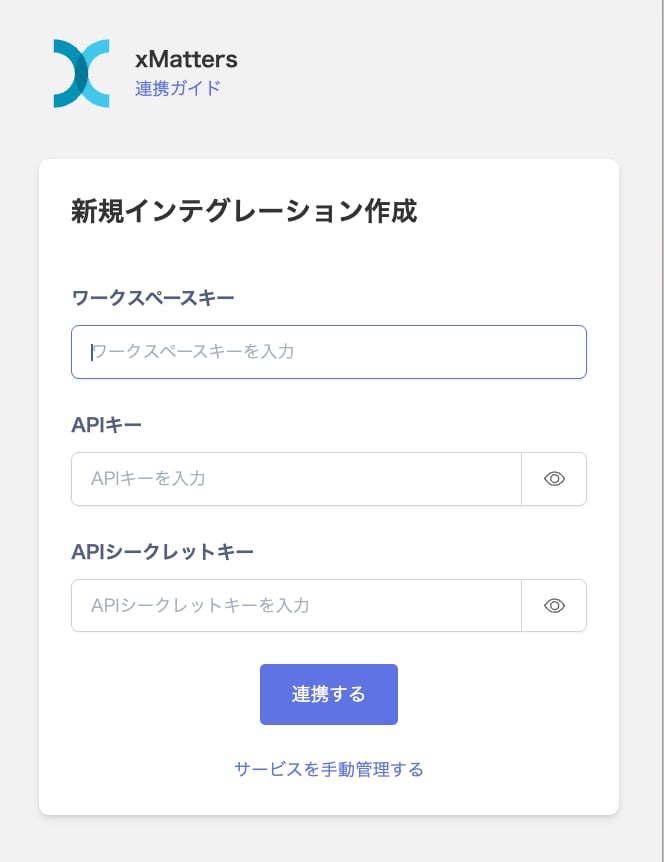
1. On the integration screen, search for **xMatters**.
2. Enter the workspace key, API key, and API secret key from the previous step, then click **Connect**.
 3. Once the integration with xMatters succeeds, registered user information appears in the account list. If it doesn't complete successfully, first try the steps in [Troubleshooting failed SaaS integrations](/en/it-management/saas-management/93nahw45is-trouble). If that doesn't resolve it, check [Information to provide](/en/it-management/saas-management/93nahw45is-trouble#info-to-provide) and contact [support](/en/contact-support).