> ## Documentation Index
> Fetch the complete documentation index at: https://support.i.moneyforward.com/llms.txt
> Use this file to discover all available pages before exploring further.
# 2-0. Using the Device Feature
> Integrate device registries from Excel, spreadsheets, or other systems into this service to manage IT assets (SaaS and devices) in one place.
A Device plan (paid) is required to use the device management feature. To request a trial, contact us via **Ask a Support Representative Directly** in the chat.
#### Overview
This page explains how to register, update, and delete devices, as well as how to operate device management.
1. [**Register a device**](#register-a-device)
[**Update or delete registered device information**](#update-or-delete-registered-device-information)
2. [**Assign devices and register statuses**](#assign-devices-and-register-statuses)
3. [**Manage device usage and history**](#manage-device-usage-and-history)
### Register a Device
Register a new device. You can register devices [manually](#register-a-device-manually), via [MDM integration](/en/it-management/device/k1u975zc6h-mdm), or via [CSV import](/en/it-management/device/dwrsgbckjp-device-csv). Enter device-specific information such as the serial number and model name, and asset information such as the purchase date and price.
#### Register a Device Manually
1. Go to Devices and click **New Device**.
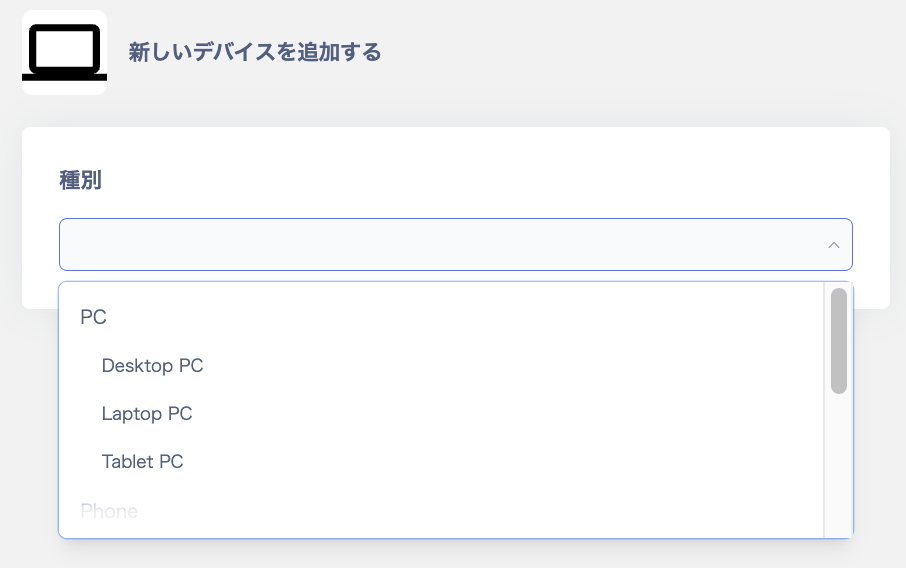
 2. On the "Add new device" screen, select a device type. Choose from "PC (Desktop PC / Laptop PC / Tablet PC), Phone (Smart Phone), or Other (Monitor / Other / Peripheral Device / Server)".
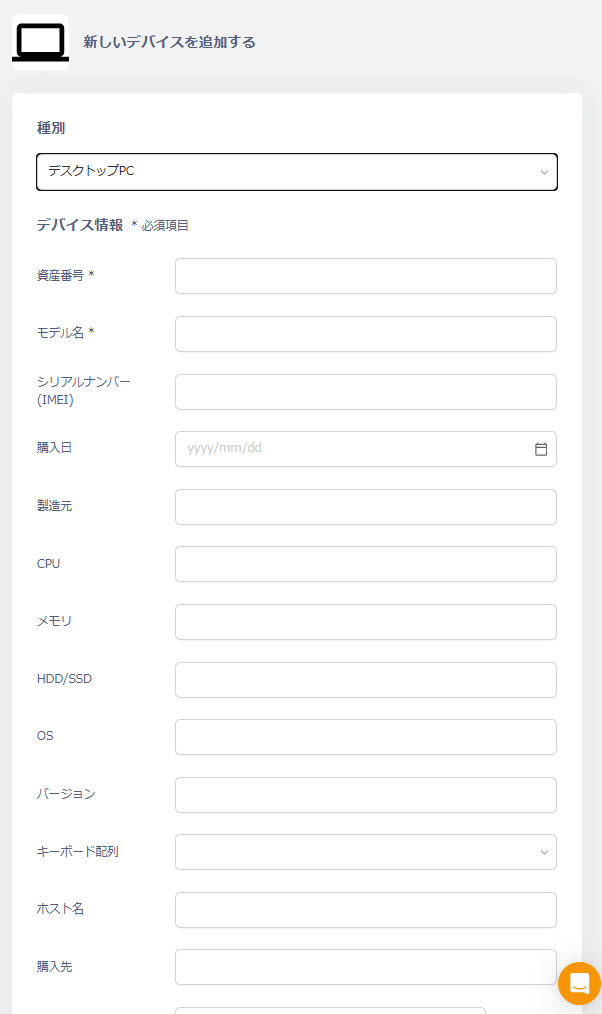
 3. Enter the required device information and click **Apply**. For a list of input fields, see [Device Management Field Reference](/en/it-management/device/qlla5169py-devicetype#device-management-field-reference). To add custom fields, see [Add Custom Management Fields](/en/it-management/device/2gdbiob664-device-itme#add-a-custom-field).
 4. When registration succeeds, the message "Device information has been registered" appears. The device is added under "PC", "Phone", or "Other" according to the selected type.
### Assign Devices and Register Statuses
Assign a user to a device and register its status. For shared PCs and similar devices, assign them to a location instead.
1. Go to Devices, select the device to assign, and click **Change Assignment and Status**.
4. When registration succeeds, the message "Device information has been registered" appears. The device is added under "PC", "Phone", or "Other" according to the selected type.
### Assign Devices and Register Statuses
Assign a user to a device and register its status. For shared PCs and similar devices, assign them to a location instead.
1. Go to Devices, select the device to assign, and click **Change Assignment and Status**.
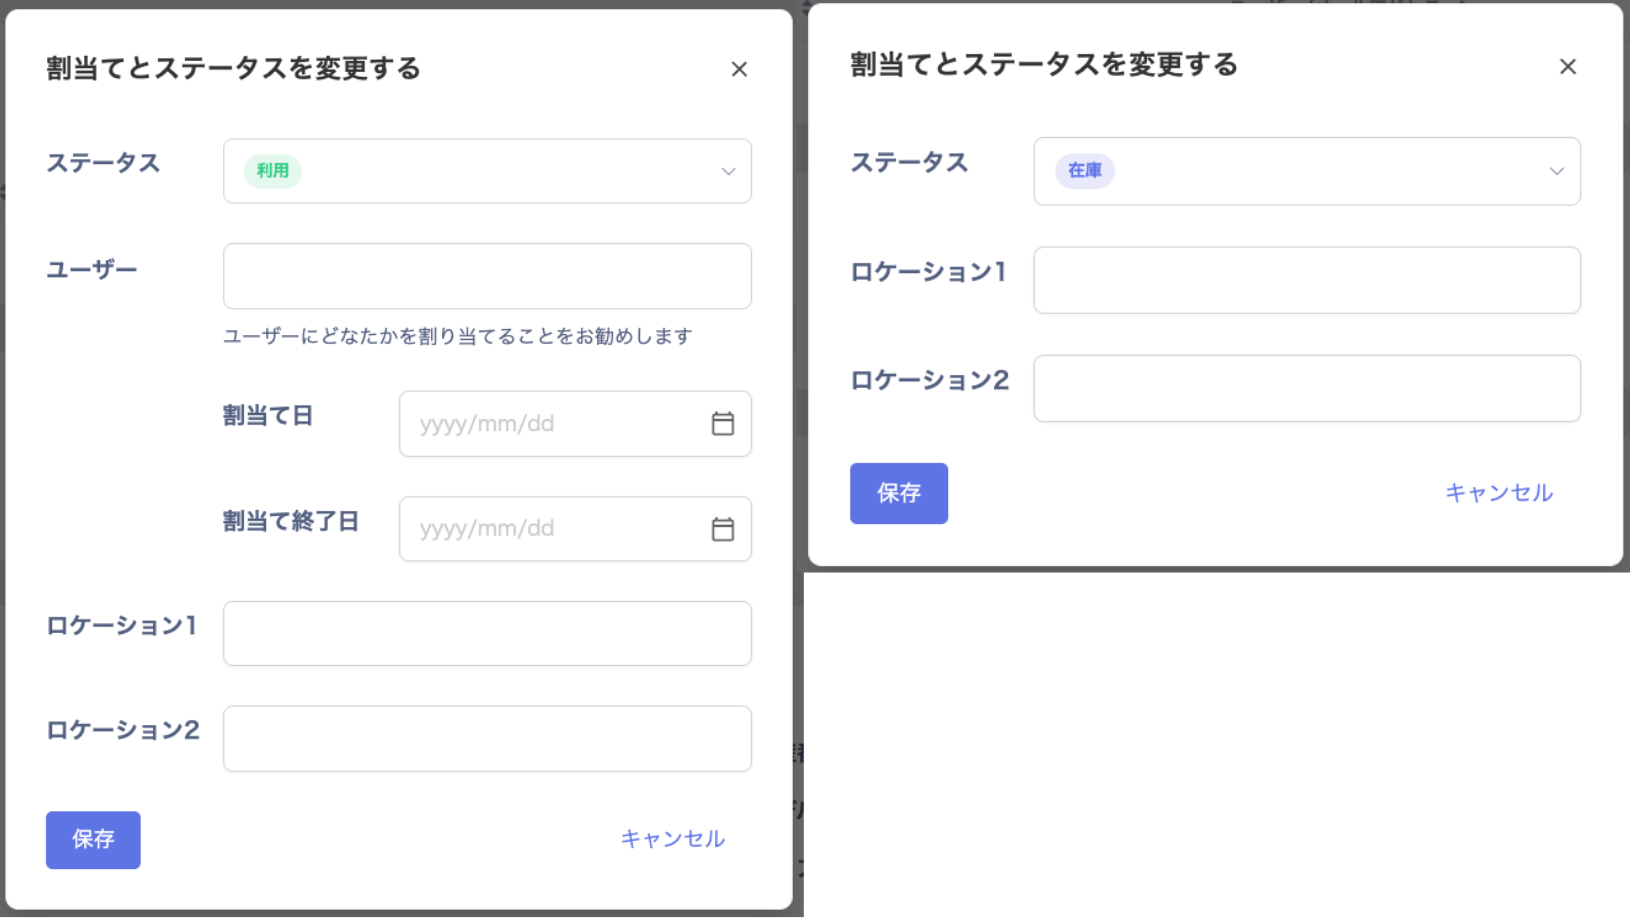
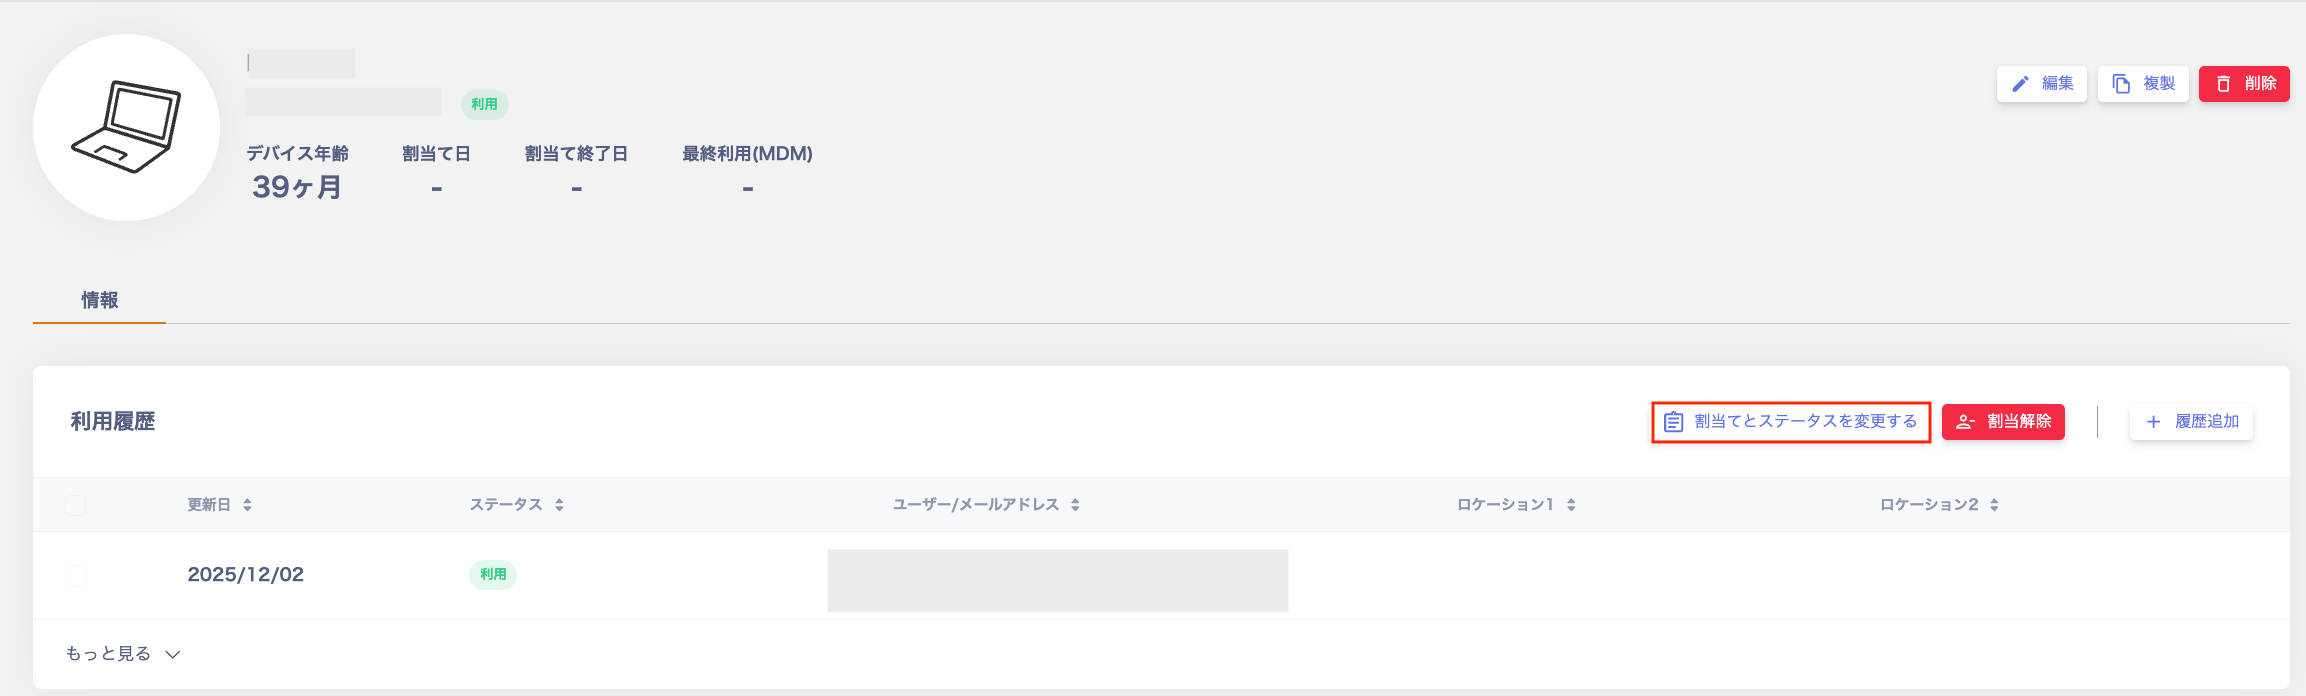 2. Fill in each field on the "Change Assignment and Status" screen and click **Save**. When you select a status other than "In Stock" or "Disposed / Cancelled", the fields "User / Assignment Date / Assignment End Date" appear. For fields that do not appear, see [Hide Fields](/en/it-management/device/2gdbiob664-device-itme#hide-a-field).
For the **Before Use** status, select "In Use" as the status and set a future date as the assignment date. After saving, the status changes to "Before Use", then automatically changes to **In Use** on the assignment date.
| Item | Description |
| ------------------------------------- | ------------------------------------------------------------------------------------------------------- |
| Status | Select from "In Use / In Stock / Awaiting Delivery / Location Unknown / Broken / Disposed & Cancelled". |
| User | Select the user to assign. Filter by name, email address, or user type. |
| Assignment Date / Assignment End Date | Enter dates manually or select from the calendar. |
| Location 1 / 2 | Enter the location. |
2. Fill in each field on the "Change Assignment and Status" screen and click **Save**. When you select a status other than "In Stock" or "Disposed / Cancelled", the fields "User / Assignment Date / Assignment End Date" appear. For fields that do not appear, see [Hide Fields](/en/it-management/device/2gdbiob664-device-itme#hide-a-field).
For the **Before Use** status, select "In Use" as the status and set a future date as the assignment date. After saving, the status changes to "Before Use", then automatically changes to **In Use** on the assignment date.
| Item | Description |
| ------------------------------------- | ------------------------------------------------------------------------------------------------------- |
| Status | Select from "In Use / In Stock / Awaiting Delivery / Location Unknown / Broken / Disposed & Cancelled". |
| User | Select the user to assign. Filter by name, email address, or user type. |
| Assignment Date / Assignment End Date | Enter dates manually or select from the calendar. |
| Location 1 / 2 | Enter the location. |
 3. The registered information appears under Info > Usage History.
### Manage Device Usage and History
Multiple changes occur throughout a device's lifecycle. Record usage changes as history entries. When conducting an inventory, also refer to [Conduct an Inventory](/en/it-management/survey/duof745x7d-4-survey#inventory-check).
Examples:
* Assignment changes (device user changes due to transfers or resignations)
* Maintenance history (device repairs or replacements)
* Status changes (under repair, scheduled for disposal, etc.)
1. Go to Devices, select the target device, and click **Add History**.
3. The registered information appears under Info > Usage History.
### Manage Device Usage and History
Multiple changes occur throughout a device's lifecycle. Record usage changes as history entries. When conducting an inventory, also refer to [Conduct an Inventory](/en/it-management/survey/duof745x7d-4-survey#inventory-check).
Examples:
* Assignment changes (device user changes due to transfers or resignations)
* Maintenance history (device repairs or replacements)
* Status changes (under repair, scheduled for disposal, etc.)
1. Go to Devices, select the target device, and click **Add History**.
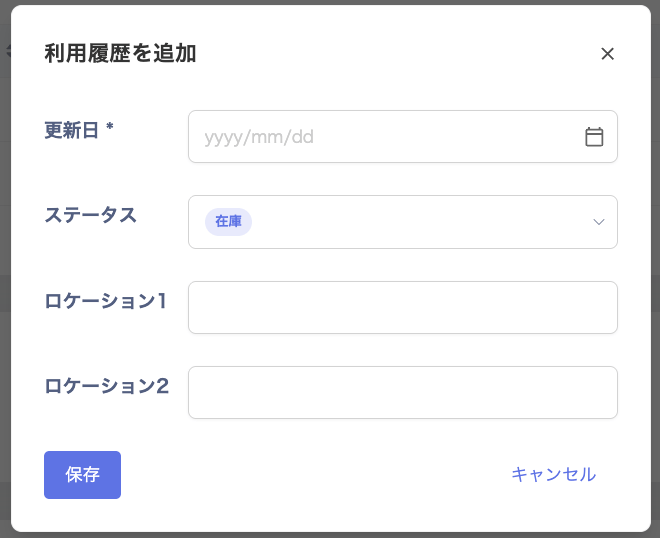
 2. Fill in each field on the "Add Usage History" screen and click **Save**. When you select a status other than "In Stock" or "Disposed / Cancelled", the fields "User / Assignment Date / Assignment End Date" appear.
 3. The registered information appears under Info > Usage History.
### Update or Delete Registered Device Information
This section explains how to update or delete registered device information, including bulk operations.
#### Update Registered Device Information
1. In the device list, click the device to update, or click the three-dot menu \[**︙**] on the right and select **Edit**.
3. The registered information appears under Info > Usage History.
### Update or Delete Registered Device Information
This section explains how to update or delete registered device information, including bulk operations.
#### Update Registered Device Information
1. In the device list, click the device to update, or click the three-dot menu \[**︙**] on the right and select **Edit**.

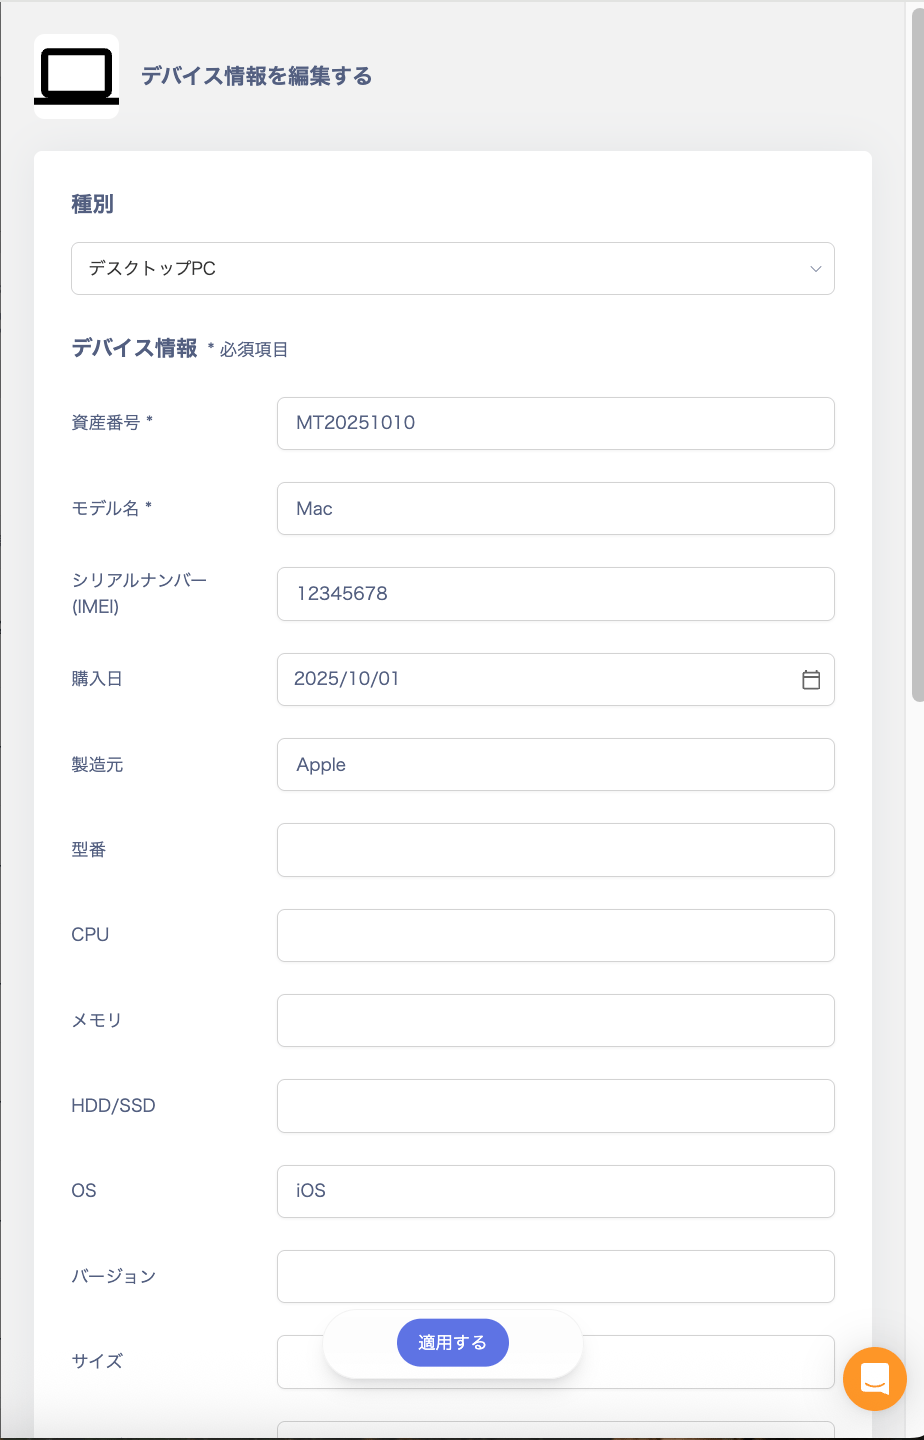
 2. Make changes on the "Edit Device Information" screen and click **Apply**. The message "Device information has been updated" appears.
 #### Delete Registered Device Information
1. In the device list, click the device to delete, or click the three-dot menu \[**︙**] on the right and select **Delete**.
#### Delete Registered Device Information
1. In the device list, click the device to delete, or click the three-dot menu \[**︙**] on the right and select **Delete**.
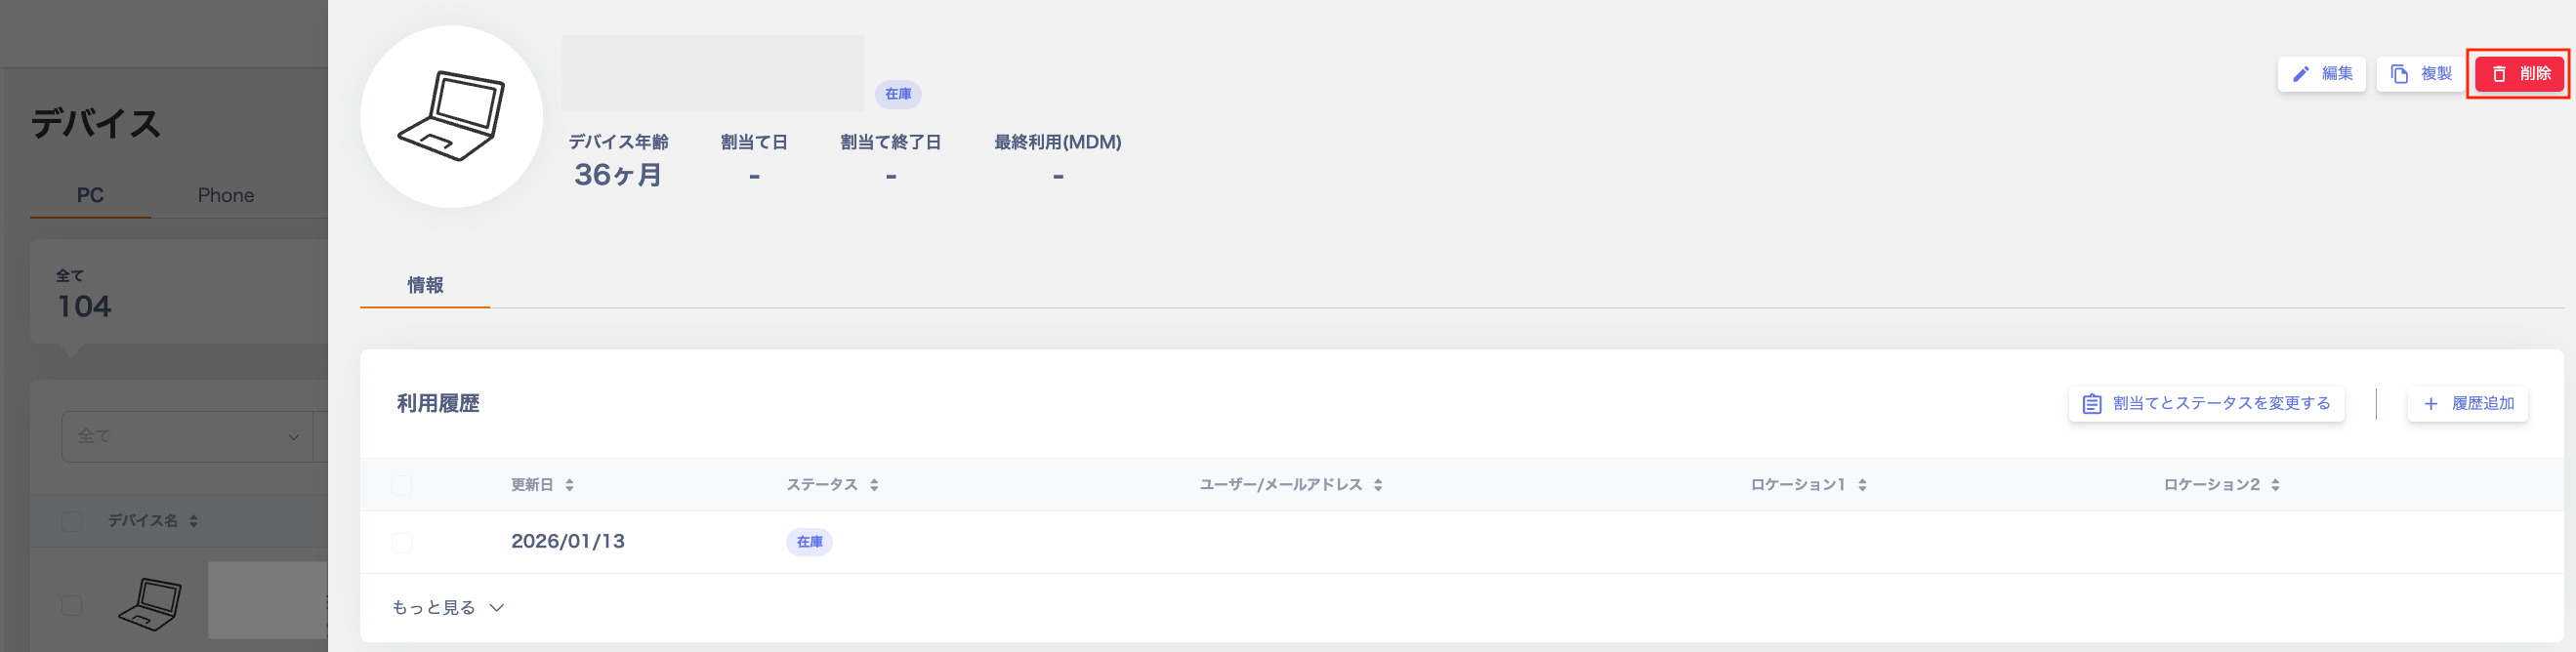
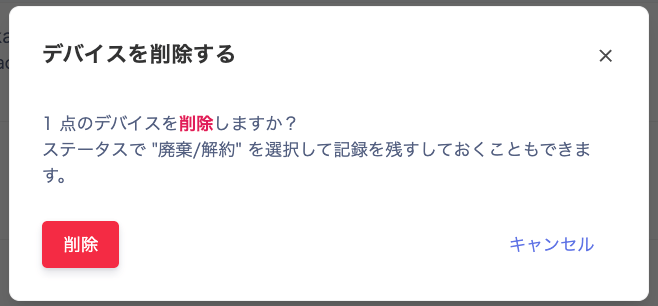
 2. When the "Delete Device" confirmation screen appears, click **Delete**. After deletion, the message "Device has been deleted" appears.
 #### Bulk Operations (Update / Delete)
**Bulk update**: Review [**CSV import precautions**](/en/it-management/device/dwrsgbckjp-device-csv#csv-import-precautions), then edit and import the CSV file.
**Bulk delete**: Check the checkbox in the upper left of the Devices screen and click **Delete**. Up to 50 devices can be deleted at a time.
#### Bulk Operations (Update / Delete)
**Bulk update**: Review [**CSV import precautions**](/en/it-management/device/dwrsgbckjp-device-csv#csv-import-precautions), then edit and import the CSV file.
**Bulk delete**: Check the checkbox in the upper left of the Devices screen and click **Delete**. Up to 50 devices can be deleted at a time.
 ### FAQ
Q. How do I add more devices?
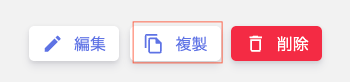
A. Follow the steps in [**Register a Device**](#register-a-device) to add devices. To duplicate a registered device, click **Duplicate** in the upper right.
### FAQ
Q. How do I add more devices?
A. Follow the steps in [**Register a Device**](#register-a-device) to add devices. To duplicate a registered device, click **Duplicate** in the upper right.