> ## Documentation Index
> Fetch the complete documentation index at: https://support.i.moneyforward.com/llms.txt
> Use this file to discover all available pages before exploring further.
# Admin Users and Role Settings
> Learn about the roles (permissions) available for admin users on this service.
All operations in this feature require **Admin** permissions.
#### Overview
This page explains user management on this service and the roles (permissions) you can assign. A key feature of this service's role management is the ability to specify both permission scope and data scope.
#### How to Configure
1. Go to **Settings > Users**. To add a new user, click **Invite User**. To update an existing user, click **Edit Role**. See [Invite Users](/en/it-management/tutorial/93a9bikaqq-user) for the invitation flow.
 2. Select a **Basic Role** and/or **Advanced Role**, then click **Apply**. You can assign multiple roles to a single user (up to 10 roles per user).
 ### Types of Roles
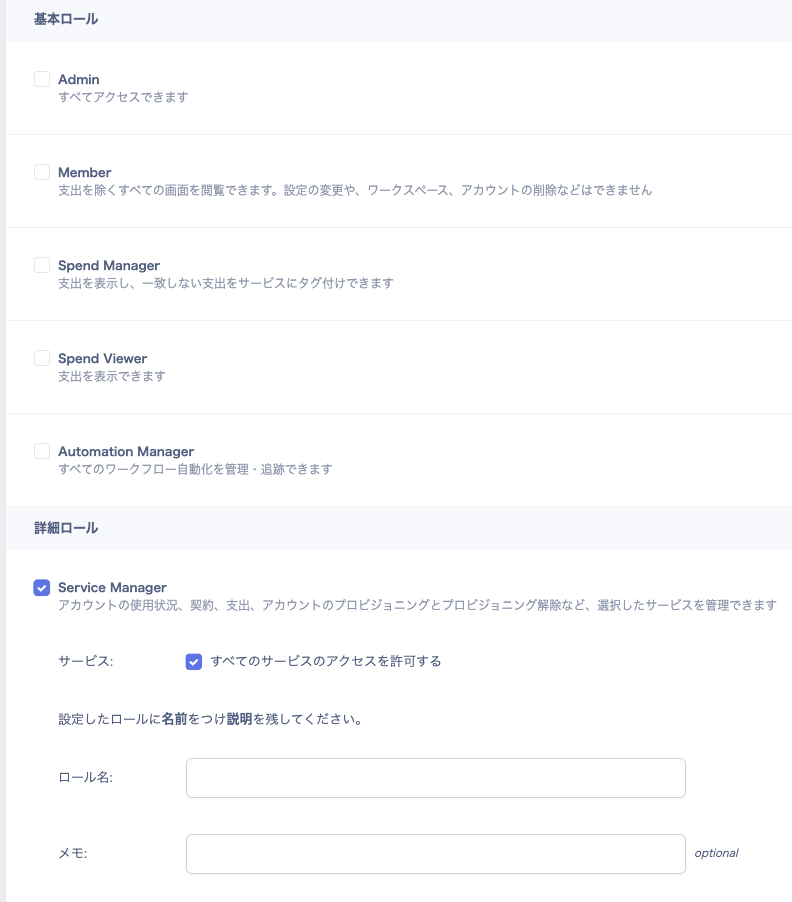
Basic Roles
The following basic roles are available on this service.
* If you invite a user without assigning any role, the minimum role (`Essential`) is automatically granted, which only allows integration operations.
* The **Integrations** menu is visible to all roles. Any role can perform integration operations on this service, but the user also needs admin-level permissions on the target service for the integration to succeed.
| Role | Description |
| ---------------------- | ------------------------------------------------------------------------------------------------------------------------------------------------------------------------------------------------------------------------------------------------------------------------------------- |
| **Admin** | Full access to all screens and operations. Cannot be combined with other roles. Even when SAML is configured, Admin users go through the standard login process (to prevent lockout). |
| **Member** | Read access to all menus except **Settings** and **Spend**. Can perform SaaS integrations. Cannot add, remove, or deactivate SaaS accounts from this service. Cannot view spend data. Cannot see the Files tab in external storage integrations. Cannot edit licenses in custom apps. |
| **Spend Manager** | Full management access to the **Spend** menu, including all operations. |
| **Spend Viewer** | Read-only access to the **Spend** menu. |
| **Automation Manager** | Full management access to the **Automation** menu, including all operations, management, and tracking. |
#### Advanced Roles
#### Service Manager
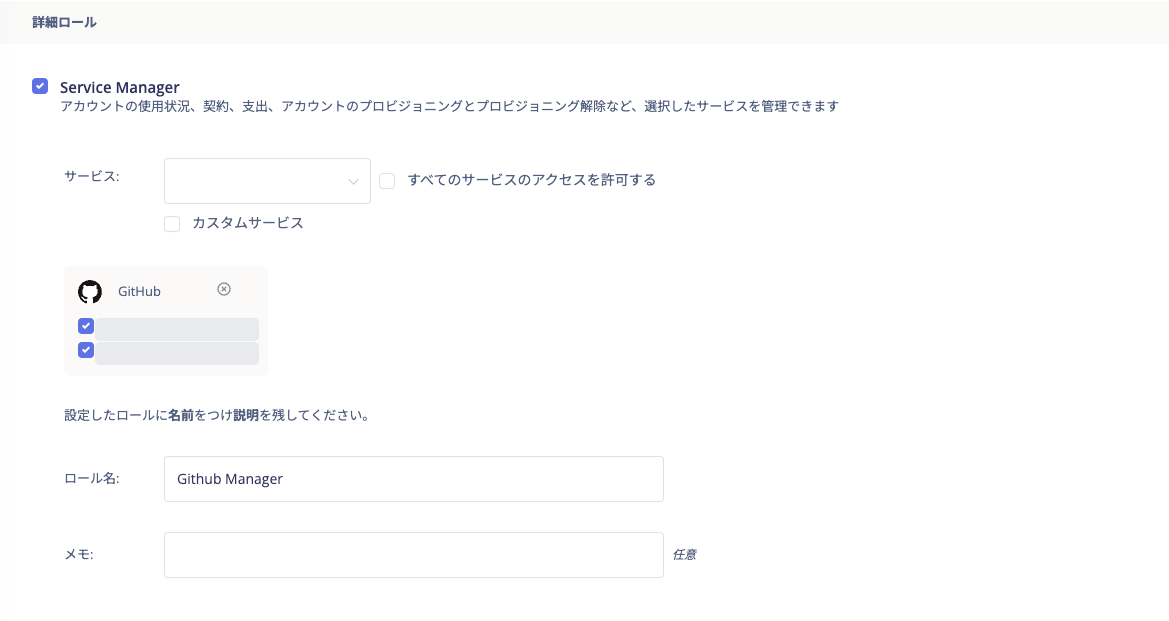
Grants permission to perform operations on this service for selected services. This includes viewing detailed account information and provisioning (adding accounts). It also includes deprovisioning (removing accounts) and viewing spend for those services.
**Setup steps (to let a user manage specific services)**
1. Check **Service Manager** under Advanced Roles.
2. Uncheck **Allow access to all services**.
3. Select the services to manage, then set a role name and an optional note. If you have multiple workspaces, check each workspace where you want the permissions to apply.
To manage custom services (manually registered apps), check **Custom Services** to make them selectable.
* Auto-registered services and custom services cannot be in the same role. Create and apply separate roles for each.
* You can create a role without selecting any services. Create an empty role first, then add services later.
 #### Service Viewer
Grants read-only access to detailed account information and contract/spend data for selected services.
Follow the same setup steps as **Service Manager** above.
#### Device Manager
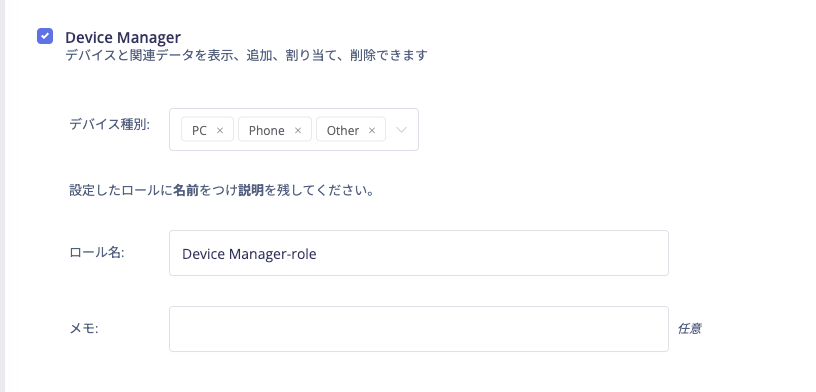
Grants full management access to the **Devices** menu. Set the device types to manage, a role name, and an optional note.
To assign or remove users, you must also assign the **Member** basic role.
#### Service Viewer
Grants read-only access to detailed account information and contract/spend data for selected services.
Follow the same setup steps as **Service Manager** above.
#### Device Manager
Grants full management access to the **Devices** menu. Set the device types to manage, a role name, and an optional note.
To assign or remove users, you must also assign the **Member** basic role.
 #### Device Viewer
Displays device data for the approved device types in the **Devices** menu. Import and edit operations are not available. Set the device types to display, a role name, and an optional note.
#### Directory Manager
Grants full management access to the **Directory** menu. Set the ID types, user types, a role name, and an optional note.
#### Directory Viewer
Displays the **Directory** menu in read-only mode. Import, edit, delete, and archive operations are not available. Set the ID types, user types, a role name, and an optional note.
#### Survey Manager
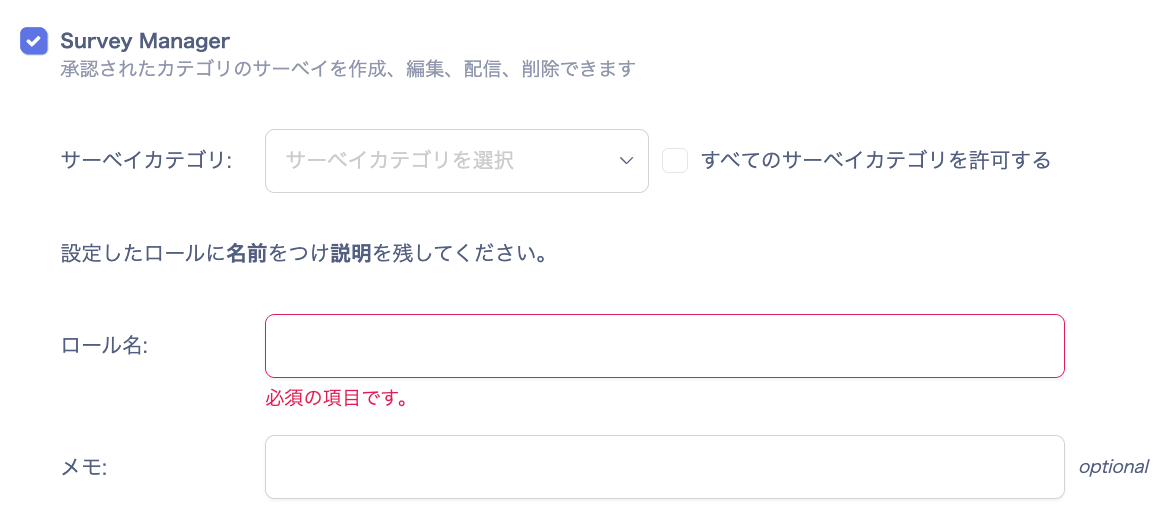
Grants full management access to the **Survey** menu. Set the survey categories to manage, a role name, and an optional note. Users with this role can create, edit, distribute, and delete surveys in the permitted categories.
#### Device Viewer
Displays device data for the approved device types in the **Devices** menu. Import and edit operations are not available. Set the device types to display, a role name, and an optional note.
#### Directory Manager
Grants full management access to the **Directory** menu. Set the ID types, user types, a role name, and an optional note.
#### Directory Viewer
Displays the **Directory** menu in read-only mode. Import, edit, delete, and archive operations are not available. Set the ID types, user types, a role name, and an optional note.
#### Survey Manager
Grants full management access to the **Survey** menu. Set the survey categories to manage, a role name, and an optional note. Users with this role can create, edit, distribute, and delete surveys in the permitted categories.
 #### Survey Viewer
Displays the **Survey** menu. Users can view survey results for permitted categories.
#### Applying Saved Advanced Roles
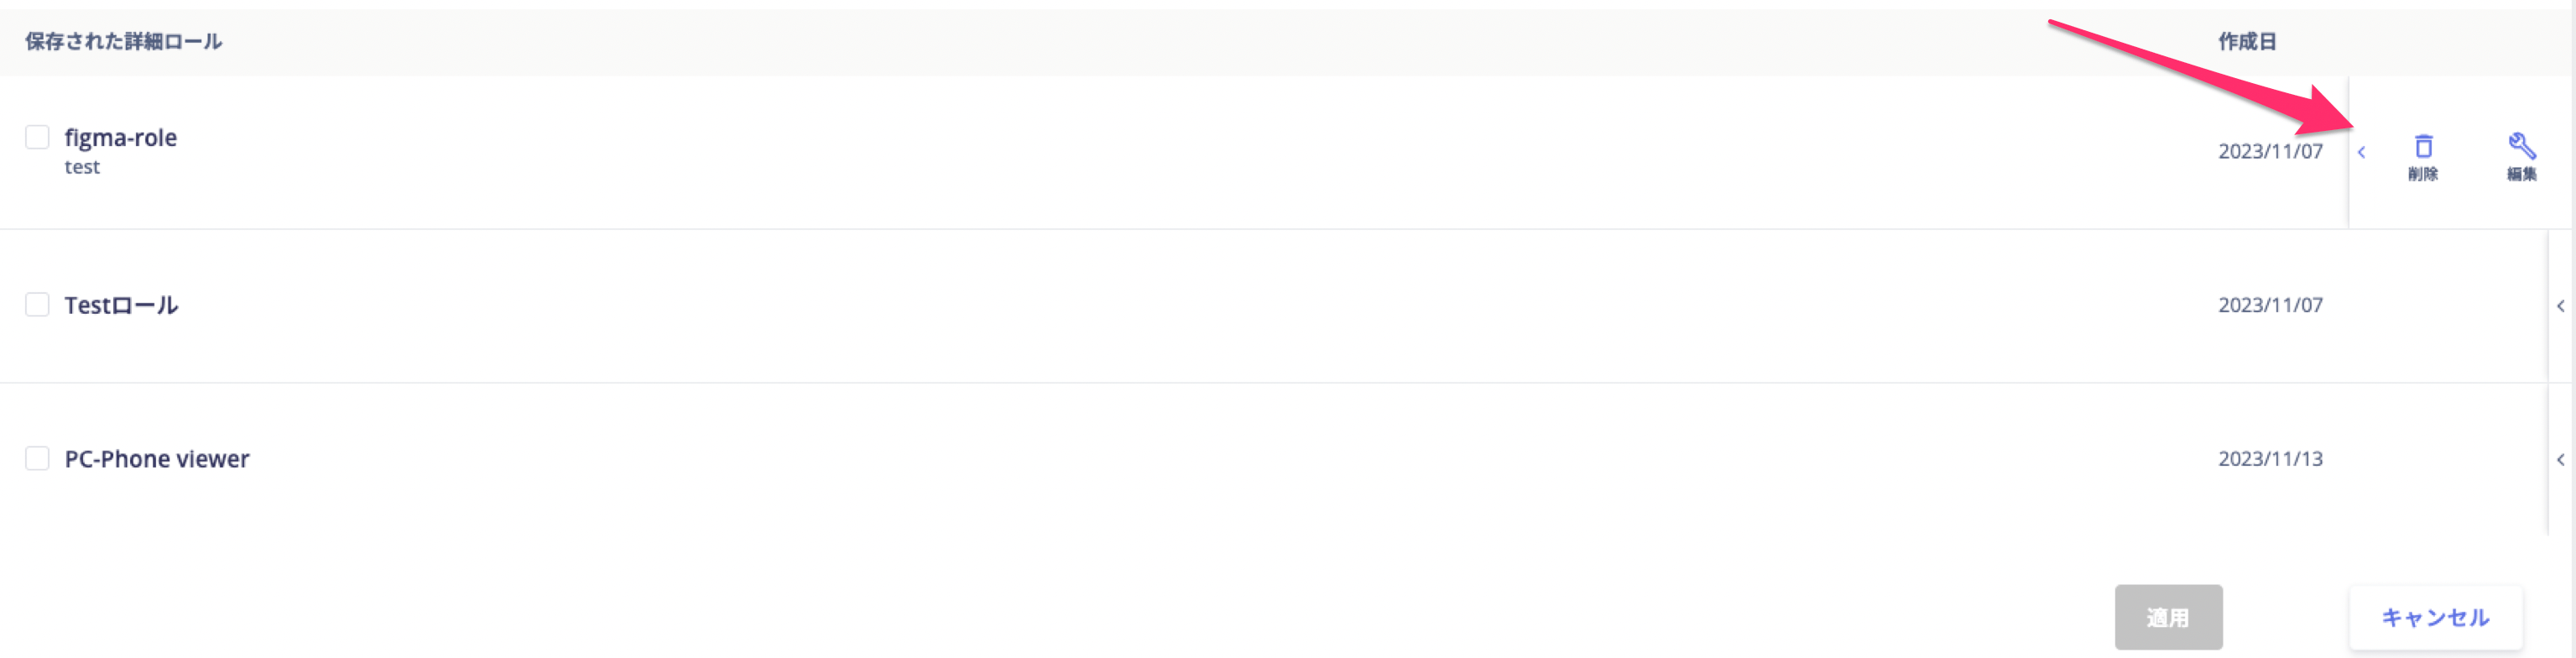
Advanced roles you configure are saved as templates under **Saved Advanced Roles** and can be applied to other members. Use the three-dot menu \[**︙**] on the right to edit or delete a saved role.
#### Survey Viewer
Displays the **Survey** menu. Users can view survey results for permitted categories.
#### Applying Saved Advanced Roles
Advanced roles you configure are saved as templates under **Saved Advanced Roles** and can be applied to other members. Use the three-dot menu \[**︙**] on the right to edit or delete a saved role.
 #### Configuration Examples
Advanced Role: Service Manager with the specific services selected
Advanced Role: Device Manager
For accountants or others who manage and operate spend:
* Basic Role: Spend Manager
* (If needed) Advanced Role: Service Manager with the relevant services selected
#### Deleting a User
1. Go to **Settings > Users**, then click the three-dot menu \[**︙**] on the right and select **Delete**.
#### Configuration Examples
Advanced Role: Service Manager with the specific services selected
Advanced Role: Device Manager
For accountants or others who manage and operate spend:
* Basic Role: Spend Manager
* (If needed) Advanced Role: Service Manager with the relevant services selected
#### Deleting a User
1. Go to **Settings > Users**, then click the three-dot menu \[**︙**] on the right and select **Delete**.
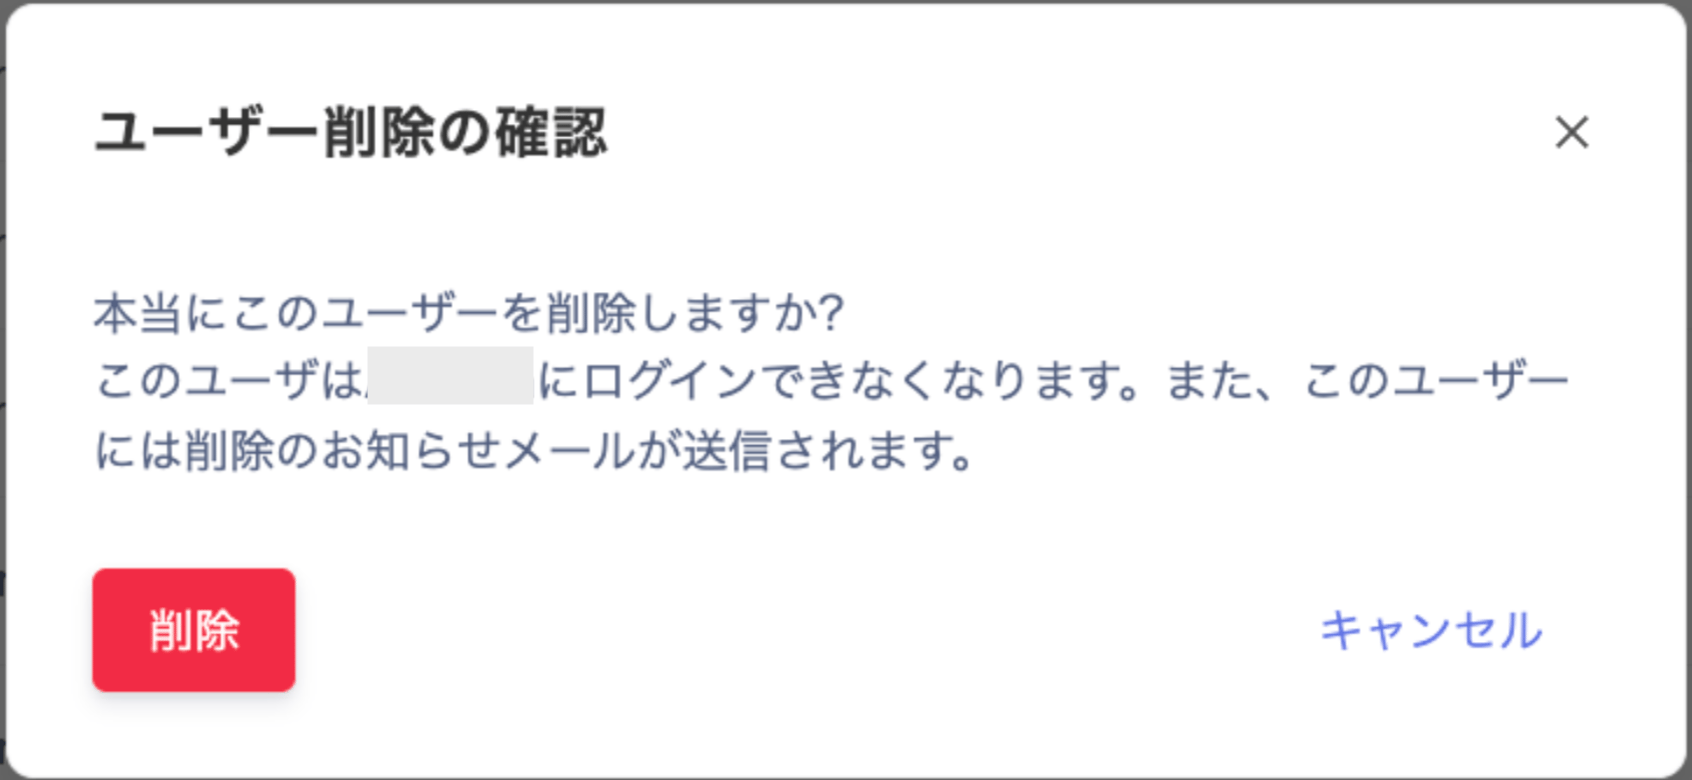
 2. The **Confirm User Deletion** dialog appears. Review the details and click **Delete**.
 #### FAQ
#### Q. How do I assign the `Essential` role?
A. To assign the `Essential` role, go to **Settings > Users > Invite User**. Enter only the email address without selecting any other options, then click **Apply** at the bottom of the screen.
#### FAQ
#### Q. How do I assign the `Essential` role?
A. To assign the `Essential` role, go to **Settings > Users > Invite User**. Enter only the email address without selecting any other options, then click **Apply** at the bottom of the screen.