> ## Documentation Index
> Fetch the complete documentation index at: https://support.i.moneyforward.com/llms.txt
> Use this file to discover all available pages before exploring further.
# 2-6. Set Up Branding for a Survey
> Customize the logo, brand name, and button color shown on the survey response page from the "Branding" tab in survey settings.
This feature requires **Admin** permission or the **Survey Manager** role to operate, and **Member** permission or the **Survey Viewer** role to view.
See [Admin Users and Role Settings](/en/it-management/settings/yne7fl2lcy-role-new) for details.
The "Device" target type requires the **Device** feature.
## Set up branding
1. Click **\[Survey settings]** at the top right of the survey.
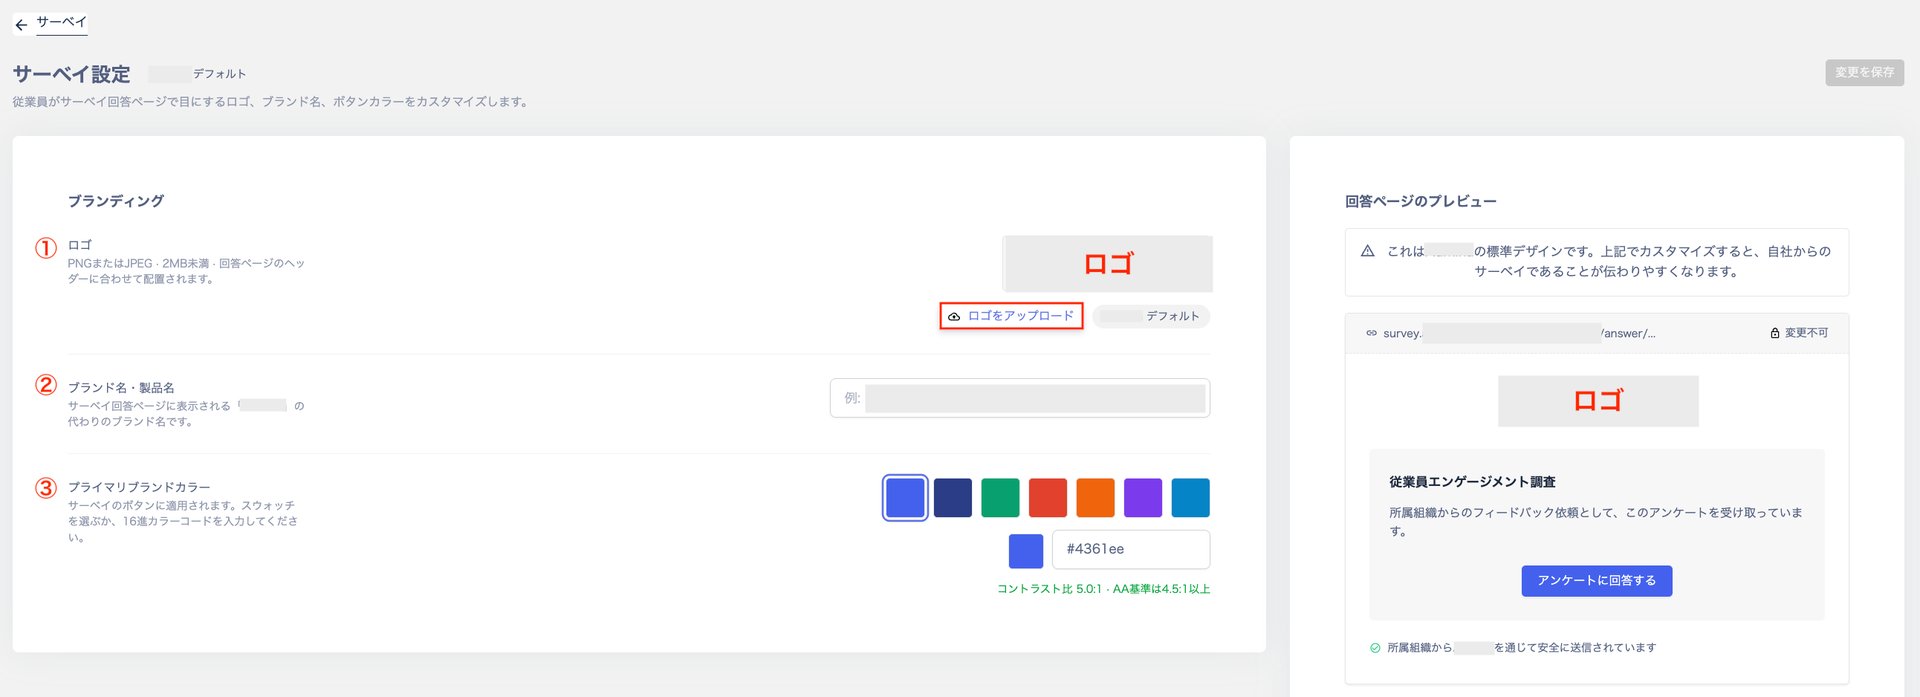
 2. On the "Survey settings" screen, use "Branding" to customize the survey response page.
You can set the logo, brand/product name, and primary brand color.
| Item | Description |
| ----------------------- | ----------------------------------------------------------------------------------------------------------------- |
| ① Logo | Set a logo from **\[Upload logo]**. PNG or JPEG, under 2MB. It's placed to match the header of the response page. |
| ② Brand / product name | Set a brand or product name. It appears on the survey response page once saved. |
| ③ Primary brand color | Applied to the survey's buttons. Choose a swatch or enter a hex color code. |
| ④ Response page preview | Check your settings in the response page preview. |
2. On the "Survey settings" screen, use "Branding" to customize the survey response page.
You can set the logo, brand/product name, and primary brand color.
| Item | Description |
| ----------------------- | ----------------------------------------------------------------------------------------------------------------- |
| ① Logo | Set a logo from **\[Upload logo]**. PNG or JPEG, under 2MB. It's placed to match the header of the response page. |
| ② Brand / product name | Set a brand or product name. It appears on the survey response page once saved. |
| ③ Primary brand color | Applied to the survey's buttons. Choose a swatch or enter a hex color code. |
| ④ Response page preview | Check your settings in the response page preview. |
 3. Click **\[Save changes]** at the top right.
## Check your settings
1. Check the survey email and click **\[Respond to the survey now]**.
See [Responding to a Survey](/en/it-management/survey/tn6l6eo3jx-survey) for details.
3. Click **\[Save changes]** at the top right.
## Check your settings
1. Check the survey email and click **\[Respond to the survey now]**.
See [Responding to a Survey](/en/it-management/survey/tn6l6eo3jx-survey) for details.
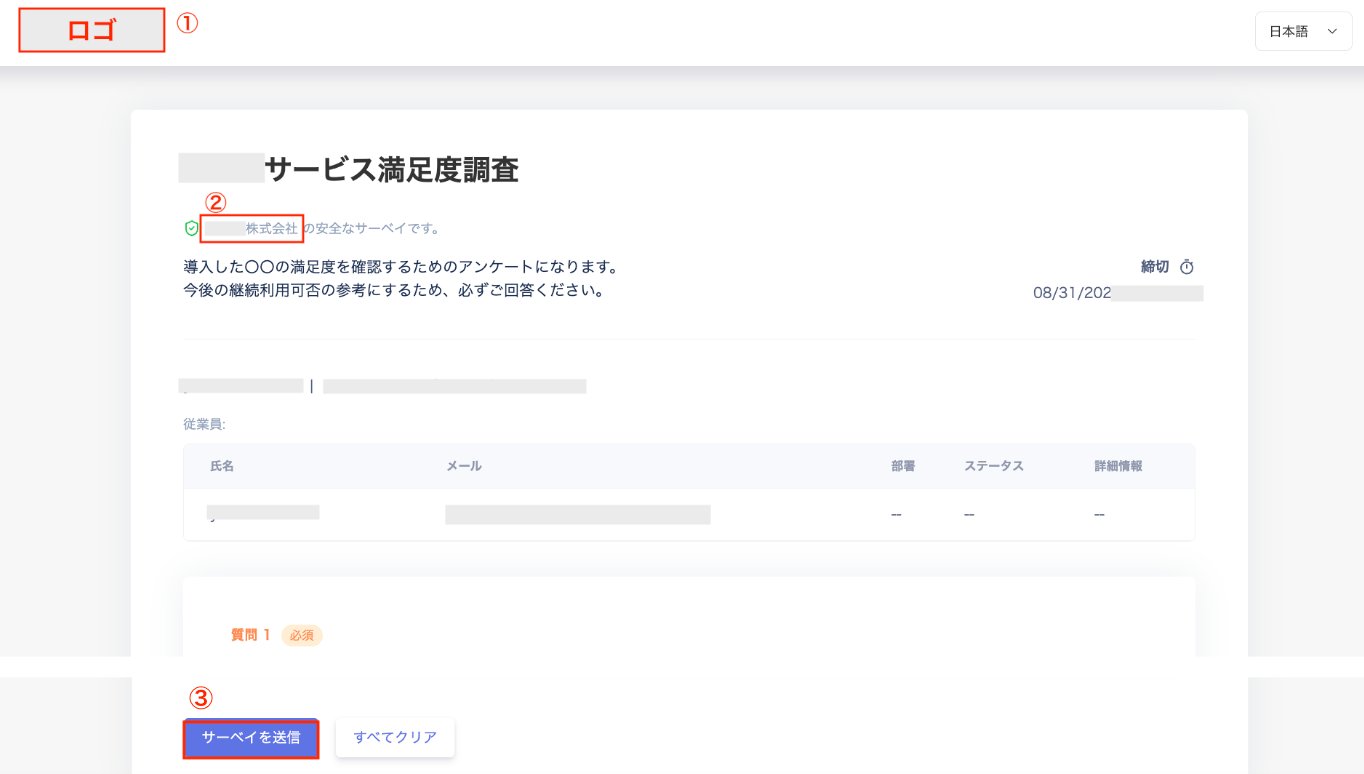
 2. On the response page, check that your settings are reflected.