> ## Documentation Index
> Fetch the complete documentation index at: https://support.i.moneyforward.com/llms.txt
> Use this file to discover all available pages before exploring further.
# Keeper Enterprise
> Keeper Enterpriseとの連携方法です。
## サポートする機能
アカウント削除 アカウント無効化 アカウント作成
## 事前準備
### APIKeyの発行
**Step1. ノードの作成**
1. APIKeyはトップノードに作成できないため、連携させたいアカウントを予め子ノードに移動させる必要があります。**管理者 > \[ノードを追加]** をクリックします。
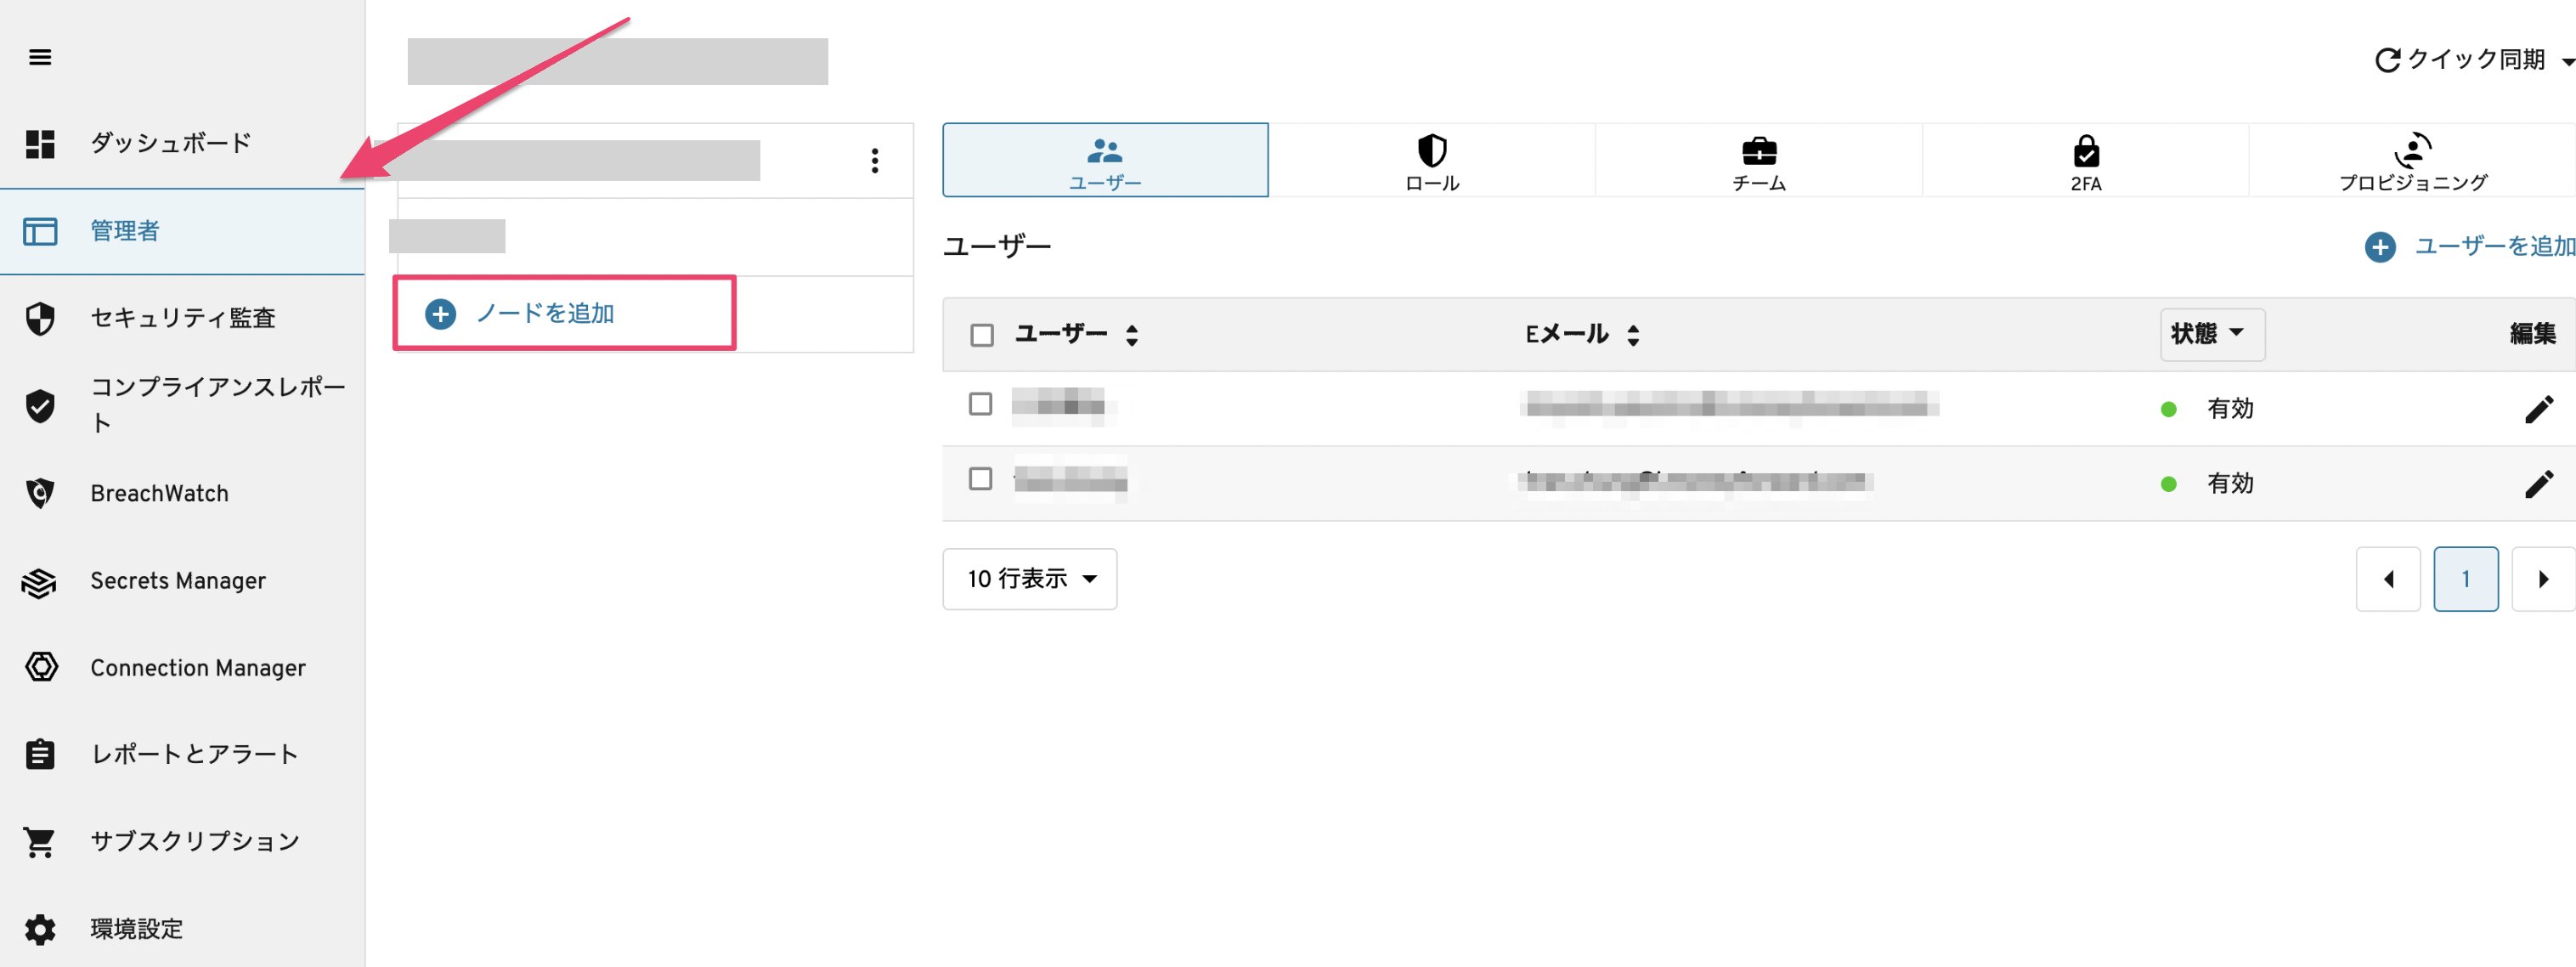 2. 任意のノードの名前を入力し、\[ノードを追加]をクリックします。
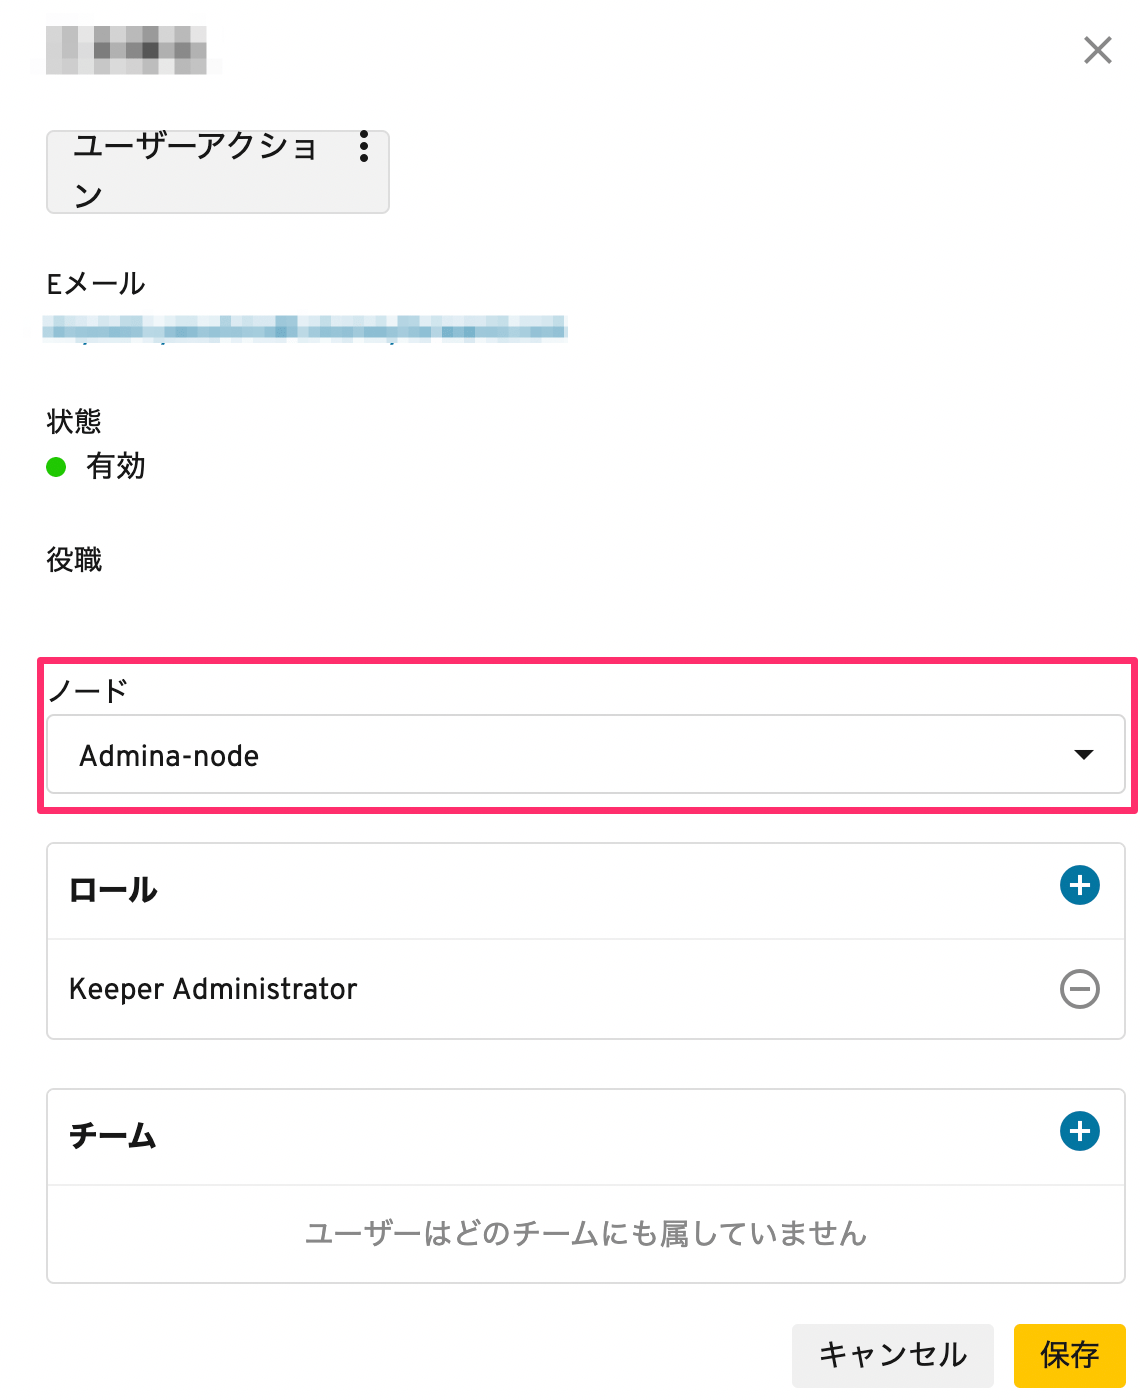
3. ユーザーを編集し、追加したノードに移動させます。
2. 任意のノードの名前を入力し、\[ノードを追加]をクリックします。
3. ユーザーを編集し、追加したノードに移動させます。
 **Step2 API keyの発行**
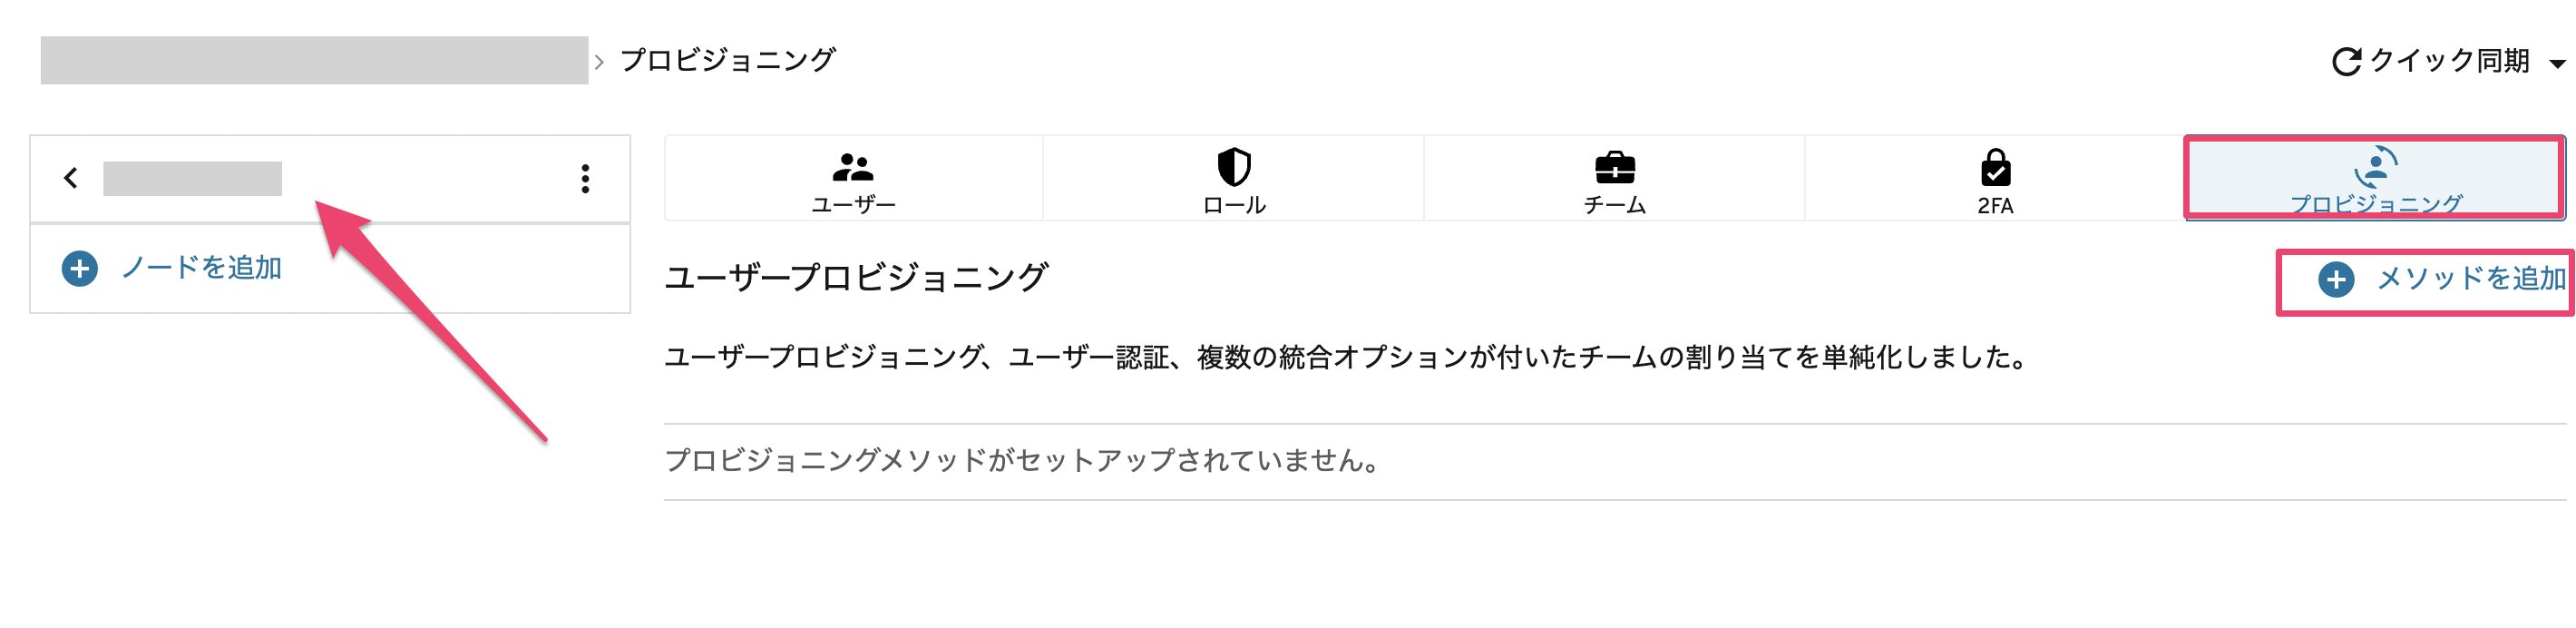
4. 追加したノードを選択し、**プロビジョニング > \[+メソッドを追加]** をクリックします。
**Step2 API keyの発行**
4. 追加したノードを選択し、**プロビジョニング > \[+メソッドを追加]** をクリックします。
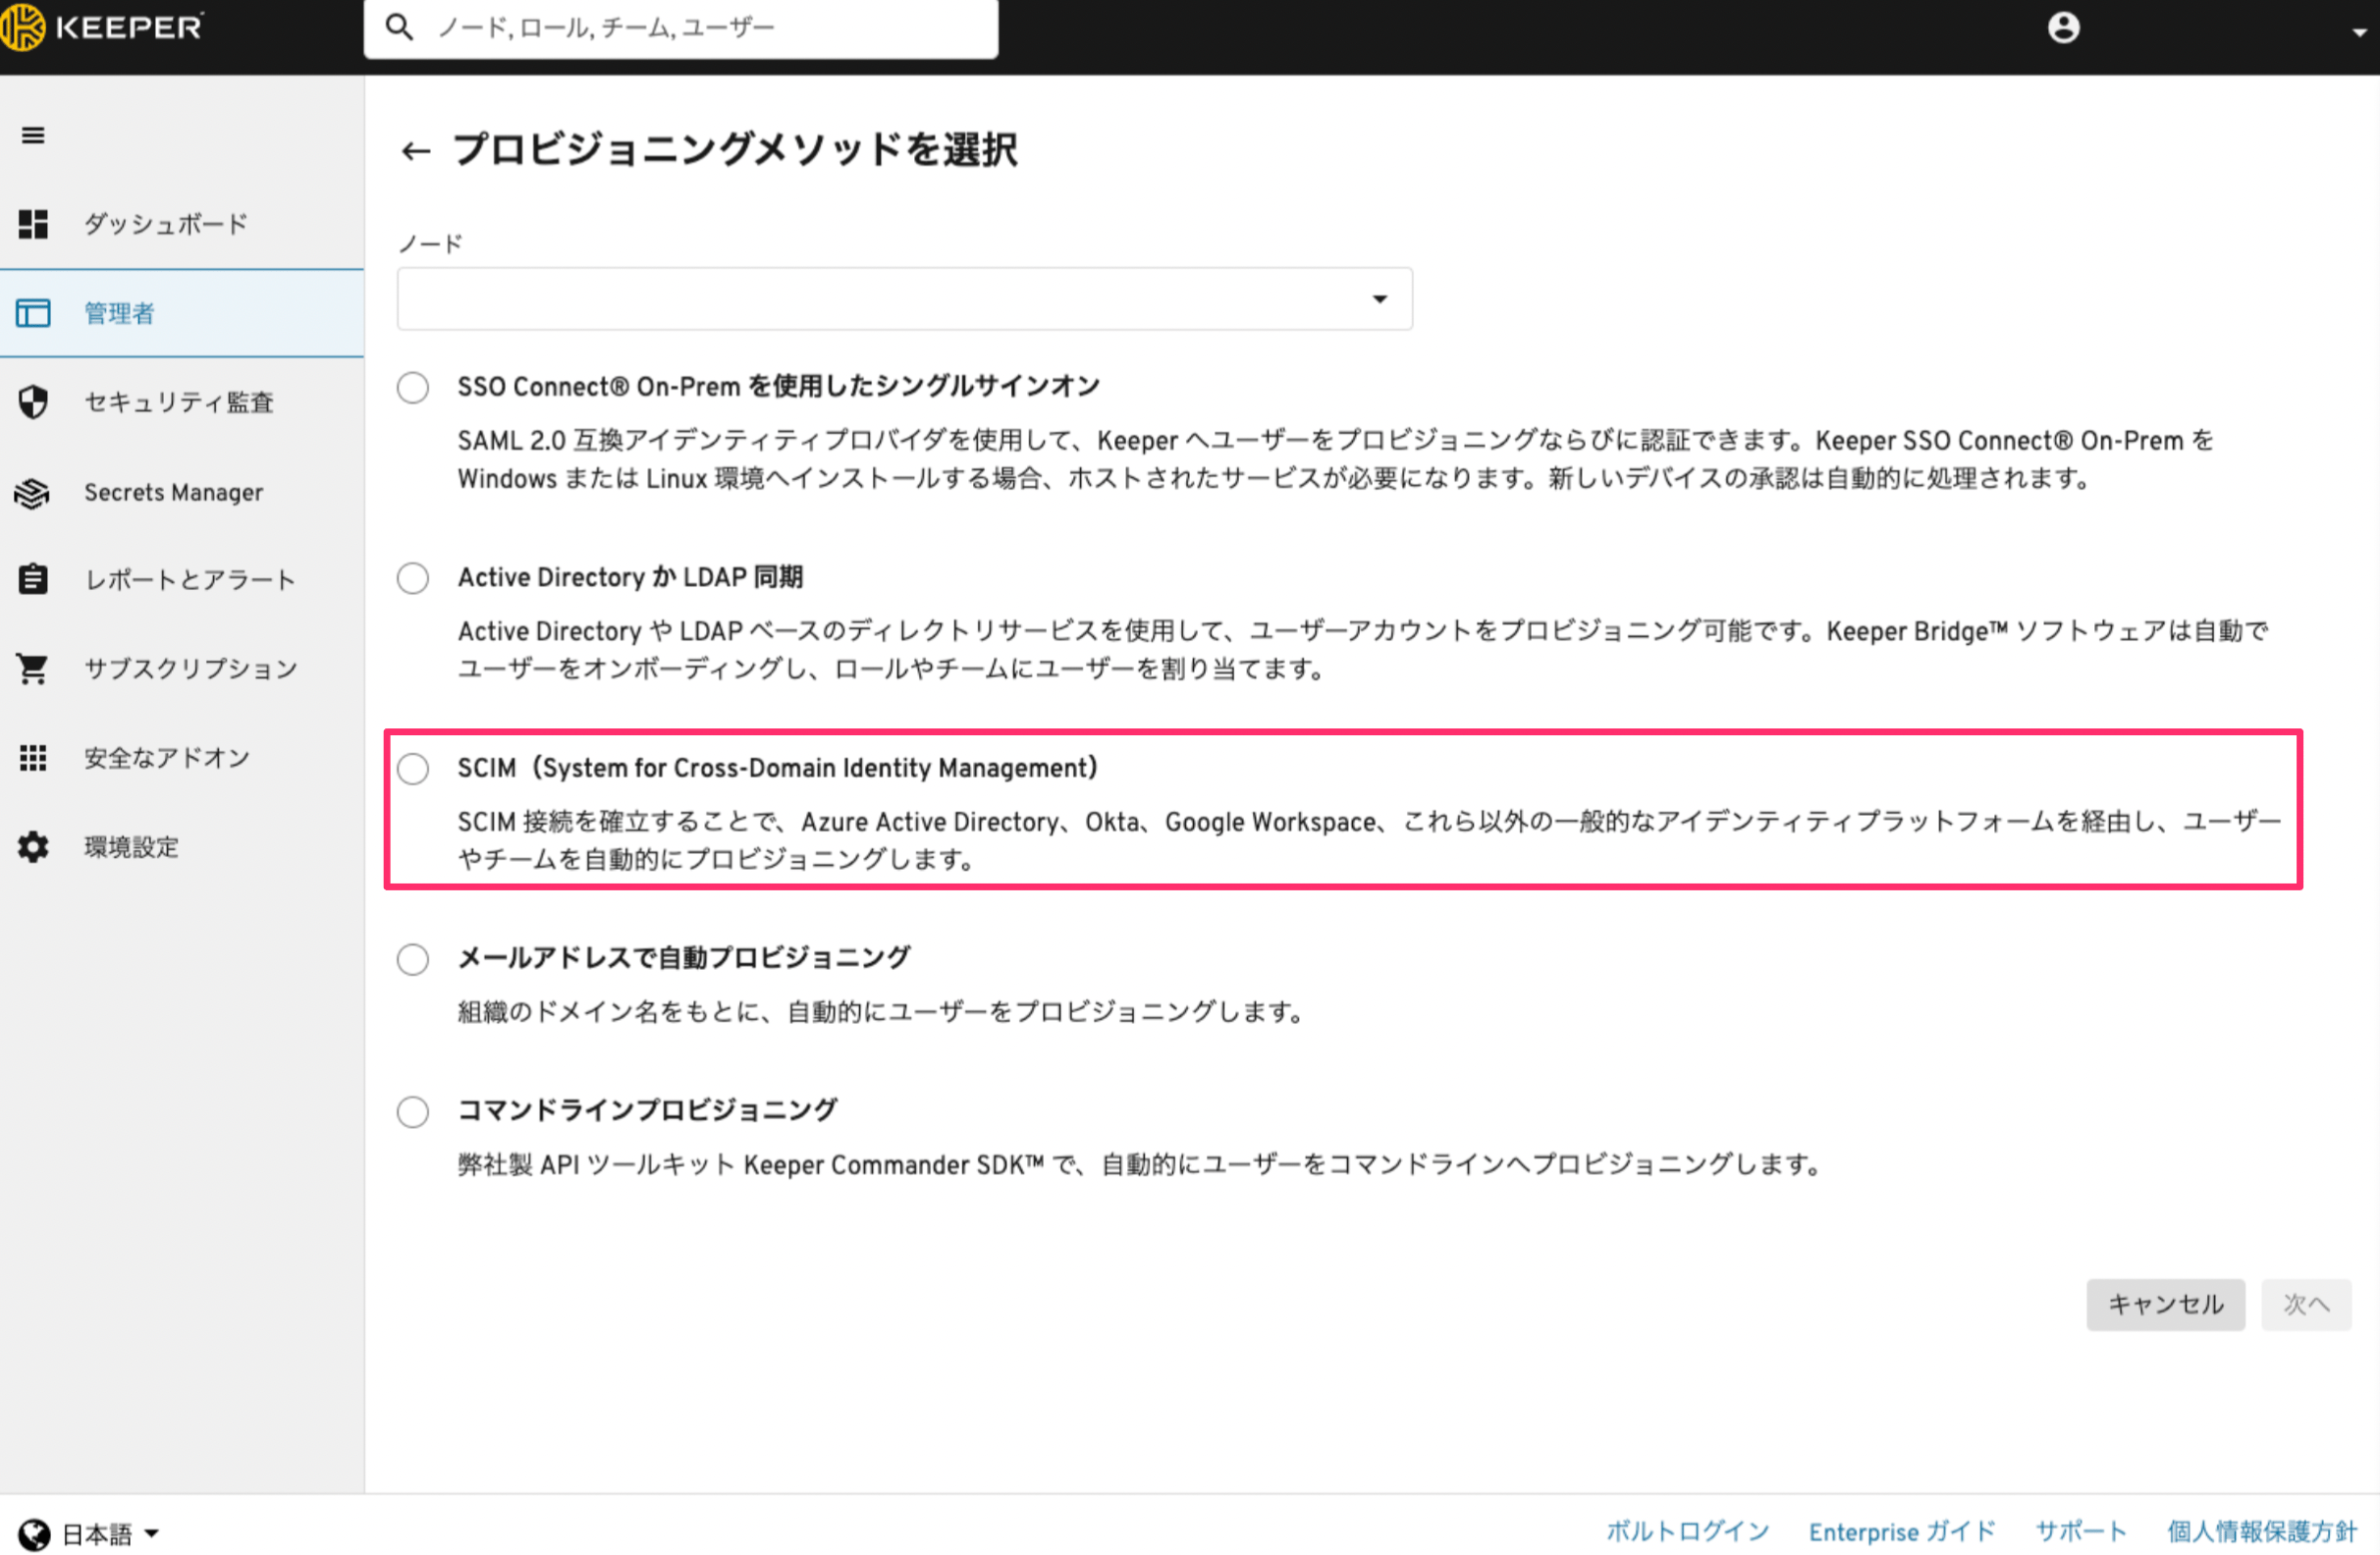
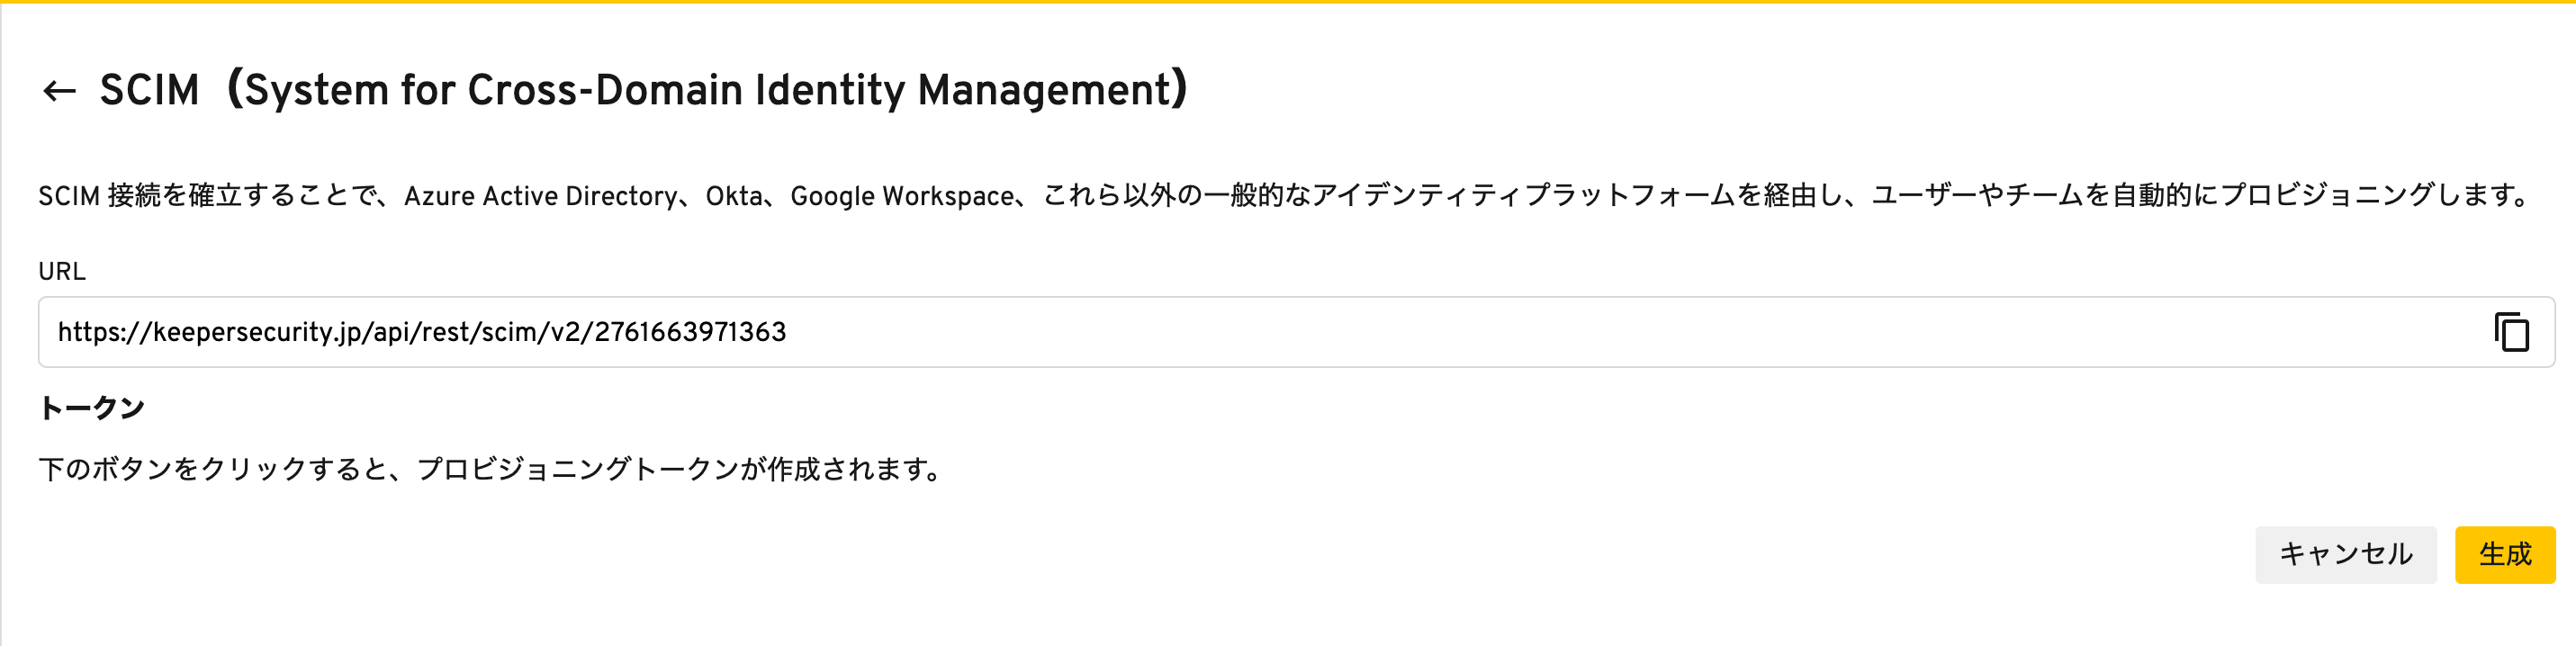
 5. プロビジョニングメソッドに **SCIM(System for Cross-Domain Identity Management)** を選択し、次へをクリックします。
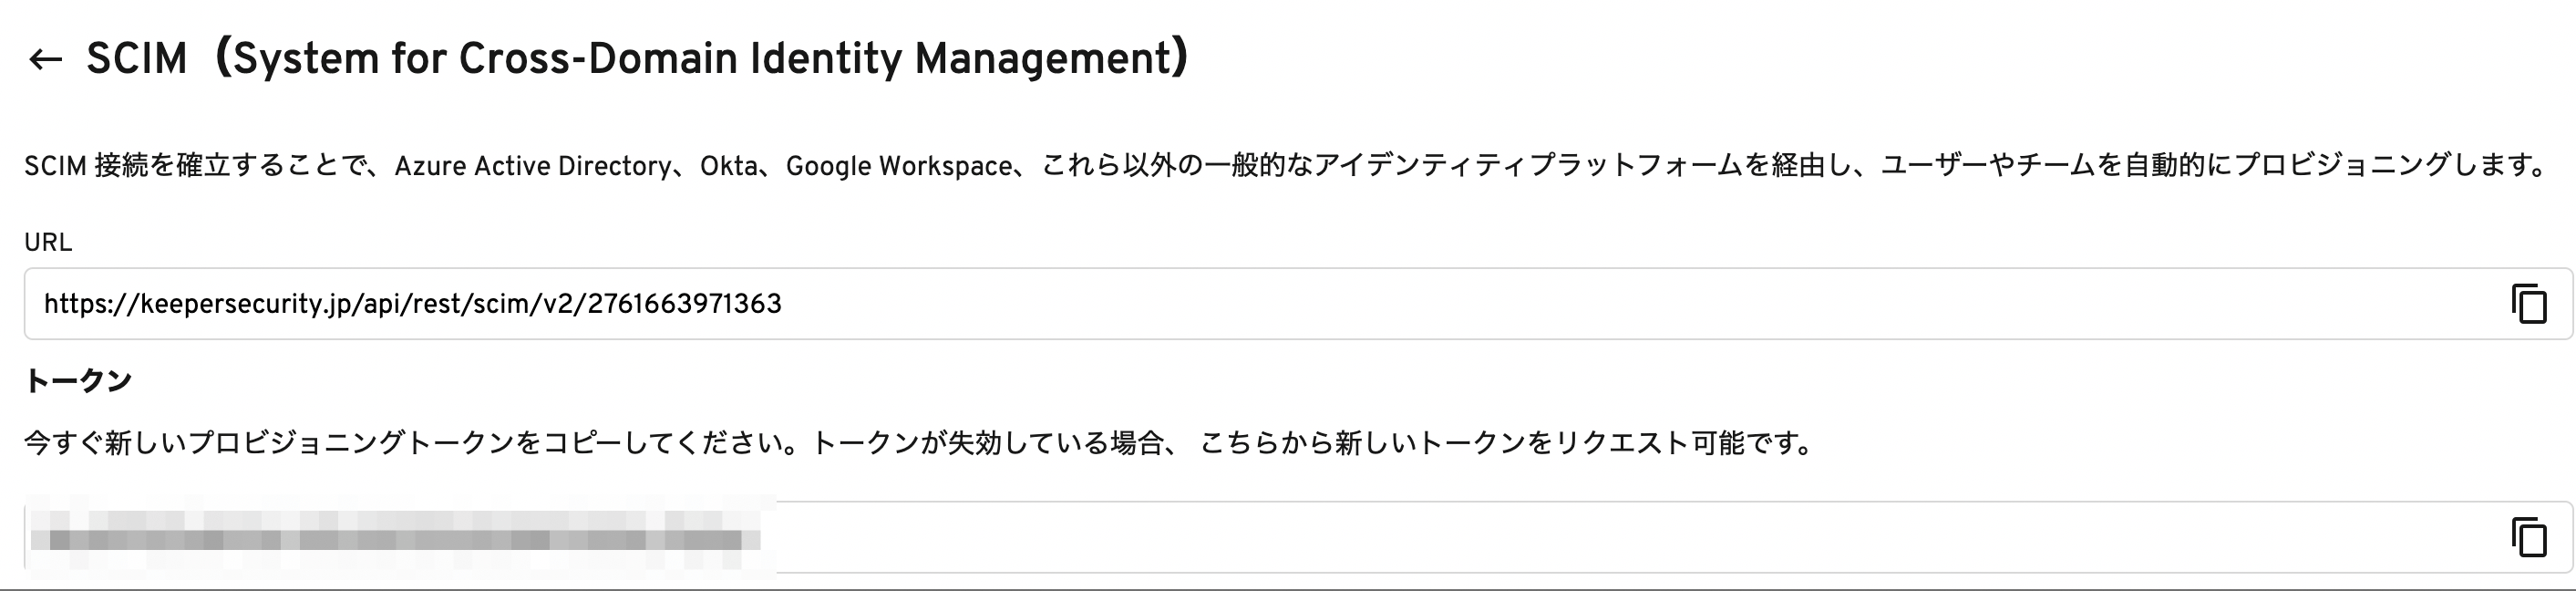
 6. 生成ボタンをクリックすると、トークンが発行されるので、URLとトークンをコピーして保存しておきます。
 ## インテグレーションのセットアップ
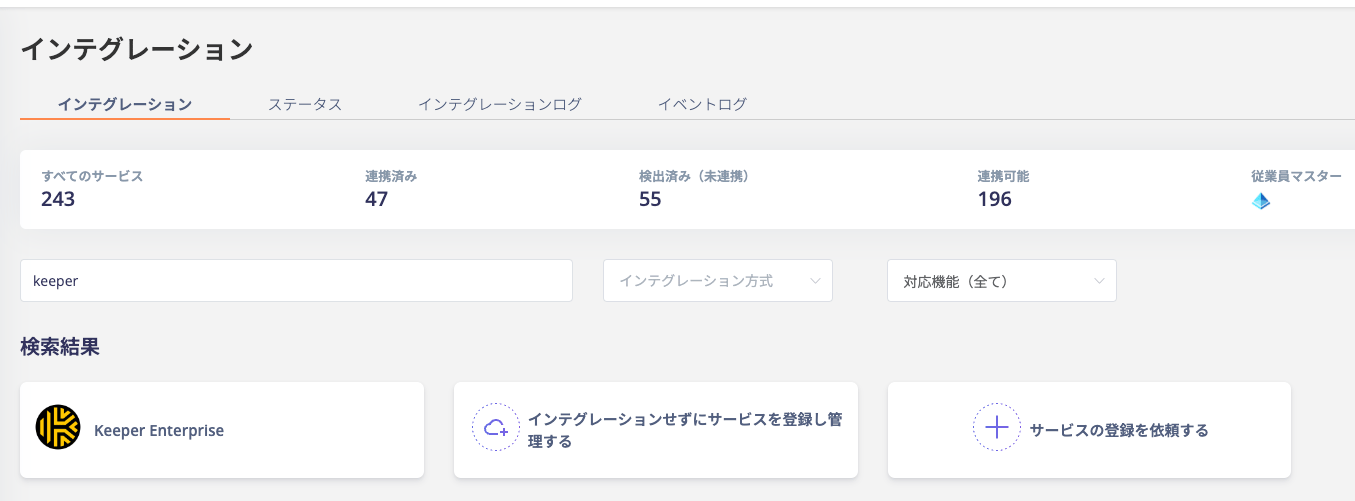
1. インテグレーション画面にて、**Keeper Enterprise** で検索します。
## インテグレーションのセットアップ
1. インテグレーション画面にて、**Keeper Enterprise** で検索します。
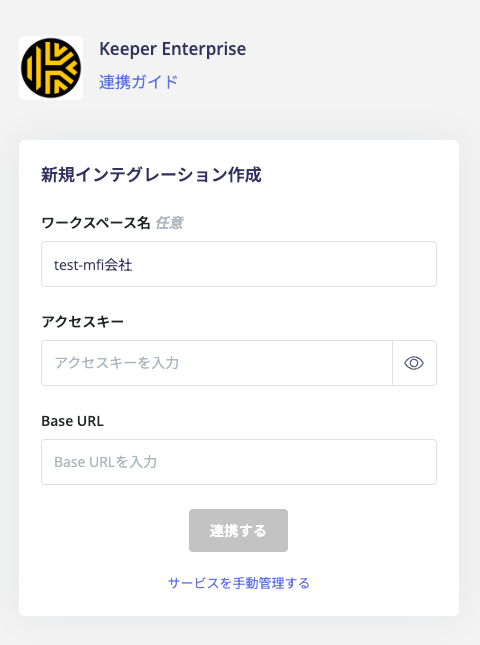
 2. 前の手順で取得した **URL** を `Base URL` に、**トークン** を `アクセスキー` に入力し、連携するをクリックします。
 3. Keeper Enterprise との連携に成功すると、アカウント一覧に登録済みのユーザー情報が表示されます。\
正常に完了しない場合は、インテグレーション画面のステータスタブから **編集** し、再度連携をお試しください。
解決しない場合は詳細を記載の上、チャットでお問い合わせください。
Keeper Enterpriseの連携概要については [連携ページ](https://admina.moneyforward.com/jp/integrations/keeper-enterprise) をご覧ください。
### 補足:Keeperアカウントの無効化について
AdminaからKeeper Enterpriseのアカウントの無効化(Disable)が可能です。このとき招待中にアカウントを無効化した場合、「削除」する挙動となります。Activeのアカウントに無効化を実行した場合、アカウントがロック状態となります。
AdminaからKeeper Enterpriseのアカウントを削除する場合、Keeper側の仕様上、アカウントを削除せず、データ損失を防ぐためにロックされます。詳細は [API Provisioning with SCIM](https://docs.keeper.io/en/enterprise-guide/user-and-team-provisioning/automated-provisioning-with-scim) をご参照ください。
3. Keeper Enterprise との連携に成功すると、アカウント一覧に登録済みのユーザー情報が表示されます。\
正常に完了しない場合は、インテグレーション画面のステータスタブから **編集** し、再度連携をお試しください。
解決しない場合は詳細を記載の上、チャットでお問い合わせください。
Keeper Enterpriseの連携概要については [連携ページ](https://admina.moneyforward.com/jp/integrations/keeper-enterprise) をご覧ください。
### 補足:Keeperアカウントの無効化について
AdminaからKeeper Enterpriseのアカウントの無効化(Disable)が可能です。このとき招待中にアカウントを無効化した場合、「削除」する挙動となります。Activeのアカウントに無効化を実行した場合、アカウントがロック状態となります。
AdminaからKeeper Enterpriseのアカウントを削除する場合、Keeper側の仕様上、アカウントを削除せず、データ損失を防ぐためにロックされます。詳細は [API Provisioning with SCIM](https://docs.keeper.io/en/enterprise-guide/user-and-team-provisioning/automated-provisioning-with-scim) をご参照ください。