> ## Documentation Index
> Fetch the complete documentation index at: https://support.i.moneyforward.com/llms.txt
> Use this file to discover all available pages before exploring further.
# HaloPSA
> HaloPSAとの連携方法です。
## サポートする機能
このサービスは基本的なアカウント情報の取得・集計のみに対応しています。
## 事前準備
### HaloPSAへのログイン方法
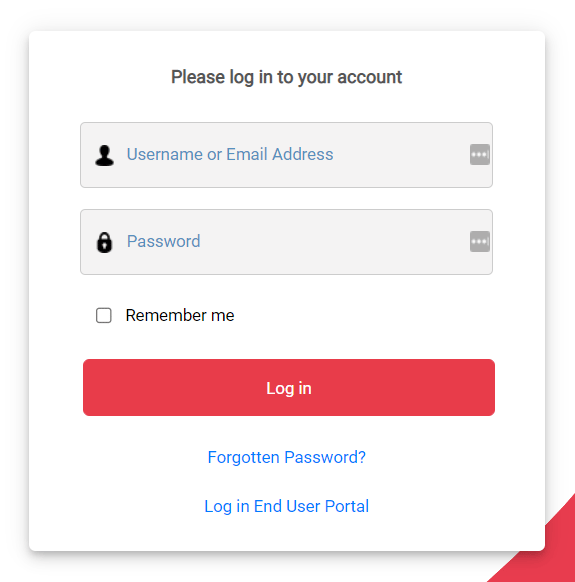
[HaloPSAログインページ](https://ocit.halopsa.com/auth/Account/Login)にて、Usernameまたはメールアドレス、パスワードを入力しログインします。
 ### ワークスペースキーの取得方法
**ドメインがワークスペースキー**となります。
https\://**`{ワークスペースキー}`**.halopsa.com/
### Base URIの取得方法
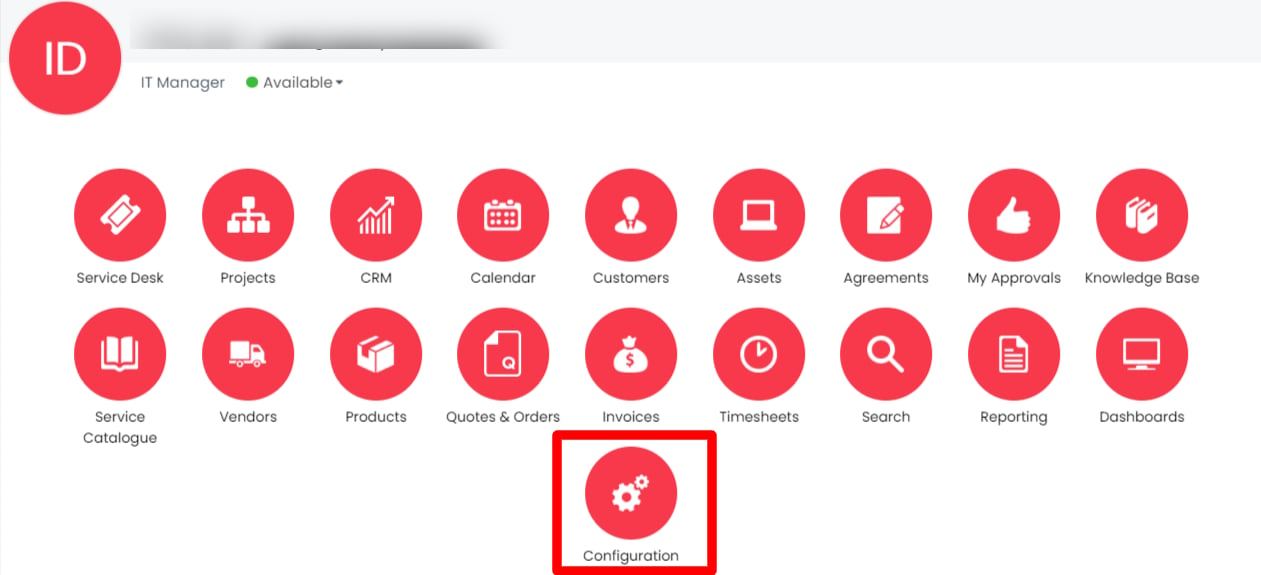
HaloPSAにログイン後、**Configurations > Integrations > HaloPSA API**と進みます。
### ワークスペースキーの取得方法
**ドメインがワークスペースキー**となります。
https\://**`{ワークスペースキー}`**.halopsa.com/
### Base URIの取得方法
HaloPSAにログイン後、**Configurations > Integrations > HaloPSA API**と進みます。
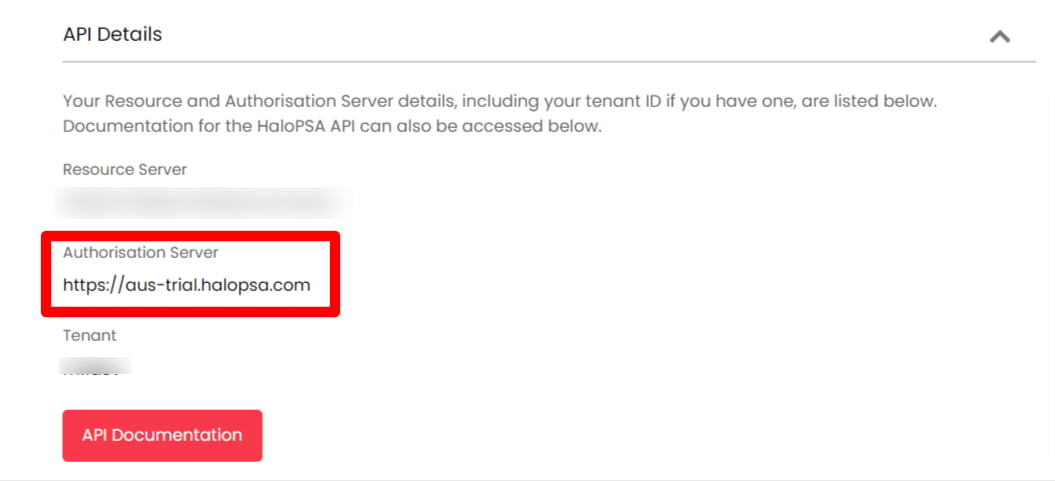
 API Detailsに表示されている**Authorisation ServerがBase URL**となるので、保存します。
 ### クライアントIDの取得方法
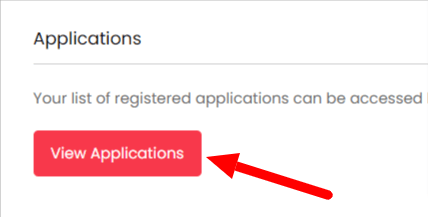
次に、HaloPSA APIページにて**ApplicationsのView Applictions**をクリックします。
### クライアントIDの取得方法
次に、HaloPSA APIページにて**ApplicationsのView Applictions**をクリックします。
 右上の**New**をクリックし、Applicationを作成します。
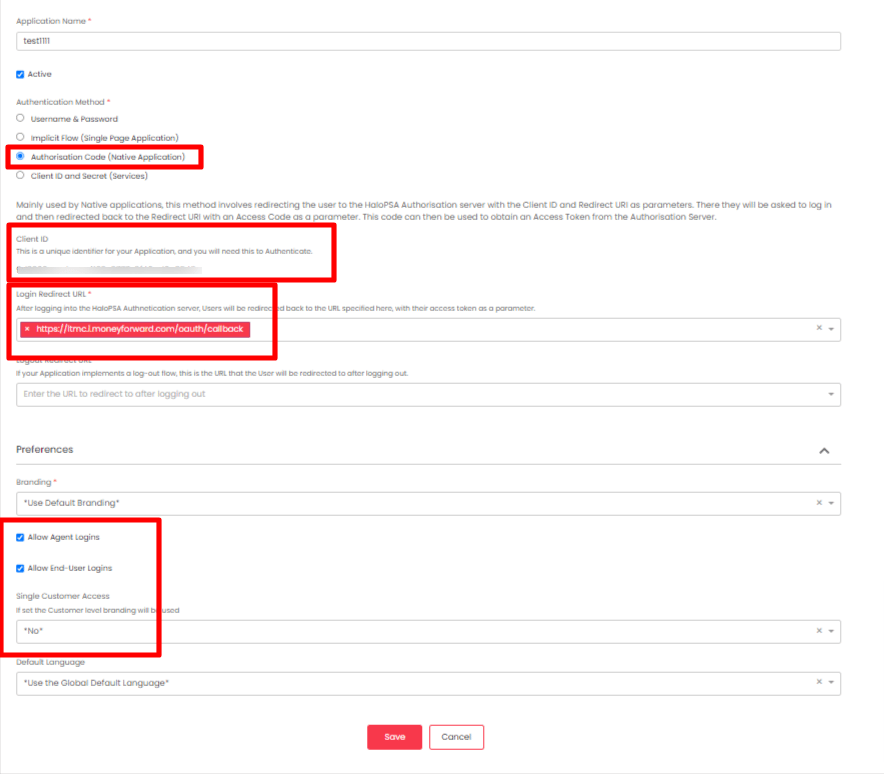
 以下の通りに入力します。
Authentication Methodを入力すると、**Client IDが表示されますので**保存します。SAVE後でもClient IDは確認可能です。
**\[Detailsタブ]**
* Application Name:任意の名称を入力します
* Authentication Method:`Authorisation Code (Native Application)`にチェックします。
* Login Redirect URL:`https://itmc.i.moneyforward.com/oauth/callback`を入力します。
* Preferences:`Allow Agent Logins` と `Allow End-User Logins`にチェックします。
以下の通りに入力します。
Authentication Methodを入力すると、**Client IDが表示されますので**保存します。SAVE後でもClient IDは確認可能です。
**\[Detailsタブ]**
* Application Name:任意の名称を入力します
* Authentication Method:`Authorisation Code (Native Application)`にチェックします。
* Login Redirect URL:`https://itmc.i.moneyforward.com/oauth/callback`を入力します。
* Preferences:`Allow Agent Logins` と `Allow End-User Logins`にチェックします。
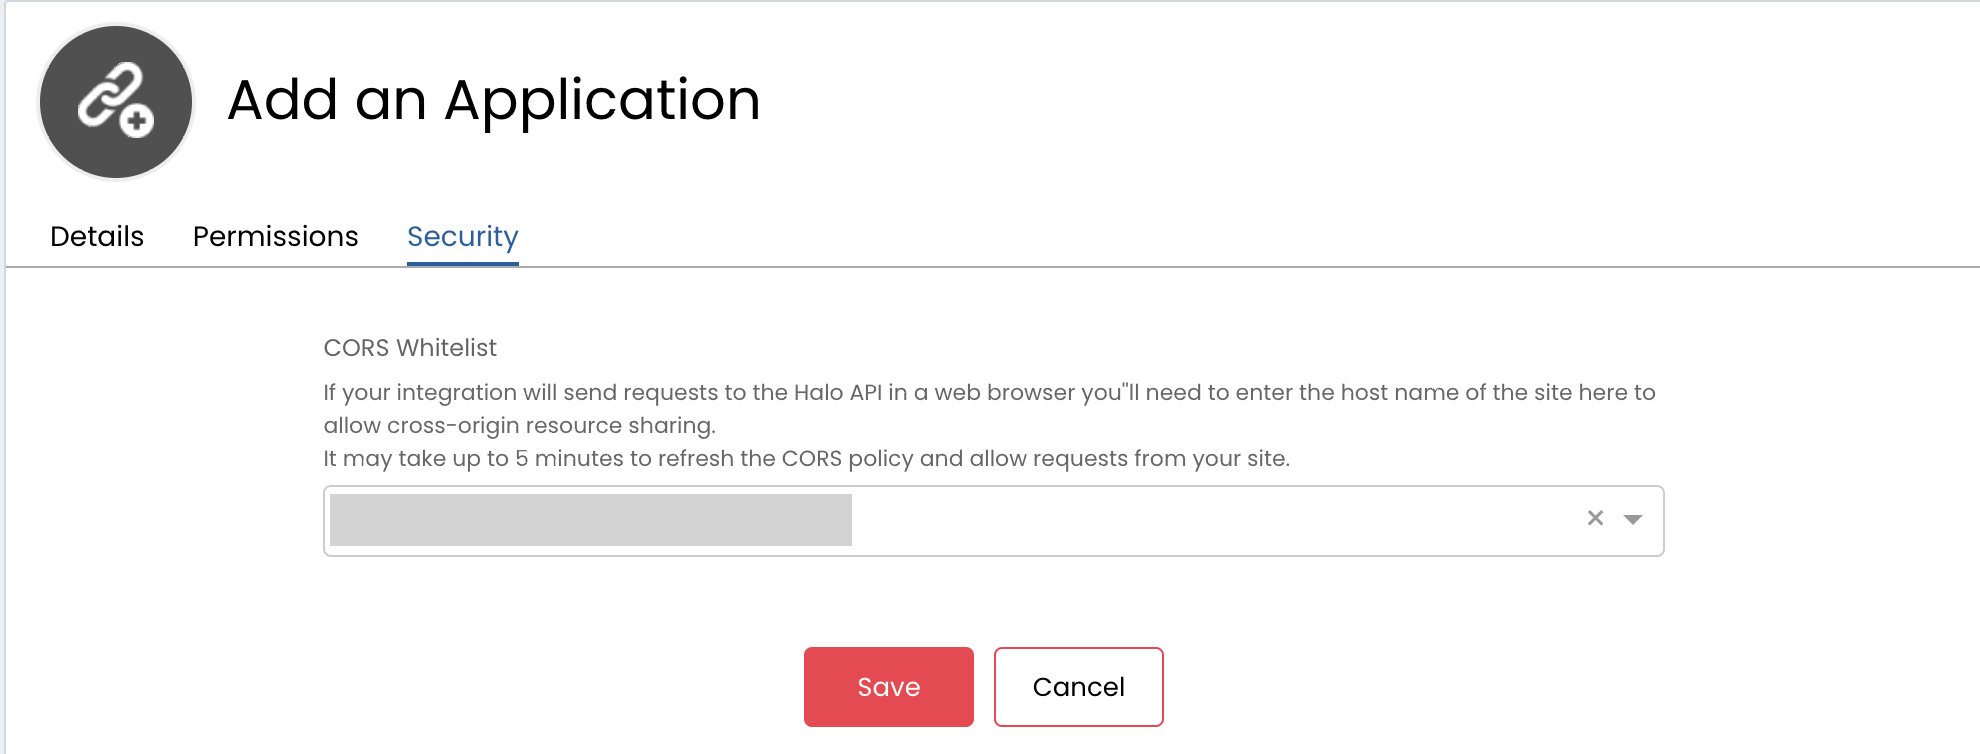
 **\[Securityタブ]**
* CORS Whitelist:`https://itmc.i.moneyforward.com/` を入力します。
**Save**をクリックします
**\[Securityタブ]**
* CORS Whitelist:`https://itmc.i.moneyforward.com/` を入力します。
**Save**をクリックします
 ## インテグレーションのセットアップ
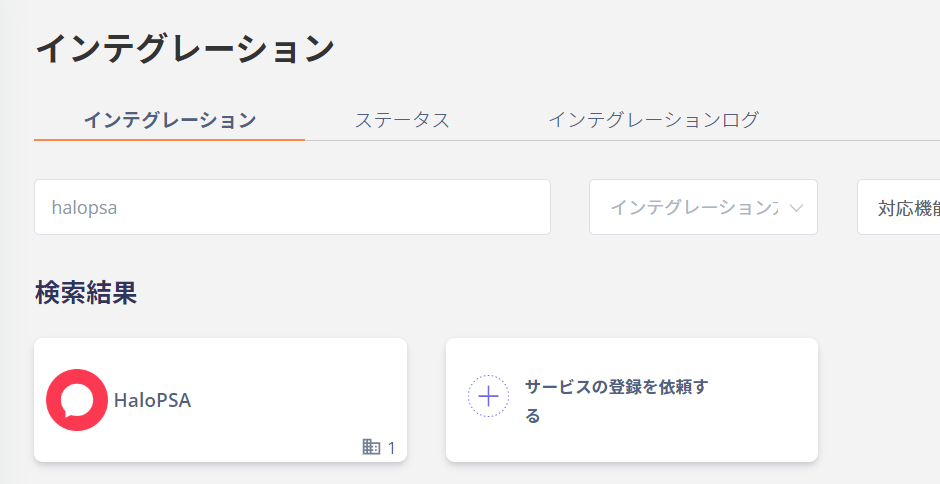
インテグレーション画面にて、**HaloPSA**で検索します。
## インテグレーションのセットアップ
インテグレーション画面にて、**HaloPSA**で検索します。
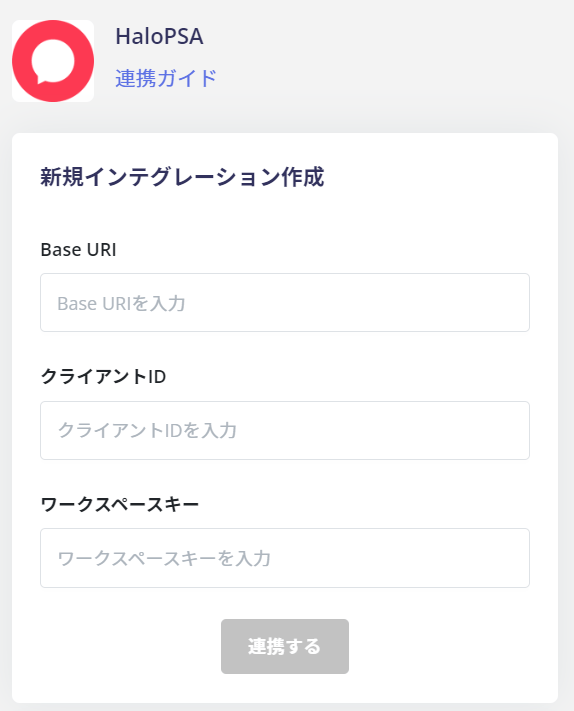
 前の手順で取得した**Base URI、クライアントID、ワークスペースキー**を入力し、**連携する**をクリックします。
 HaloPSAとの連携に成功すると、アカウント一覧に登録済みのユーザー情報が表示されます。
正常に完了しない場合は、インテグレーション画面のステータスタブから**編集**し、再度連携をお試しください。
解決しない場合はチャットにてお問い合わせください。
HaloPSAの連携概要については[連携ページ](http://admina.moneyforward.com/jp/integrations/halopsa)をご覧ください。
HaloPSAとの連携に成功すると、アカウント一覧に登録済みのユーザー情報が表示されます。
正常に完了しない場合は、インテグレーション画面のステータスタブから**編集**し、再度連携をお試しください。
解決しない場合はチャットにてお問い合わせください。
HaloPSAの連携概要については[連携ページ](http://admina.moneyforward.com/jp/integrations/halopsa)をご覧ください。