> ## Documentation Index
> Fetch the complete documentation index at: https://support.i.moneyforward.com/llms.txt
> Use this file to discover all available pages before exploring further.
# Google Ads
> Google Ads連携にはサービスアカウント追加後、ワークスペースキーを確認してAdminaのインテグレーション画面で登録します。
## サポートする機能
アカウント削除 アカウント作成
Google Ads のワークスペースを連携するには、Admina のサービスアカウントをメンバーとして追加する必要があります。
ユーザーの集計のみを行う場合は「閲覧のみ(Read-only)」権限で十分ですが、プロビジョニングおよびデプロビジョニングを行う場合は「管理者(Admin)」権限が必要になります。
Google広告のAPIではアカウントが削除されたかを判断する方法のご提供がございませんので、退職アカウントを[ミュート](/it-management/retired/j61yplowpw-mute#alert-mute)してご利用ください。
## 事前準備
### サービスアカウントの追加方法
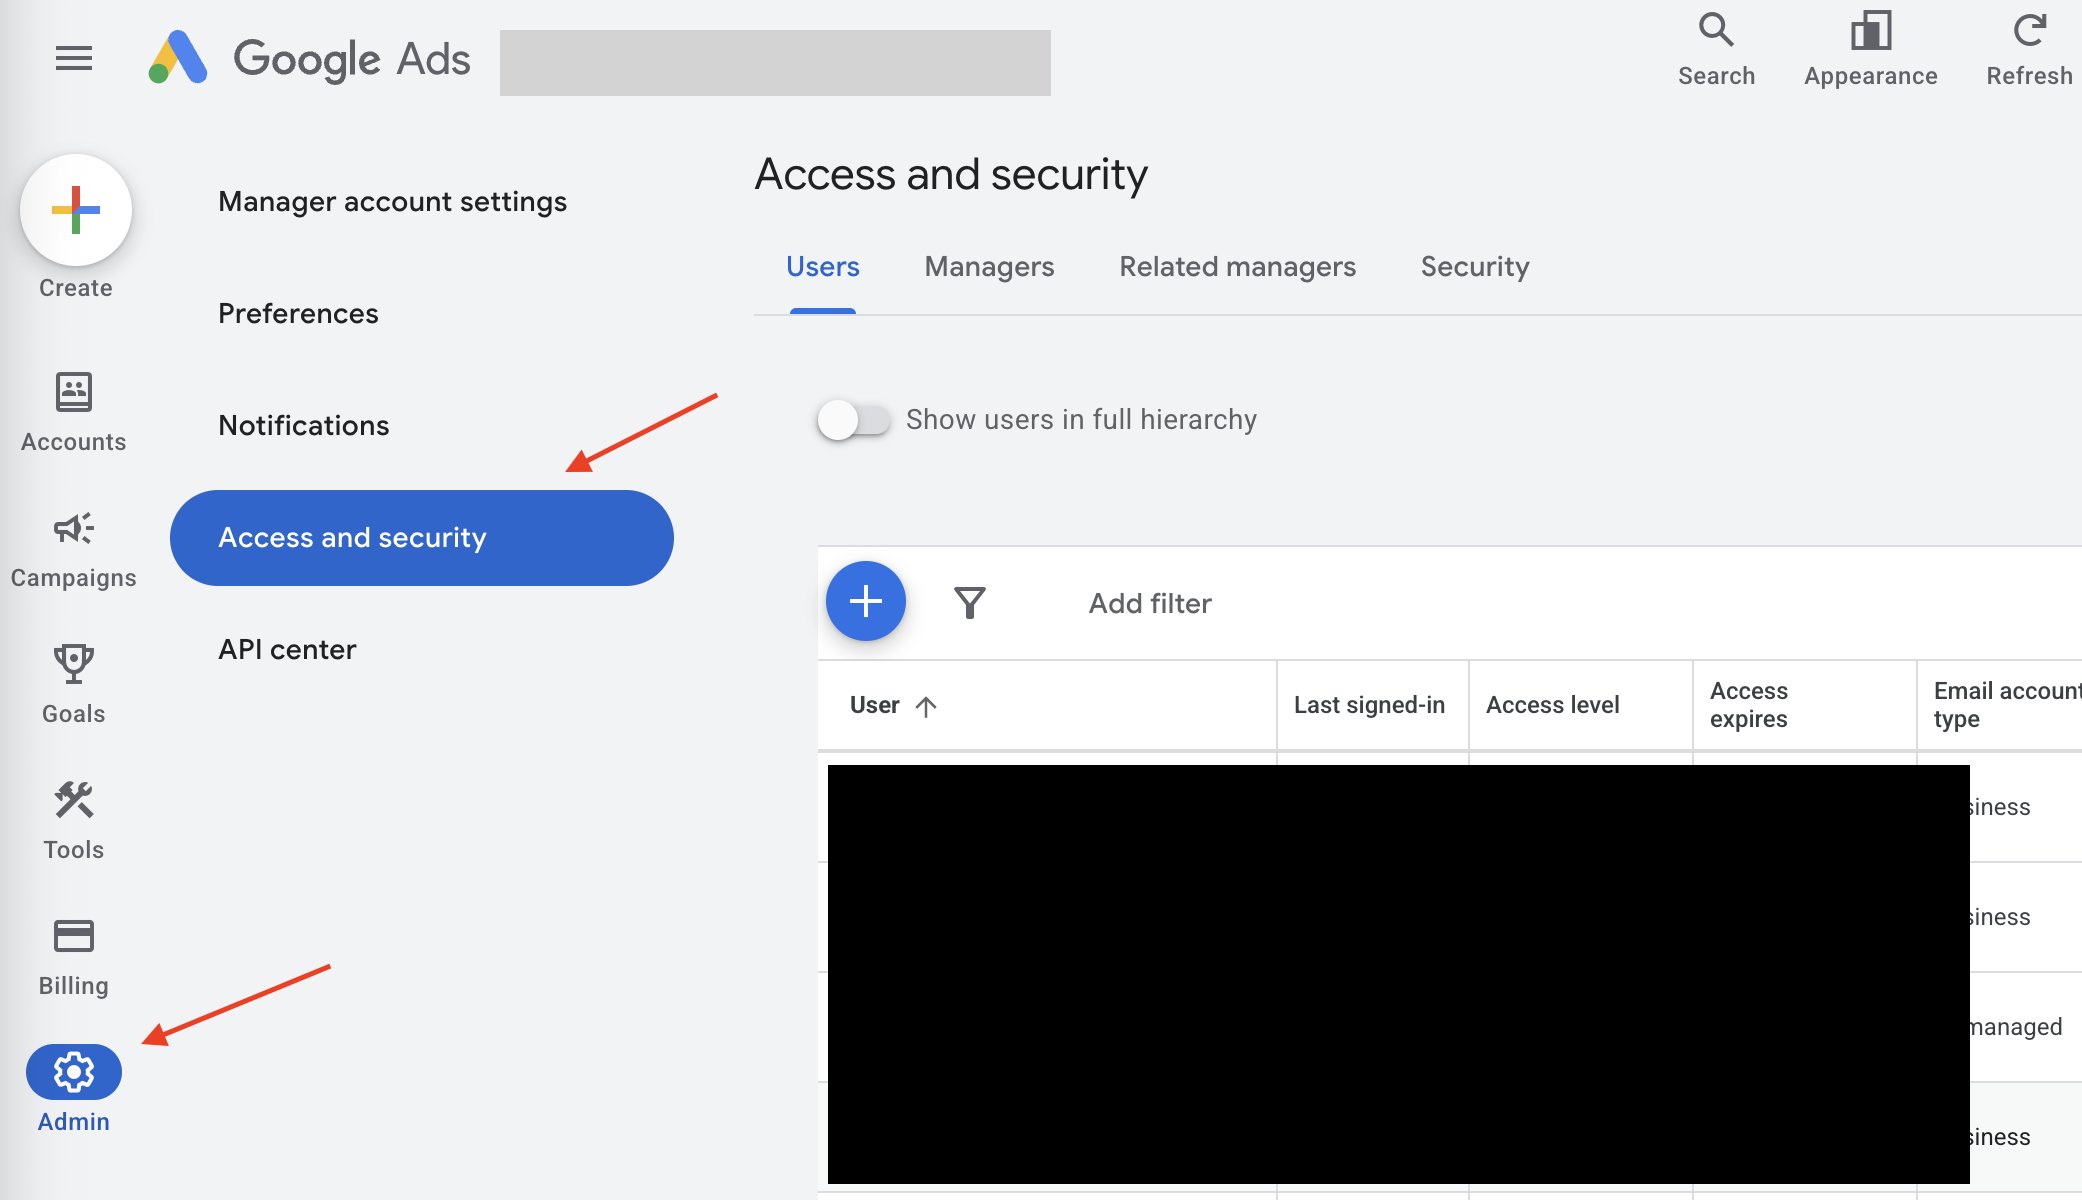
Google Adsログイン後、左側メニューの **Admin** > **Access and security** > **+ボタン**をクリックします。
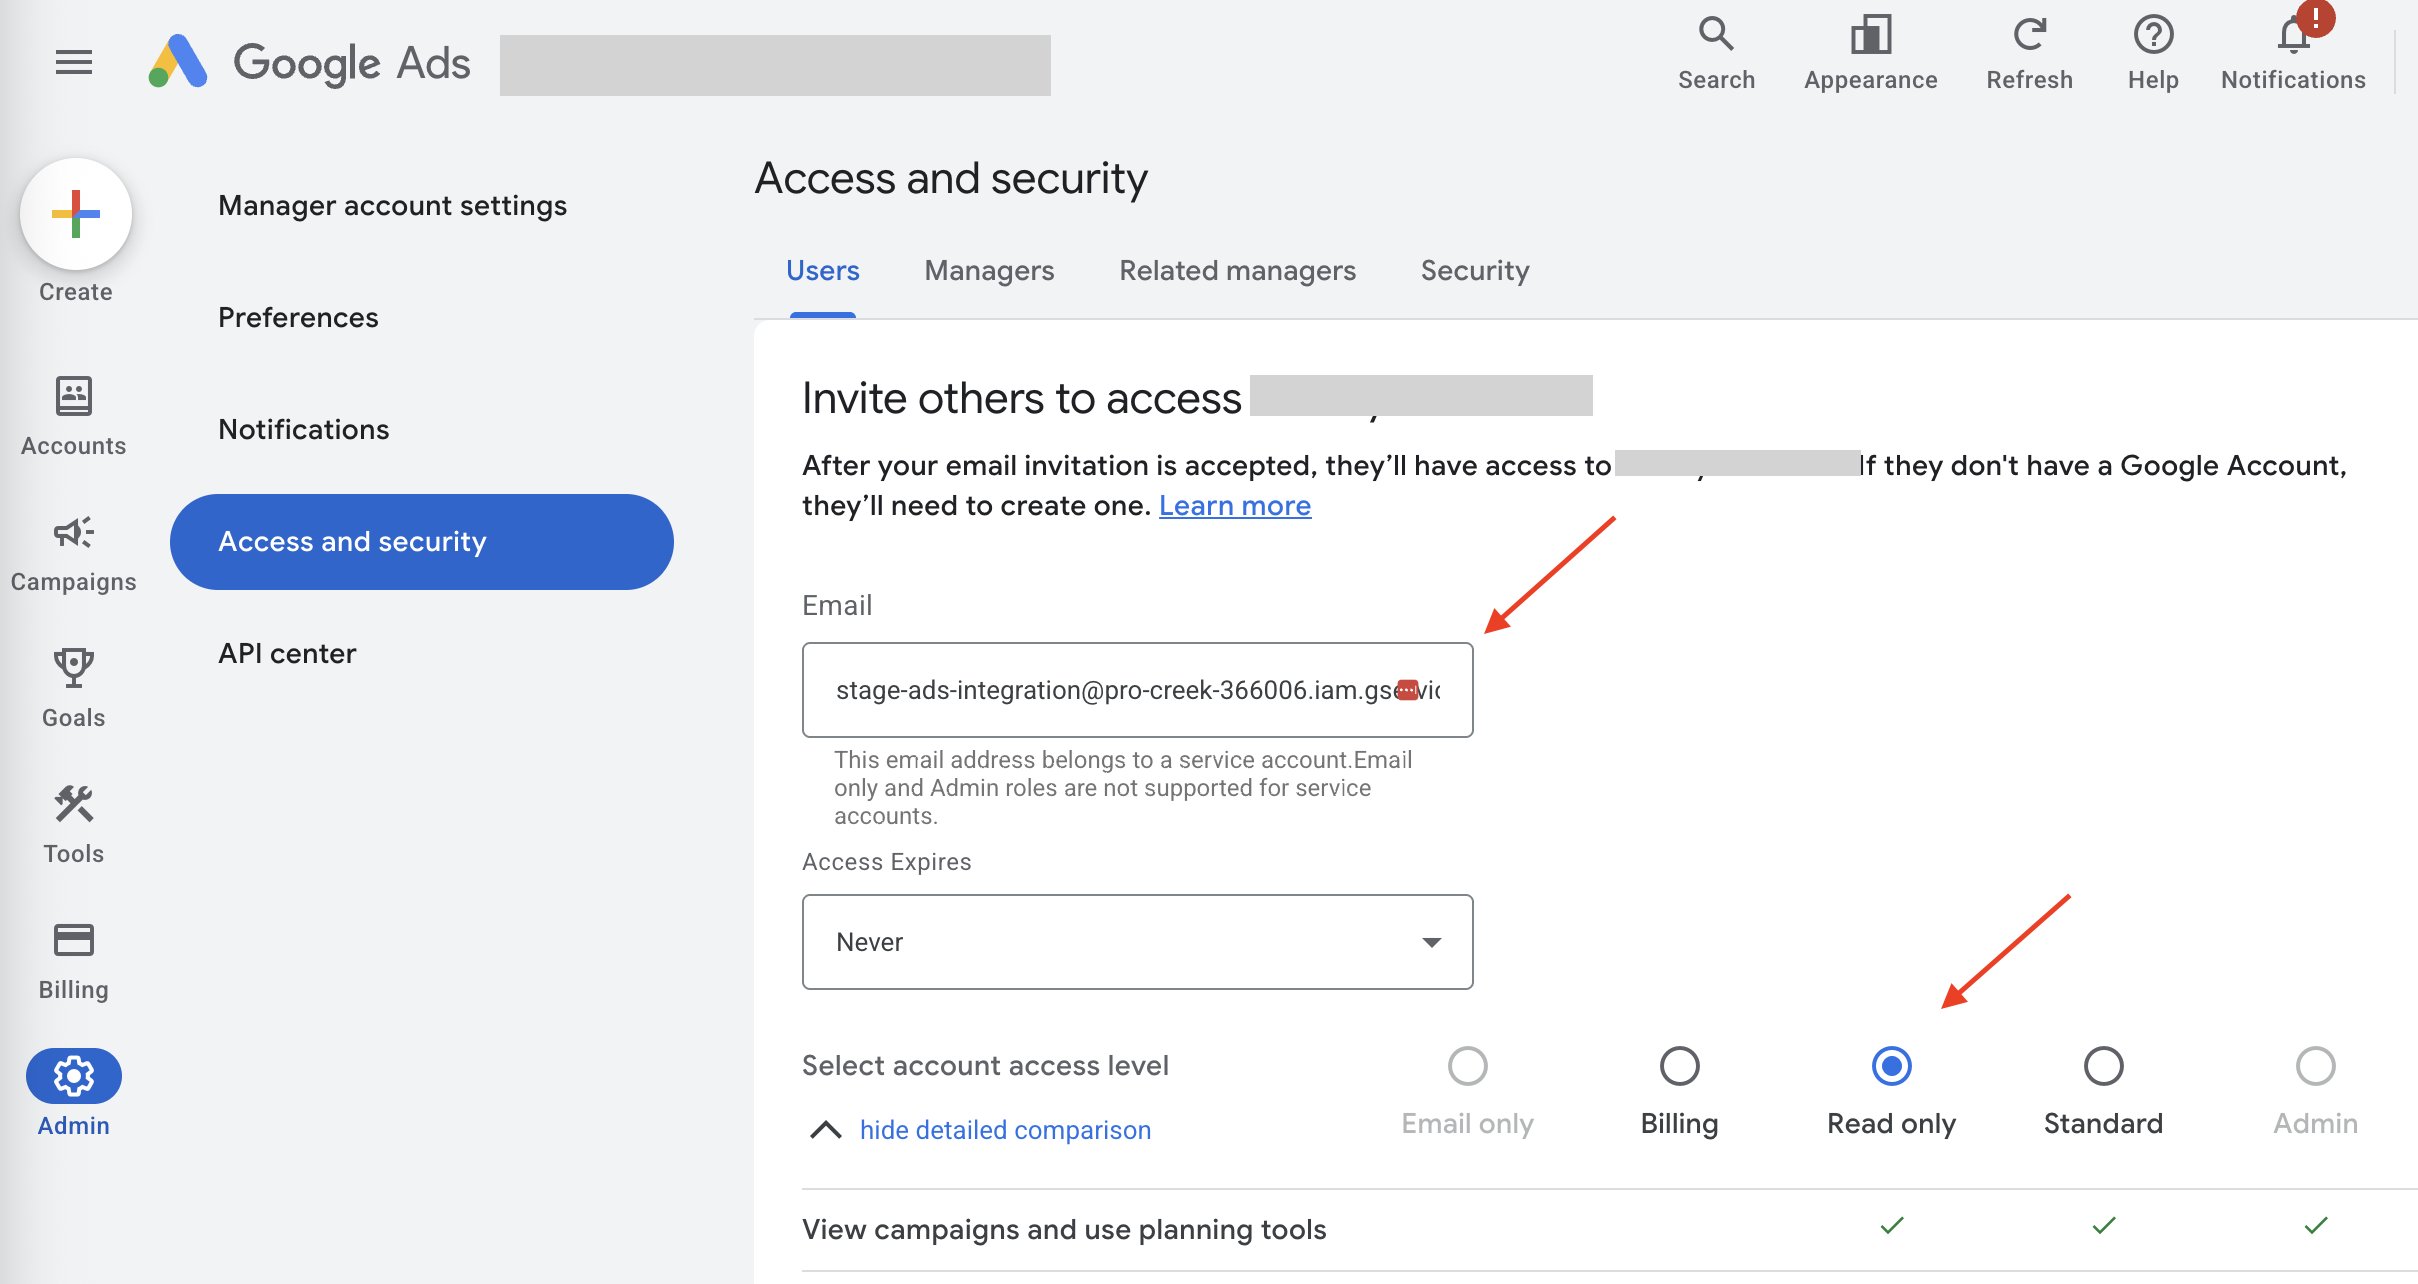
 サービスアカウントのメールアドレス `google-ads-integration@money-forward-itmc.iam.gserviceaccount.com` を入力し、Select account access level は **Read only** を選択します。
※このメールアドレスは本番環境専用です。ステージ環境では、代わりに以下のメールアドレスを使用してください。
`stage-ads-integration@pro-creek-366006.iam.gserviceaccount.com`
この画面では Admin権限を選択できません。後から変更する必要があります。
必要に応じて有効期限を設定もできますが、期限が切れると連携は停止します。
サービスアカウントのメールアドレス `google-ads-integration@money-forward-itmc.iam.gserviceaccount.com` を入力し、Select account access level は **Read only** を選択します。
※このメールアドレスは本番環境専用です。ステージ環境では、代わりに以下のメールアドレスを使用してください。
`stage-ads-integration@pro-creek-366006.iam.gserviceaccount.com`
この画面では Admin権限を選択できません。後から変更する必要があります。
必要に応じて有効期限を設定もできますが、期限が切れると連携は停止します。
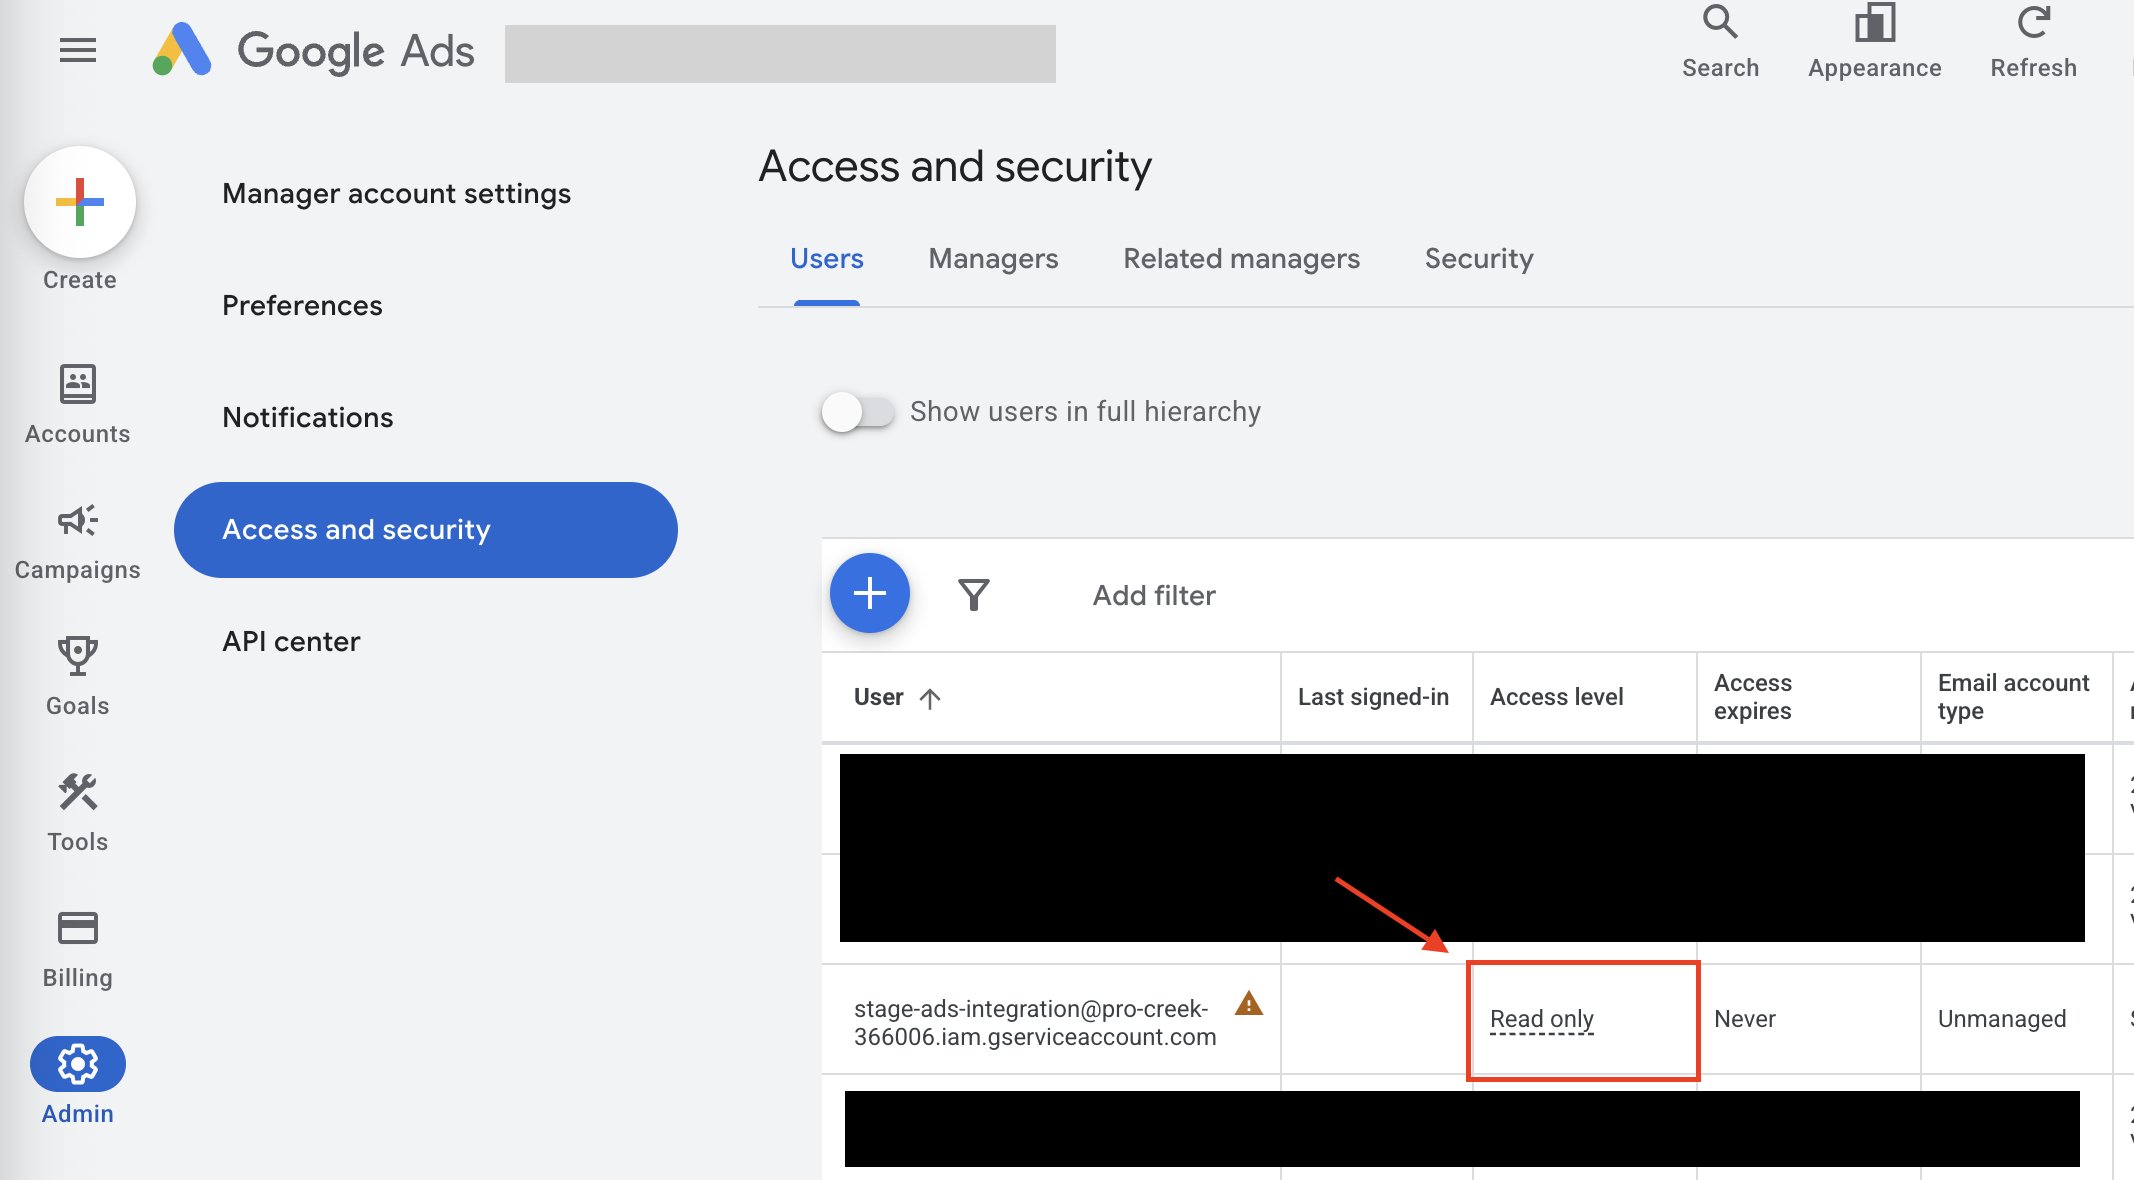
 (任意)プロビジョニングおよびデプロビジョニングのために **Admin権限**が必要な場合は、ユーザー一覧からアクセスレベルを変更できます。
ユーザー一覧が更新されない場合は、ページをリフレッシュしてください。
(任意)プロビジョニングおよびデプロビジョニングのために **Admin権限**が必要な場合は、ユーザー一覧からアクセスレベルを変更できます。
ユーザー一覧が更新されない場合は、ページをリフレッシュしてください。
 ### ワークスペースキーの確認方法
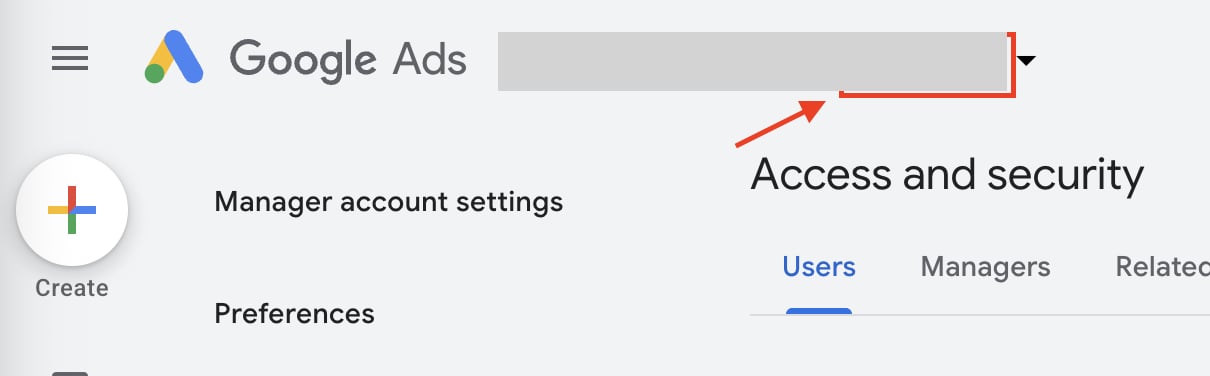
Google Ads にサービスアカウントを追加後、Google Ads アカウント名の近くに表示されている番号を確認します。
この番号が**ワークスペースキー**となります。
(ハイフンの有無はどちらでも問題ありません。)
### ワークスペースキーの確認方法
Google Ads にサービスアカウントを追加後、Google Ads アカウント名の近くに表示されている番号を確認します。
この番号が**ワークスペースキー**となります。
(ハイフンの有無はどちらでも問題ありません。)
 ## インテグレーションのセットアップ
インテグレーション画面にて、**Google Ads**で検索します。
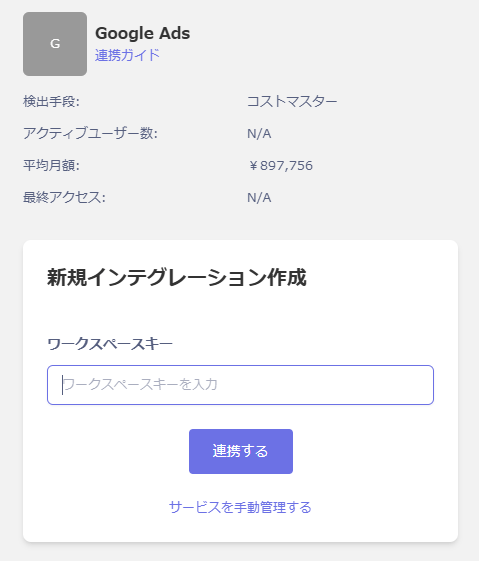
前の手順で確認した**ワークスペースキー**を入力し、**連携する**をクリックします。
## インテグレーションのセットアップ
インテグレーション画面にて、**Google Ads**で検索します。
前の手順で確認した**ワークスペースキー**を入力し、**連携する**をクリックします。
 連携に成功すると、アカウント一覧に登録済みのユーザー情報が表示されます。
正常に完了しない場合は、インテグレーション画面のステータスタブから**編集**し、再度連携をお試しください。
解決しない場合はチャットにてお問い合わせください🙏
連携に成功すると、アカウント一覧に登録済みのユーザー情報が表示されます。
正常に完了しない場合は、インテグレーション画面のステータスタブから**編集**し、再度連携をお試しください。
解決しない場合はチャットにてお問い合わせください🙏