> ## Documentation Index
> Fetch the complete documentation index at: https://support.i.moneyforward.com/llms.txt
> Use this file to discover all available pages before exploring further.
# Expensify
> Expensifyとの連携方法です。マネーフォワードAdminaからExpensifyへの、管理者のログインから、連携方法まで一連の手順を解説します。
## サポートする機能
コスト集計
本サービスはコスト(支出)データ取得用のため、アカウント情報は取得いたしません。
## 事前準備
### Expensifyへのログイン方法
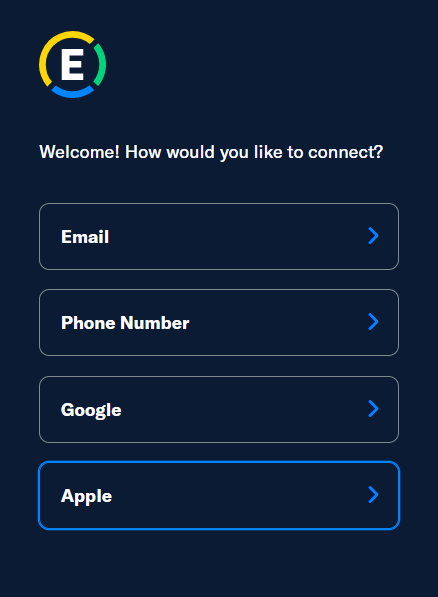
[**Expensifyのログインページ**](https://www.expensify.com/)にて、ご利用のログイン方法を選択しログインします。
 ### クライアントIDとクライアントシークレットの取得方法
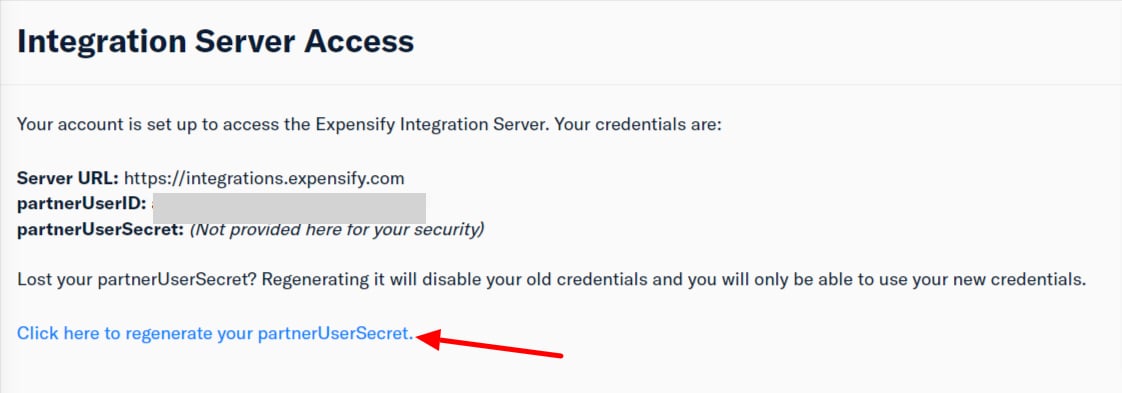
Expensifyにログイン後、下記リンクより **Integration Server Access** にアクセスし、**Check here to regenerate your partnerUserSecret** をクリックします。
[https://www.expensify.com/tools/integrations/](https://www.expensify.com/tools/integrations/)
### クライアントIDとクライアントシークレットの取得方法
Expensifyにログイン後、下記リンクより **Integration Server Access** にアクセスし、**Check here to regenerate your partnerUserSecret** をクリックします。
[https://www.expensify.com/tools/integrations/](https://www.expensify.com/tools/integrations/)
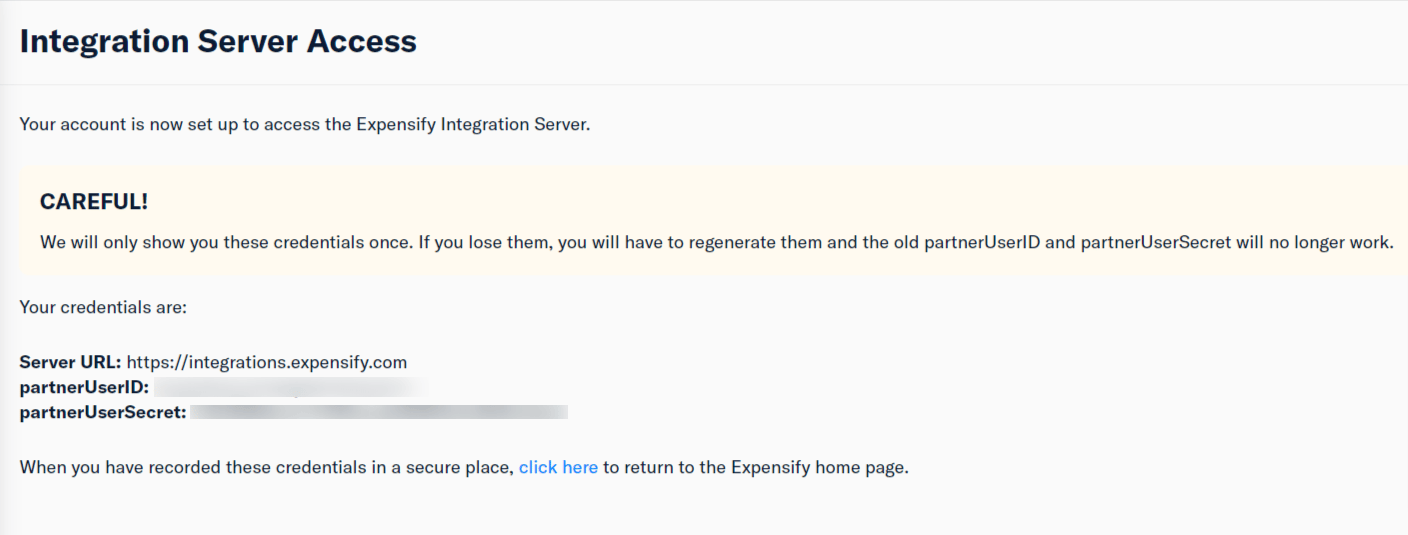
 すると、以下のように **partnerUserSecret** が作成されます。**partnerUserIDがクライアントID、partnerUserSecretがクライアントシークレット** となるので、保存します。
partnerUserSecretは再表示されないので、注意してください。
すると、以下のように **partnerUserSecret** が作成されます。**partnerUserIDがクライアントID、partnerUserSecretがクライアントシークレット** となるので、保存します。
partnerUserSecretは再表示されないので、注意してください。
 ## インテグレーションのセットアップ
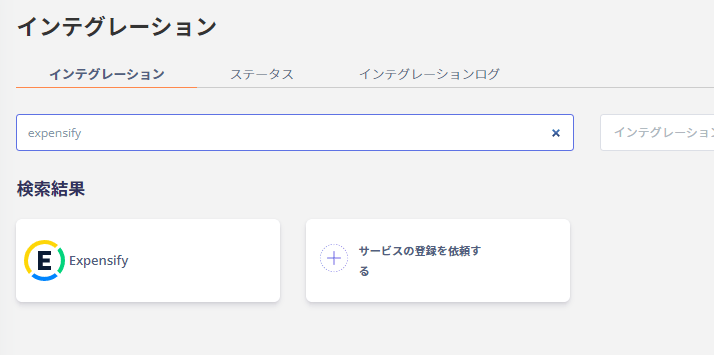
インテグレーション画面にて、**Expensify** で検索します。
## インテグレーションのセットアップ
インテグレーション画面にて、**Expensify** で検索します。
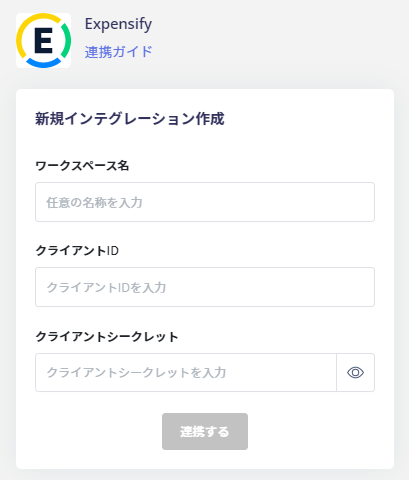
 **ワークスペース名には任意の名称**(会社名など)、前の手順で取得した **クライアントIDとクライアントシークレット** を入力し、**連携する** をクリックします。
 Expensifyとの連携に成功すると、アカウント一覧に登録済みのユーザー情報が表示されます。
正常に完了しない場合は、インテグレーション画面のステータスタブから編集し、再度連携をお試しください。
解決しない場合はチャットにてお問い合わせください。
Expensifyの連携概要については[連携ページ](http://admina.moneyforward.com/jp/integrations/expensify)をご覧ください。
Expensifyとの連携に成功すると、アカウント一覧に登録済みのユーザー情報が表示されます。
正常に完了しない場合は、インテグレーション画面のステータスタブから編集し、再度連携をお試しください。
解決しない場合はチャットにてお問い合わせください。
Expensifyの連携概要については[連携ページ](http://admina.moneyforward.com/jp/integrations/expensify)をご覧ください。