> ## Documentation Index
> Fetch the complete documentation index at: https://support.i.moneyforward.com/llms.txt
> Use this file to discover all available pages before exploring further.
# Miro
> Miroとの連携の手順です。
## サポートする機能
アカウント削除 アカウント作成
## Miroとの連携
エンタープライズプランとそれ以外のプランで連携方法が異なります。エンタープライズプランをご利用のお客様は、エンタープライズ版の連携(OAuth)を、それ以外のプランをご利用お客様は、通常版(ID/Password)連携をご利用ください。
### 通常版(エンタープライズ以外)の連携方法
ID/Password連携の場合、GoogleやSSOなど外部認証アカウントはご利用いただけません。詳細は[\[制限事項\]Google 認証やSSOなど外部認証アカウントによる連携失敗](/it-management/faq/7gbneu0vz5-auth-error)\[\[制限事項]Google 認証やSSOなど外部認証アカウントによる連携失敗]をご覧ください。
#### 事前準備
**ワークスペースキーの取得**
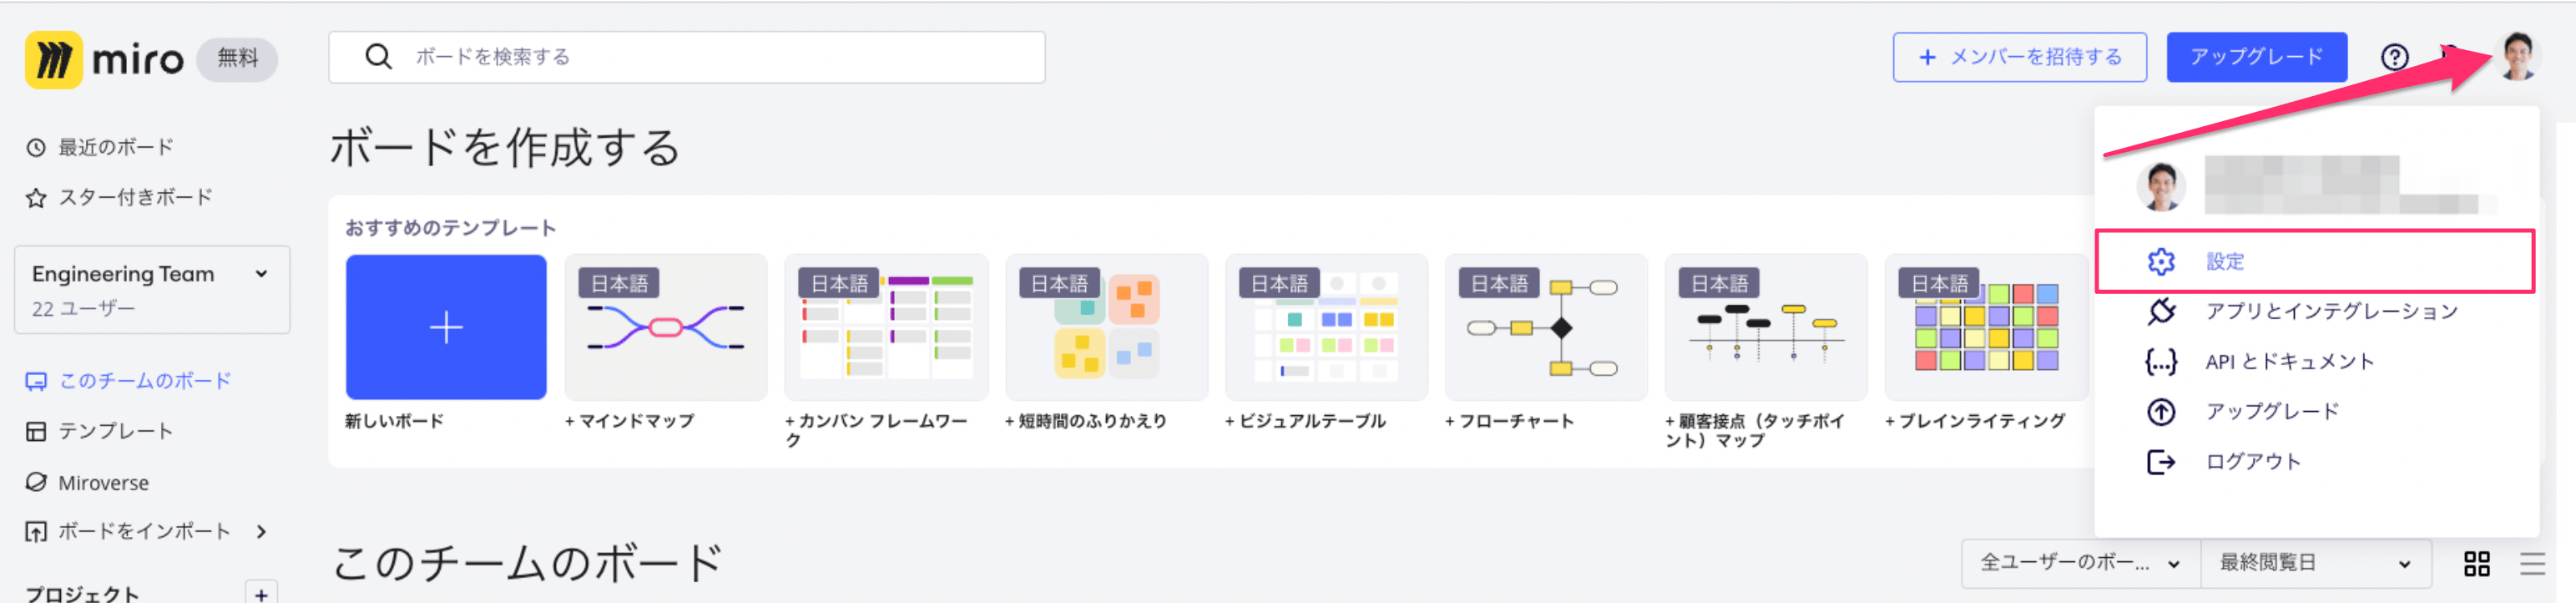
Miroにログイン後、右上のアイコンをクリックし、**設定をクリックします。**
 連携する組織(Company)を選択し、Profileページに移動します。URLの一部の数字がワークスペースキーになるので、保存しておきます。
`https://miro.com/app/settings/company/{ワークスペースキー}/user-profile`
連携する組織(Company)を選択し、Profileページに移動します。URLの一部の数字がワークスペースキーになるので、保存しておきます。
`https://miro.com/app/settings/company/{ワークスペースキー}/user-profile`
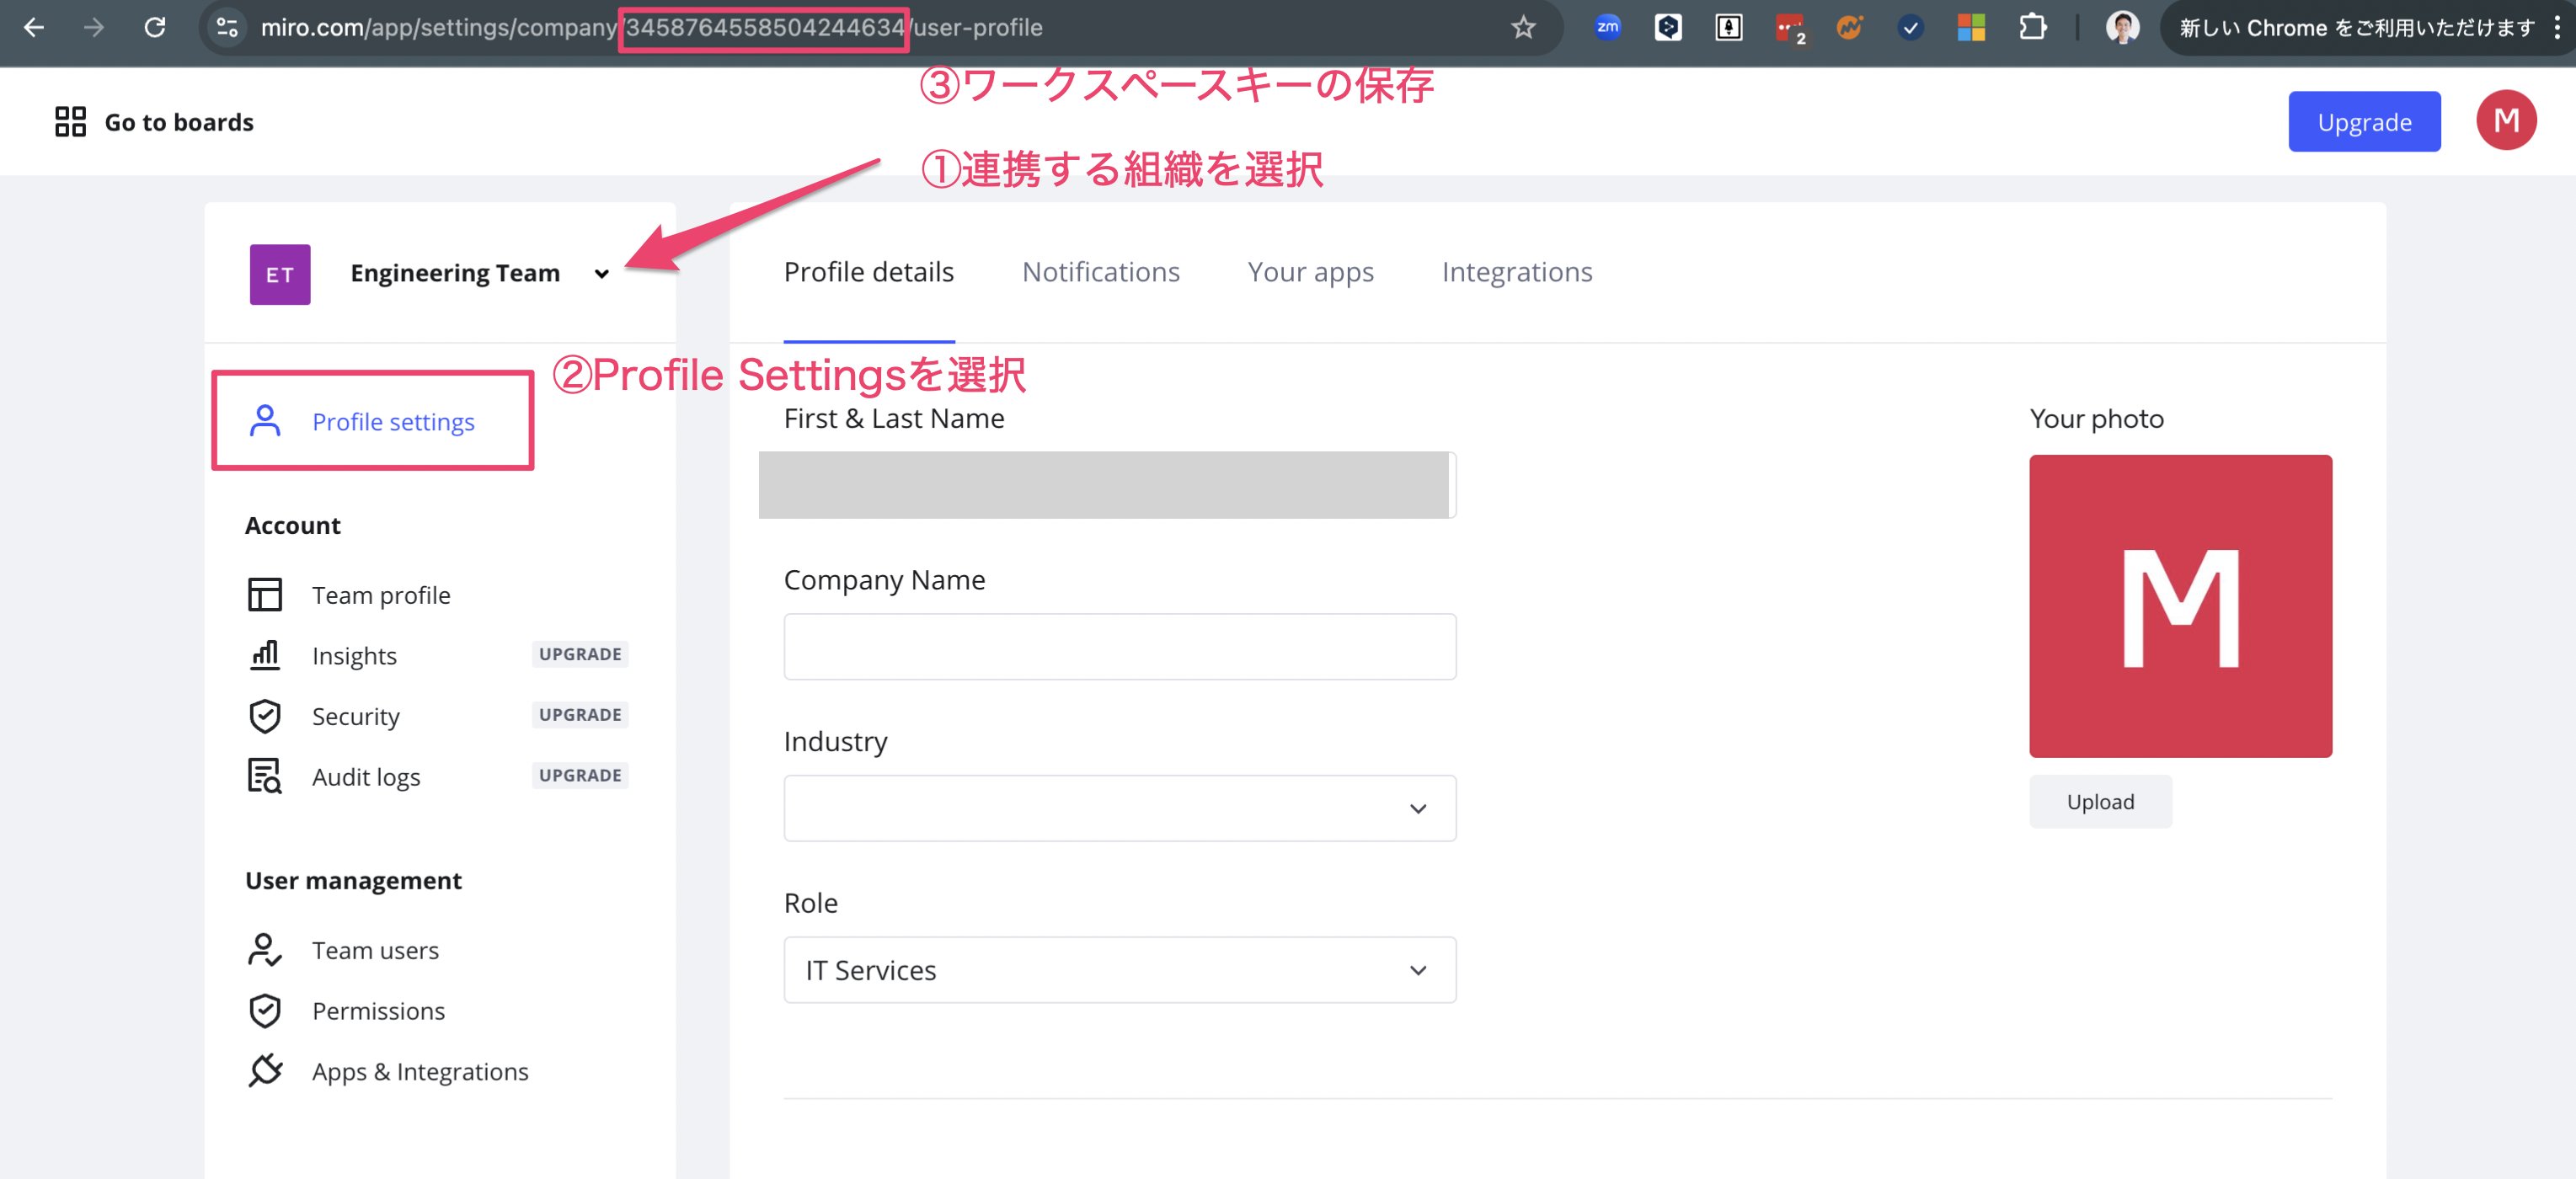 複数の組織がある場合、ワークスペースキーが異なりますので、組織ごとにワークスペースキーを保存しておきます。
#### インテグレーションのセットアップ
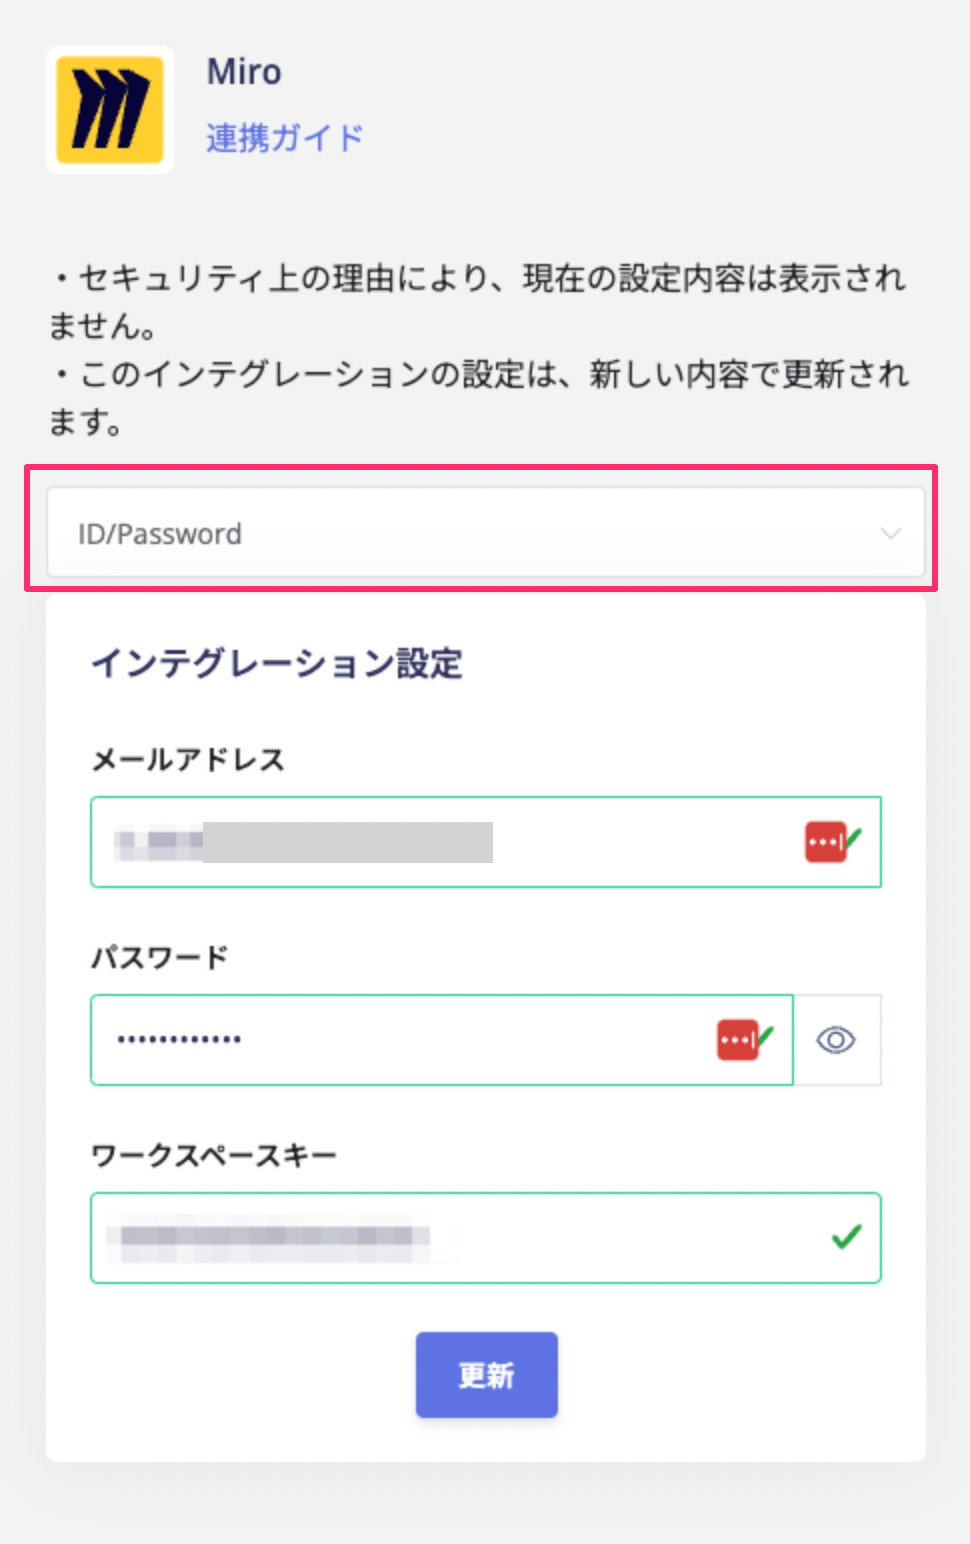
インテグレーション画面にて、**Miro**で検索し、`ID/Password`を選択します。
Miroのログインメールアドレス・パスワード、取得したワークスペースキーを入力し、**連携する**をクリックします。
以下の制限によりGoogleやSSOなど外部認証のアカウントはご利用いただけません。メールアドレス・パスワードでログイン可能な管理者アカウントをご用意の上、連携を実施ください。
[\[制限事項\]Google 認証やSSOなど外部認証アカウントによる連携失敗](/it-management/faq/7gbneu0vz5-auth-error)\[\[制限事項]Google 認証やSSOなど外部認証アカウントによる連携失敗]
複数の組織がある場合、ワークスペースキーが異なりますので、組織ごとにワークスペースキーを保存しておきます。
#### インテグレーションのセットアップ
インテグレーション画面にて、**Miro**で検索し、`ID/Password`を選択します。
Miroのログインメールアドレス・パスワード、取得したワークスペースキーを入力し、**連携する**をクリックします。
以下の制限によりGoogleやSSOなど外部認証のアカウントはご利用いただけません。メールアドレス・パスワードでログイン可能な管理者アカウントをご用意の上、連携を実施ください。
[\[制限事項\]Google 認証やSSOなど外部認証アカウントによる連携失敗](/it-management/faq/7gbneu0vz5-auth-error)\[\[制限事項]Google 認証やSSOなど外部認証アカウントによる連携失敗]
 Miroとの連携に成功すると、アカウント一覧に登録済みのユーザー情報が表示されます。
複数チームがある場合、ワークスペースキーが異なりますので、チームごとに同様の手順で連携ください。
正常に完了しない場合は、インテグレーション画面のステータスタブから編集し、再度連携をお試しください。
解決しない場合はチャットにてお問い合わせください🙏
Miroの連携概要については[連携ページ](http://admina.moneyforward.com/jp/integrations/miro)をご覧ください。
### エンタープライズプランの連携手順
#### クライアントIDとクライアントシークレットの取得方法
1. 次のURLの内容に従って、**OAuth Appを作成**します。
[https://help.miro.com/hc/en-us/articles/4766759572114](https://help.miro.com/hc/en-us/articles/4766759572114)
2. 次の**リダイレクト URI**を追加します
`https://itmc.i.moneyforward.com/oauth/callback`
Miroとの連携に成功すると、アカウント一覧に登録済みのユーザー情報が表示されます。
複数チームがある場合、ワークスペースキーが異なりますので、チームごとに同様の手順で連携ください。
正常に完了しない場合は、インテグレーション画面のステータスタブから編集し、再度連携をお試しください。
解決しない場合はチャットにてお問い合わせください🙏
Miroの連携概要については[連携ページ](http://admina.moneyforward.com/jp/integrations/miro)をご覧ください。
### エンタープライズプランの連携手順
#### クライアントIDとクライアントシークレットの取得方法
1. 次のURLの内容に従って、**OAuth Appを作成**します。
[https://help.miro.com/hc/en-us/articles/4766759572114](https://help.miro.com/hc/en-us/articles/4766759572114)
2. 次の**リダイレクト URI**を追加します
`https://itmc.i.moneyforward.com/oauth/callback`
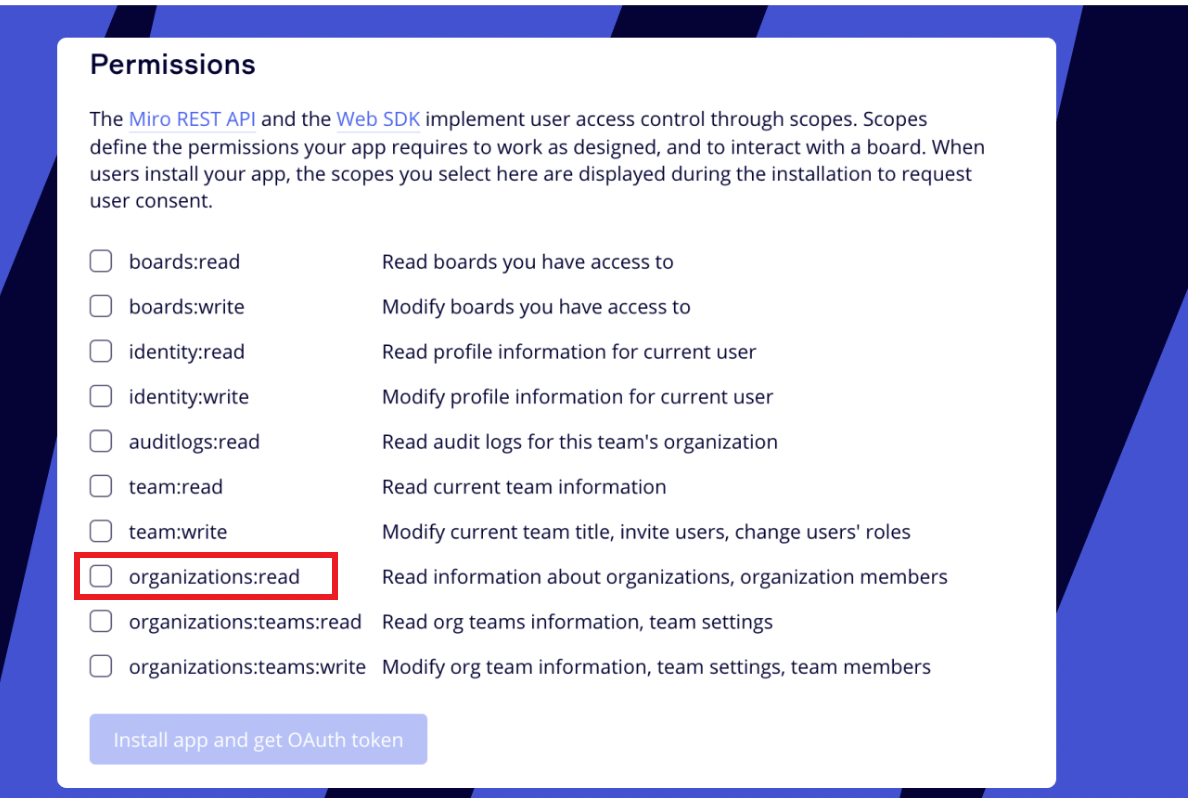
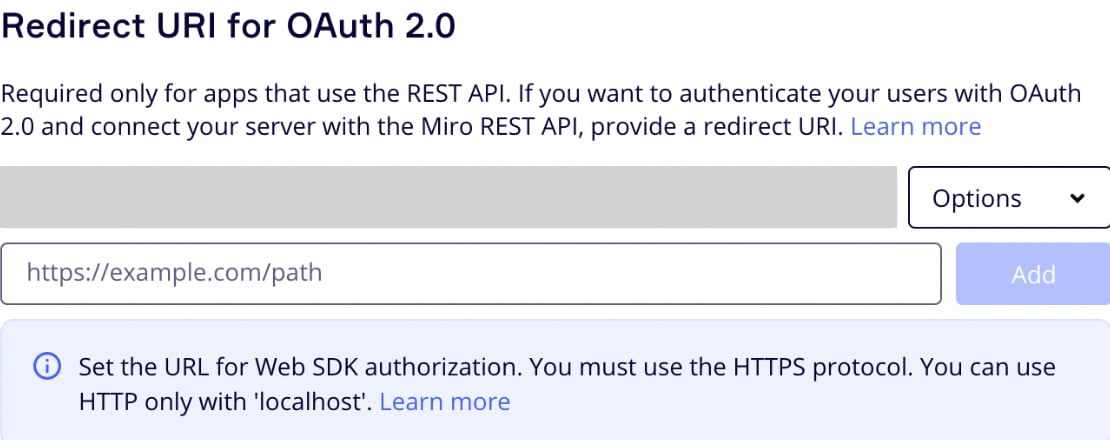 3. Permissionsは、**`organizations:read`** を選択します。
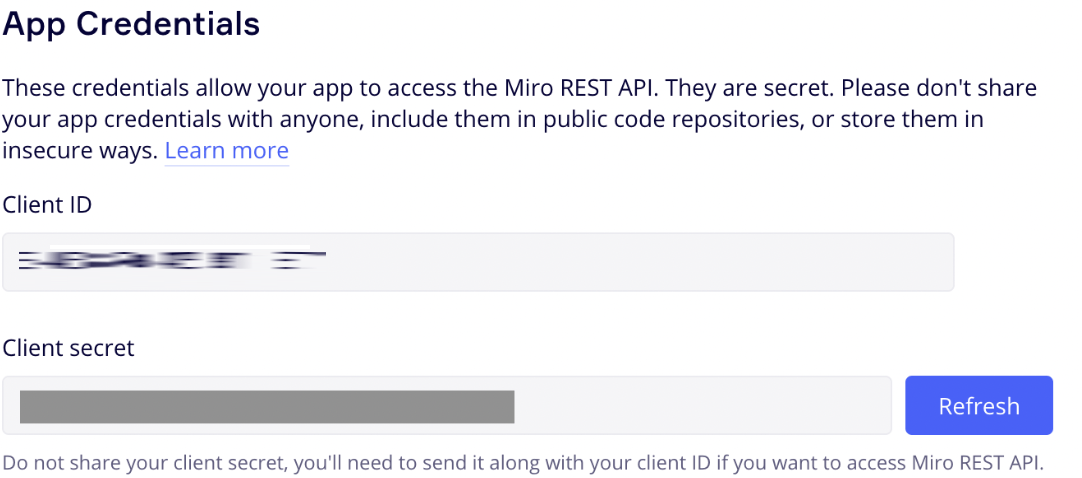
 4. App Credentialsから**Copy Client ID とClient secret**をコピー・保存します。
 #### インテグレーションのセットアップ
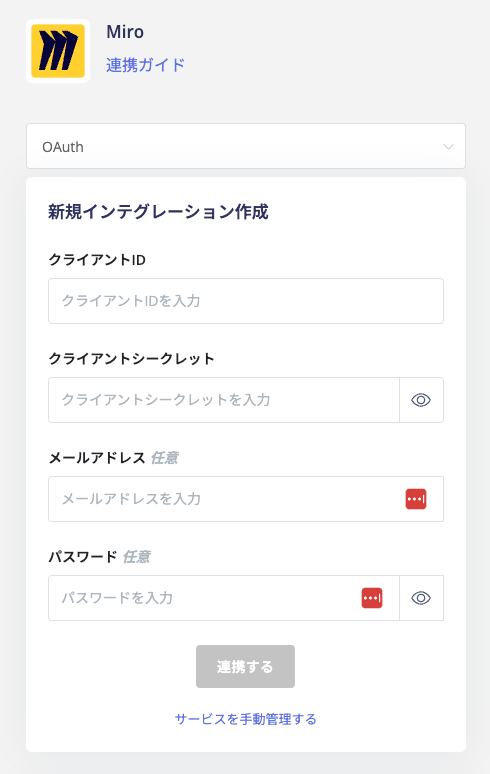
インテグレーション画面にて、**Miro**で検索し、`OAuth`を選択します。
前の手順で取得した、**Copy Client IDをクライアントID、Client secretをクライアントシークレット**へ入力し、**連携する**をクリックします。
Miroの各アカウントの**最終利用日**を取得する場合、メールアドレス・パスワードを入力し、連携するをクリックください。
#### インテグレーションのセットアップ
インテグレーション画面にて、**Miro**で検索し、`OAuth`を選択します。
前の手順で取得した、**Copy Client IDをクライアントID、Client secretをクライアントシークレット**へ入力し、**連携する**をクリックします。
Miroの各アカウントの**最終利用日**を取得する場合、メールアドレス・パスワードを入力し、連携するをクリックください。
 Miroとの連携に成功すると、アカウント一覧に登録済みのユーザー情報が表示されます。
正常に完了しない場合は、インテグレーション画面のステータスタブから編集し、再度連携をお試しください。
解決しない場合はチャットにてお問い合わせください🙏
Miroの連携概要については[連携ページ](http://admina.moneyforward.com/jp/integrations/miro)をご覧ください。
Miroとの連携に成功すると、アカウント一覧に登録済みのユーザー情報が表示されます。
正常に完了しない場合は、インテグレーション画面のステータスタブから編集し、再度連携をお試しください。
解決しない場合はチャットにてお問い合わせください🙏
Miroの連携概要については[連携ページ](http://admina.moneyforward.com/jp/integrations/miro)をご覧ください。