> ## Documentation Index
> Fetch the complete documentation index at: https://support.i.moneyforward.com/llms.txt
> Use this file to discover all available pages before exploring further.

# Zoho Desk

> 管理者権限で組織IDを確認、OAuthアプリ登録後、Zoho Deskをインテグレーション

## サポートする機能

<Badge color="blue">アカウント削除</Badge> <Badge color="blue">アカウント無効化</Badge> <Badge color="blue">アカウント作成</Badge>

## 事前準備

<Info>
  連携には管理者権限のアカウントが必要です。
</Info>

### ログイン方法

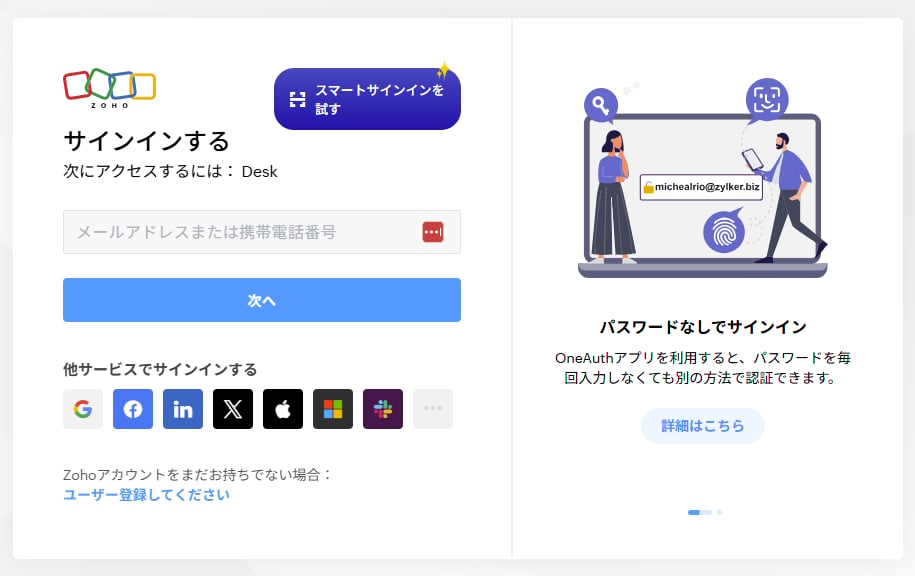
[Zoho Deskログインページ](https://accounts.zoho.jp/signin?servicename=ZohoSupport\&signupurl=https://www.zoho.com/desk/signup.html\&serviceurl=https%3A%2F%2Fdesk.zoho.jp%3Fref_value%3Dgoogle%253Adeveloper%257Cdirect%253Adesk%257Ckagi.com%253Adesk%252Chttps%253A%252F%252Fwww.zoho.com%252Fdesk%252F%252C%252CDesktop%252Chttps%253A%252F%252Fwww.zoho.com%252Fdesk%252F)にて、メールアドレス・パスワードを入力し、ログインします。
<img src="https://mintcdn.com/moneyforwardi/5mVcwZ5Mh9A1Ays_/images/integrations/bg6ovvnk3l/2025-12-17-143402.png?fit=max&auto=format&n=5mVcwZ5Mh9A1Ays_&q=85&s=eadccb4af0af87fb9ad3c5dd3349c7bb" alt="Zoho Deskログイン画面" width="915" height="576" data-path="images/integrations/bg6ovvnk3l/2025-12-17-143402.png" />

### 組織IDの確認方法

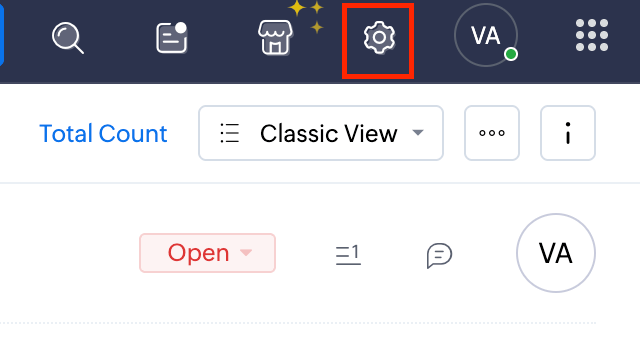
1. Zoho Deskログイン後、右上の **Setup** をクリックします。

   <img src="https://mintcdn.com/moneyforwardi/8rNSDZnPhsTE7YvM/images/integrations/bg6ovvnk3l/screenshot-2025-12-04-at-18-39-28.png?fit=max&auto=format&n=8rNSDZnPhsTE7YvM&q=85&s=dfcf65712523a5405dea4aa091692771" alt="Setup画面" width="640" height="358" data-path="images/integrations/bg6ovvnk3l/screenshot-2025-12-04-at-18-39-28.png" />

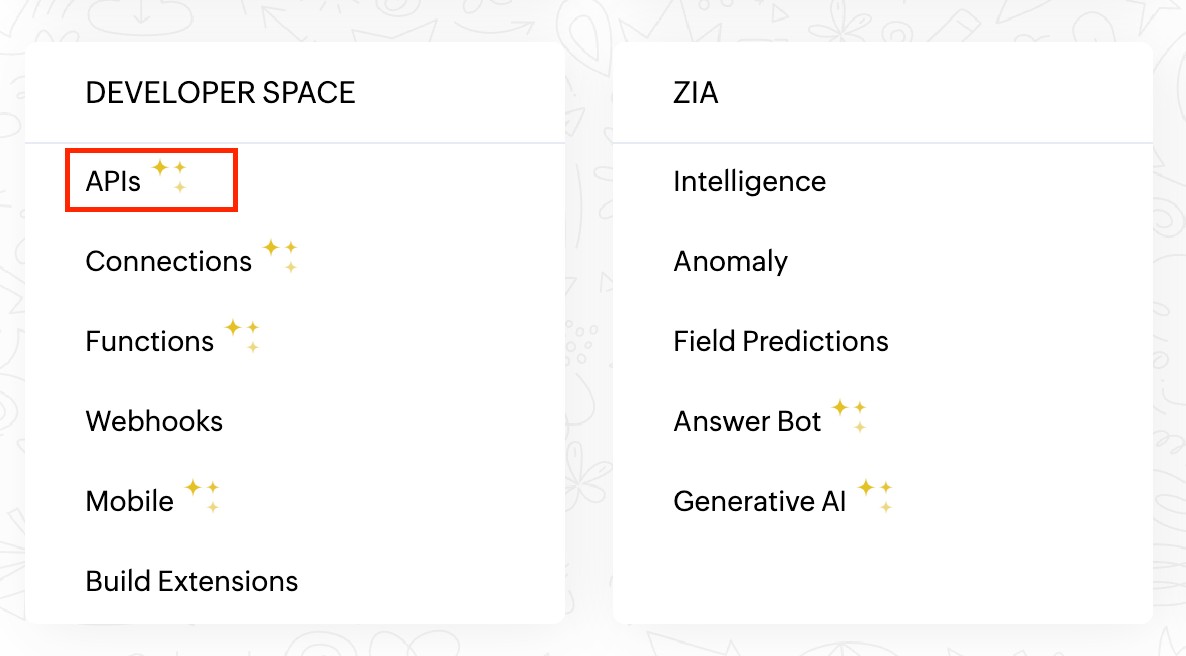
2. **APIs** をクリックします。

   <img src="https://mintcdn.com/moneyforwardi/8rNSDZnPhsTE7YvM/images/integrations/bg6ovvnk3l/screenshot-2025-12-04-at-18-40-11.png?fit=max&auto=format&n=8rNSDZnPhsTE7YvM&q=85&s=026f35529216c6b88dc9000f8a75cf34" alt="APIs画面" width="1186" height="656" data-path="images/integrations/bg6ovvnk3l/screenshot-2025-12-04-at-18-40-11.png" />

3. **Org ID** が **組織ID** です。

   <img src="https://mintcdn.com/moneyforwardi/8rNSDZnPhsTE7YvM/images/integrations/bg6ovvnk3l/screenshot-2025-12-04-at-18-40-29.png?fit=max&auto=format&n=8rNSDZnPhsTE7YvM&q=85&s=7eaf2b423a905a9006a7ceb65e2b6ffe" alt="Org ID確認画面" width="2096" height="362" data-path="images/integrations/bg6ovvnk3l/screenshot-2025-12-04-at-18-40-29.png" />

### OAuthアプリを登録する

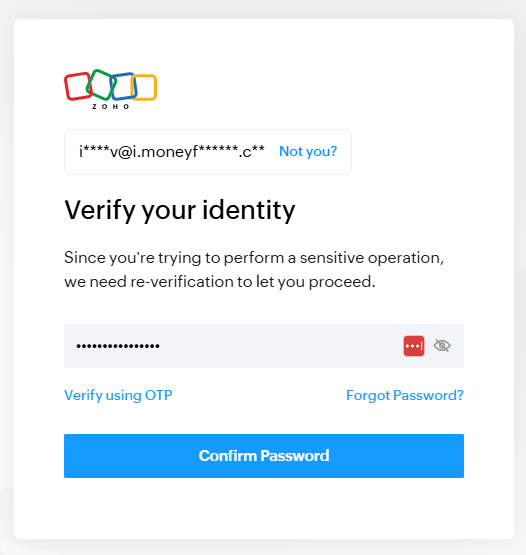
1. [`https://api-console.zoho.com/`](https://api-console.zoho.com/) にサインインします。
   <img src="https://mintcdn.com/moneyforwardi/yRr9M1Mo9PbmsShv/images/integrations/7voeaxzynv/2025-12-15-190445.png?fit=max&auto=format&n=yRr9M1Mo9PbmsShv&q=85&s=f62474d8846a6e888ba94de533ee8ace" alt="Zoho API Console" width="526" height="555" data-path="images/integrations/7voeaxzynv/2025-12-15-190445.png" />

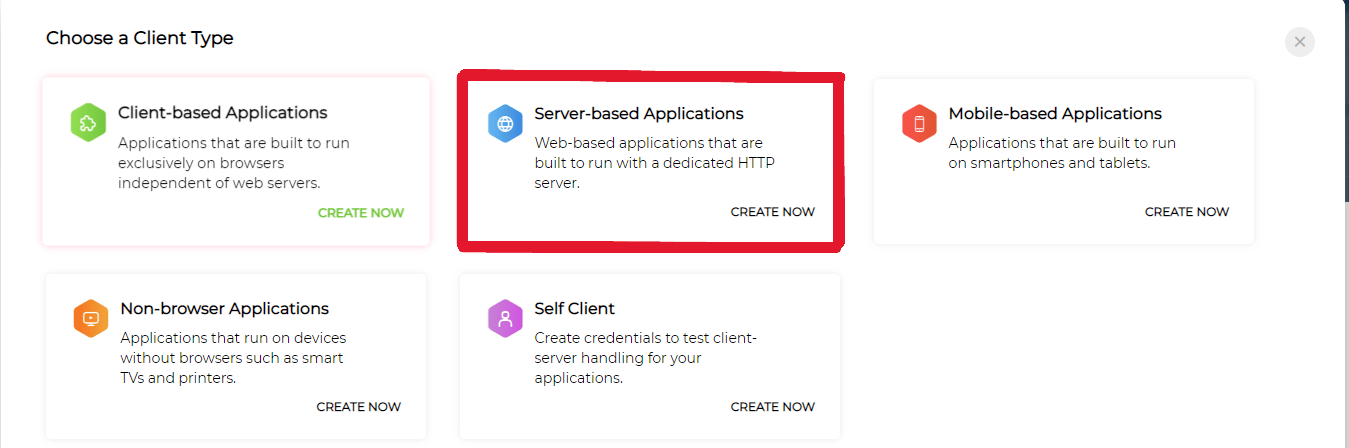
2. **ADD CLIENT** > **Server-Based Applications** をクリックします。
   <img src="https://mintcdn.com/moneyforwardi/yRr9M1Mo9PbmsShv/images/integrations/7voeaxzynv/untitled.png?fit=max&auto=format&n=yRr9M1Mo9PbmsShv&q=85&s=3c61757cb7611ae3e0438ebb4ec839d0" alt="ADD CLIENT画面" width="1349" height="448" data-path="images/integrations/7voeaxzynv/untitled.png" />

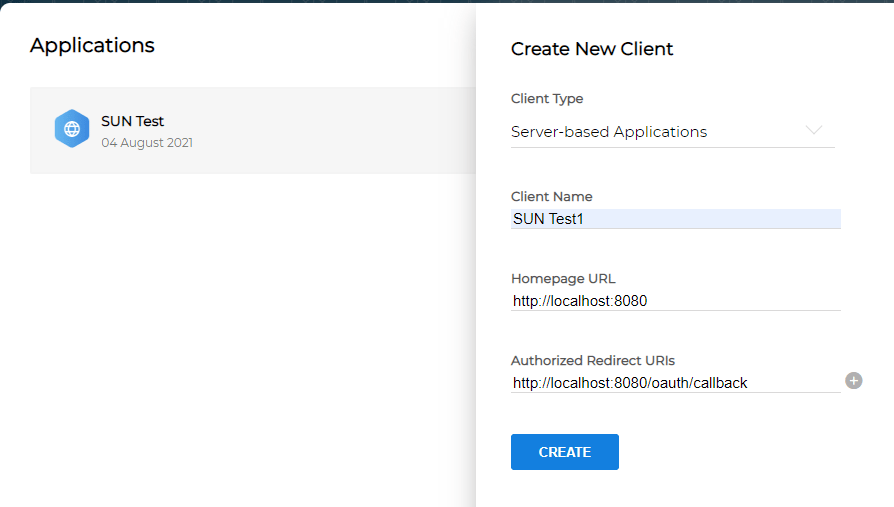
3. 必要な情報を入力し、**CREATE** をクリックします。

   <img src="https://mintcdn.com/moneyforwardi/Yz9fubAau8iTSrRo/images/integrations/7voeaxzynv/untitled-1.png?fit=max&auto=format&n=Yz9fubAau8iTSrRo&q=85&s=2eff326bd92e141b320aded6c379de5e" alt="クライアント作成画面" width="894" height="507" data-path="images/integrations/7voeaxzynv/untitled-1.png" />

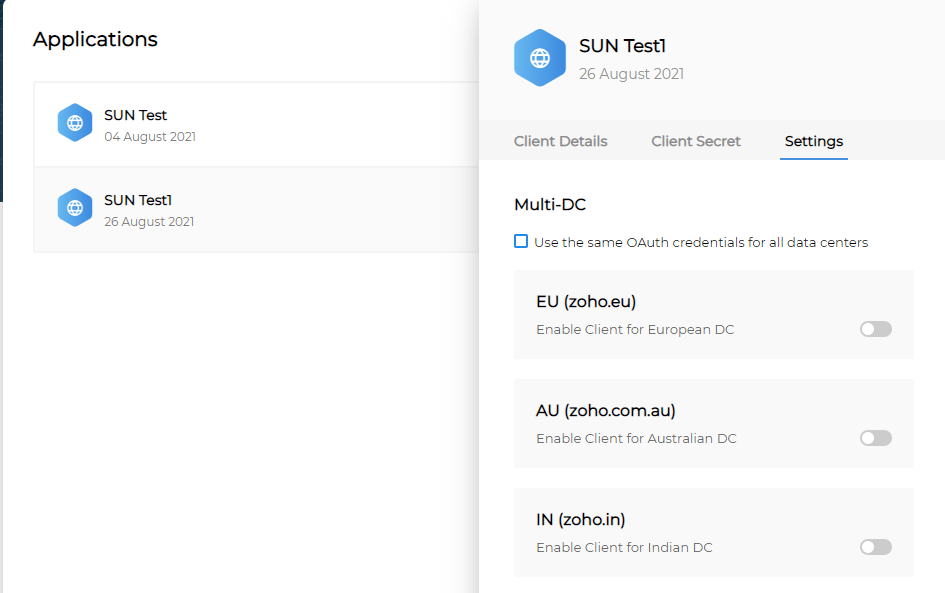
4. **Settings** > **Use the same Oauth credentials for all data centers** にチェックを入れます。
   <img src="https://mintcdn.com/moneyforwardi/Yz9fubAau8iTSrRo/images/integrations/7voeaxzynv/untitled-2.png?fit=max&auto=format&n=Yz9fubAau8iTSrRo&q=85&s=a577e35fd6378f76cf322545d070531e" alt="Settings画面" width="945" height="593" data-path="images/integrations/7voeaxzynv/untitled-2.png" />

## インテグレーションのセットアップ

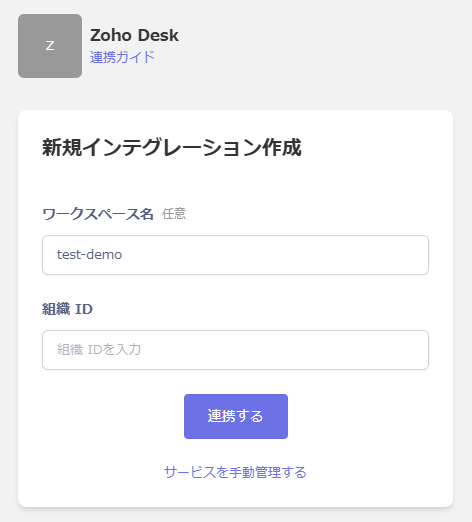
1. インテグレーション画面にて、**Zoho Desk** で検索します。

2. 任意の**ワークスペース名**、前の手順で確認した**組織ID**を入力し、**連携する**をクリックします。
   <img src="https://mintcdn.com/moneyforwardi/asVFolHD2Z2R-UWD/images/integrations/bg6ovvnk3l/zoho-desk.png?fit=max&auto=format&n=asVFolHD2Z2R-UWD&q=85&s=a81a6982545f26b97dcc4962fbd4833f" alt="Zoho Deskインテグレーション設定画面" width="734" height="818" data-path="images/integrations/bg6ovvnk3l/zoho-desk.png" />

3. 連携が成功すると、アカウント一覧に登録済みのユーザー情報が表示されます。正常に完了しない場合は、まず [SaaSとの連携に失敗する場合の対処法](/it-management/saas-management/93nahw45is-trouble) に記載のステップをお試しください。それでも解決しない場合は、[ご提供いただきたい情報](/it-management/saas-management/93nahw45is-trouble#info-to-provide) をご確認のうえ、[サポート窓口](/contact-support)までお問い合わせください。