> ## Documentation Index
> Fetch the complete documentation index at: https://support.i.moneyforward.com/llms.txt
> Use this file to discover all available pages before exploring further.
# Amazon Web Services (AWS IAM)
> Amazon Web Services (AWS)の連携手順です。マネーフォワード AdminaからAWSへの、管理者のログインから、連携方法まで一連の手順を解説します。
## サポートする機能
アカウント削除 アカウント作成
## 事前準備
### Amazon Web Servicesへのログイン方法
[AWSのログインページ](https://console.aws.amazon.com)にアクセスし、ルートユーザーもしくはIAMユーザーでログインします。
 ### 連携用ポリシーの作成方法
1. [Identity and Access Management (IAM)](https://console.aws.amazon.com/iam)にアクセスし、左メニューの**ポリシー**にアクセス、\[**ポリシーの作成**] をクリックします。
### 連携用ポリシーの作成方法
1. [Identity and Access Management (IAM)](https://console.aws.amazon.com/iam)にアクセスし、左メニューの**ポリシー**にアクセス、\[**ポリシーの作成**] をクリックします。
 2. ポリシーの作成画面で、`JSON`タブをクリックし、次のスクリプトを上書きします。
ロールの LastActivityを取得する場合、ポリシーのスクリプト"iam:ListRoles",の下に`"iam:GetRole",`を追加します。
```json theme={null}
{
"Version": "2012-10-17",
"Statement": [
{
"Effect": "Allow",
"Action": [
"iam:GetAccessKeyLastUsed",
"iam:ListAccessKeys",
"iam:ListAttachedUserPolicies",
"iam:ListGroupsForUser",
"iam:ListMFADevices",
"iam:ListRolePolicies",
"iam:ListRoles",
"iam:GetRole",
"iam:ListUsers",
"iam:ListUserTags",
"iam:DeleteUser",
"iam:DeleteAccessKey",
"iam:DeleteRole",
"iam:ListAttachedRolePolicies",
"iam:DetachRolePolicy",
"iam:DeleteLoginProfile",
"iam:ListAttachedUserPolicies",
"iam:DetachUserPolicy",
"iam:CreateUser",
"iam:TagUser",
"iam:ListUserPolicies",
"account:GetContactInformation"
],
"Resource": "*"
}
]
}
```
Adminaからのアカウント削除および、追加する機能が不要な場合(Read Only)、次のスクリプトをご利用ください。
ロールの LastActivityを取得する場合、ポリシーのスクリプト"iam:ListRoles",の下に`"iam:GetRole",`を追加します。
```json theme={null}
{
"Version": "2012-10-17",
"Statement": [
{
"Effect": "Allow",
"Action": [
"iam:GetAccessKeyLastUsed",
"iam:ListAccessKeys",
"iam:ListAttachedUserPolicies",
"iam:ListGroupsForUser",
"iam:ListMFADevices",
"iam:ListRolePolicies",
"iam:ListRoles",
"iam:GetRole",
"iam:ListUsers",
"iam:ListUserTags",
"iam:ListAttachedRolePolicies",
"iam:ListAttachedUserPolicies",
"iam:TagUser",
"iam:ListUserPolicies",
"account:GetContactInformation"
],
"Resource": "*"
}
]
}
```
3. 入力完了後、「**次へ**」をクリックします。
2. ポリシーの作成画面で、`JSON`タブをクリックし、次のスクリプトを上書きします。
ロールの LastActivityを取得する場合、ポリシーのスクリプト"iam:ListRoles",の下に`"iam:GetRole",`を追加します。
```json theme={null}
{
"Version": "2012-10-17",
"Statement": [
{
"Effect": "Allow",
"Action": [
"iam:GetAccessKeyLastUsed",
"iam:ListAccessKeys",
"iam:ListAttachedUserPolicies",
"iam:ListGroupsForUser",
"iam:ListMFADevices",
"iam:ListRolePolicies",
"iam:ListRoles",
"iam:GetRole",
"iam:ListUsers",
"iam:ListUserTags",
"iam:DeleteUser",
"iam:DeleteAccessKey",
"iam:DeleteRole",
"iam:ListAttachedRolePolicies",
"iam:DetachRolePolicy",
"iam:DeleteLoginProfile",
"iam:ListAttachedUserPolicies",
"iam:DetachUserPolicy",
"iam:CreateUser",
"iam:TagUser",
"iam:ListUserPolicies",
"account:GetContactInformation"
],
"Resource": "*"
}
]
}
```
Adminaからのアカウント削除および、追加する機能が不要な場合(Read Only)、次のスクリプトをご利用ください。
ロールの LastActivityを取得する場合、ポリシーのスクリプト"iam:ListRoles",の下に`"iam:GetRole",`を追加します。
```json theme={null}
{
"Version": "2012-10-17",
"Statement": [
{
"Effect": "Allow",
"Action": [
"iam:GetAccessKeyLastUsed",
"iam:ListAccessKeys",
"iam:ListAttachedUserPolicies",
"iam:ListGroupsForUser",
"iam:ListMFADevices",
"iam:ListRolePolicies",
"iam:ListRoles",
"iam:GetRole",
"iam:ListUsers",
"iam:ListUserTags",
"iam:ListAttachedRolePolicies",
"iam:ListAttachedUserPolicies",
"iam:TagUser",
"iam:ListUserPolicies",
"account:GetContactInformation"
],
"Resource": "*"
}
]
}
```
3. 入力完了後、「**次へ**」をクリックします。
 4. 次の画面で**ポリシー名**に任意の名前を入力し、\[ポリシーの作成]をクリックします。これでポリシーの作成が完了です。
 ### 連携用ロールの作成方法
1. [Identity and Access Management (IAM)](https://console.aws.amazon.com/iam)にアクセスし、左メニューの**ロール**にアクセスし、\[**ロールを作成**] をクリックします。
ロールのLastActivityは取得できません。
### 連携用ロールの作成方法
1. [Identity and Access Management (IAM)](https://console.aws.amazon.com/iam)にアクセスし、左メニューの**ロール**にアクセスし、\[**ロールを作成**] をクリックします。
ロールのLastActivityは取得できません。
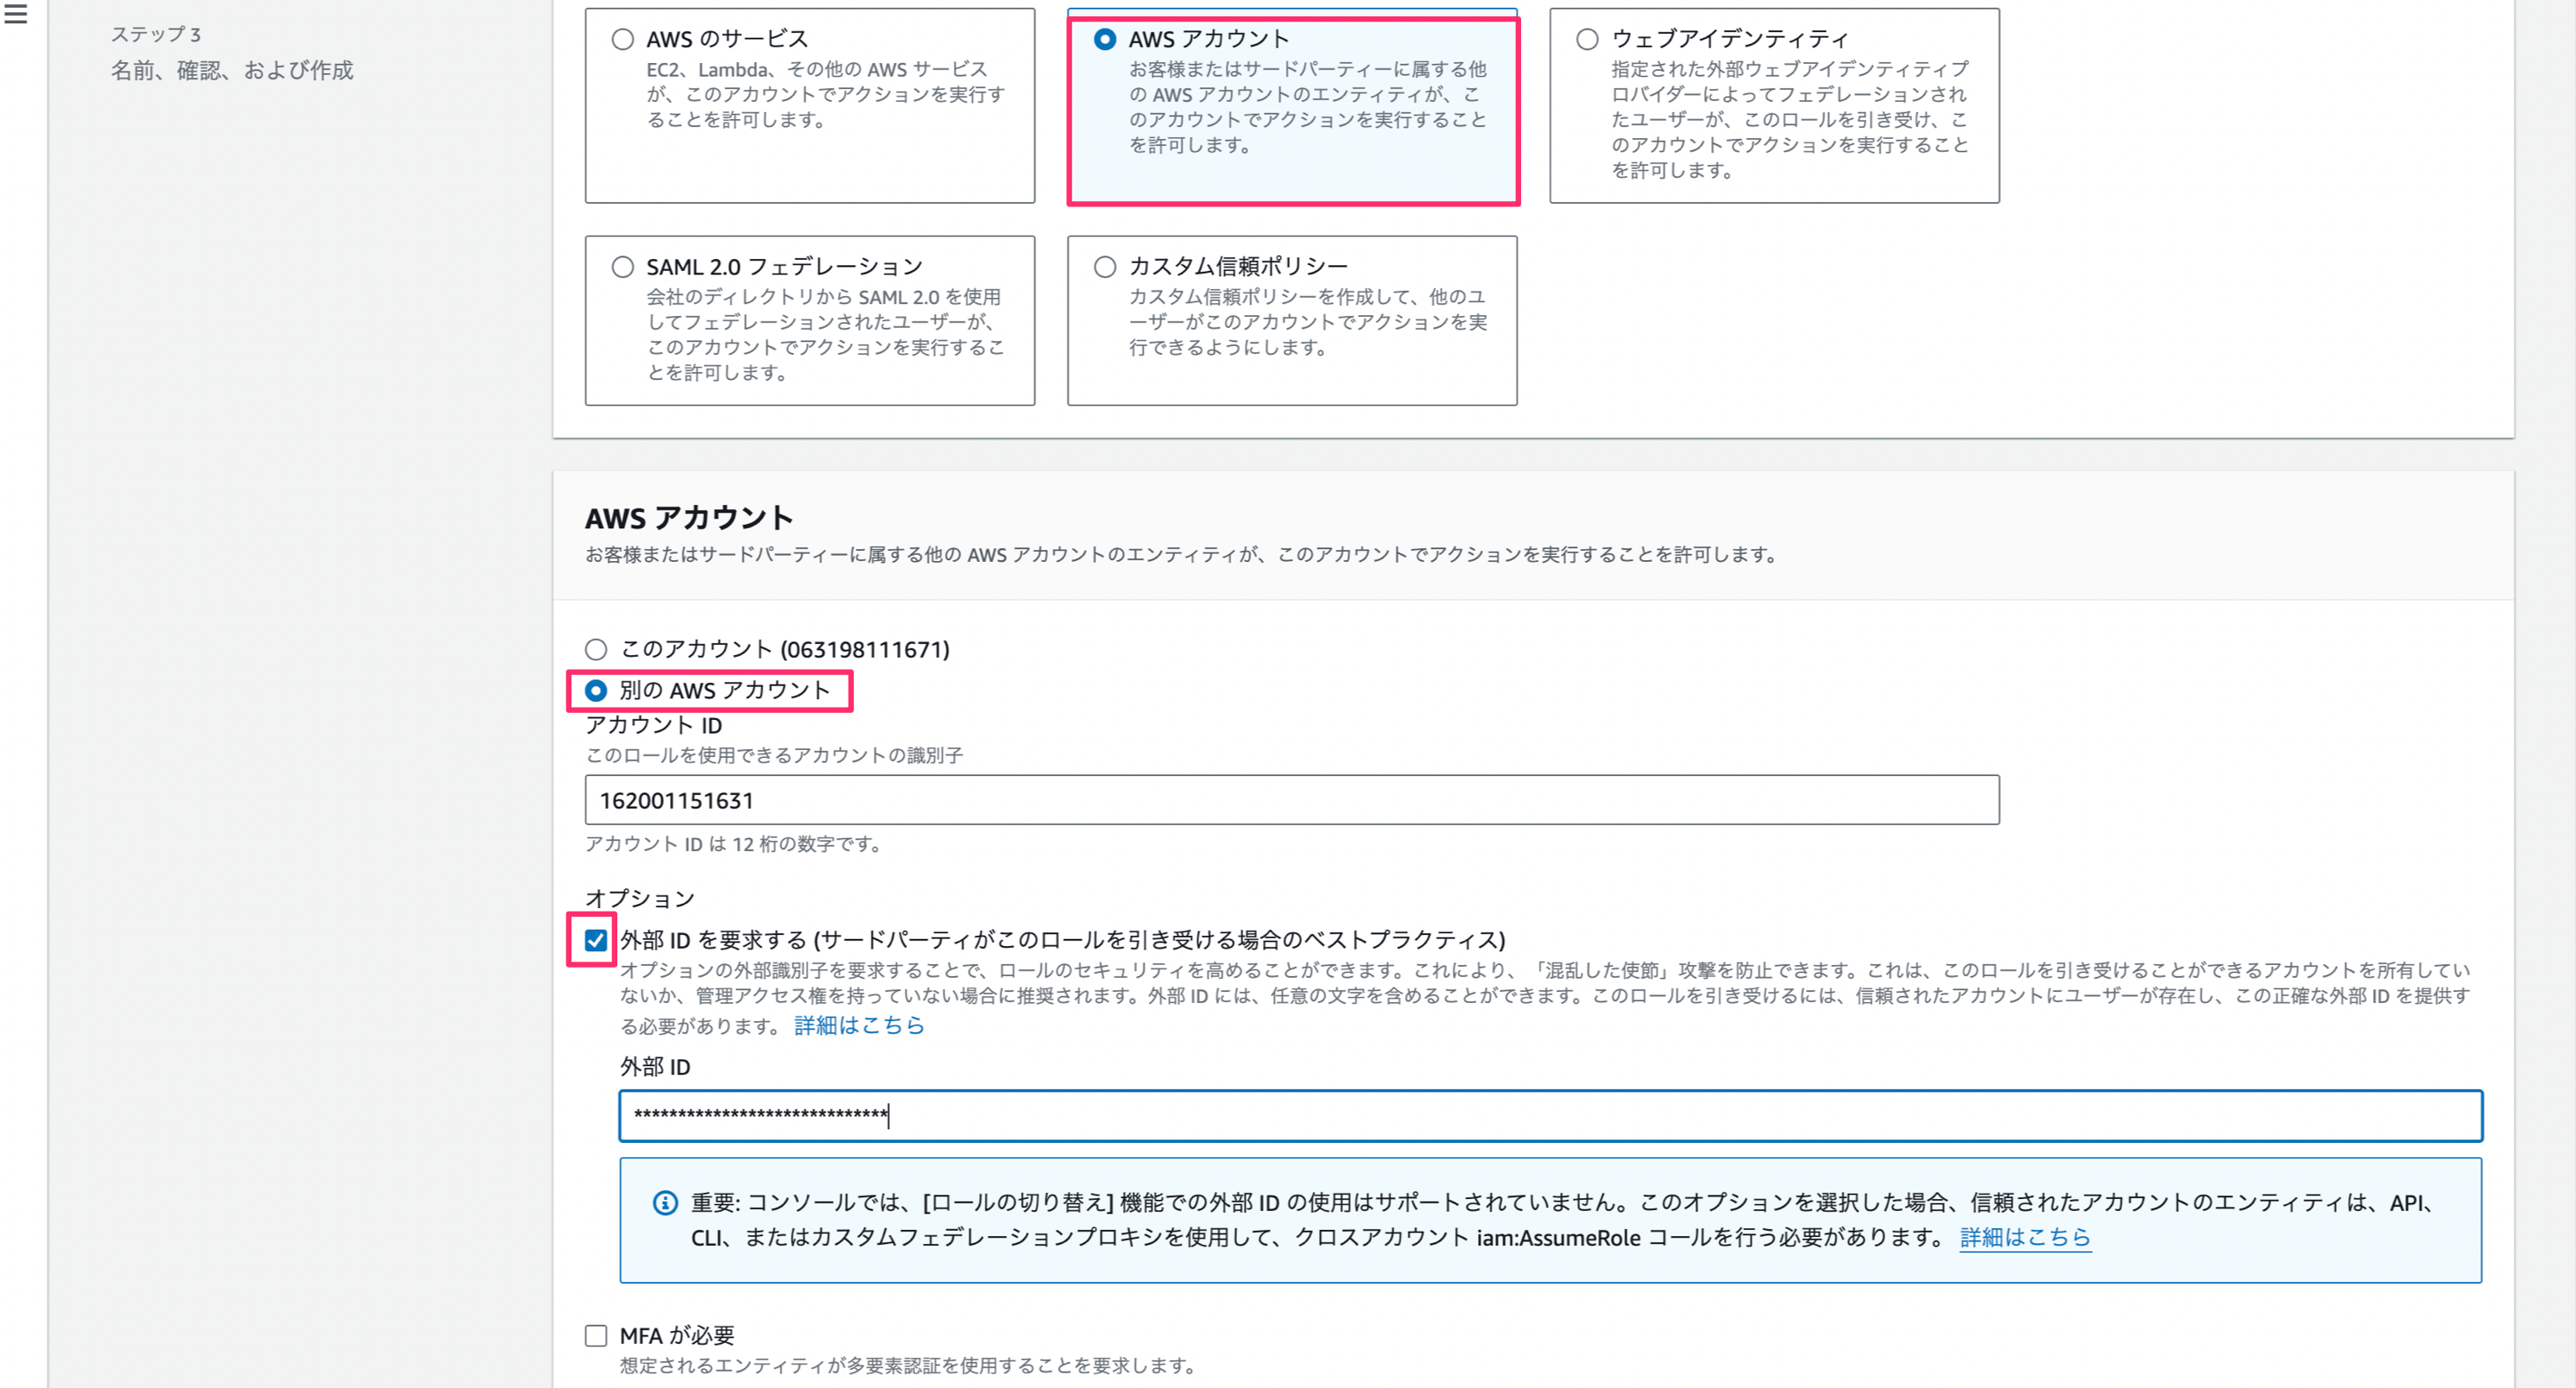
 2. 信頼されたエンティティを選択では、次のように各値を入力します。
* 信頼されたエンティティタイプ:AWSアカウントを選択
* AWSアカウント:「別のAWSアカウント」を選択し、アカウントIDに`162001151631`と入力します。
* \*\*外部 ID を要求する (サードパーティがこのロールを引き受ける場合のベストプラクティス)\*\*にチェック
* 外部IDには`ランダムな英数字(記号を除く24桁以上推奨)`を入力します。
* MFAが必要のチェックは外してください。
入力完了後、**次へ**をクリックします。
2. 信頼されたエンティティを選択では、次のように各値を入力します。
* 信頼されたエンティティタイプ:AWSアカウントを選択
* AWSアカウント:「別のAWSアカウント」を選択し、アカウントIDに`162001151631`と入力します。
* \*\*外部 ID を要求する (サードパーティがこのロールを引き受ける場合のベストプラクティス)\*\*にチェック
* 外部IDには`ランダムな英数字(記号を除く24桁以上推奨)`を入力します。
* MFAが必要のチェックは外してください。
入力完了後、**次へ**をクリックします。
 3. 許可を追加画面が表示されますので、前項で作成したポリシー選択し画面を下にスクロール後、\[**次へ**]をクリックします。
 4. ロールの名前(任意)を設定し、下にスクロール後、「ロールを作成」ボタンをクリックします。これでロールの作成が完了しました。
 ### Role ARNの確認方法
ロール画面で作成したロールを検索して表示、クリックします。
### Role ARNの確認方法
ロール画面で作成したロールを検索して表示、クリックします。
 **Role ARN**が表示されるので、コピーして保存しておきます。
 ## インテグレーションのセットアップ
1. マネーフォワード Adminaのインテグレーション画面にて、**AWS IAM**で検索します。
## インテグレーションのセットアップ
1. マネーフォワード Adminaのインテグレーション画面にて、**AWS IAM**で検索します。
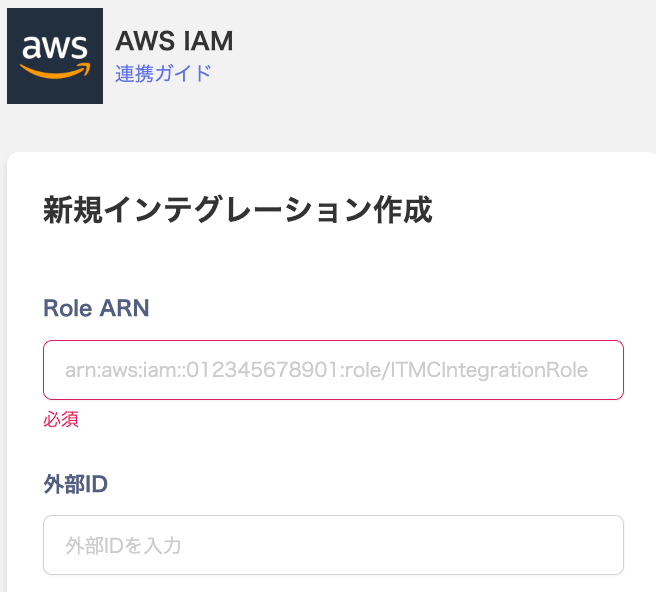
 2. 前の手順で取得した**Role ARN**および、ロール作成時に設定した**外部ID**を入力します。
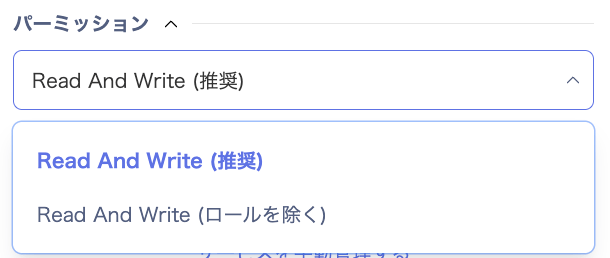
 3. パーミッションを選択します。
連携時にロールを取得しない場合は、[Read And Write(ロールを除く)]を選択します。
3. パーミッションを選択します。
連携時にロールを取得しない場合は、[Read And Write(ロールを除く)]を選択します。
 4. 入力内容を確認して、[連携する]をクリックします。
 5. AWSとの連携に成功すると、アカウント一覧に登録済みのユーザー情報が表示されます。
正常に完了しない場合は、インテグレーション画面のステータスタブから**編集**し、再度連携をお試しください。
解決しない場合はチャットにてお問い合わせください。
AWSの連携概要については[連携ページ](http://admina.moneyforward.com/jp/integrations/amazon-web-service-aws)をご覧ください。
### 補足:メールアドレスの取得
AWSはデフォルトではメールアドレスを取得しないサービスのため、ユーザータイプは「不明」もしくは「システム」で取得します。
メールアドレスの取得するためには、以下のいずれかの方法をご利用ください。
1. [アカウントマージ機能](/it-management/saas-management/d97dy5z2l7-merge)の利用
ユーザータイプの付与が可能となり、より正確な退職者管理が可能となります。
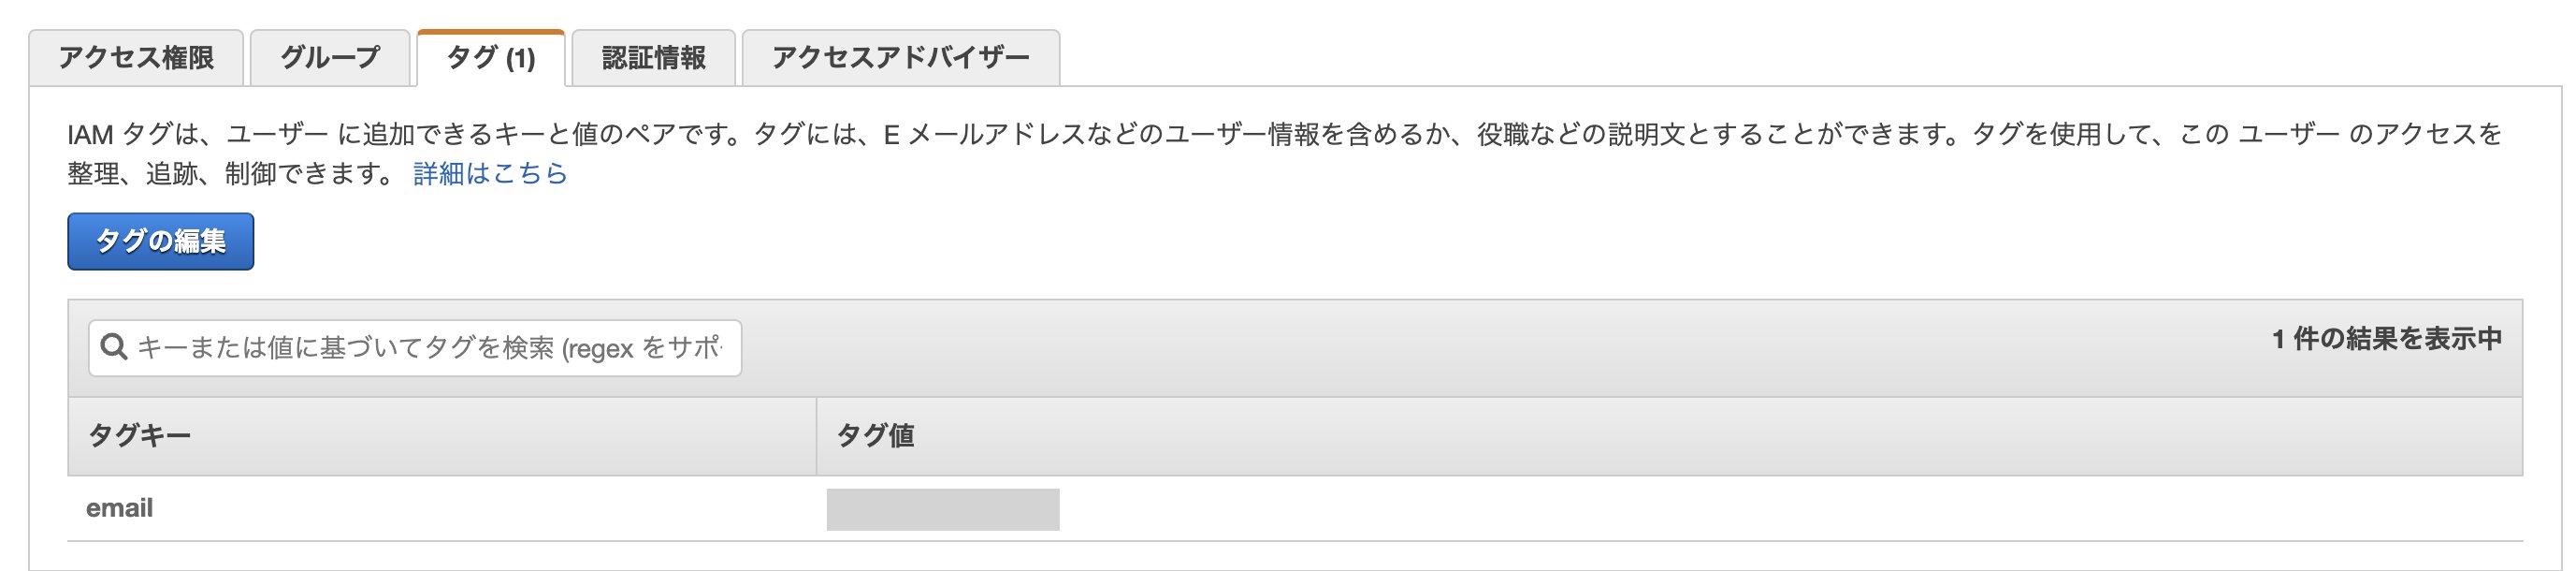
2. タグを利用し、IAMユーザーに直接メールアドレスを付与する。
タグキーに`email`、タグ値にメールアドレスを付与することで、マネーフォワード Adminaがメールアドレスを取得します。
5. AWSとの連携に成功すると、アカウント一覧に登録済みのユーザー情報が表示されます。
正常に完了しない場合は、インテグレーション画面のステータスタブから**編集**し、再度連携をお試しください。
解決しない場合はチャットにてお問い合わせください。
AWSの連携概要については[連携ページ](http://admina.moneyforward.com/jp/integrations/amazon-web-service-aws)をご覧ください。
### 補足:メールアドレスの取得
AWSはデフォルトではメールアドレスを取得しないサービスのため、ユーザータイプは「不明」もしくは「システム」で取得します。
メールアドレスの取得するためには、以下のいずれかの方法をご利用ください。
1. [アカウントマージ機能](/it-management/saas-management/d97dy5z2l7-merge)の利用
ユーザータイプの付与が可能となり、より正確な退職者管理が可能となります。
2. タグを利用し、IAMユーザーに直接メールアドレスを付与する。
タグキーに`email`、タグ値にメールアドレスを付与することで、マネーフォワード Adminaがメールアドレスを取得します。