> ## Documentation Index
> Fetch the complete documentation index at: https://support.i.moneyforward.com/llms.txt
> Use this file to discover all available pages before exploring further.
# Deputy
> Deputyとの連携方法です。OAuthクライアントの作成から、連携方法まで一連の手順を解説します。
## 事前準備
### OAuthクライアントの作成方法
1. [Deputyの OAuth Clients ページ](https://once.deputy.com/my/oauth_clients)に、システム管理者権限のあるアカウント(またはワークスペース所有者アカウント)でログインします。
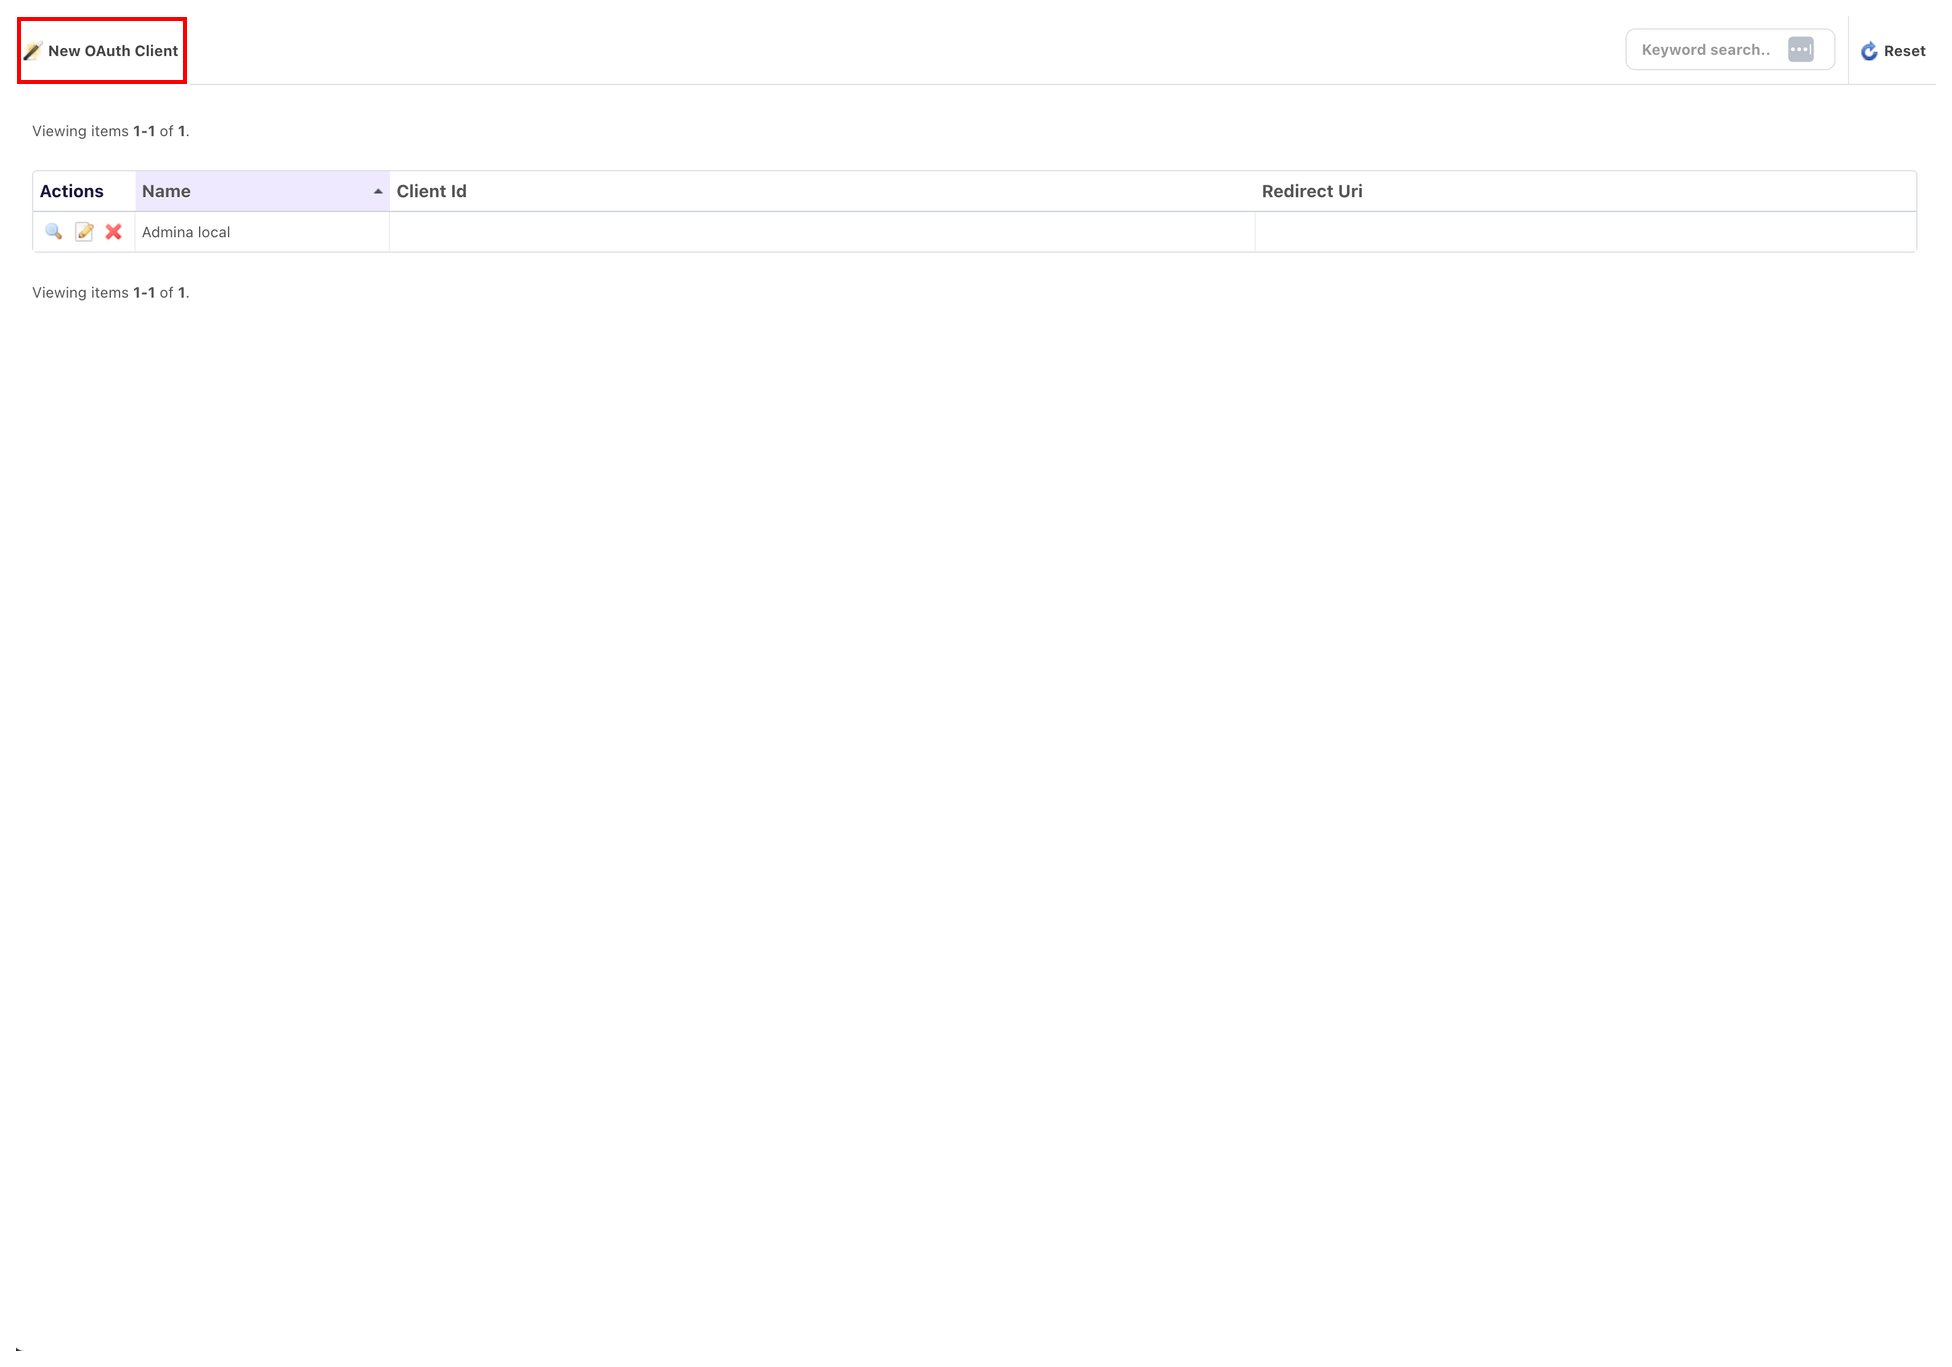
2. 画面左上の**New OAuth Client**をクリックします。
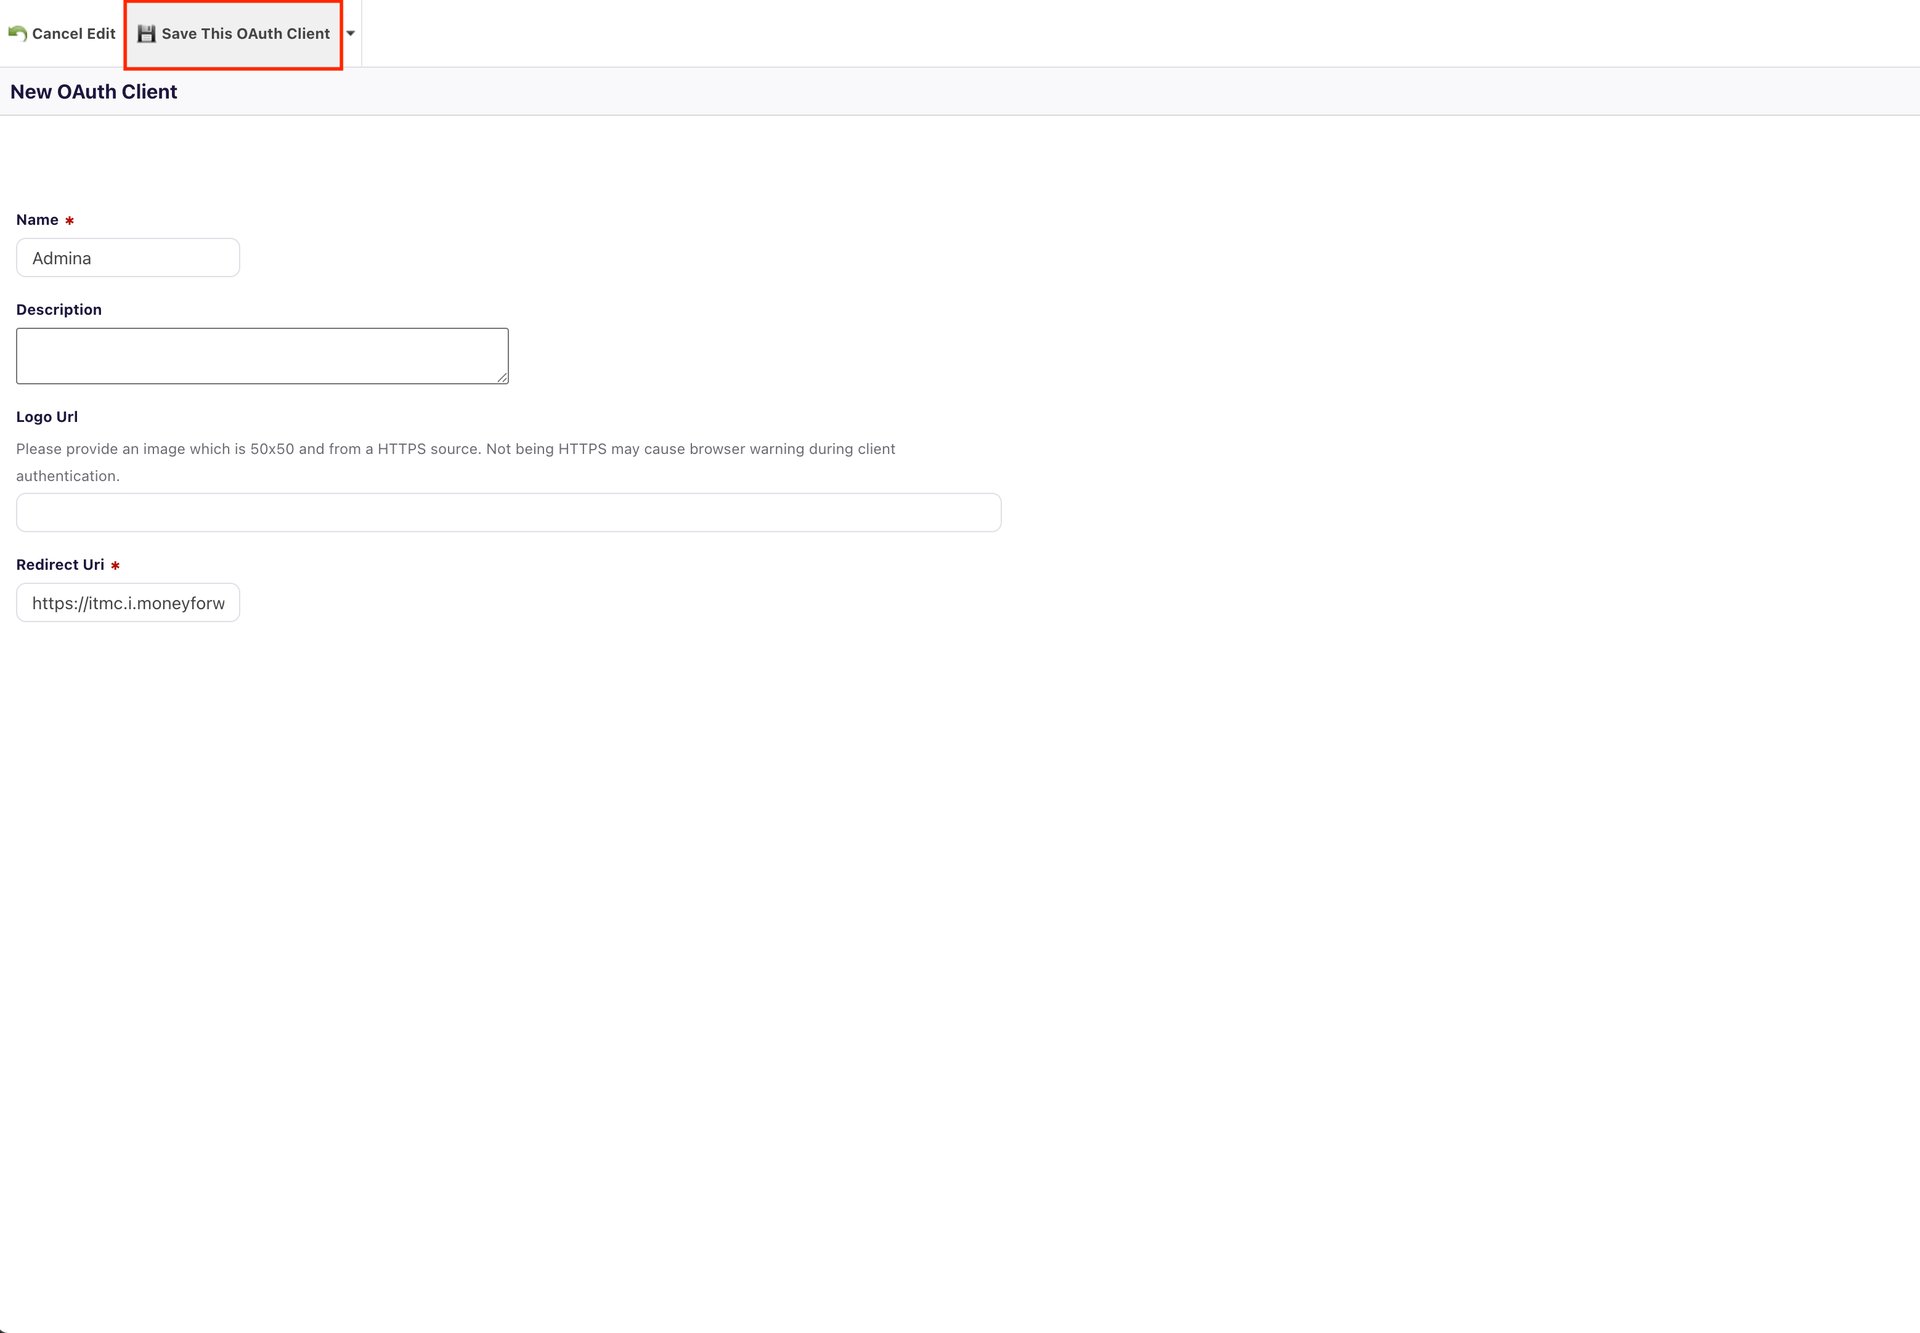
 3. **Name**に任意の名称を、**Redirect Uri**に以下を入力し、**Save This OAuth Client**をクリックします。
```text theme={null}
https://itmc.i.moneyforward.com/oauth/callback
```
3. **Name**に任意の名称を、**Redirect Uri**に以下を入力し、**Save This OAuth Client**をクリックします。
```text theme={null}
https://itmc.i.moneyforward.com/oauth/callback
```
 4. 保存後に表示される**Client Id**・**Client Secret**をコピーして保存します。
## インテグレーションのセットアップ
1. インテグレーション画面にて**Deputy**を検索します。
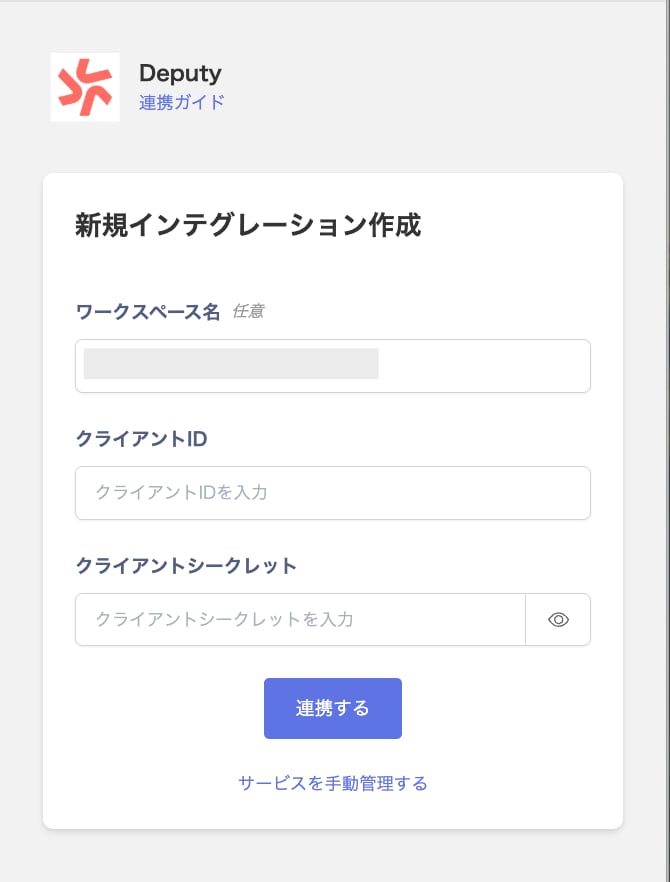
2. 前の手順で取得した**クライアントID**・**クライアントシークレット**を入力し、**連携する**をクリックします。
4. 保存後に表示される**Client Id**・**Client Secret**をコピーして保存します。
## インテグレーションのセットアップ
1. インテグレーション画面にて**Deputy**を検索します。
2. 前の手順で取得した**クライアントID**・**クライアントシークレット**を入力し、**連携する**をクリックします。
 3. Deputyとの連携が成功すると、アカウント一覧に登録済みのユーザー情報が表示されます。正常に完了しない場合は、まず [SaaSとの連携に失敗する場合の対処法](/it-management/saas-management/93nahw45is-trouble) に記載のステップをお試しください。それでも解決しない場合は、[ご提供いただきたい情報](/it-management/saas-management/93nahw45is-trouble#info-to-provide) をご確認のうえ、[サポート窓口](/contact-support)までお問い合わせください。