> ## Documentation Index
> Fetch the complete documentation index at: https://support.i.moneyforward.com/llms.txt
> Use this file to discover all available pages before exploring further.

# Call Connect

> Call Connectとの連携方法です。

## 事前準備

### Call Connectへのログイン方法

[Call Connectログインページ](https://www.callconnect.jp/users/sign_in)にて、メールアドレス・パスワードを入力しログインします。
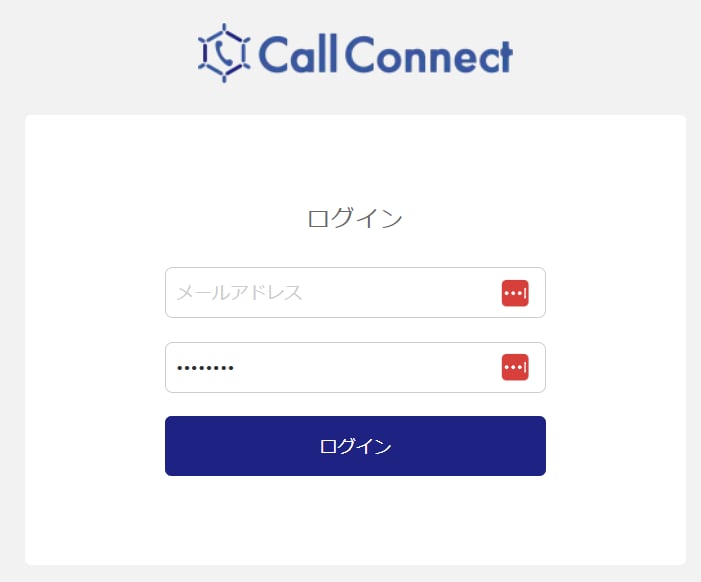
<img src="https://mintcdn.com/moneyforwardi/zKVVvDYqzE3w_IfF/images/integrations/ih283rpilu/1718606089184-image.png?fit=max&auto=format&n=zKVVvDYqzE3w_IfF&q=85&s=16f0c7c6e779cd8743f26f6f6caef39f" alt="Call Connectログイン画面" width="701" height="582" data-path="images/integrations/ih283rpilu/1718606089184-image.png" />

### APIキーの取得方法

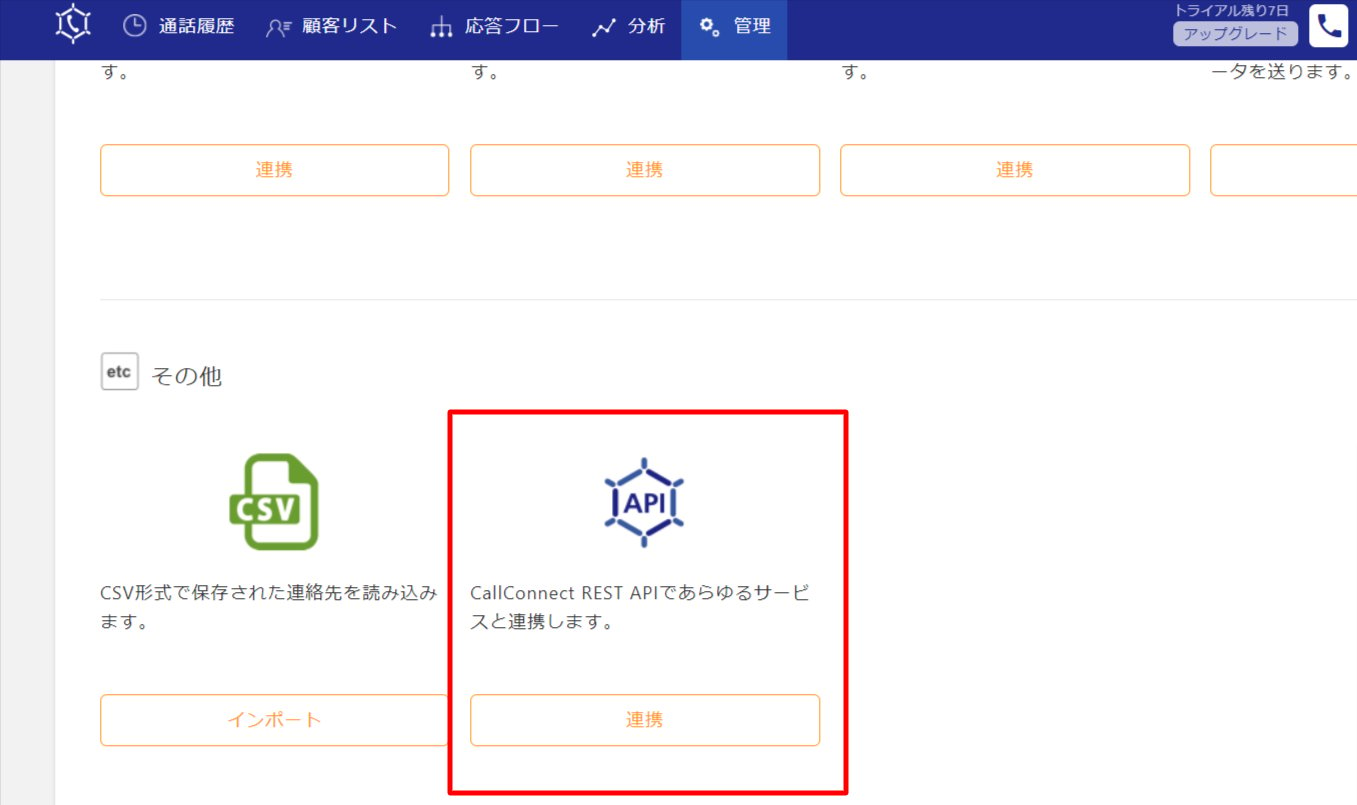
1. Call Connectログイン後、**管理＞連携＞その他 API** と進みます。

   <img src="https://mintcdn.com/moneyforwardi/zKVVvDYqzE3w_IfF/images/integrations/ih283rpilu/1718606275709-image.png?fit=max&auto=format&n=zKVVvDYqzE3w_IfF&q=85&s=973d4bb68f2572836306fc88677552f5" alt="管理メニュー" width="1357" height="805" data-path="images/integrations/ih283rpilu/1718606275709-image.png" />

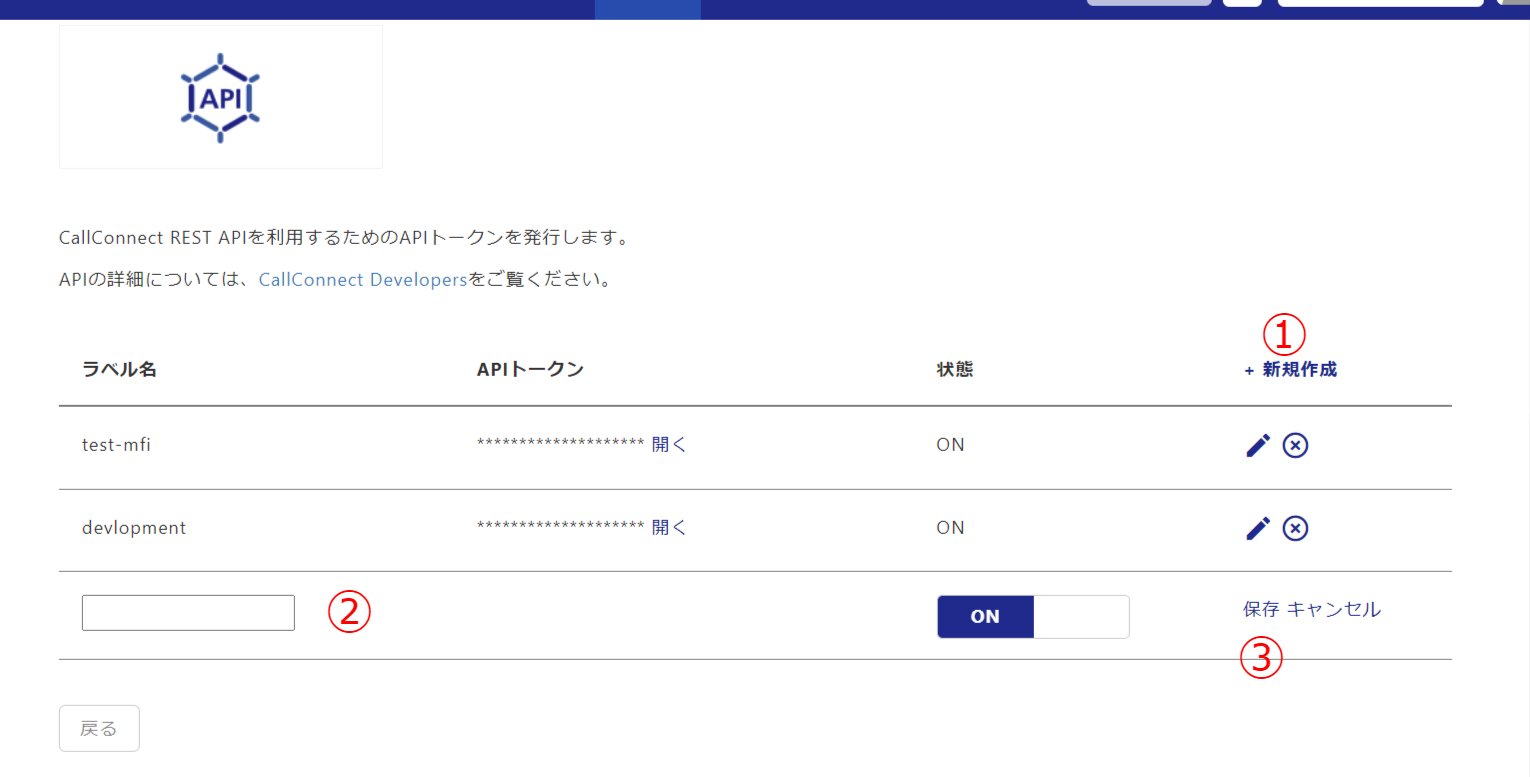
2. 新規作成をクリックし、ラベル名を入力し保存します。

   <img src="https://mintcdn.com/moneyforwardi/tPMW9PSDRuUa8oq7/images/integrations/ih283rpilu/2026-07-12-23-58-02.png?fit=max&auto=format&n=tPMW9PSDRuUa8oq7&q=85&s=59c6a66e3432f22b05881f94d122cb4b" alt="新規作成画面" width="1920" height="967" data-path="images/integrations/ih283rpilu/2026-07-12-23-58-02.png" />

3. APIトークンの開くをクリックするとAPIトークンを確認できます。この**APIトークンが連携に必要なAPIキー**となるのでコピー・保存します。

   <img src="https://mintcdn.com/moneyforwardi/tPMW9PSDRuUa8oq7/images/integrations/ih283rpilu/2026-07-12-23-58-16.png?fit=max&auto=format&n=tPMW9PSDRuUa8oq7&q=85&s=cd317e74d44ce0352c507c3e5d1fb81b" alt="APIトークン画面" width="1370" height="244" data-path="images/integrations/ih283rpilu/2026-07-12-23-58-16.png" />

## インテグレーションのセットアップ

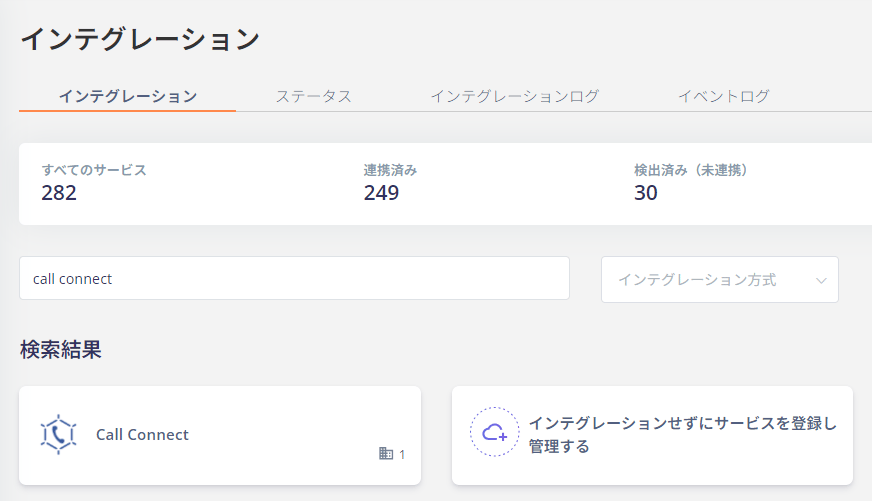
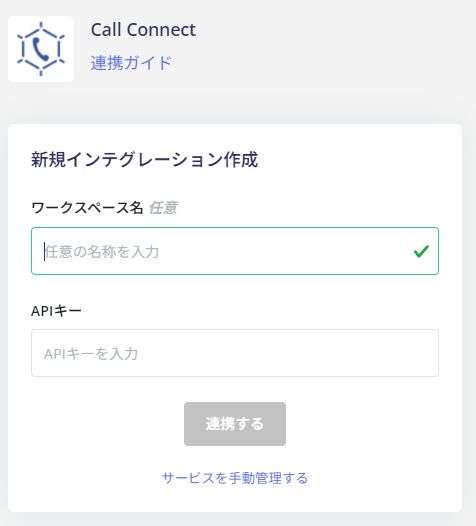
1. インテグレーション画面にて、**Call Connect**で検索します。

2. 前の手順で取得した**APIキー**を入力し、連携するをクリックします。ワークスペース名は任意入力です。
   <img src="https://mintcdn.com/moneyforwardi/zKVVvDYqzE3w_IfF/images/integrations/ih283rpilu/1718606855134-image.png?fit=max&auto=format&n=zKVVvDYqzE3w_IfF&q=85&s=65c2774d1450ee557391e18b37ee8336" alt="連携設定画面" width="476" height="526" data-path="images/integrations/ih283rpilu/1718606855134-image.png" />

3. Call Connectとの連携が成功すると、アカウント一覧に登録済みのユーザー情報が表示されます。正常に完了しない場合は、まず [SaaSとの連携に失敗する場合の対処法](/it-management/saas-management/93nahw45is-trouble) に記載のステップをお試しください。それでも解決しない場合は、[ご提供いただきたい情報](/it-management/saas-management/93nahw45is-trouble#info-to-provide) をご確認のうえ、[サポート窓口](/contact-support)までお問い合わせください。