> ## Documentation Index
> Fetch the complete documentation index at: https://support.i.moneyforward.com/llms.txt
> Use this file to discover all available pages before exploring further.

# SmartDB

> SmartDBとの連携の手順です。

<Info>
  連携には、SmartDBのシステム管理者ユーザーのアカウントが必要です。
</Info>

## 事前準備

### SmartDBへのログイン方法

SmartDBログイン用URLにアクセスし、SmartDBのシステム管理者ユーザーのメールアドレス・パスワードを入力し、ログインします。
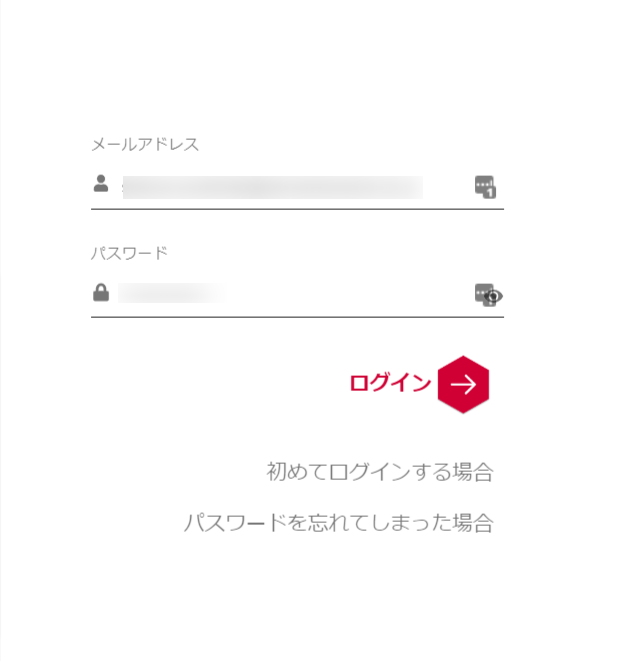
<img src="https://mintcdn.com/moneyforwardi/H1U6E2frRcGDFDpD/images/integrations/jloes0st8a/1655963893735-image.png?fit=max&auto=format&n=H1U6E2frRcGDFDpD&q=85&s=1a88f16b2cec9f9b94975fe35cb8c3dc" alt="SmartDBログイン画面" width="620" height="661" data-path="images/integrations/jloes0st8a/1655963893735-image.png" />

### ワークスペースキーの取得方法

SmartDBログイン用**URLの一部がワークスペースキー**となっています。

https\://**`{ワークスペースキー}`**.smartdb.jp

### アクセスキーの取得方法

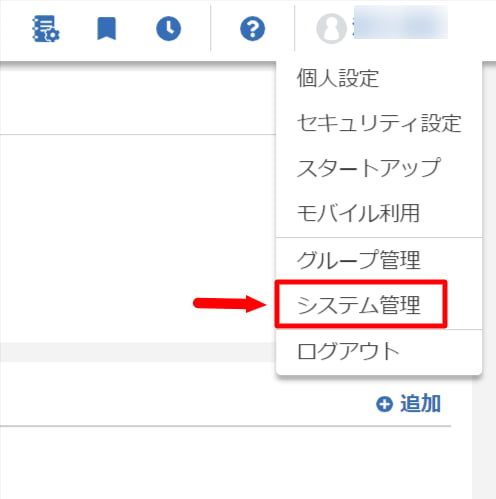
1. SmartDBにログイン後、画面右上のユーザーアイコンよりメニューを開き、**システム管理**をクリックします。
   <img src="https://mintcdn.com/moneyforwardi/H1U6E2frRcGDFDpD/images/integrations/jloes0st8a/1655963959741-image.png?fit=max&auto=format&n=H1U6E2frRcGDFDpD&q=85&s=8372ea1f57ed463bb07e3476cd1e7379" alt="システム管理メニュー" width="496" height="499" data-path="images/integrations/jloes0st8a/1655963959741-image.png" />

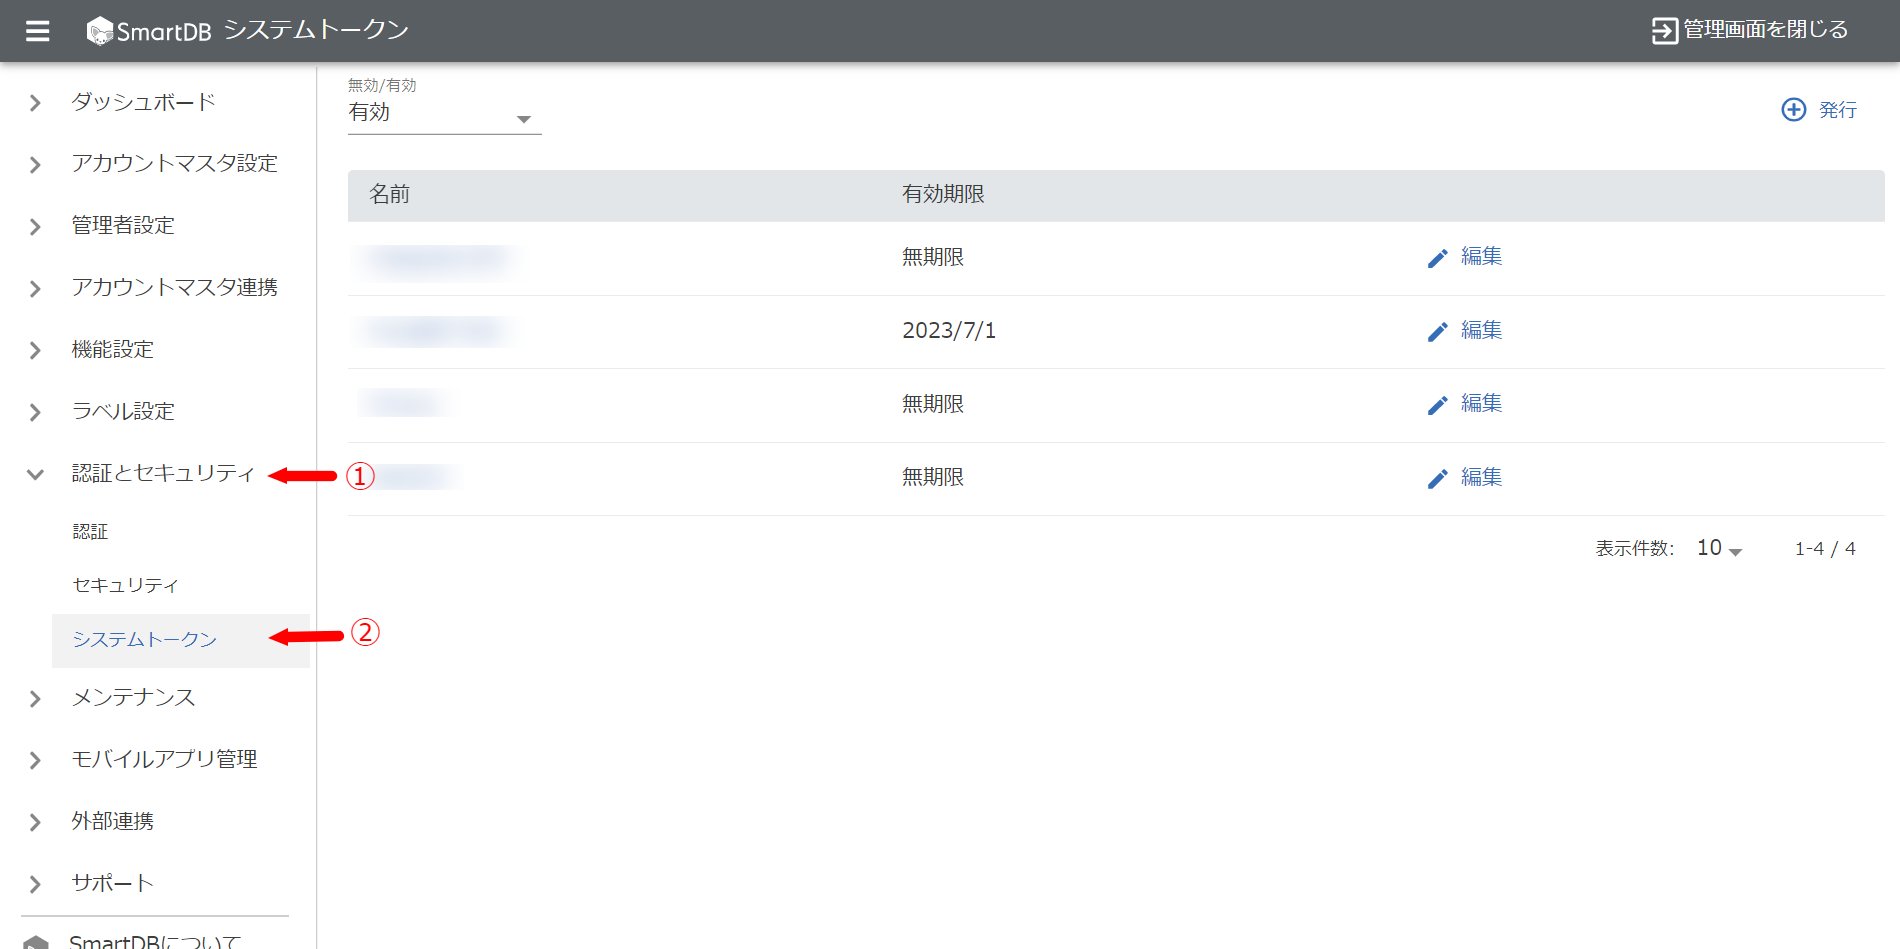
2. 管理画面のサイドメニューから **認証とセキュリティ＞システムトークン**に進みます。**システムトークンがアクセスキー**となります。

   <img src="https://mintcdn.com/moneyforwardi/H1U6E2frRcGDFDpD/images/integrations/jloes0st8a/1655968077206-image.png?fit=max&auto=format&n=H1U6E2frRcGDFDpD&q=85&s=549470eaa0b8363c3c0fd75442f90bca" alt="システムトークン画面" width="1900" height="949" data-path="images/integrations/jloes0st8a/1655968077206-image.png" />

#### 【新規作成の場合】

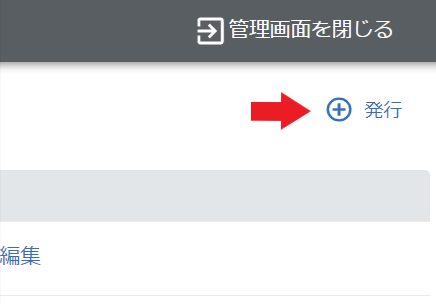
1. 画面右上の\*\*＋発行\*\*をクリックします。

   <img src="https://mintcdn.com/moneyforwardi/H1U6E2frRcGDFDpD/images/integrations/jloes0st8a/1655967970760-image.png?fit=max&auto=format&n=H1U6E2frRcGDFDpD&q=85&s=aac58e18c4d321904577708fb4cf50f5" alt="＋発行ボタン" width="436" height="304" data-path="images/integrations/jloes0st8a/1655967970760-image.png" />

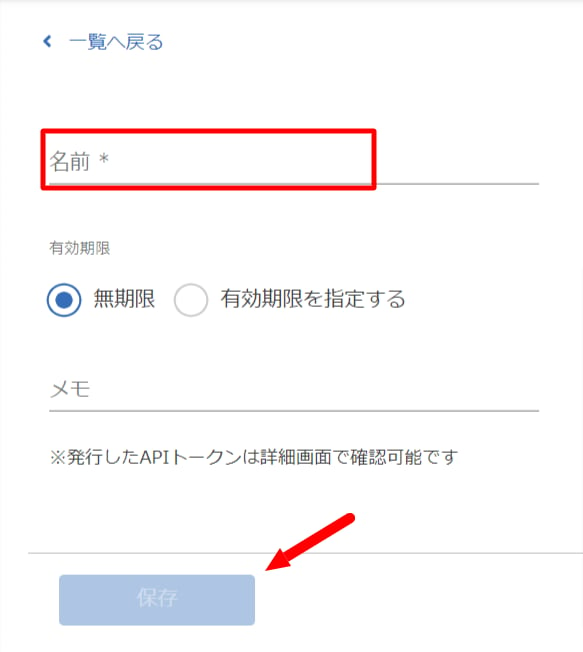
2. **任意の名前**（会社名など）入力し、**保存**をクリックします。

   <img src="https://mintcdn.com/moneyforwardi/H1U6E2frRcGDFDpD/images/integrations/jloes0st8a/1655965552303-image.png?fit=max&auto=format&n=H1U6E2frRcGDFDpD&q=85&s=13c2a850ad538b9c9995f5a625998724" alt="トークン名入力" width="583" height="652" data-path="images/integrations/jloes0st8a/1655965552303-image.png" />

3. 保存をクリックすると、システムトークンが発行されるので、コピー・保存します。

   <img src="https://mintcdn.com/moneyforwardi/Qb7lZLvS8Hx0Rhjp/images/integrations/jloes0st8a/1655964513399-image.png?fit=max&auto=format&n=Qb7lZLvS8Hx0Rhjp&q=85&s=cadef7efcf8ee0f072f5d8f058e32303" alt="トークン発行" width="870" height="563" data-path="images/integrations/jloes0st8a/1655964513399-image.png" />

#### 【作成済システムトークンを利用する場合】

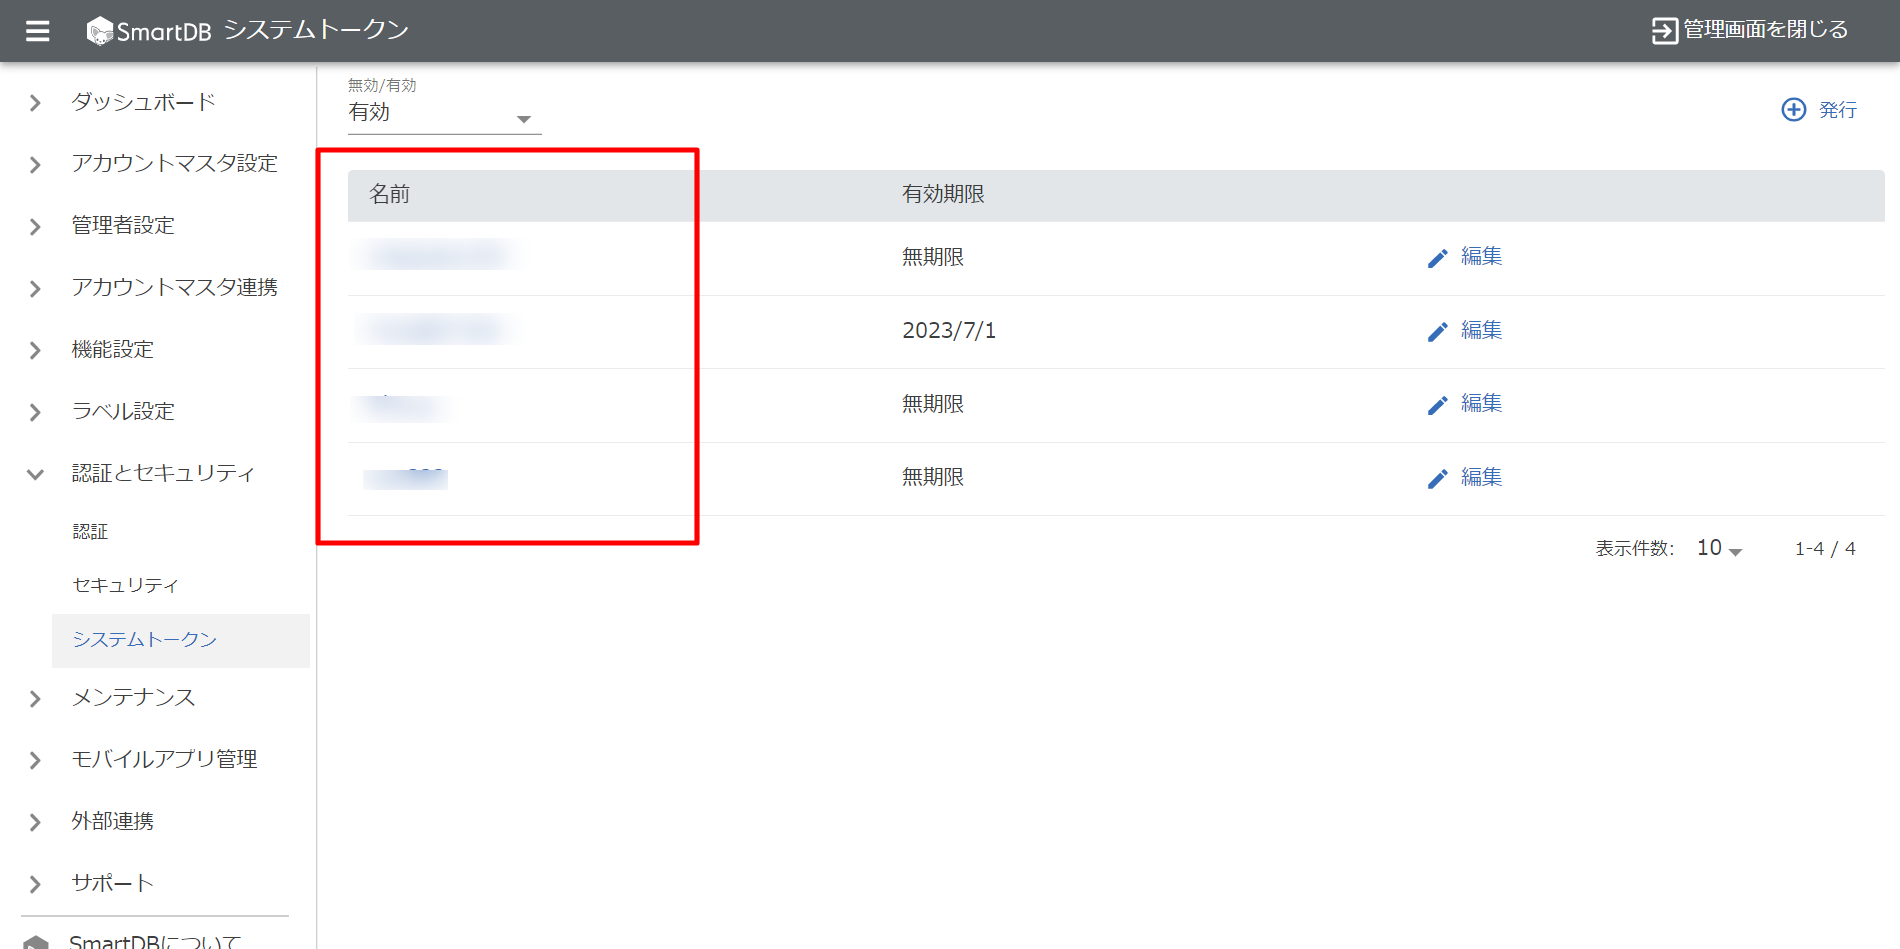
1. 一覧より利用したいシステムトークンの**名前**をクリックします。

   <img src="https://mintcdn.com/moneyforwardi/H1U6E2frRcGDFDpD/images/integrations/jloes0st8a/1655968232783-image.png?fit=max&auto=format&n=H1U6E2frRcGDFDpD&q=85&s=2255558fdf70422be874b8cfd7762a95" alt="トークン一覧" width="1900" height="949" data-path="images/integrations/jloes0st8a/1655968232783-image.png" />

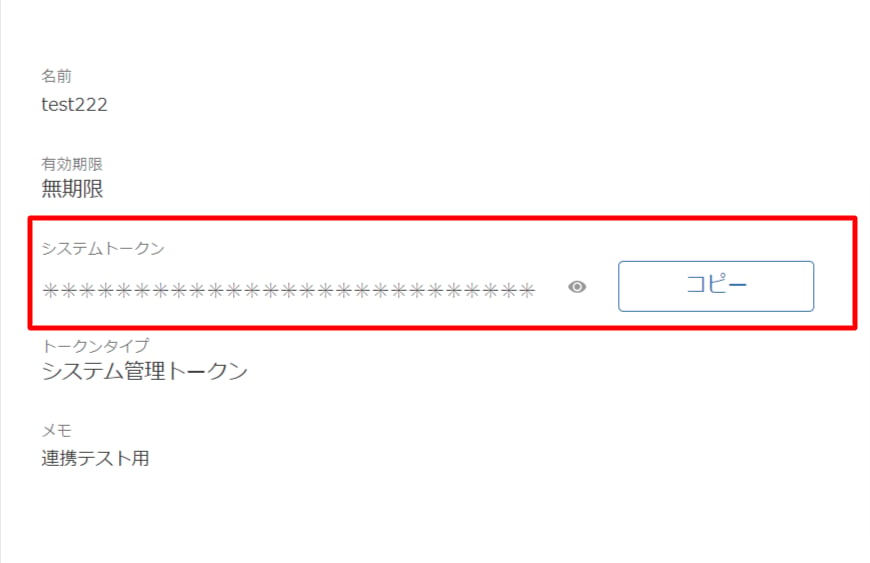
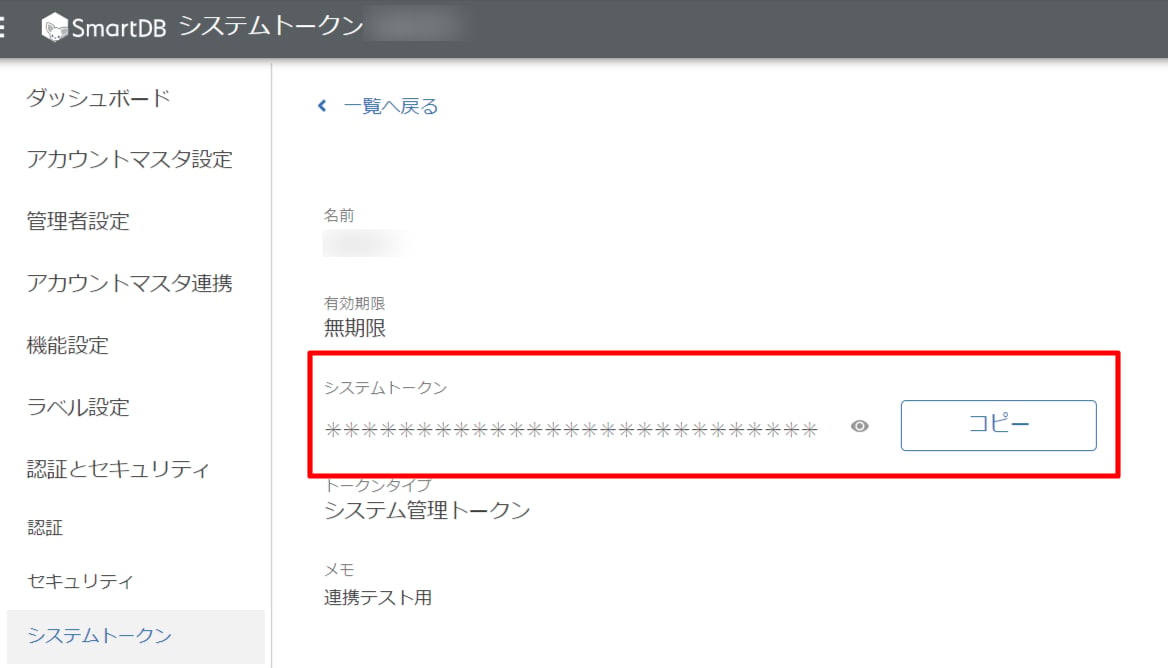
2. クリックすると以下の画面に移動するので、システムトークンをコピー・保存します。

   <img src="https://mintcdn.com/moneyforwardi/H1U6E2frRcGDFDpD/images/integrations/jloes0st8a/1655968310113-image.png?fit=max&auto=format&n=H1U6E2frRcGDFDpD&q=85&s=1857d3bdc0c8eb697ad2f81b6bd428c8" alt="トークン詳細" width="1168" height="668" data-path="images/integrations/jloes0st8a/1655968310113-image.png" />

## インテグレーションのセットアップ

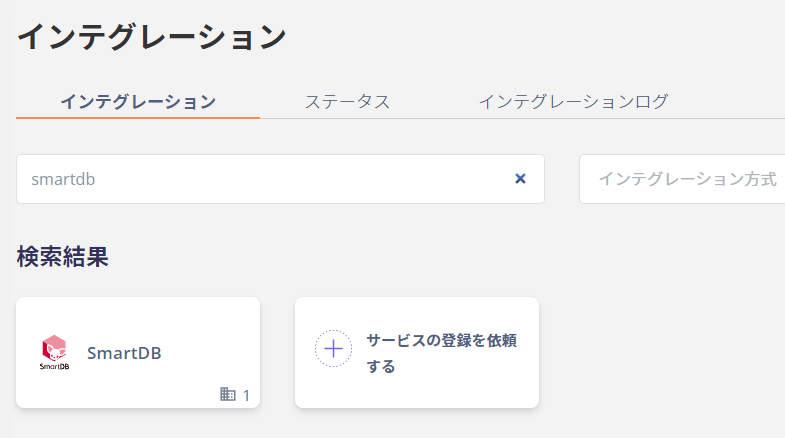
1. インテグレーション画面にて、**SmartDB**で検索します。

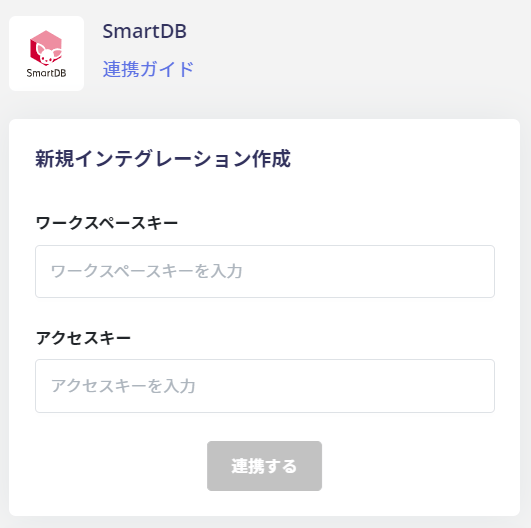
2. 前の手順で取得した**ワークスペースキー、アクセスキー**を入力し、**連携する**をクリックします。
   <img src="https://mintcdn.com/moneyforwardi/H1U6E2frRcGDFDpD/images/integrations/jloes0st8a/1656296103856-image.png?fit=max&auto=format&n=H1U6E2frRcGDFDpD&q=85&s=b3c4ce1f79c77f9a759763bd333363d5" alt="連携情報入力" width="531" height="528" data-path="images/integrations/jloes0st8a/1656296103856-image.png" />

3. SmartDBとの連携が成功すると以下のように表示され、アカウント一覧に登録済みのユーザー情報が表示されます。正常に完了しない場合は、まず [SaaSとの連携に失敗する場合の対処法](/it-management/saas-management/93nahw45is-trouble) に記載のステップをお試しください。それでも解決しない場合は、[ご提供いただきたい情報](/it-management/saas-management/93nahw45is-trouble#info-to-provide) をご確認のうえ、[サポート窓口](/contact-support)までお問い合わせください。