> ## Documentation Index
> Fetch the complete documentation index at: https://support.i.moneyforward.com/llms.txt
> Use this file to discover all available pages before exploring further.
# Sentry
> Sentryとの連携手順です。
## サポートする機能
アカウント削除 アカウント作成
## 事前準備
### Sentryへのログイン方法
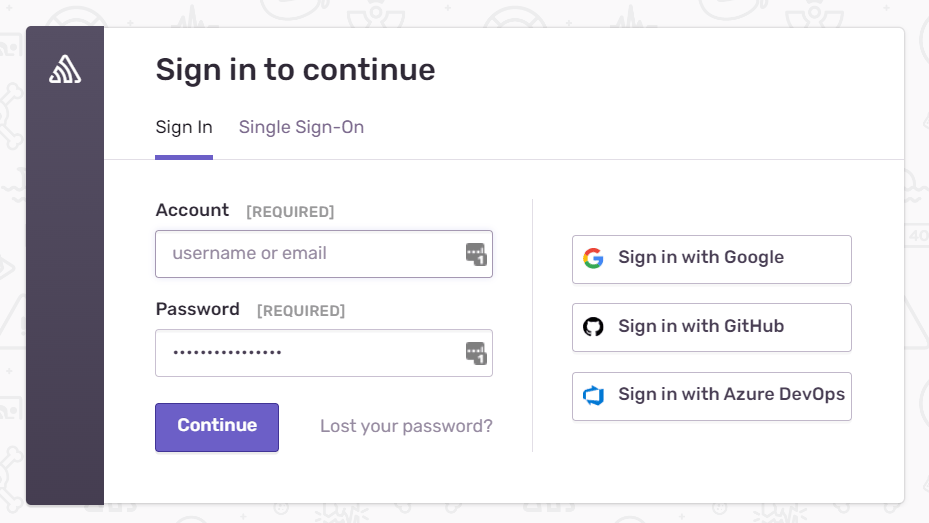
[Sentryログインページ](https://sentry.io/auth/login/)にて、メールアドレス・パスワードを入力しログインします。
 ### ワークスペースキーの取得方法
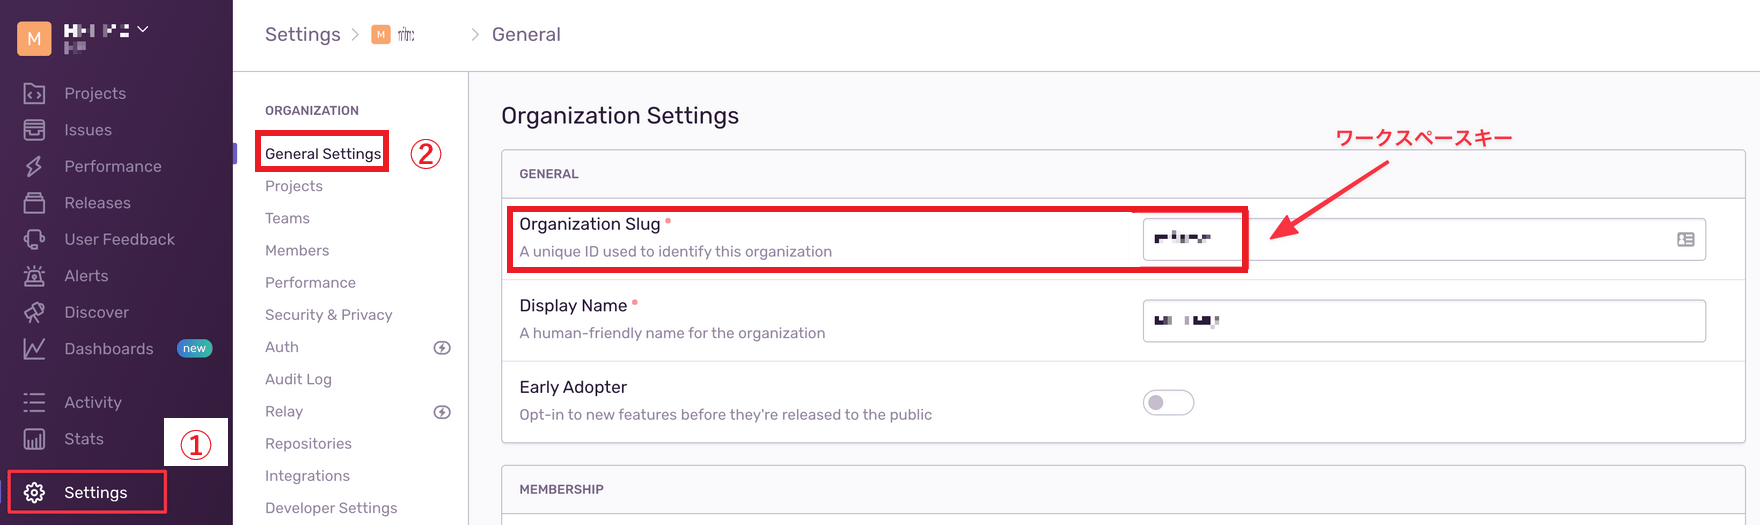
Sentryにログイン後、左のメニューより**Settings > General Settings**と進みます。
以下のようにOrganization Setting画面に移ります。**Organization Slug**が**ワークスペースキー**となりますので、保存しておきます。
### ワークスペースキーの取得方法
Sentryにログイン後、左のメニューより**Settings > General Settings**と進みます。
以下のようにOrganization Setting画面に移ります。**Organization Slug**が**ワークスペースキー**となりますので、保存しておきます。
 ### アクセスキー(Auth Token)の取得方法
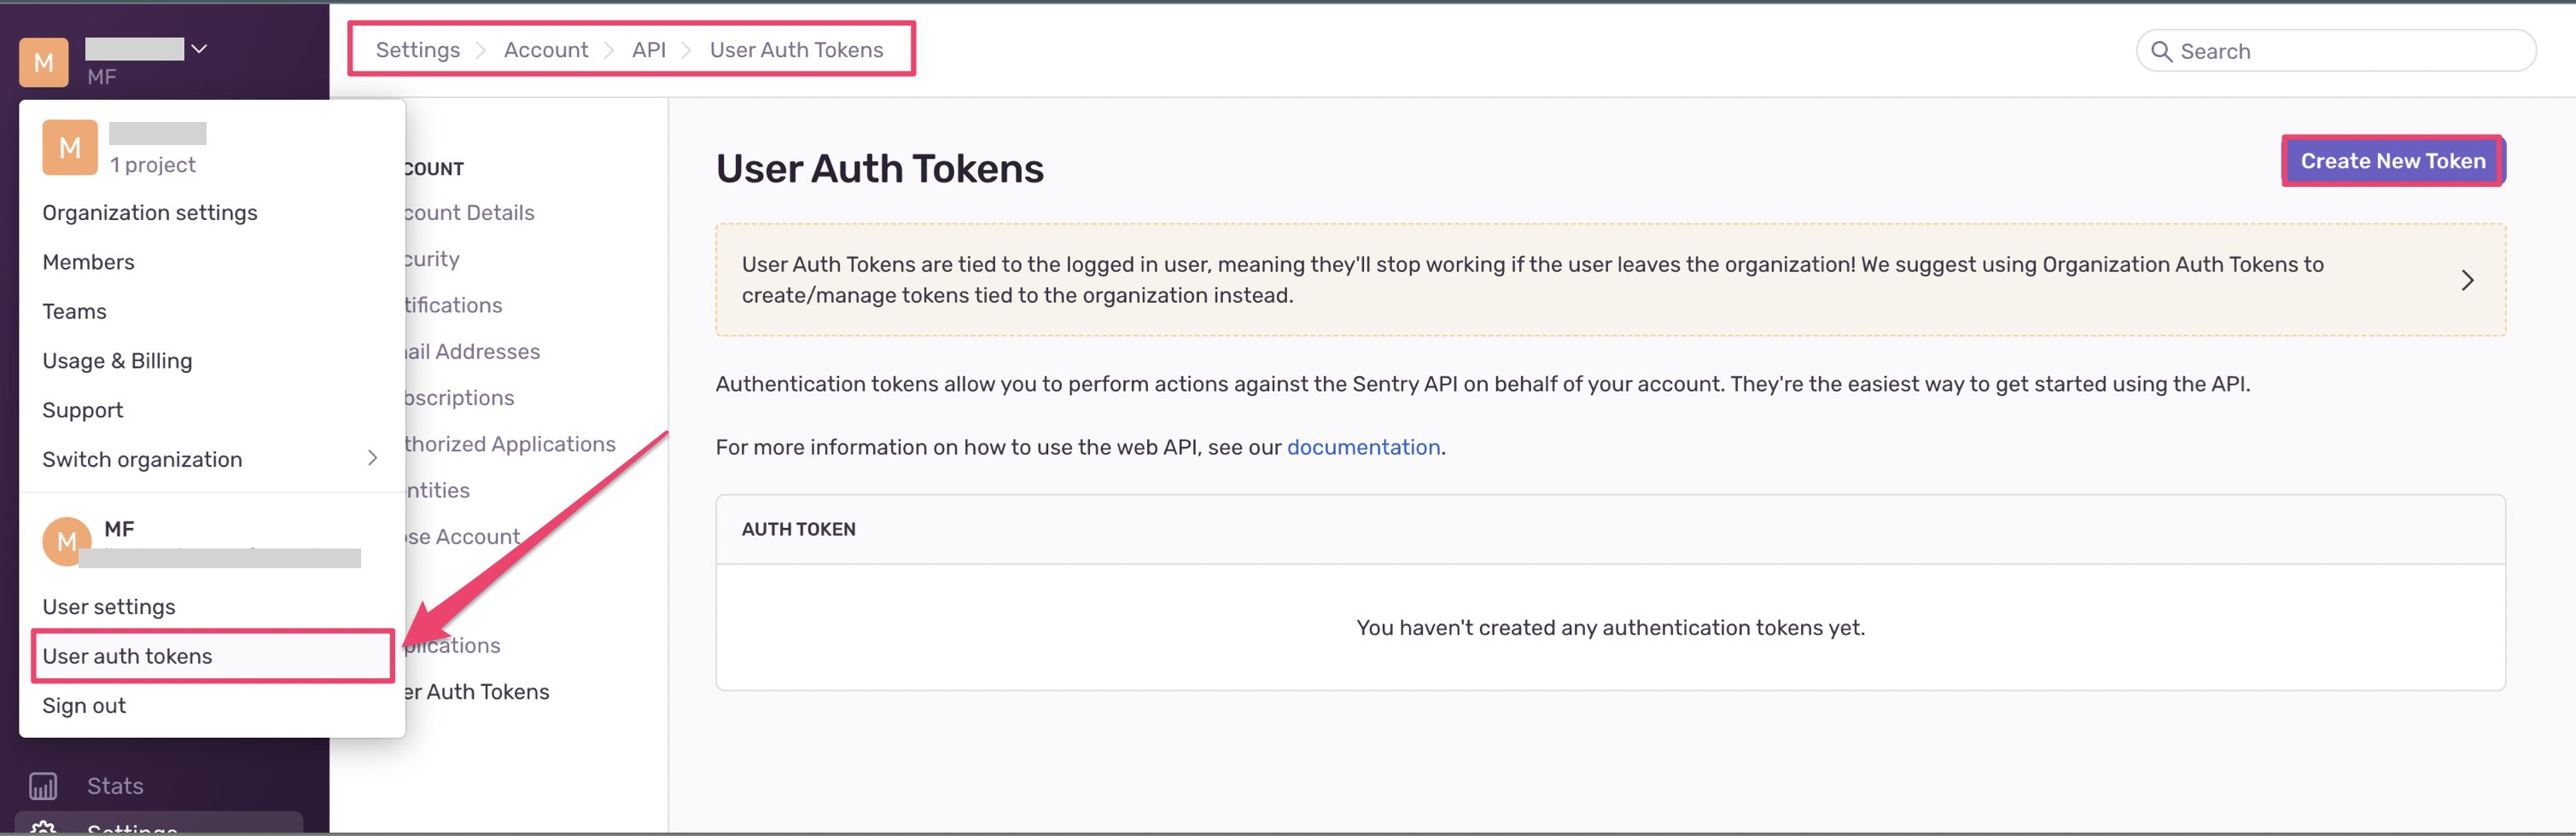
Sentryにログイン後、左のメニューアカウントを選択し、**User Auth Tokens**をクリックします。
\[**Create New Token**] ボタンをクリックします。
### アクセスキー(Auth Token)の取得方法
Sentryにログイン後、左のメニューアカウントを選択し、**User Auth Tokens**をクリックします。
\[**Create New Token**] ボタンをクリックします。
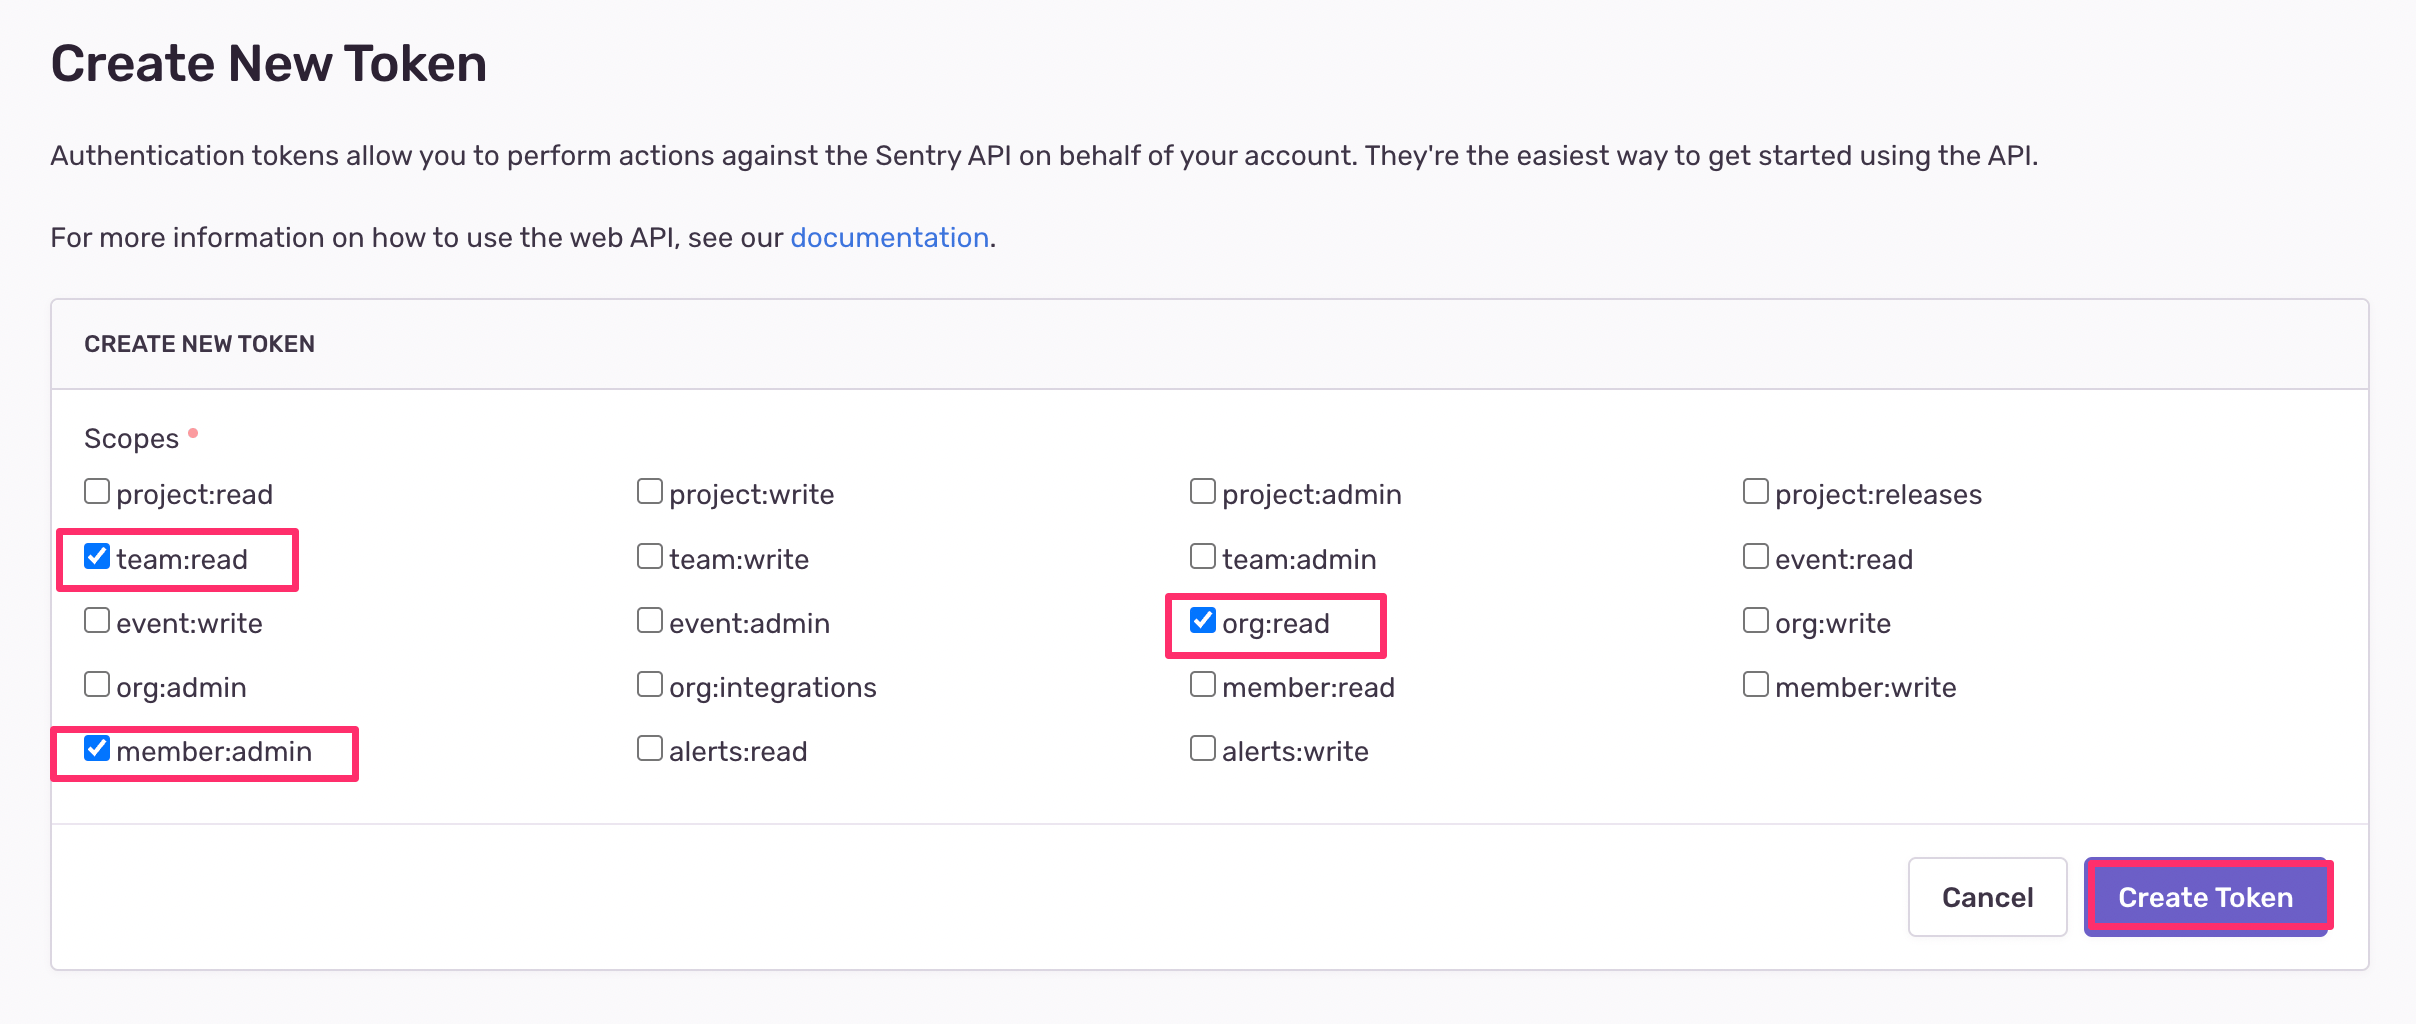
 画面のとおり、`team:read`, `member:admin`, `org:read`, にチェックを入れ、\[Create Token]ボタンをクリックします。
 Auth Tokenが表示されるので、コピーします(アクセスキーになります)
 ## インテグレーションのセットアップ
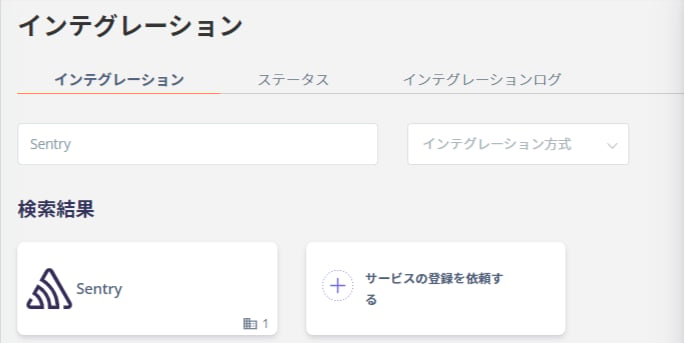
インテグレーション画面にて、**Sentry** で検索します。
## インテグレーションのセットアップ
インテグレーション画面にて、**Sentry** で検索します。
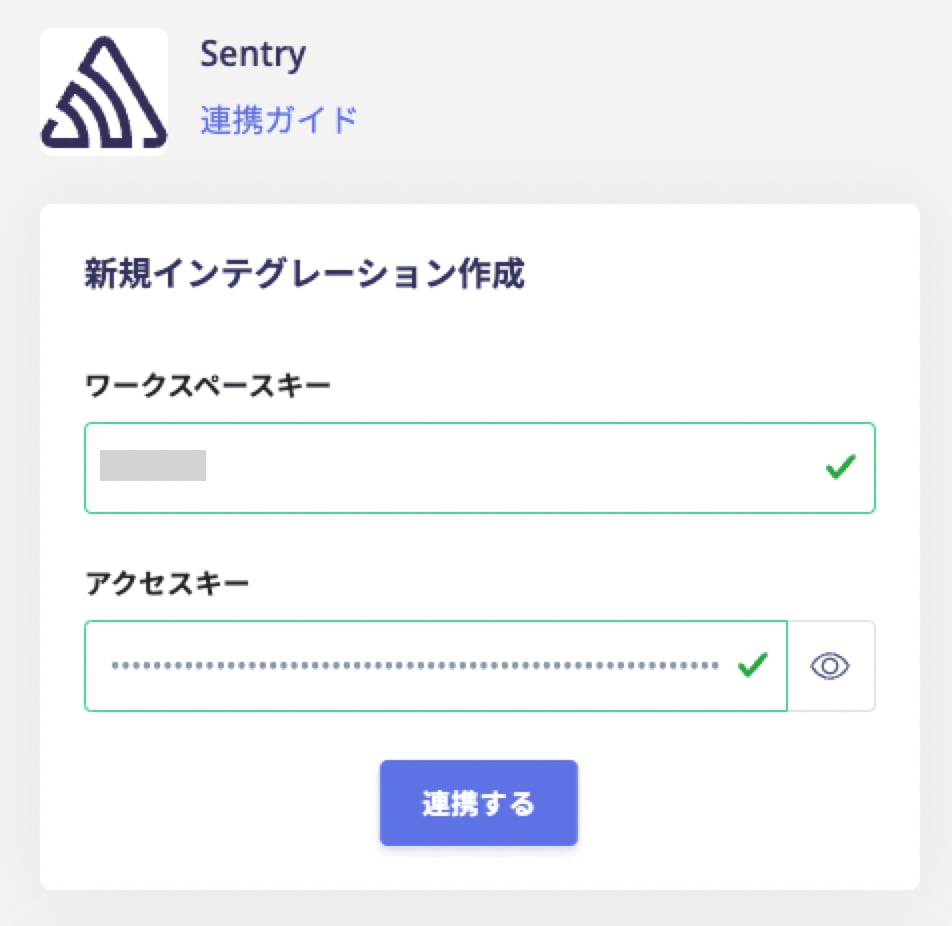
 **前の手順で取得したワークスペースキー、アクセスキー**を入力し、**連携する**をクリックします。
 Sentryとの連携に成功すると、アカウント一覧に登録済みのユーザー情報が表示されます。
正常に完了しない場合は、インテグレーション画面のステータスタブから編集し、再度連携をお試しください。
また、次の制限事項に該当していないかどうかも併せてご確認ください。[\[制限事項\]Google 認証やSSOなど外部認証アカウントによる連携失敗](/it-management/faq/7gbneu0vz5-auth-error)
解決しない場合はチャットにてお問い合わせください。
Sentryの連携概要については[連携ページ](http://admina.moneyforward.com/jp/integrations/sentry)をご覧ください。
Sentryとの連携に成功すると、アカウント一覧に登録済みのユーザー情報が表示されます。
正常に完了しない場合は、インテグレーション画面のステータスタブから編集し、再度連携をお試しください。
また、次の制限事項に該当していないかどうかも併せてご確認ください。[\[制限事項\]Google 認証やSSOなど外部認証アカウントによる連携失敗](/it-management/faq/7gbneu0vz5-auth-error)
解決しない場合はチャットにてお問い合わせください。
Sentryの連携概要については[連携ページ](http://admina.moneyforward.com/jp/integrations/sentry)をご覧ください。