> ## Documentation Index
> Fetch the complete documentation index at: https://support.i.moneyforward.com/llms.txt
> Use this file to discover all available pages before exploring further.

# Kentik

> Kentik連携には管理者権限が必要です。APIキーを取得後、インテグレーション画面で設定します。

## サポートする機能

<Badge color="blue">アカウント削除</Badge> <Badge color="blue">アカウント作成</Badge>

<Info>
  連携には管理者権限のアカウントが必要です。
</Info>

## 事前準備

### ログイン方法

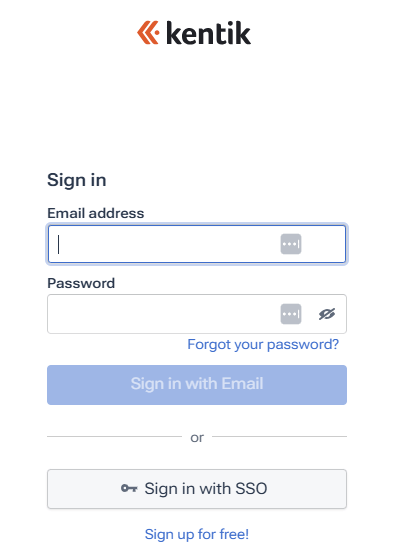
[Kentikログインページ](https://portal.kentik.com/login)にて、メールアドレス・パスワードを入力し、ログインします。
<img src="https://mintcdn.com/moneyforwardi/H1U6E2frRcGDFDpD/images/integrations/jwpyovm6n2/1774415465464-2026-03-25-140750.png?fit=max&auto=format&n=H1U6E2frRcGDFDpD&q=85&s=8fd68016b5d999282a81875bc869ffed" alt="Kentikログインページ" width="395" height="558" data-path="images/integrations/jwpyovm6n2/1774415465464-2026-03-25-140750.png" />

### APIキーの取得方法

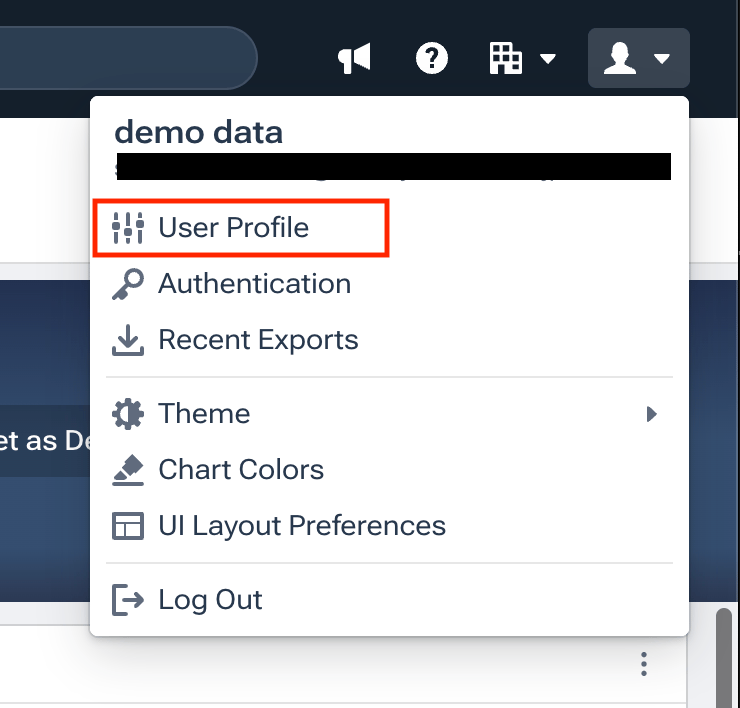
1. ログイン後、右上の**ユーザーアイコン** > **User Profile** をクリックします。
   <img src="https://mintcdn.com/moneyforwardi/Qb7lZLvS8Hx0Rhjp/images/integrations/jwpyovm6n2/1774415799114-2026-02-18-13-34-30.png?fit=max&auto=format&n=Qb7lZLvS8Hx0Rhjp&q=85&s=57b3d704d82572a039636966a0b28934" alt="User Profileメニュー" width="740" height="708" data-path="images/integrations/jwpyovm6n2/1774415799114-2026-02-18-13-34-30.png" />

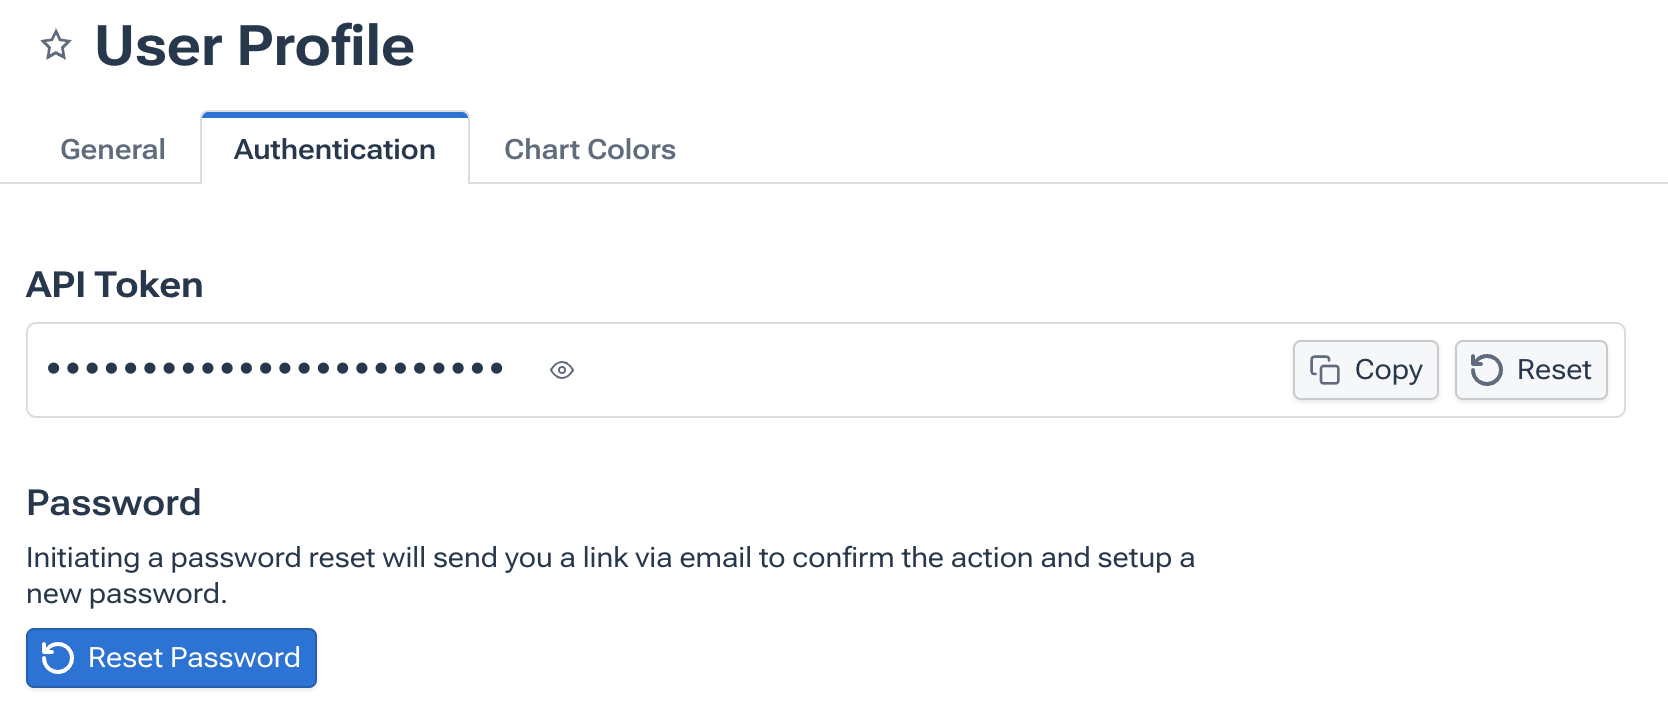
2. 「**Authentication**」セクションに移動し、**API Token** をコピーします。
   <img src="https://mintcdn.com/moneyforwardi/H1U6E2frRcGDFDpD/images/integrations/jwpyovm6n2/1774416026086-2026-02-18-13-38-15.png?fit=max&auto=format&n=H1U6E2frRcGDFDpD&q=85&s=42b133a58b8c8e7893848060097f248f" alt="API Token取得画面" width="1668" height="712" data-path="images/integrations/jwpyovm6n2/1774416026086-2026-02-18-13-38-15.png" />

## インテグレーションのセットアップ

1. インテグレーション画面にて、**Kentik**で検索します。

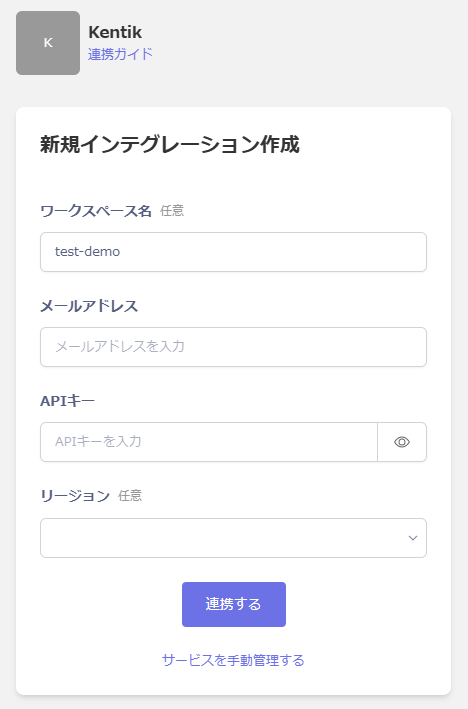
2. 任意の**ワークスペース名**、Kentikログイン時の**メールアドレス**、前の手順で取得した**APIキー**、任意の**リージョン**を選択し、**連携する**をクリックします。
   <img src="https://mintcdn.com/moneyforwardi/asVFolHD2Z2R-UWD/images/integrations/jwpyovm6n2/kentik.png?fit=max&auto=format&n=asVFolHD2Z2R-UWD&q=85&s=ba84a69bc8035170fe0f0f547ba77383" alt="Kentik連携設定画面" width="722" height="1092" data-path="images/integrations/jwpyovm6n2/kentik.png" />

3. 連携が成功すると、アカウント一覧に登録済みのユーザー情報が表示されます。正常に完了しない場合は、まず [SaaSとの連携に失敗する場合の対処法](/it-management/saas-management/93nahw45is-trouble) に記載のステップをお試しください。それでも解決しない場合は、[ご提供いただきたい情報](/it-management/saas-management/93nahw45is-trouble#info-to-provide) をご確認のうえ、[サポート窓口](/contact-support)までお問い合わせください。
