> ## Documentation Index
> Fetch the complete documentation index at: https://support.i.moneyforward.com/llms.txt
> Use this file to discover all available pages before exploring further.
# Adobe
> Adobeとの連携の手順です。
## サポートする機能
アカウント削除 アカウント作成
連携には、Adobe エンタープライズプランのご契約が必要です。
## 事前準備
### Adobeへのログイン方法
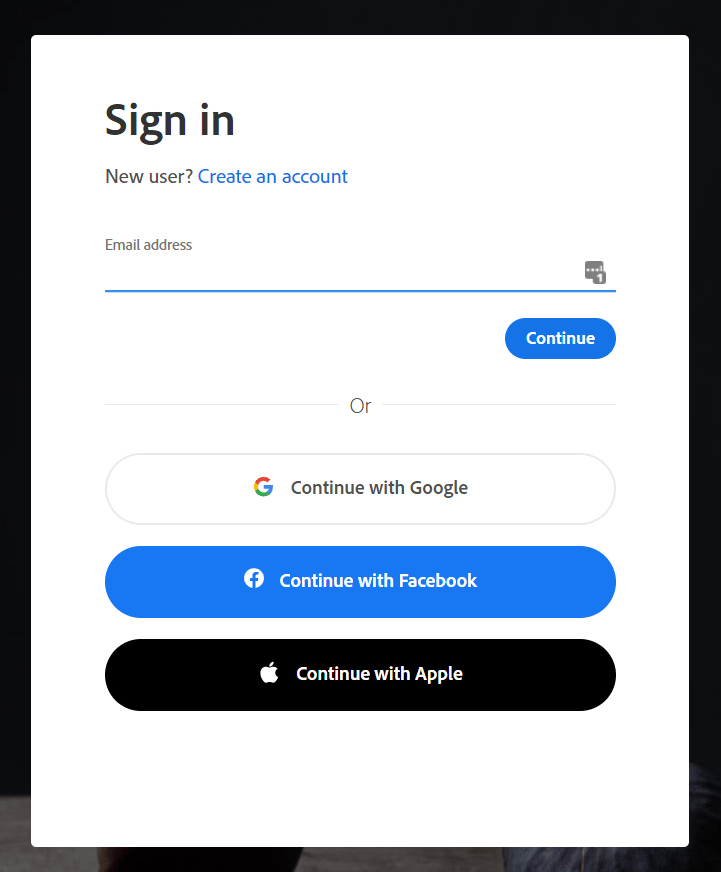
[Adobeログインページ](https://console.adobe.io/home)にて、**メールアドレス・パスワード**を入力し、ログインします。
 ### APIキーの取得方法
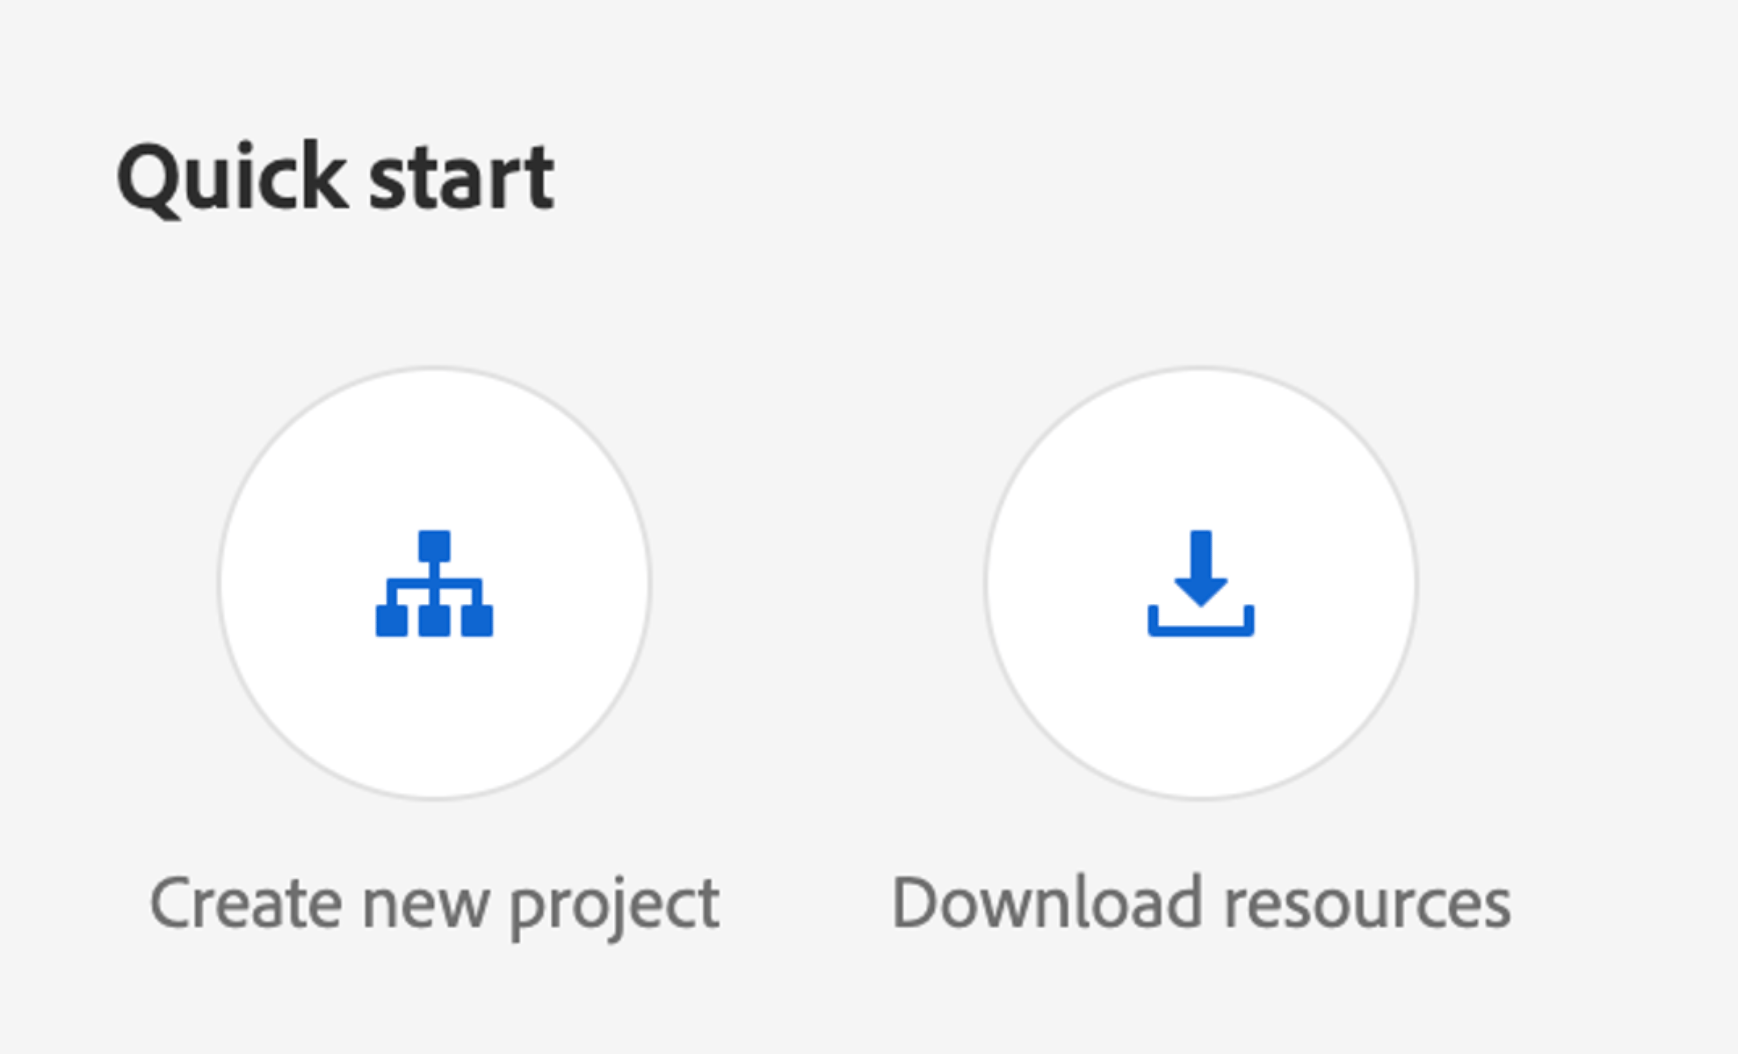
1. Adobeにログイン後、**Adobe developer console([developer.adobe.com/console](https://developer.adobe.com/console/))> Create new project**に進み、**プロジェクトを作成**します。
### APIキーの取得方法
1. Adobeにログイン後、**Adobe developer console([developer.adobe.com/console](https://developer.adobe.com/console/))> Create new project**に進み、**プロジェクトを作成**します。
 プロジェクト名がAdmina上のワークスペース名になりますので、管理しやすい名前を設定ください。
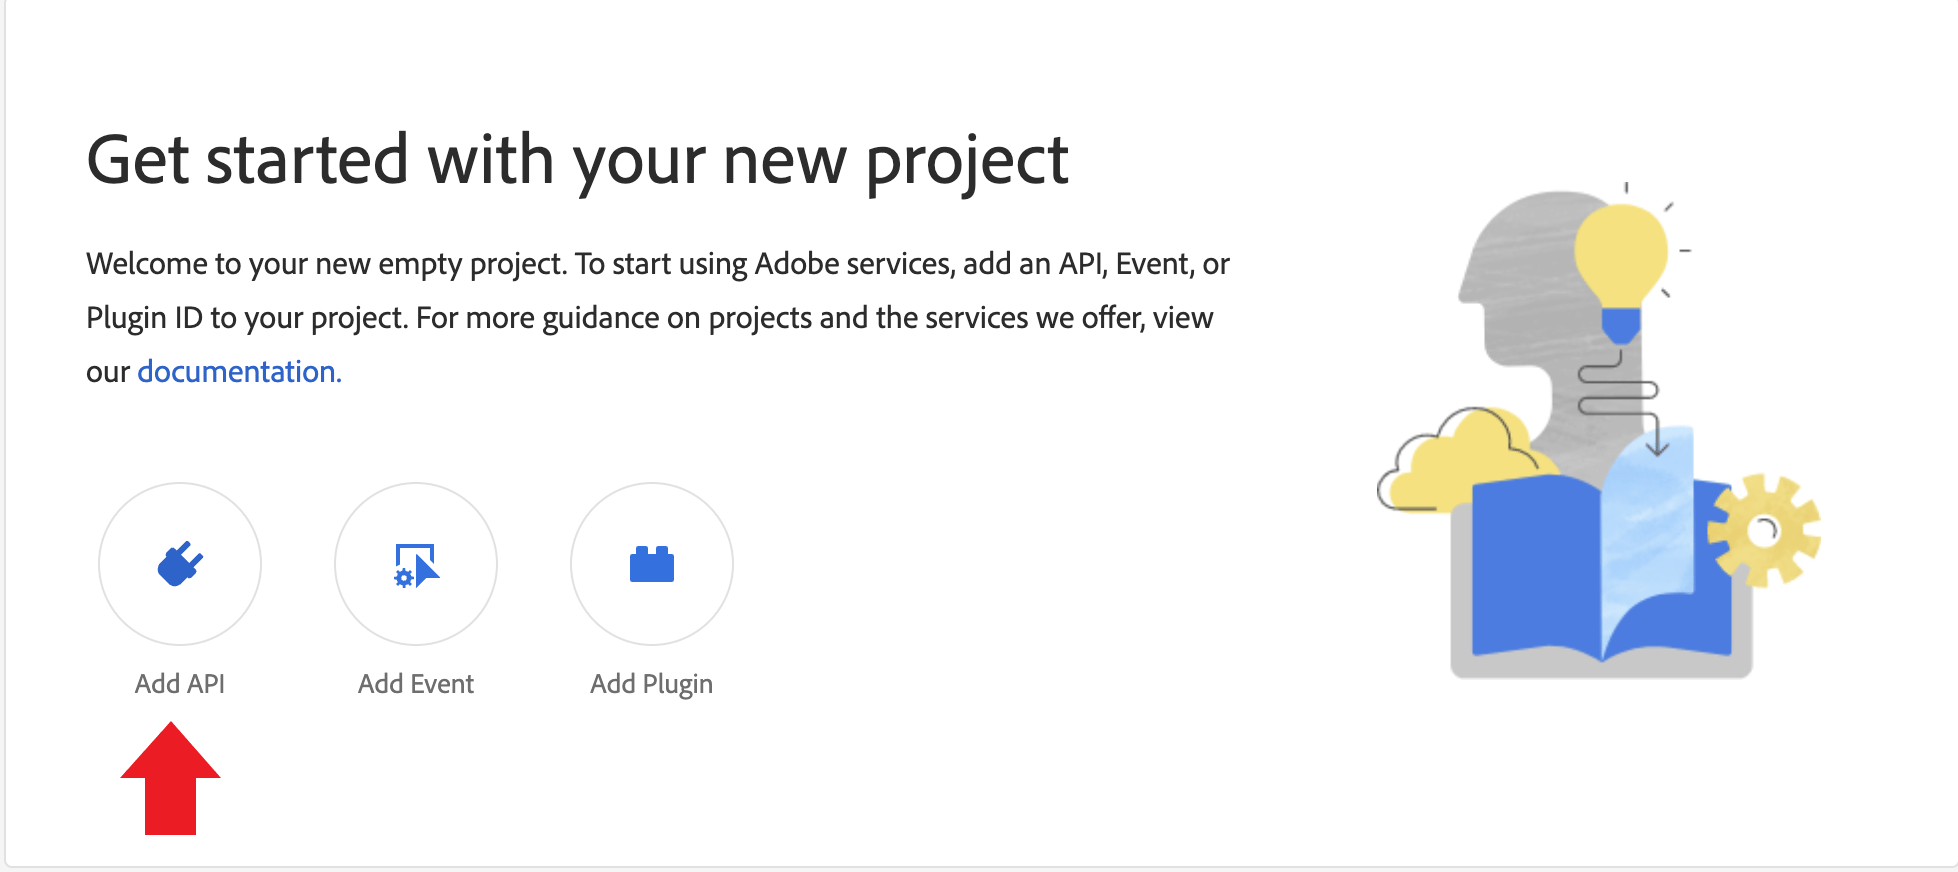
2. **Add API** をクリック後、**UserManagement API**を選択し、\[Next]ボタンをクリックします。
プロジェクト名がAdmina上のワークスペース名になりますので、管理しやすい名前を設定ください。
2. **Add API** をクリック後、**UserManagement API**を選択し、\[Next]ボタンをクリックします。
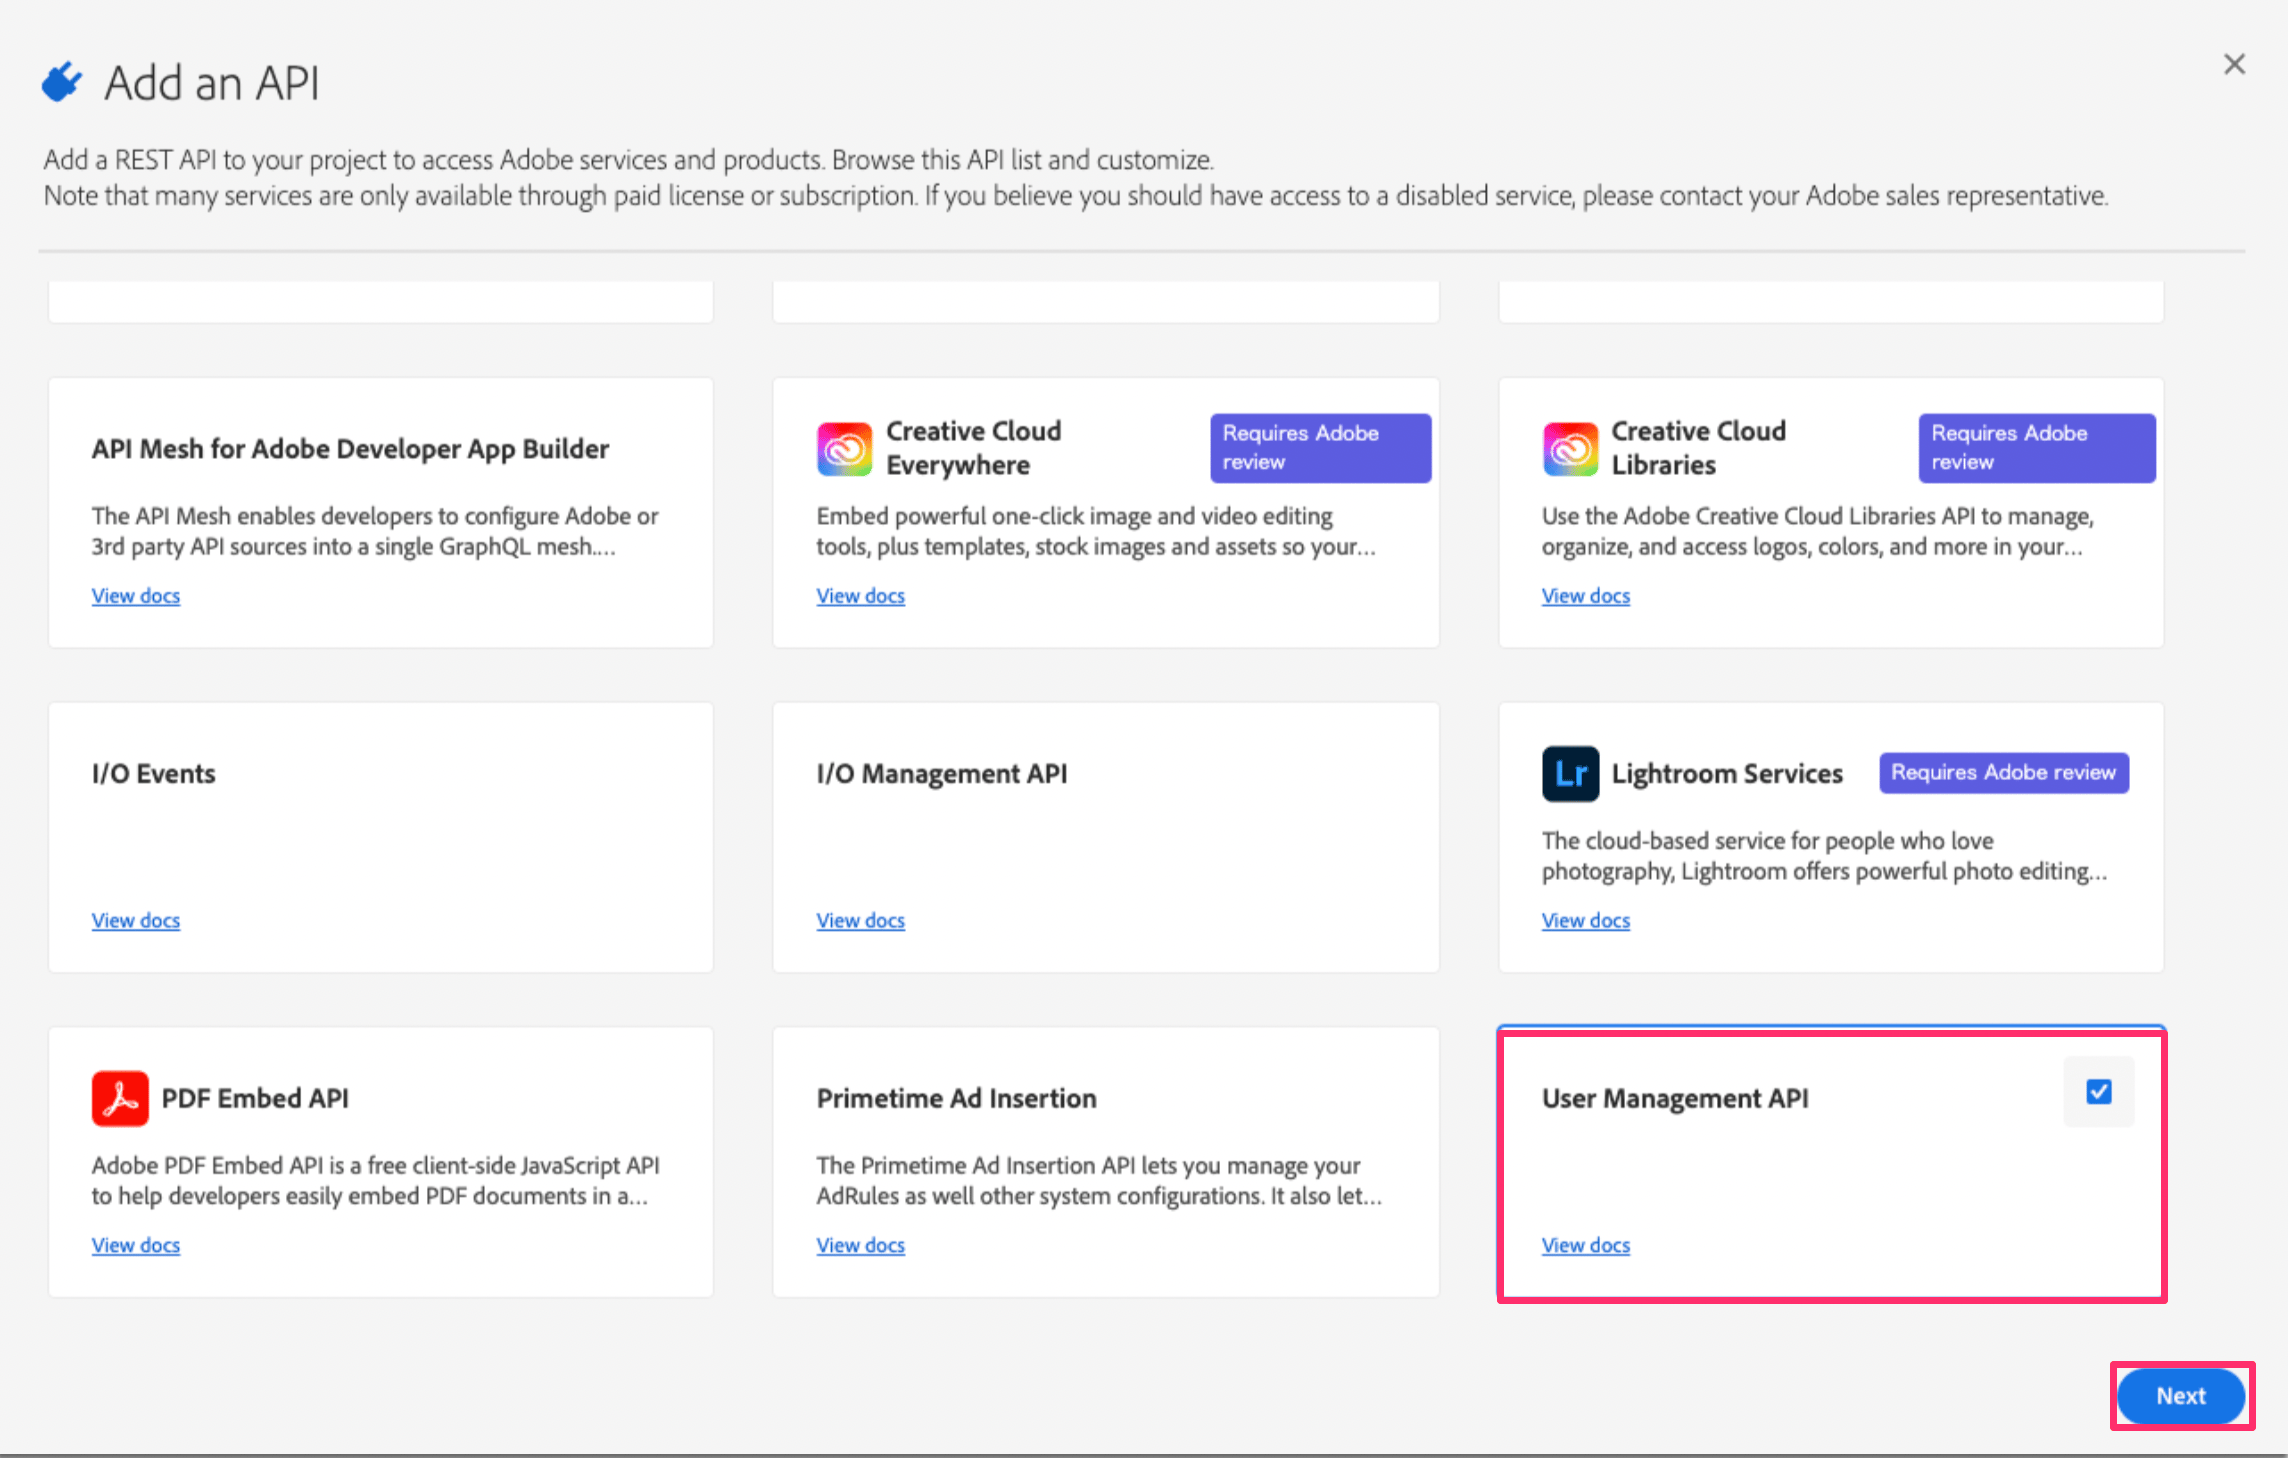 User Management APIを選択出来ない場合、エンタープライズプラン以外のプランを利用されている可能性がございます。ご契約プランをご確認ください。
3. **OAuth Server to Server**を選択し、**Save configured API**をクリックします。
User Management APIを選択出来ない場合、エンタープライズプラン以外のプランを利用されている可能性がございます。ご契約プランをご確認ください。
3. **OAuth Server to Server**を選択し、**Save configured API**をクリックします。
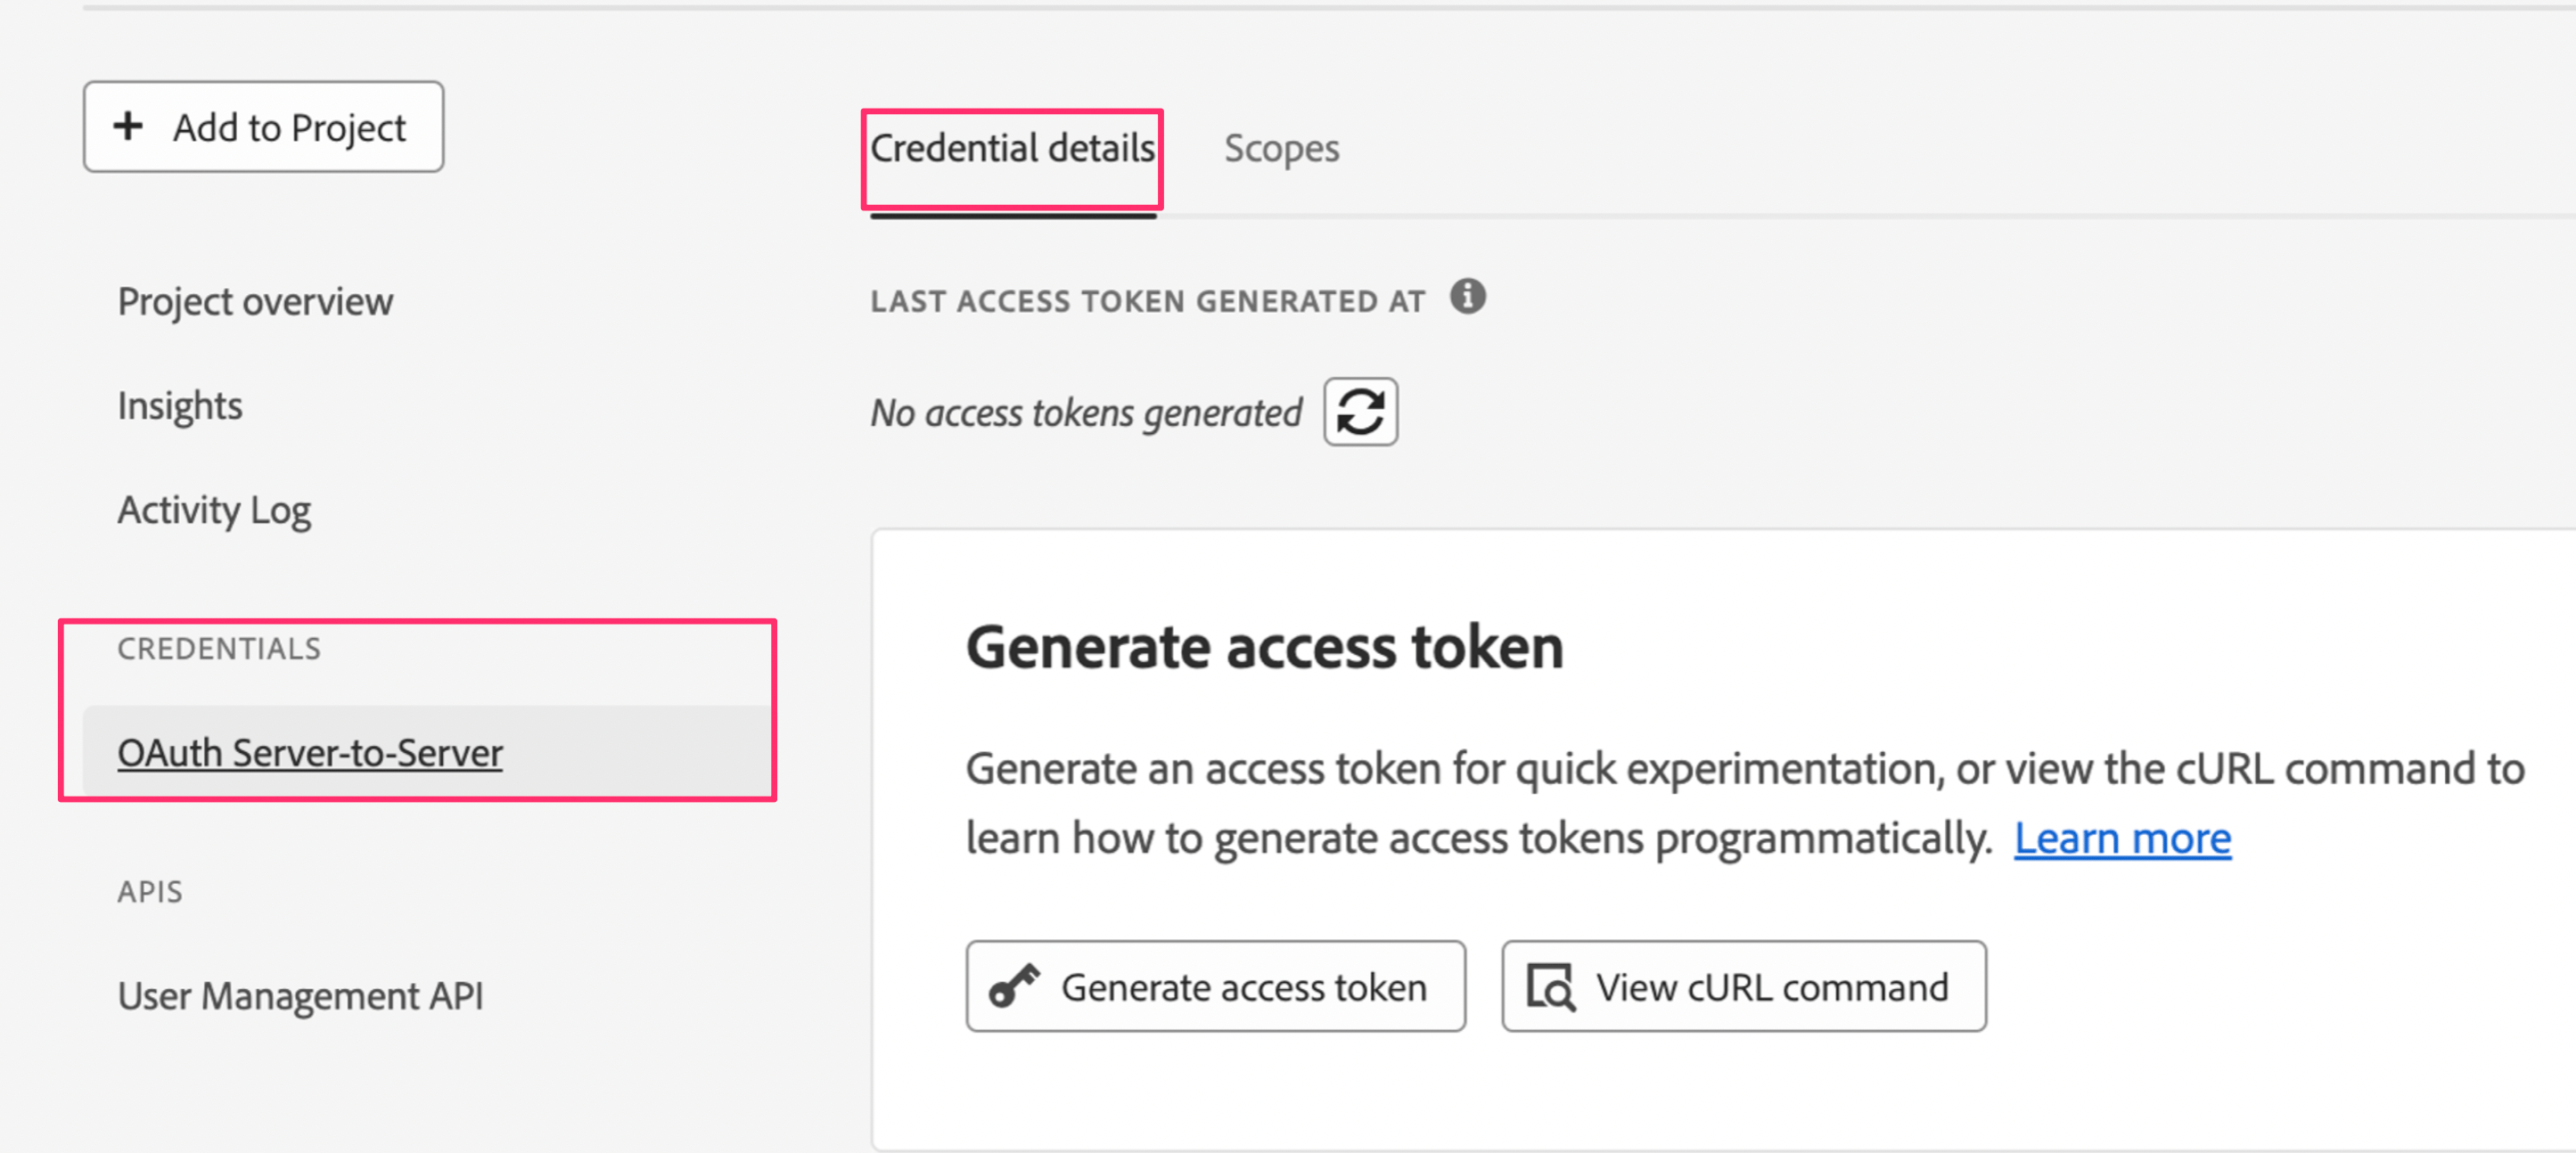
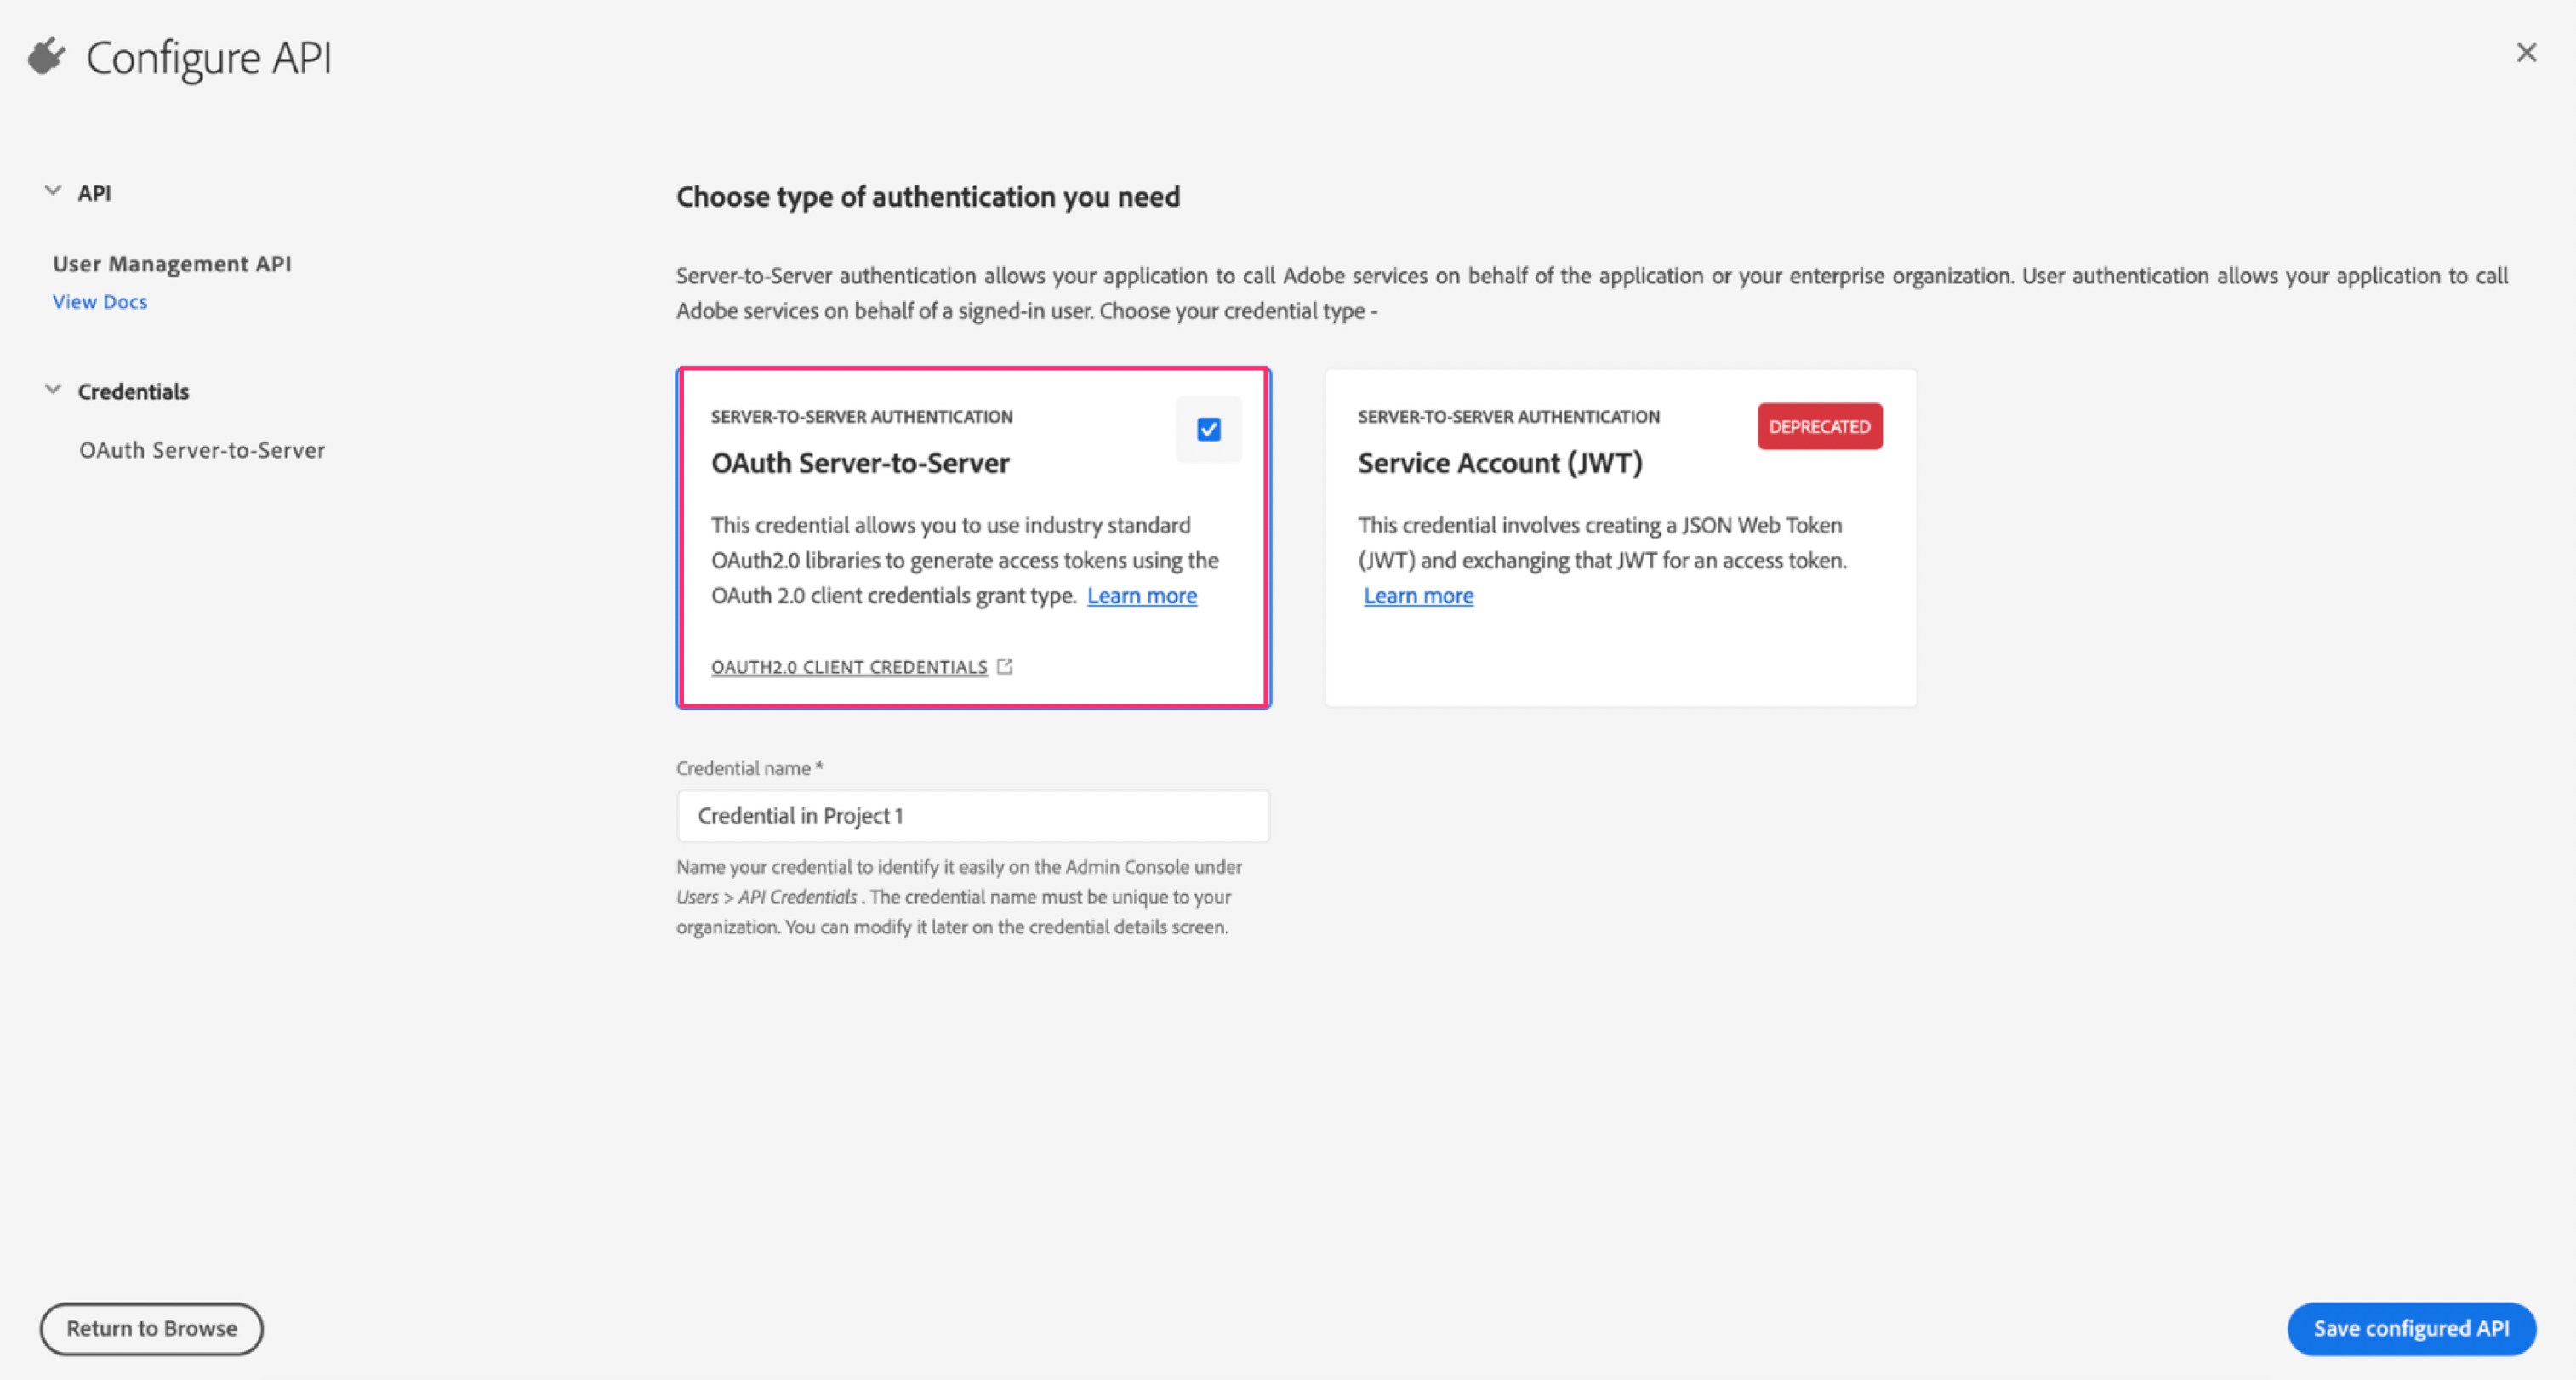 4. 左のメニューで `CREDENTIALS> OAuth Server-to-Server > Credential details` を選択します。
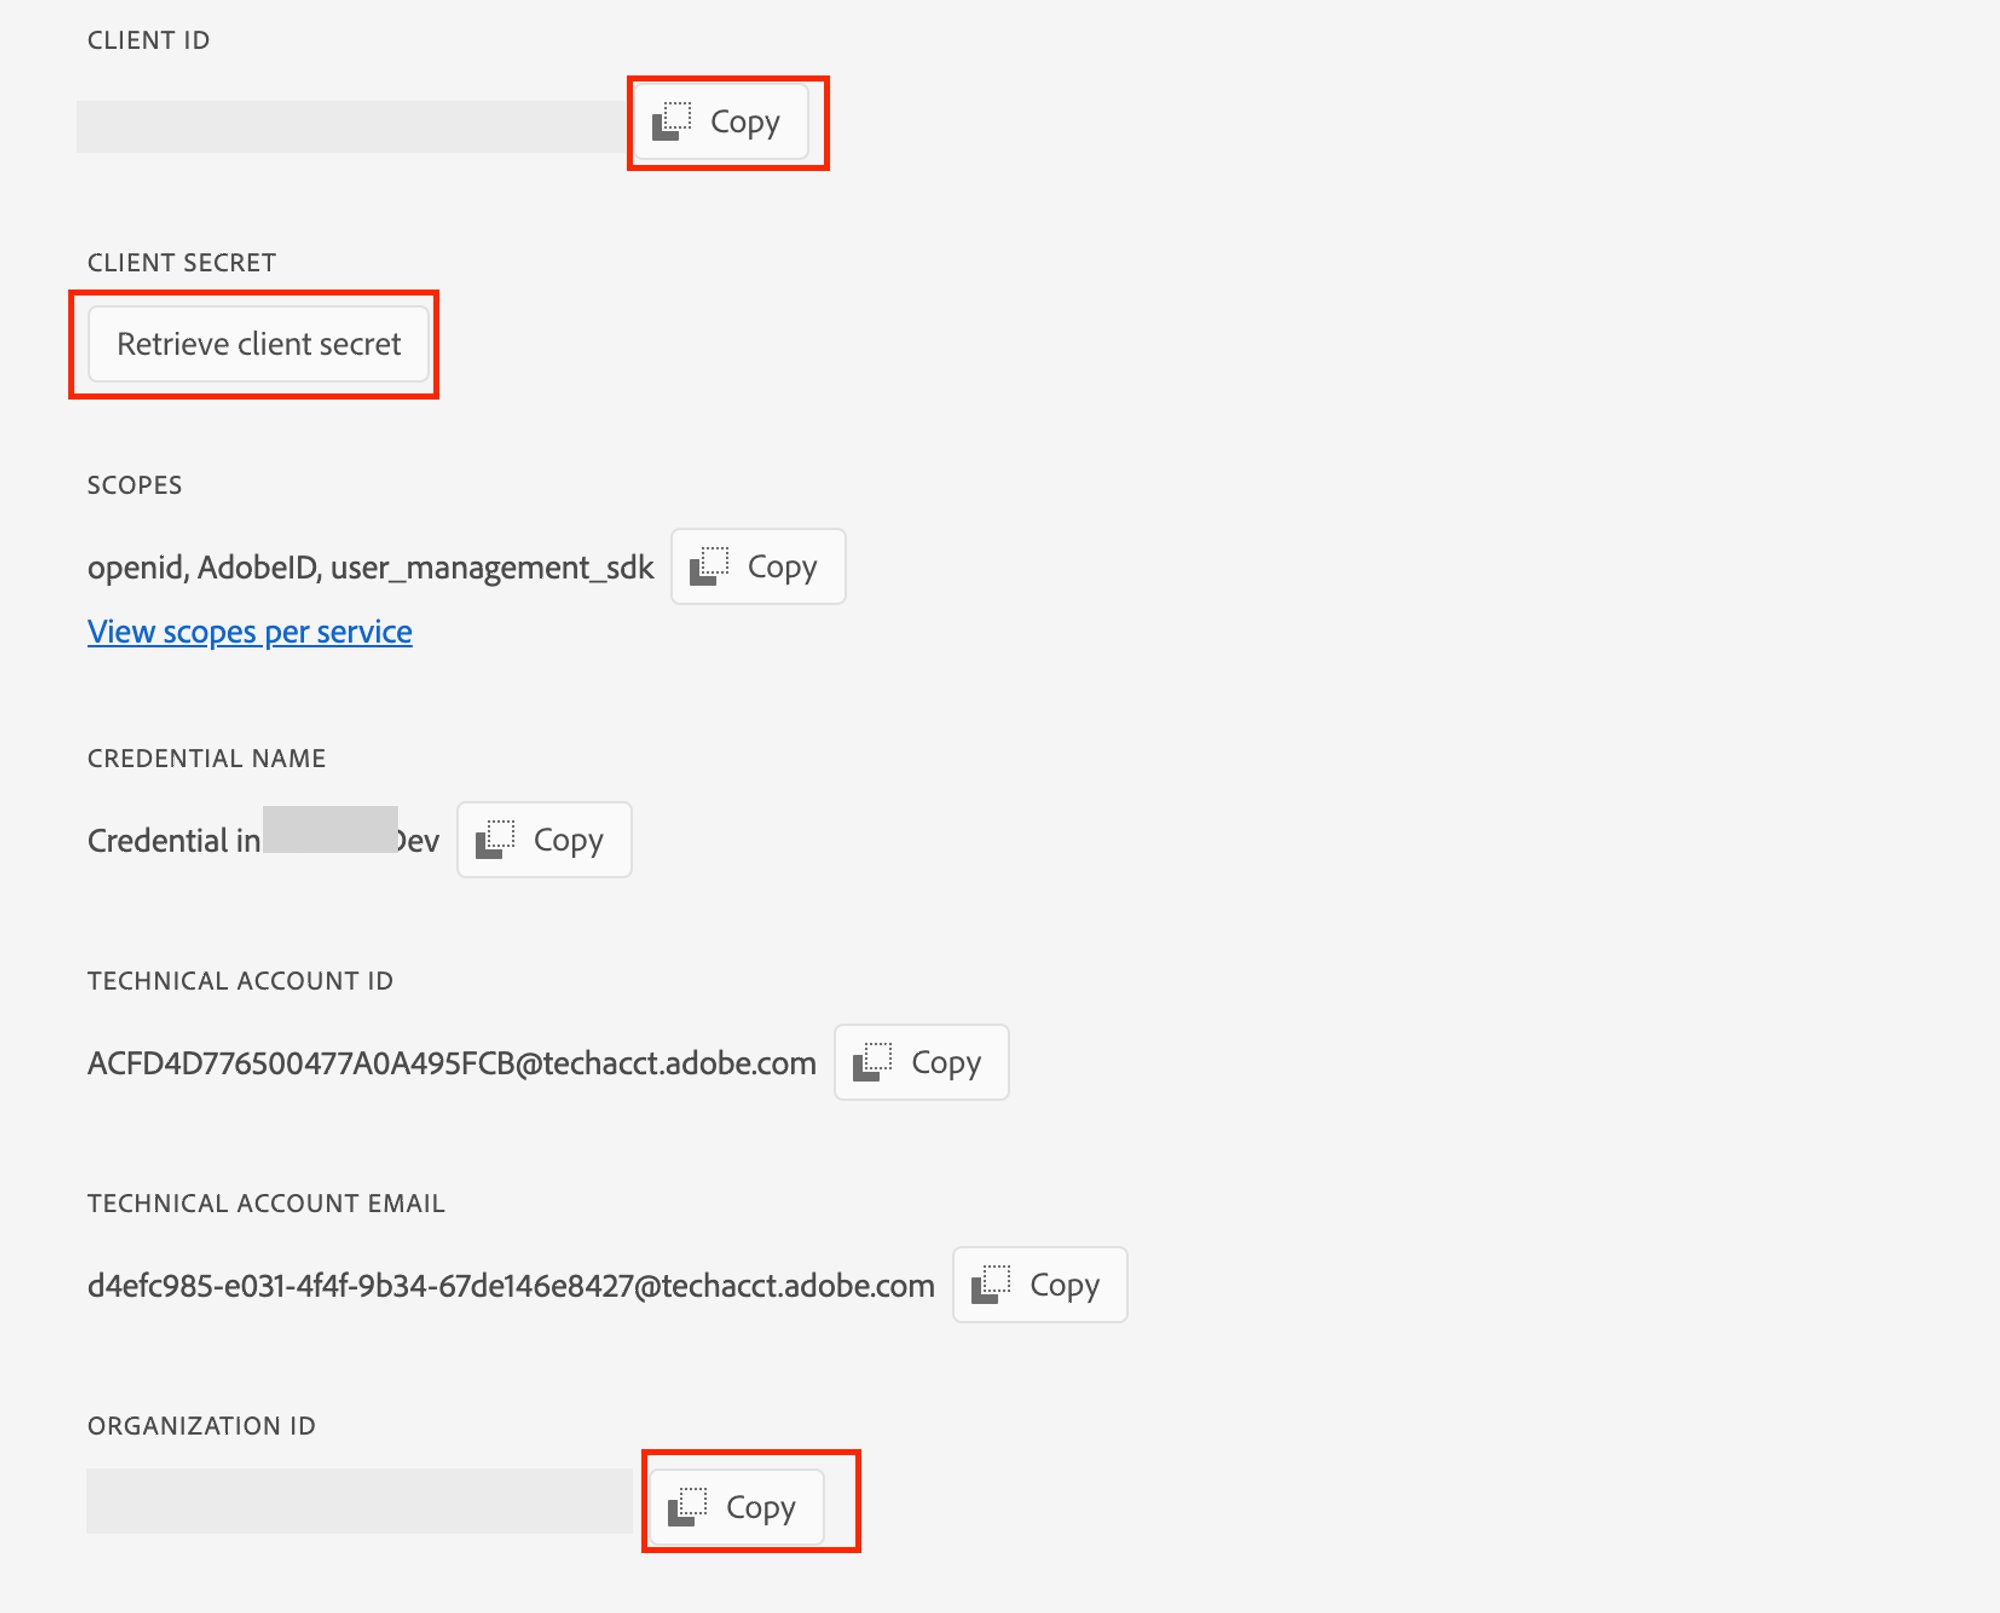
 5. 以下の項目を**コピー**しておきます。これらが**APIキー**となります。
* **Client ID**
* **Client secret**
* **Organization ID**
5. 以下の項目を**コピー**しておきます。これらが**APIキー**となります。
* **Client ID**
* **Client secret**
* **Organization ID**
 ## インテグレーションのセットアップ
1. マネーフォワード Adminaのインテグレーション画面にて、**Adobe**で検索しクリックします。
## インテグレーションのセットアップ
1. マネーフォワード Adminaのインテグレーション画面にて、**Adobe**で検索しクリックします。
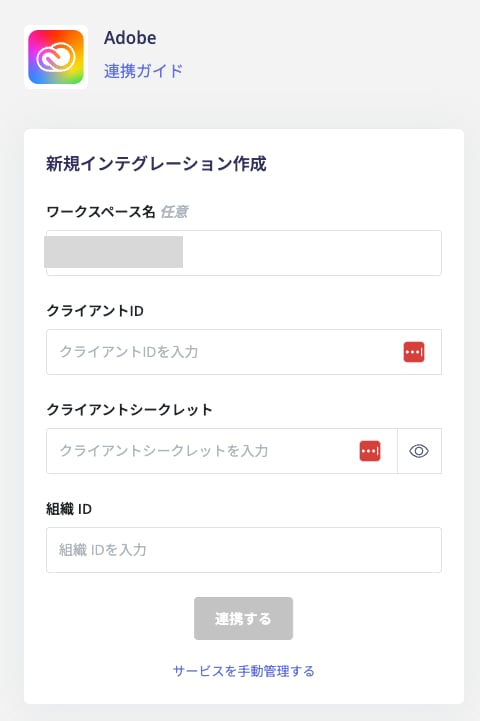
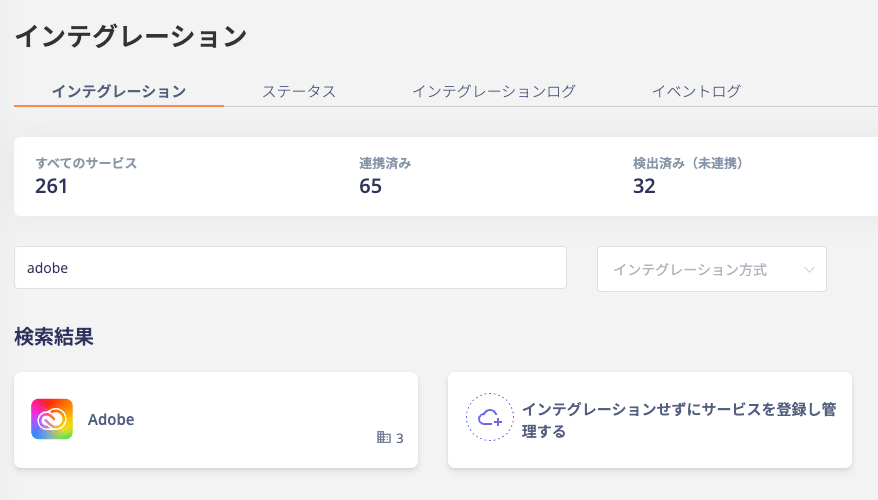 2. 事前準備で取得した内容を入力し、**連携する**をクリックします。
* ワークスペース名:任意の名前(会社名など)
* クライアントID:Client ID
* クライアントシークレット:Client secret
* 組織ID:Organization ID
2. 事前準備で取得した内容を入力し、**連携する**をクリックします。
* ワークスペース名:任意の名前(会社名など)
* クライアントID:Client ID
* クライアントシークレット:Client secret
* 組織ID:Organization ID
 Adobe との連携に成功すると、アカウント一覧に登録済みのユーザー情報が表示されます。
正常に完了しない場合は、インテグレーション画面のステータスタブから**編集**し、再度連携をお試しください。
解決しない場合はチャットにてお問い合わせください。
Adobe の連携概要については[連携ページ](http://admina.moneyforward.com/jp/integrations/adobe-creative-cloud)をご覧ください。
Adobe との連携に成功すると、アカウント一覧に登録済みのユーザー情報が表示されます。
正常に完了しない場合は、インテグレーション画面のステータスタブから**編集**し、再度連携をお試しください。
解決しない場合はチャットにてお問い合わせください。
Adobe の連携概要については[連携ページ](http://admina.moneyforward.com/jp/integrations/adobe-creative-cloud)をご覧ください。