> ## Documentation Index
> Fetch the complete documentation index at: https://support.i.moneyforward.com/llms.txt
> Use this file to discover all available pages before exploring further.
# Shopify
> Shopify との連携方法です。マネーフォワードAdminaからShopify への、管理者のログインから、連携方法まで一連の手順を解説します。
連携には、Shopify Plus プランが必要です。アクセスキー取得の際に、Shopify Plus サポートに連絡し、アプリの `read_users` [アクセススコープ](https://shopify.dev/docs/api/usage/access-scopes)をリクエストします。
## 事前準備
### Shopifyへのログイン方法
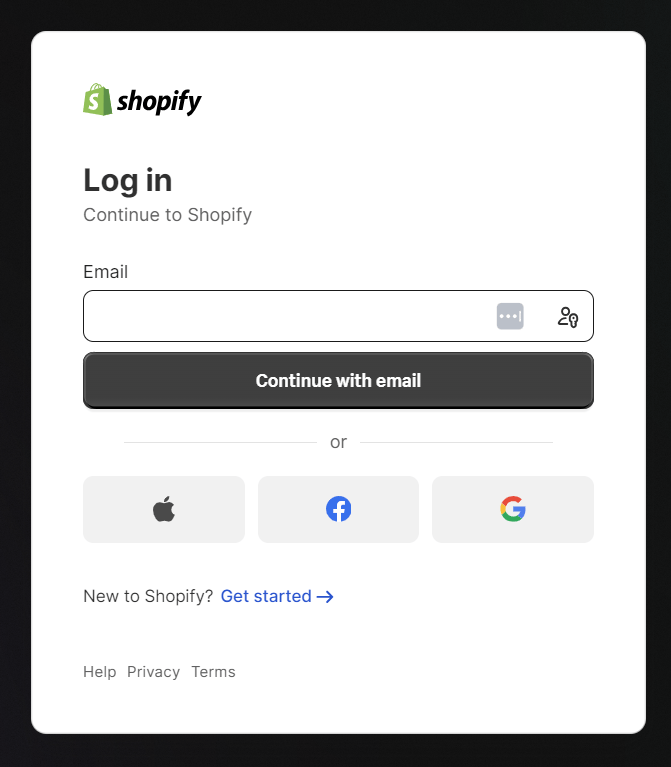
[Shopifyログインページ](https://accounts.shopify.com/lookup?rid=a677e1a0-1862-487e-b4d3-78c297a6baa9)にて、メールアドレス・パスワードを入力しログインします。
 ### ワークスペースキーの取得方法
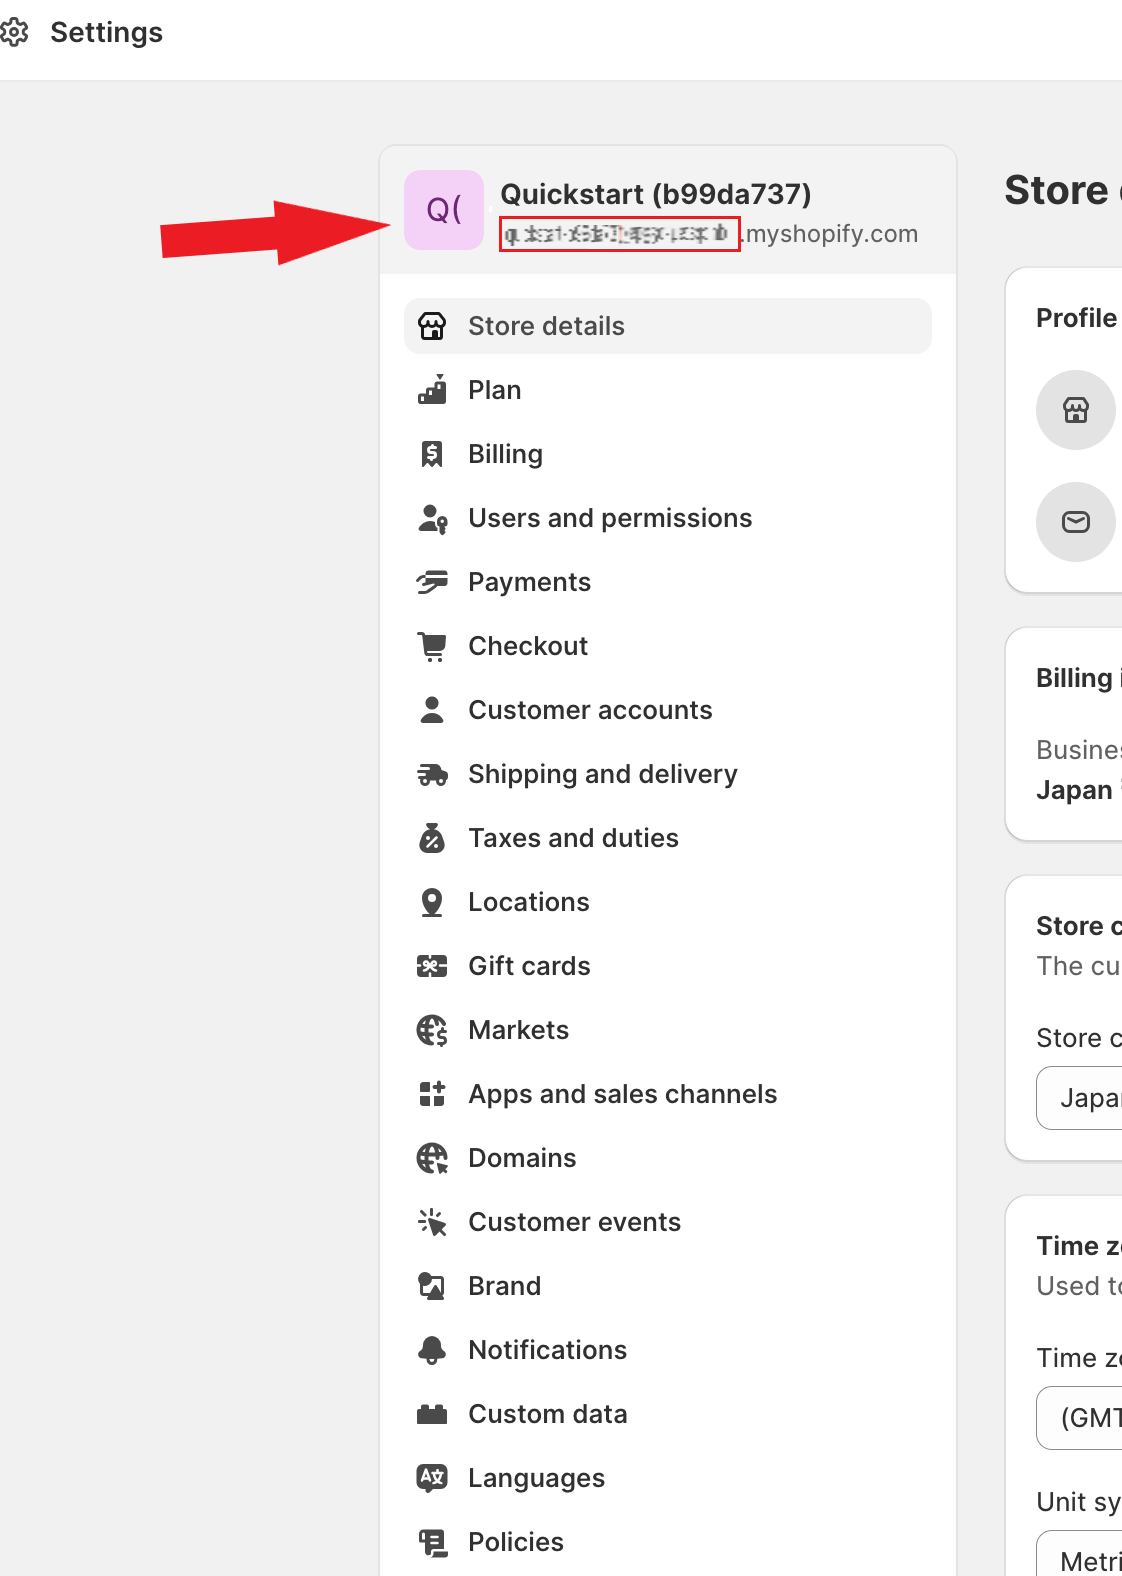
Shopify ログイン後、**Settings**に移動するとサイドメニューの一番上にストア名あります。
ストア名の下に**ストアドメイン**があるので、それが**ワークスペースキー**となります。
**`{workspace key}`**.myshopify.com
### ワークスペースキーの取得方法
Shopify ログイン後、**Settings**に移動するとサイドメニューの一番上にストア名あります。
ストア名の下に**ストアドメイン**があるので、それが**ワークスペースキー**となります。
**`{workspace key}`**.myshopify.com
 ### アクセスキーの取得方法
アプリの `read_users` [アクセススコープ](https://shopify.dev/docs/api/usage/access-scopes)をリクエストするには、Shopify Plus サポートに連絡いただく必要があります。
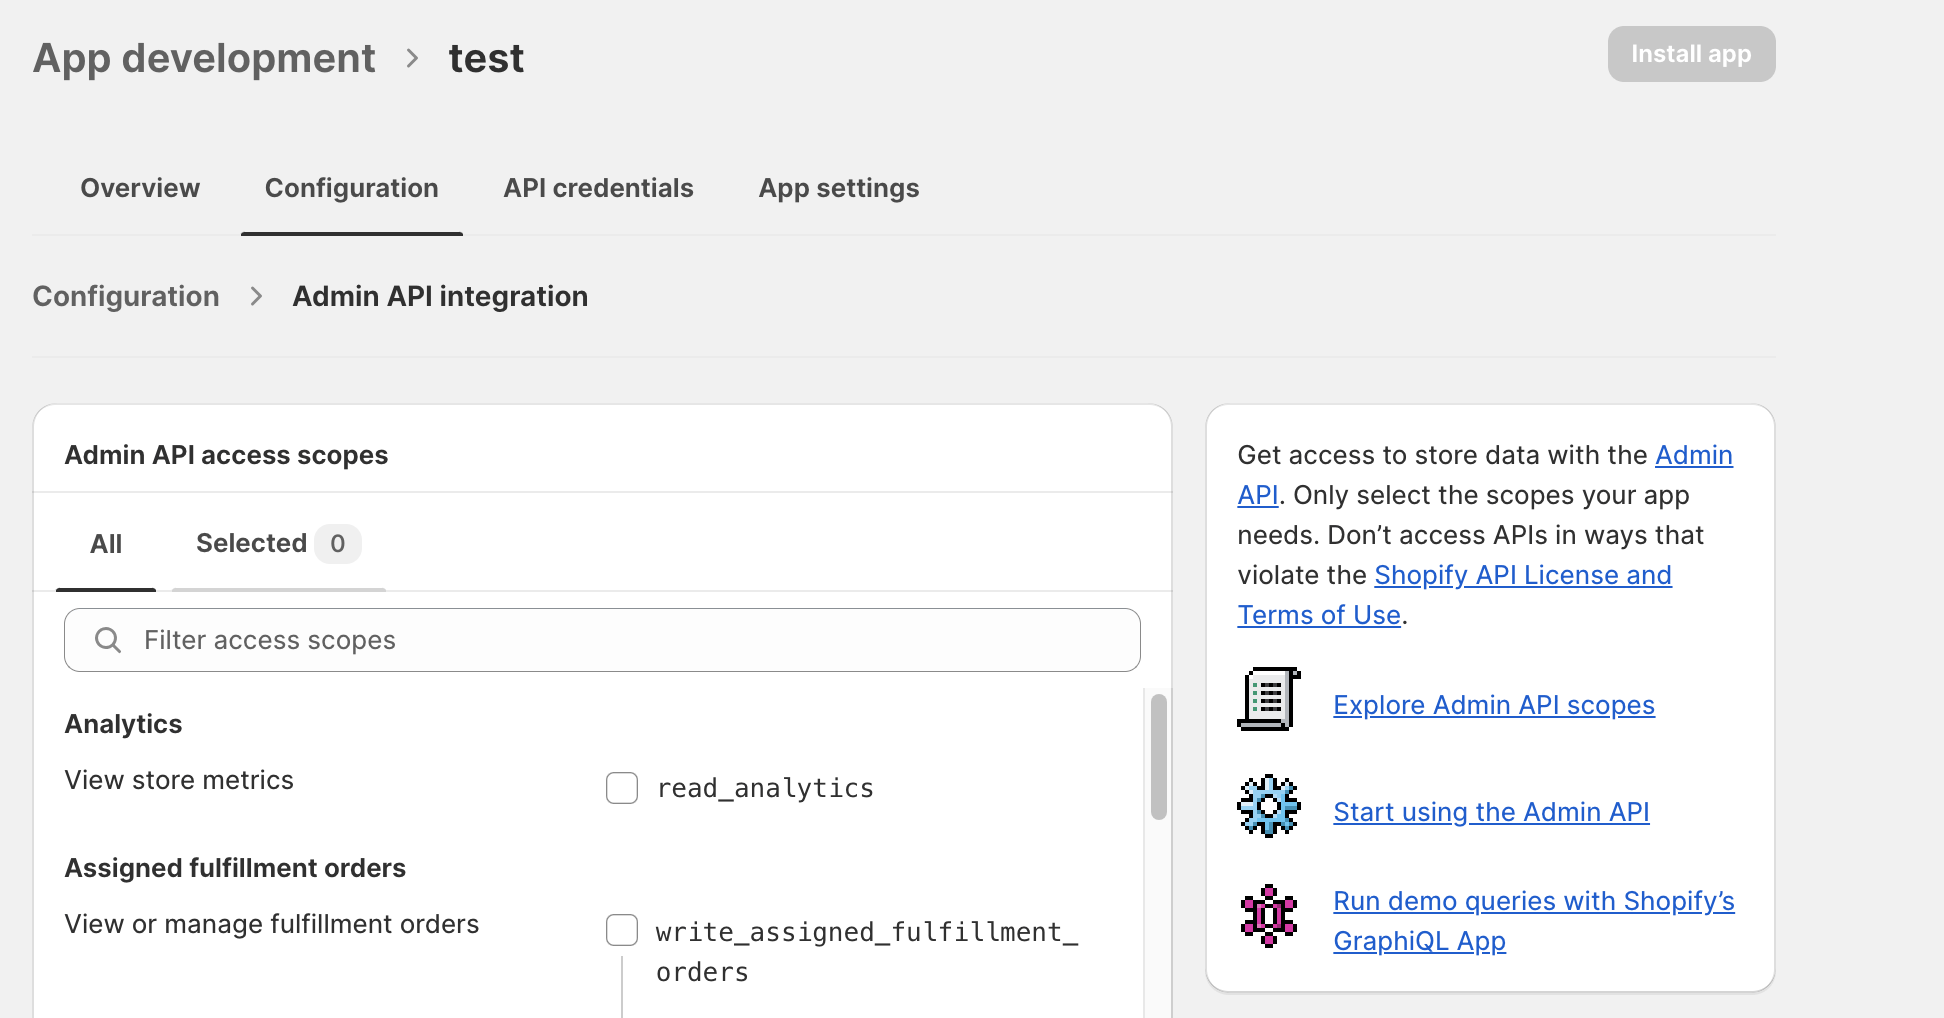
**Apps and sales channels >Develop apps > Create an app > Configure Admin API scopes**と進み、設定していきます。
scopeは、**`read_users`** を選択しSaveします。
### アクセスキーの取得方法
アプリの `read_users` [アクセススコープ](https://shopify.dev/docs/api/usage/access-scopes)をリクエストするには、Shopify Plus サポートに連絡いただく必要があります。
**Apps and sales channels >Develop apps > Create an app > Configure Admin API scopes**と進み、設定していきます。
scopeは、**`read_users`** を選択しSaveします。
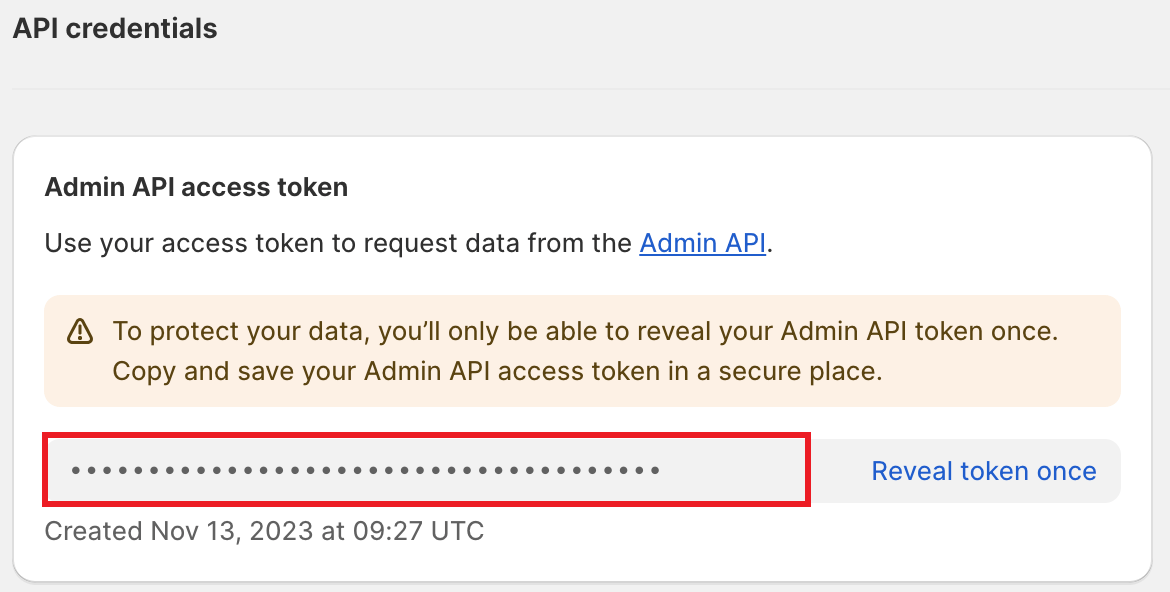
 API credentials に **Admin API access token** が表示されます。これが**アクセスキー**となるので、コピー・保存します。
※Admin API access token は一度限りの表示ですので、ご注意ください。
API credentials に **Admin API access token** が表示されます。これが**アクセスキー**となるので、コピー・保存します。
※Admin API access token は一度限りの表示ですので、ご注意ください。
 ## インテグレーションのセットアップ
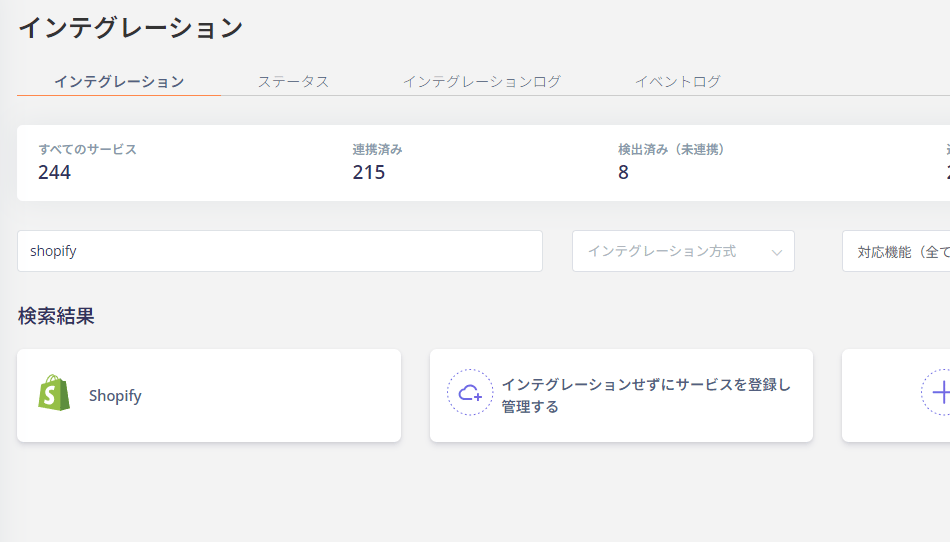
インテグレーション画面にて、**Shopify**で検索します。
## インテグレーションのセットアップ
インテグレーション画面にて、**Shopify**で検索します。
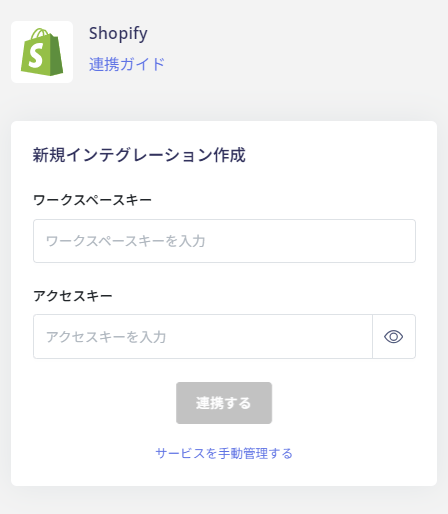
 前の手順で取得した**ワークスペースキーとアクセスキー**を入力し、**連携する**をクリックします。
 Shopify との連携に成功すると、アカウント一覧に登録済みのユーザー情報が表示されます。
正常に完了しない場合は、インテグレーション画面のステータスタブから**編集**し、再度連携をお試しください。
解決しない場合はチャットにてお問い合わせください。
Shopifyの連携概要については[連携ページ](https://admina.moneyforward.com/jp/integrations/shopify)をご覧ください。
Shopify との連携に成功すると、アカウント一覧に登録済みのユーザー情報が表示されます。
正常に完了しない場合は、インテグレーション画面のステータスタブから**編集**し、再度連携をお試しください。
解決しない場合はチャットにてお問い合わせください。
Shopifyの連携概要については[連携ページ](https://admina.moneyforward.com/jp/integrations/shopify)をご覧ください。