> ## Documentation Index
> Fetch the complete documentation index at: https://support.i.moneyforward.com/llms.txt
> Use this file to discover all available pages before exploring further.

# Cisco Umbrella

> Cisco Umbrella連携手順：管理者ログイン、APIキー取得、Admina設定で簡単インテグレーション

## サポートする機能

<Badge color="blue">アカウント削除</Badge> <Badge color="blue">アカウント作成</Badge>

## 事前準備

### ログイン方法

[Cisco Umbrellaログインページ](https://dashboard.umbrella.com)にて、**メールアドレス**・**パスワード**を入力し、**ログイン**します。
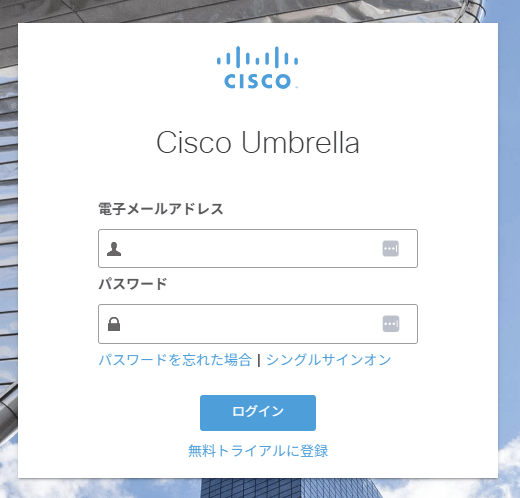
<img src="https://mintcdn.com/moneyforwardi/zAdY-Q72dgQYDZIE/images/integrations/yyed0q40i0/2025-05-30-152400.png?fit=max&auto=format&n=zAdY-Q72dgQYDZIE&q=85&s=a58ef0831399875666fa31ff018cd4b9" alt="Cisco Umbrellaログイン画面" width="520" height="498" data-path="images/integrations/yyed0q40i0/2025-05-30-152400.png" />

### クライアントID・クライアントシークレットの確認方法

**Cisco Umbrella**にログイン後、左側メニューの **Admin** > **API Keys** をクリックします。
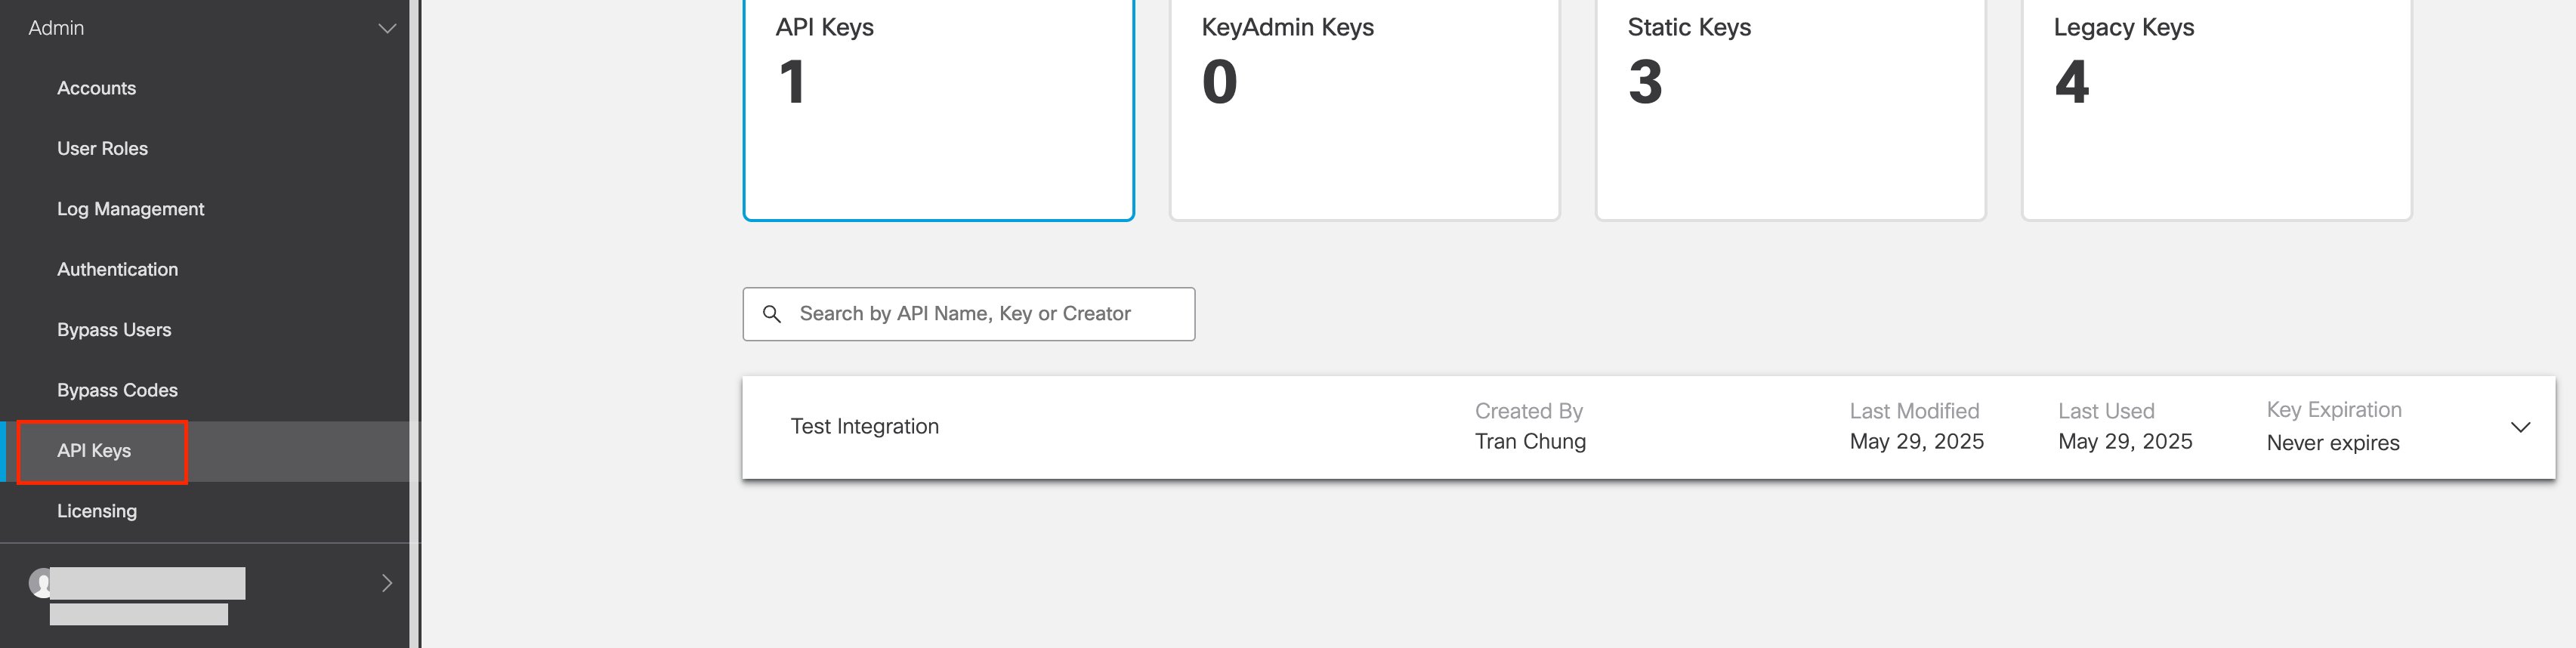
<img src="https://mintcdn.com/moneyforwardi/zAdY-Q72dgQYDZIE/images/integrations/yyed0q40i0/screenshot-2025-05-29-at-11-40-21.png?fit=max&auto=format&n=zAdY-Q72dgQYDZIE&q=85&s=d6d8687122b45a118e27664e7aa6c634" alt="Admin > API Keysメニュー" data-og-width="3410" width="3410" data-og-height="858" height="858" data-path="images/integrations/yyed0q40i0/screenshot-2025-05-29-at-11-40-21.png" data-optimize="true" data-opv="3" srcset="https://mintcdn.com/moneyforwardi/zAdY-Q72dgQYDZIE/images/integrations/yyed0q40i0/screenshot-2025-05-29-at-11-40-21.png?w=280&fit=max&auto=format&n=zAdY-Q72dgQYDZIE&q=85&s=a851addad02ad14f32bb95122491a19a 280w, https://mintcdn.com/moneyforwardi/zAdY-Q72dgQYDZIE/images/integrations/yyed0q40i0/screenshot-2025-05-29-at-11-40-21.png?w=560&fit=max&auto=format&n=zAdY-Q72dgQYDZIE&q=85&s=1d2747b219f399195f3ad189ecef8d7a 560w, https://mintcdn.com/moneyforwardi/zAdY-Q72dgQYDZIE/images/integrations/yyed0q40i0/screenshot-2025-05-29-at-11-40-21.png?w=840&fit=max&auto=format&n=zAdY-Q72dgQYDZIE&q=85&s=8b44510d98de42e17ba269920644309a 840w, https://mintcdn.com/moneyforwardi/zAdY-Q72dgQYDZIE/images/integrations/yyed0q40i0/screenshot-2025-05-29-at-11-40-21.png?w=1100&fit=max&auto=format&n=zAdY-Q72dgQYDZIE&q=85&s=55a696d13783ec5d824ad098ef5589ad 1100w, https://mintcdn.com/moneyforwardi/zAdY-Q72dgQYDZIE/images/integrations/yyed0q40i0/screenshot-2025-05-29-at-11-40-21.png?w=1650&fit=max&auto=format&n=zAdY-Q72dgQYDZIE&q=85&s=b1456236938d29fe6cebbdfb0f9216c1 1650w, https://mintcdn.com/moneyforwardi/zAdY-Q72dgQYDZIE/images/integrations/yyed0q40i0/screenshot-2025-05-29-at-11-40-21.png?w=2500&fit=max&auto=format&n=zAdY-Q72dgQYDZIE&q=85&s=a38a4171aaddad36b029dfdb4659ed57 2500w" />

右上の\*\*プラス（＋）\*\*をクリックし、新しいAPIキーを追加します。

<img src="https://mintcdn.com/moneyforwardi/zAdY-Q72dgQYDZIE/images/integrations/yyed0q40i0/screenshot-2025-05-29-at-11-41-13.png?fit=max&auto=format&n=zAdY-Q72dgQYDZIE&q=85&s=1e16b3be51aa17c5c341c35d62cf22bd" alt="API Key追加ボタン" width="3226" height="1006" data-path="images/integrations/yyed0q40i0/screenshot-2025-05-29-at-11-41-13.png" />

その後、「**API Key Name**」の欄に、新しいAPIキーの名前を入力します。

「**Key Scope**」の一覧から、**Admin** > **Users ・ Roles** にチェックを入れます。

<img src="https://mintcdn.com/moneyforwardi/zAdY-Q72dgQYDZIE/images/integrations/yyed0q40i0/screenshot-2025-05-29-at-11-41-53.png?fit=max&auto=format&n=zAdY-Q72dgQYDZIE&q=85&s=82b2d0d5ccf832d35df5ee3f8eccf829" alt="Key Scopeの設定" width="1162" height="1090" data-path="images/integrations/yyed0q40i0/screenshot-2025-05-29-at-11-41-53.png" />

デフォルトでは、**Admin/Users** は「**Read-Only**」に設定されています。

これを「**Read / Write**」に変更してください。
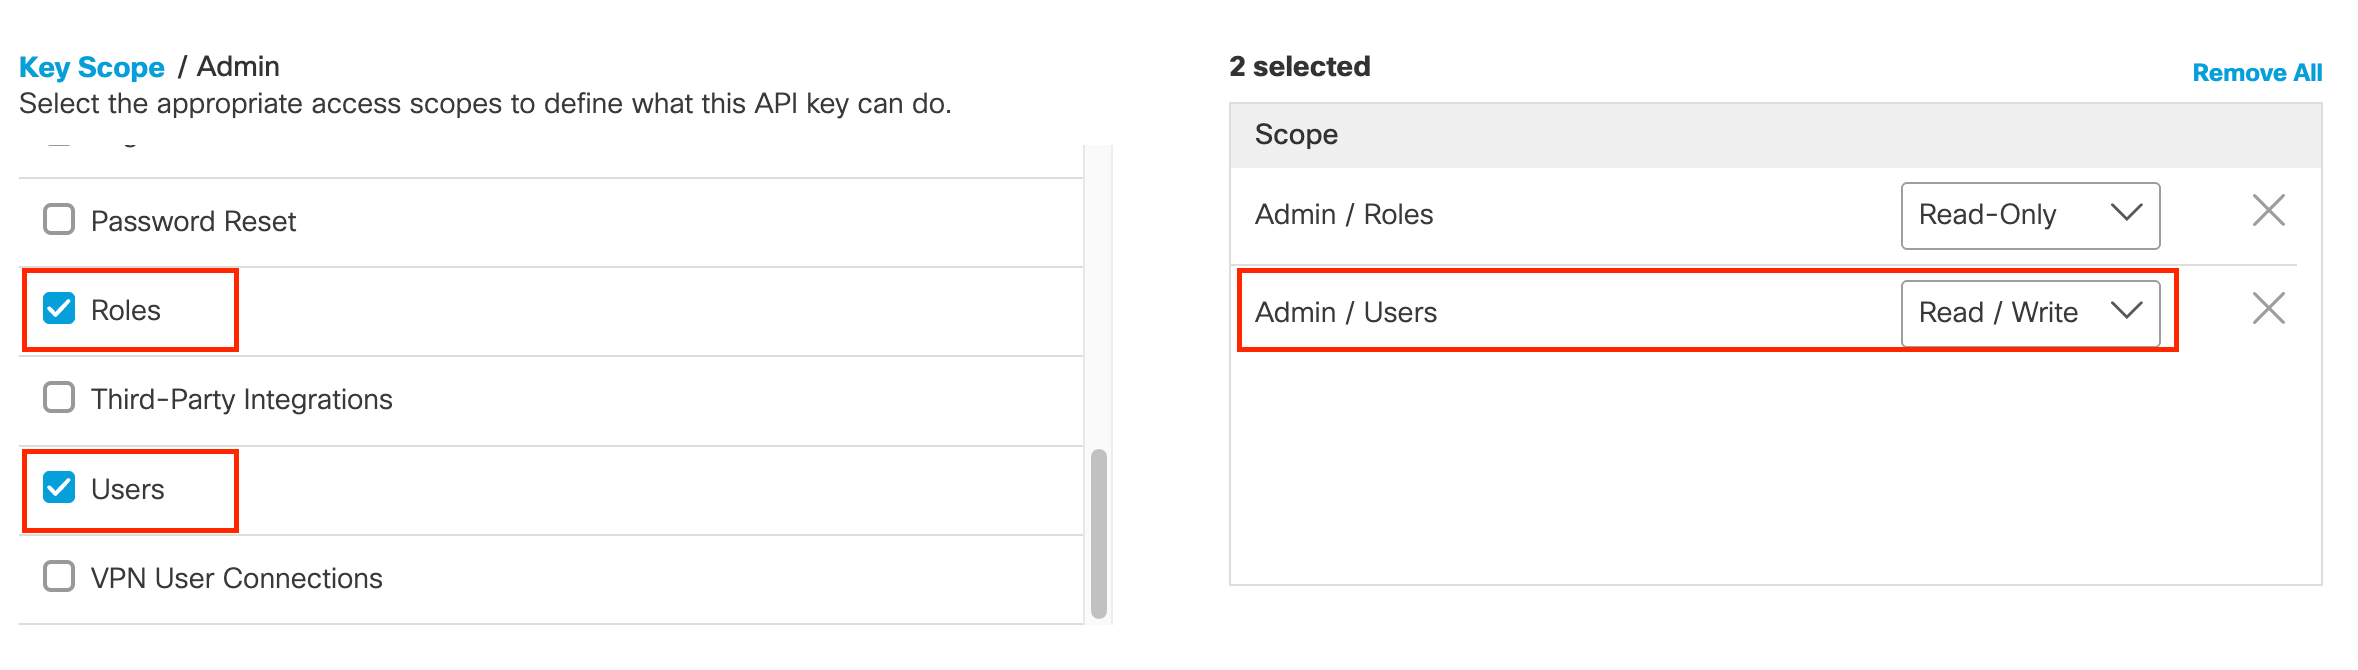
<img src="https://mintcdn.com/moneyforwardi/zAdY-Q72dgQYDZIE/images/integrations/yyed0q40i0/screenshot-2025-05-29-at-11-42-55.png?fit=max&auto=format&n=zAdY-Q72dgQYDZIE&q=85&s=dfbd93e425570abc0a7b469fc4d75aca" alt="Read/Writeに変更" width="2358" height="670" data-path="images/integrations/yyed0q40i0/screenshot-2025-05-29-at-11-42-55.png" />

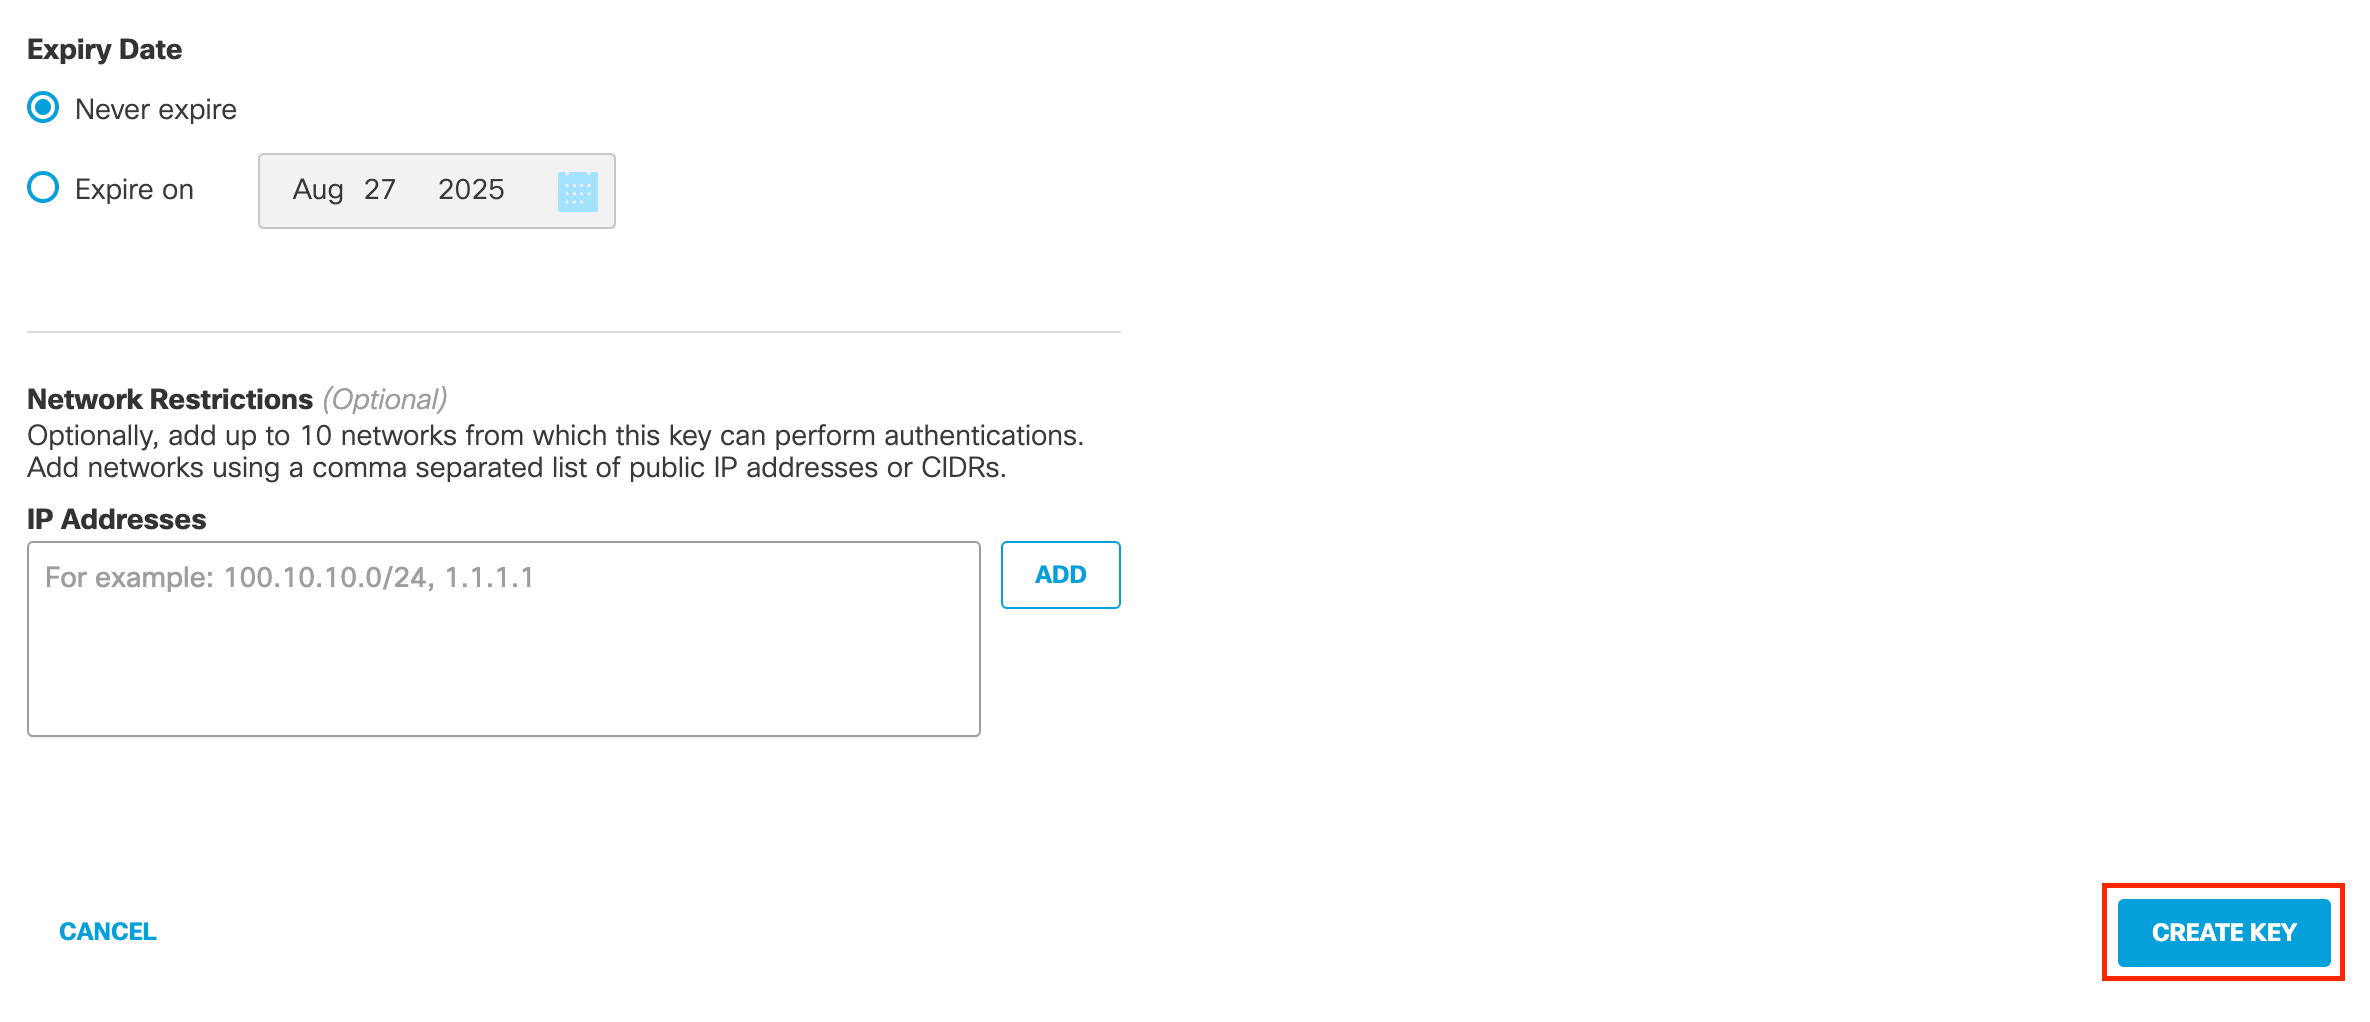
ページ下部にある 「**CREATE KEY**」 をクリックします。

<img src="https://mintcdn.com/moneyforwardi/zAdY-Q72dgQYDZIE/images/integrations/yyed0q40i0/screenshot-2025-05-29-at-11-43-38.png?fit=max&auto=format&n=zAdY-Q72dgQYDZIE&q=85&s=0884756d7afbfbe4a66f05f57934b25f" alt="CREATE KEYボタン" width="2370" height="1022" data-path="images/integrations/yyed0q40i0/screenshot-2025-05-29-at-11-43-38.png" />

表示された **API Key** と **Key Secret** をコピーしてください。

**API Key** が **クライアントID**、**Key Secret** が **クライアントシークレット**です。

<Info>
  キーシークレットは一度しか表示されません。ページを離れると再表示できなくなるため、必ず保管しておいてください。

</Info>

<img src="https://mintcdn.com/moneyforwardi/zAdY-Q72dgQYDZIE/images/integrations/yyed0q40i0/screenshot-2025-05-29-at-11-44-04.png?fit=max&auto=format&n=zAdY-Q72dgQYDZIE&q=85&s=45b4d6f628fa65cc59fe711ed908d9b8" alt="API KeyとKey Secretの表示" width="1892" height="362" data-path="images/integrations/yyed0q40i0/screenshot-2025-05-29-at-11-44-04.png" />

## インテグレーションのセットアップ

インテグレーション画面にて、**Cisco Umbrella**で検索します。

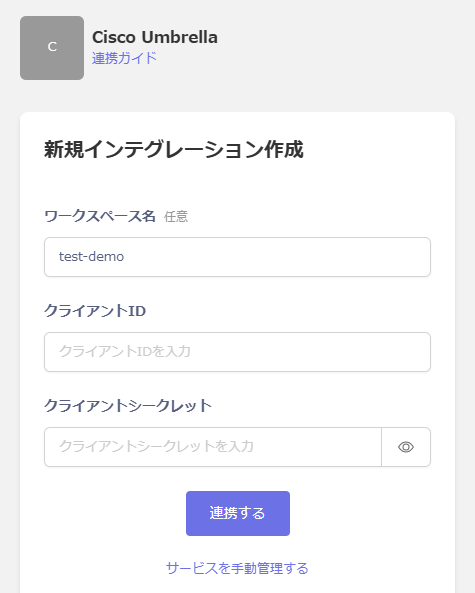
任意のワークスペース名、前の手順で取得した**クライアントID**(API Key)**・クライアントシークレット**(Key Secret)を入力し、**連携する**をクリックします。
<img src="https://mintcdn.com/moneyforwardi/zAdY-Q72dgQYDZIE/images/integrations/yyed0q40i0/2025-06-02-165331.png?fit=max&auto=format&n=zAdY-Q72dgQYDZIE&q=85&s=7f194cfa7fb9ea2a2c63eb0bc5fd3e78" alt="Admina連携画面" width="475" height="593" data-path="images/integrations/yyed0q40i0/2025-06-02-165331.png" />

連携に成功すると、アカウント一覧に登録済みのユーザー情報が表示されます。

正常に完了しない場合は、インテグレーション画面のステータスタブから**編集**し、再度連携をお試しください。

解決しない場合はチャットにてお問い合わせください。