

Disabling and deleting have different effects. Disabling temporarily suspends access; re-enabling the ID restores it. Deleting removes the Entra ID-linked account itself — it can be restored within 30 days of deletion, but not after that. Choose the option that matches your goal.
Open the action screen
You can open the disable/delete screen for an Entra ID-linked account using either of the following two methods. a. Go to Services > select Microsoft Entra ID (Azure AD) > open the “Accounts” tab.Click the ⋮ menu next to the target account, then click Delete.

In the “Actions” column for the target service, click Delete.

Disable an Entra ID-linked account
This revokes access, but data in Microsoft Entra ID (Azure AD) and in the app itself is retained. Re-enabling the ID restores access. App assignments to Microsoft Entra ID (Azure AD)-managed services are kept as they are.-
Select Disable this ID. To also unassign all apps at the same time, check Also unassign all apps.
This checkbox unassigns only direct assignments — group assignments and conditional access assignments are not affected.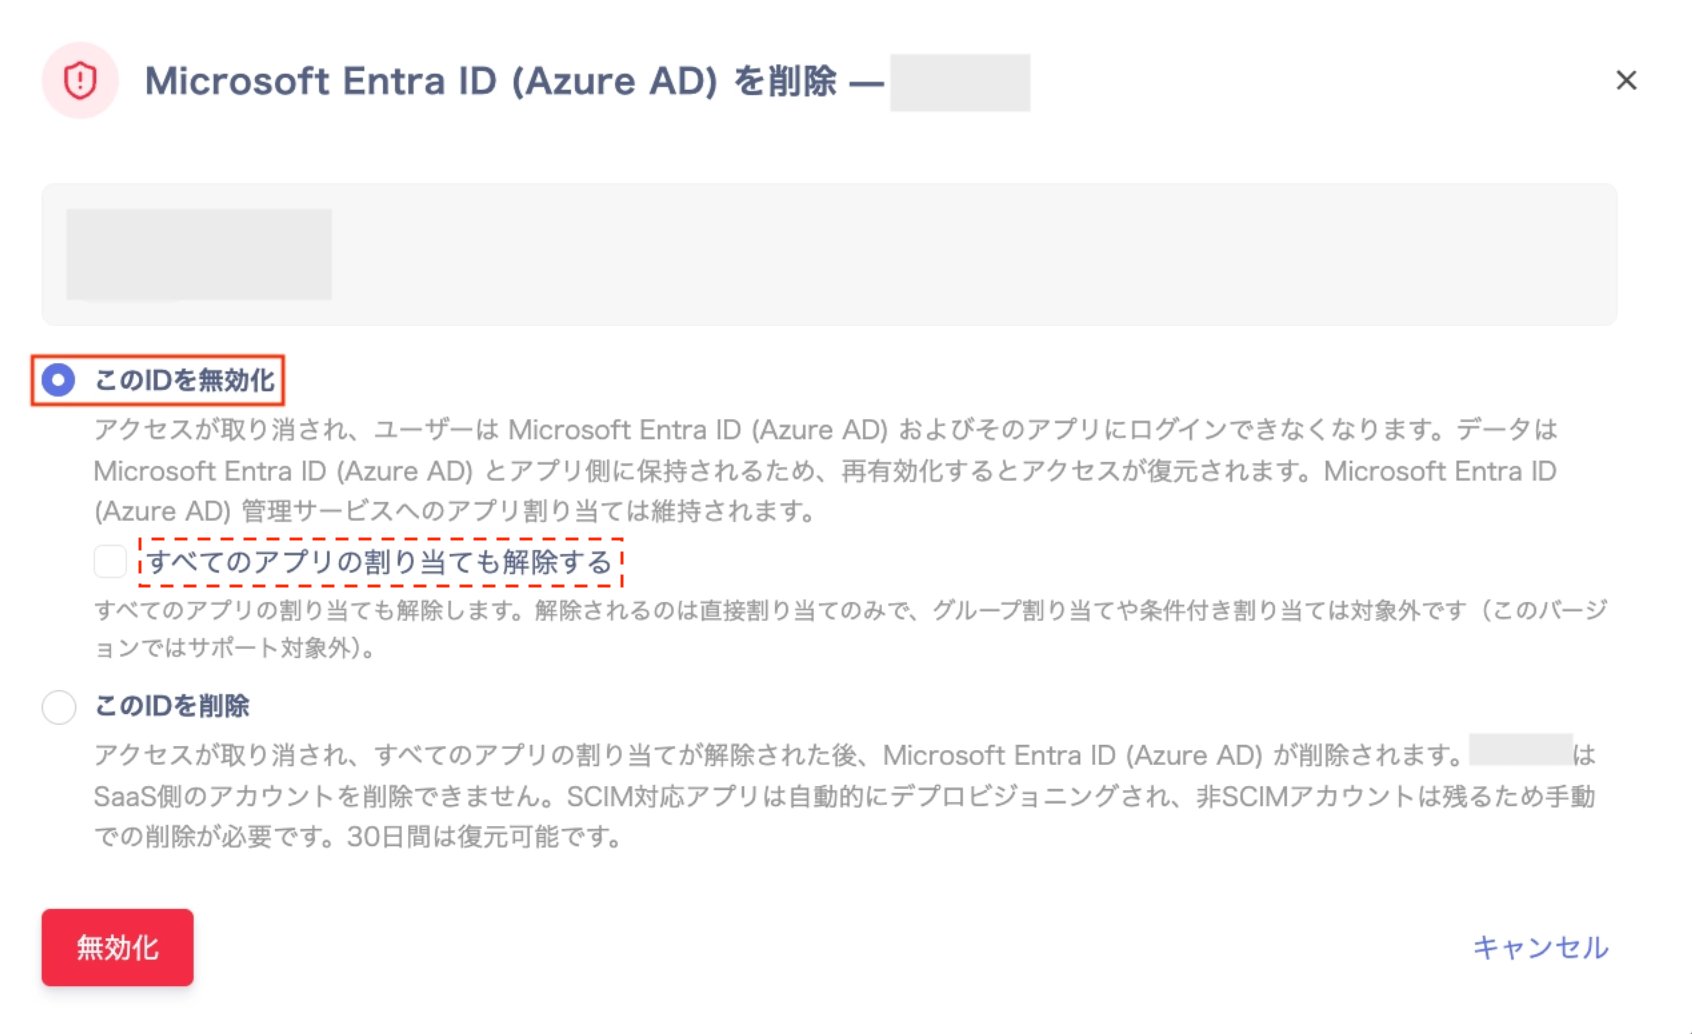
-
Click Disable. If you checked “Also unassign all apps,” enter the target user’s email address as a safety check. Then click Disable.

-
Once “Microsoft Entra ID (Azure AD) disabled” appears, the operation is complete.
Login to Microsoft Entra ID (Azure AD) and its apps is blocked once processing finishes, which can take a few minutes.
Click Done to close the screen. A “Unassigned apps — needs review” entry is created for each app that was unassigned. For details, see Check Entra ID assignment status and errors.
Delete an Entra ID-linked account
Access is revoked, all app assignments are unassigned, and then Microsoft Entra ID (Azure AD) is deleted. Accounts on the SaaS side cannot be deleted directly. SCIM-supported apps are deprovisioned automatically; non-SCIM apps leave the account and need manual deletion. You can restore the ID within 30 days.-
Select Delete this ID. A list of apps whose assignments will be unassigned is shown — review it.
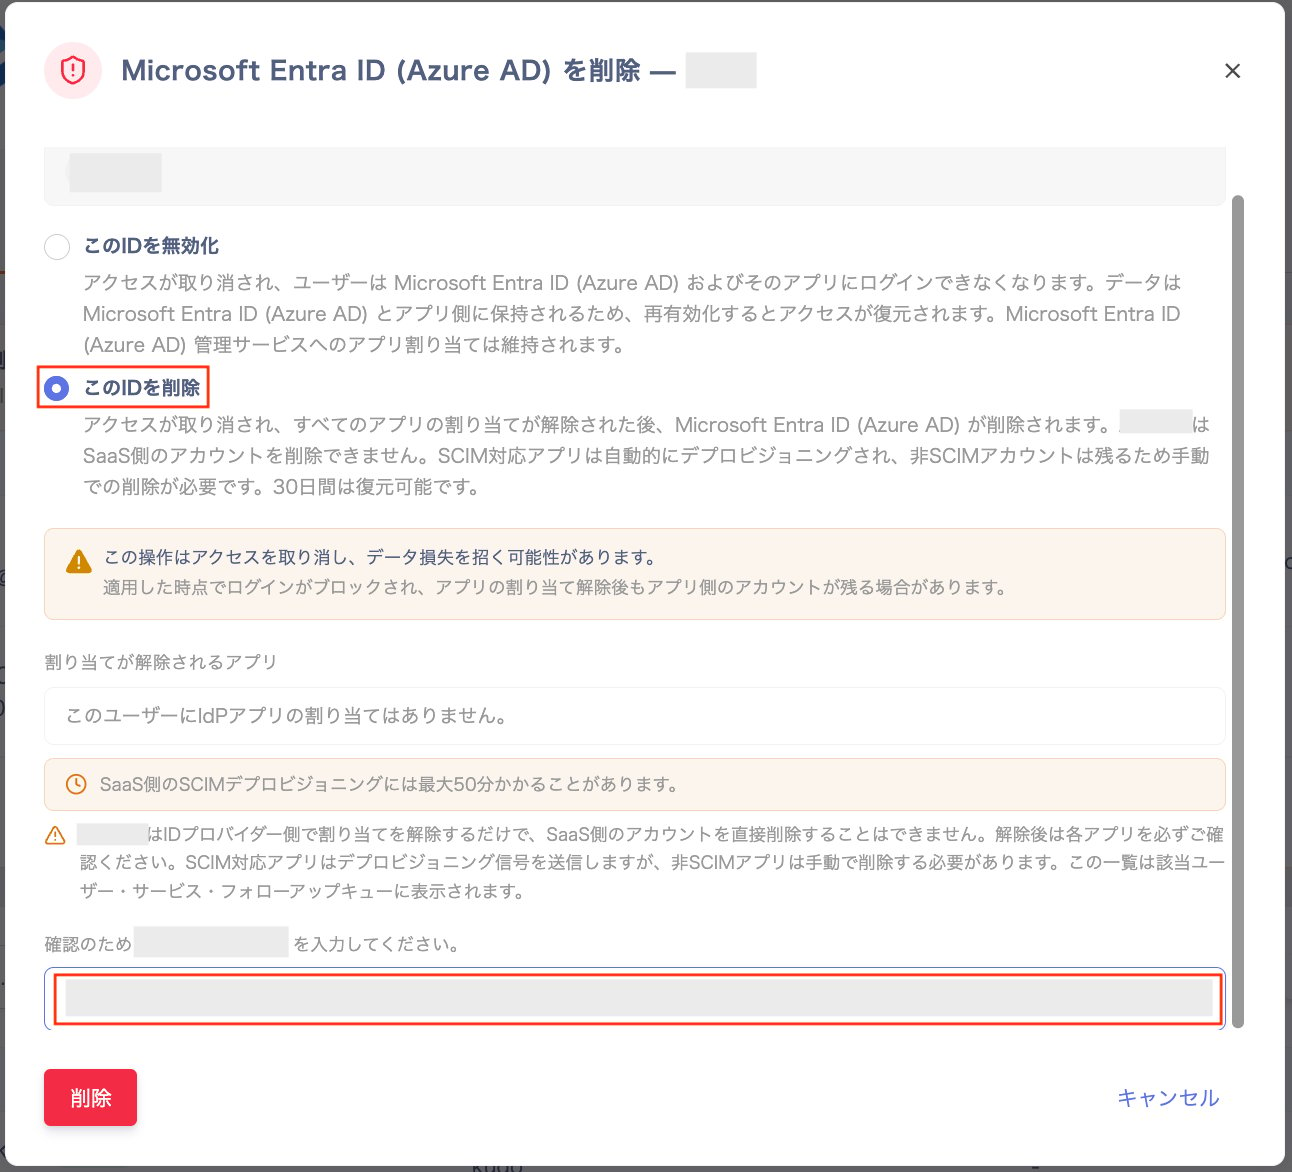
- As a safety confirmation, enter the target user’s email address in the confirmation field, then click Delete.
-
Once “Microsoft Entra ID (Azure AD) deleted” appears, the operation is complete. Click Done to close the screen.
You can restore it within 30 days, but restoring does not re-assign apps — you’ll need to provision them again. A “Unassigned apps — needs review” entry is created for each app that was unassigned. For details, see Check Entra ID assignment status and errors.