

Prerequisites
Apps and services must already be linked via the Identity Provider Integration (Entra ID).Currently, Microsoft Entra ID (Azure AD) is the only supported identity provider. Only users managed in Microsoft Entra ID (Azure AD) can be added to a workspace. This feature supports individual assignment by user and app only — group assignment and conditional access assignment are not supported.
Assign a user to an app
-
In the service list, click Assign app on the “Microsoft Entra ID (Azure AD)” row.

-
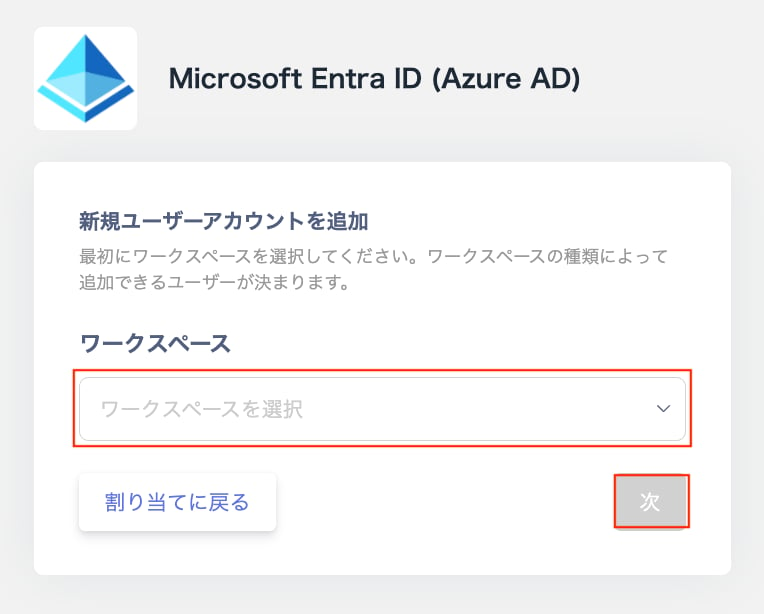
On the “Add new user account” screen, select a workspace and click Next.
-
Select the employee to add.
Existing user: Search by name or email.
New user: Select Register a new user in Microsoft Entra ID (Azure AD). Enter the display name, email address (UPN), and department (optional).
App role (optional): Set an app role if one is configured for the app.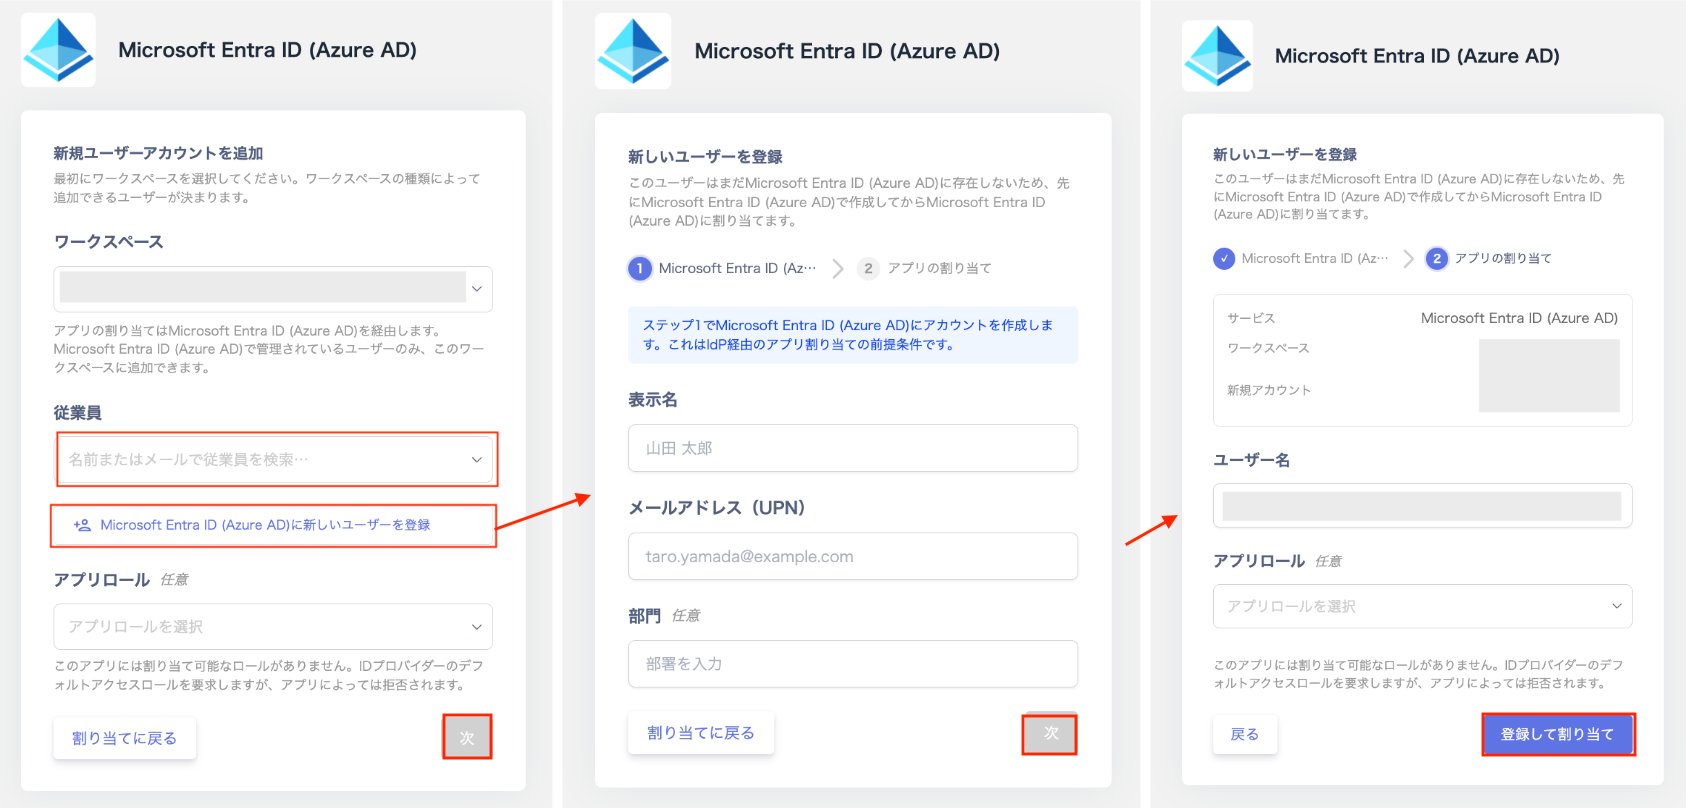
- Click Register and assign (or Next if you selected an existing user).
-
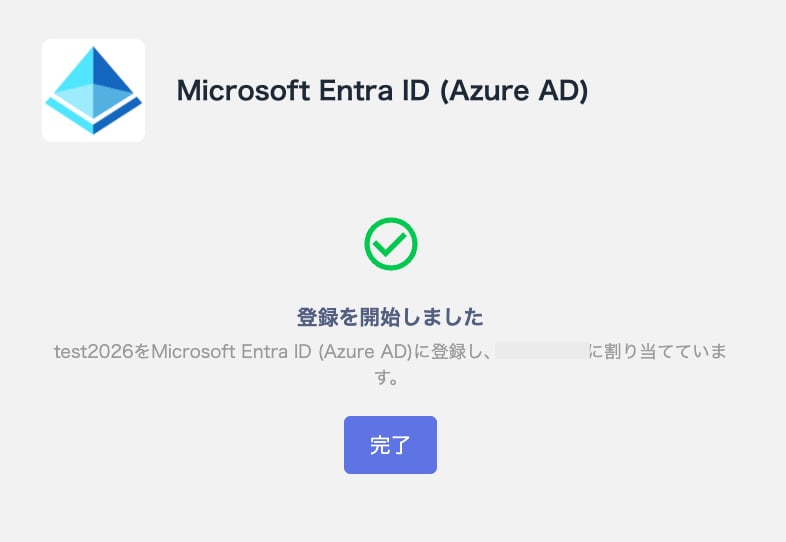
Once “Registration started” appears, the operation is complete. Click Done to close the screen.
How long assignment takes to reflect
Assigning a user does not take effect immediately. The expected time and required follow-up differ by app type.
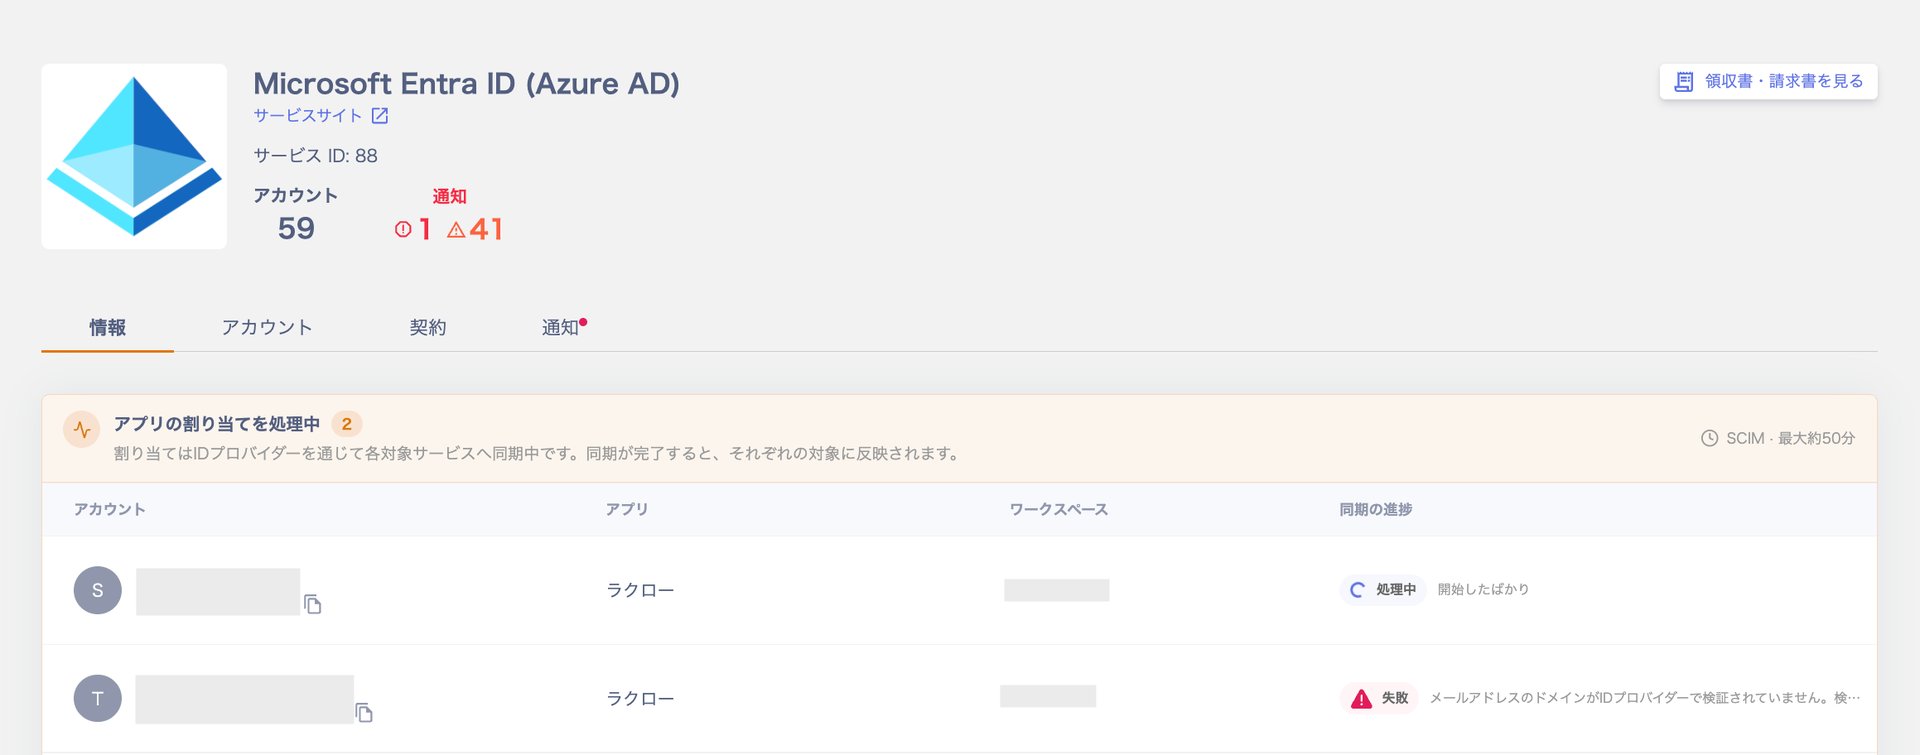
You can check the assignment sync status in real time on the “Info” tab of the service detail screen.
Unassign an app
This revokes only the IdP-side assignment, removing access to a specific SaaS app. The user’s identity provider account itself is not deleted.-
You can unassign an app using either of the following two methods.
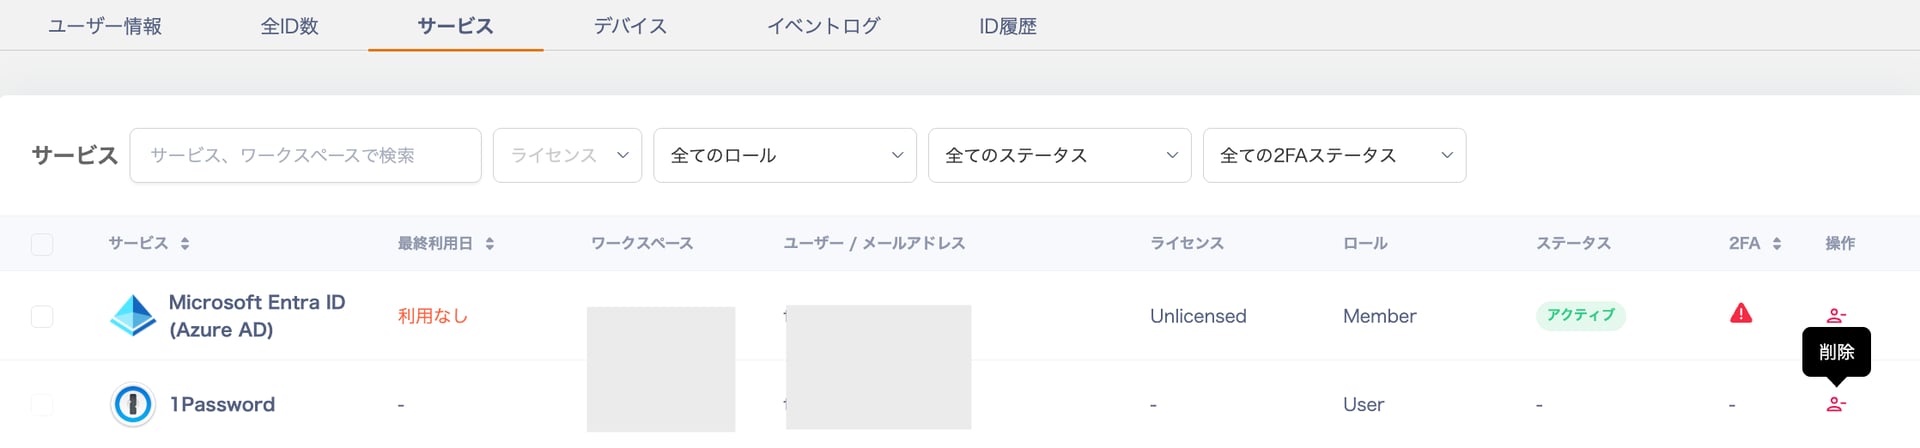
a. Go to Services > select the SaaS > open the “Accounts” tab. Click the ⋮ menu next to the target account, then click Delete.

-
On the “Unassign app” screen, confirm the target user and click Delete. It can take up to about 50 minutes for this to take effect.
 If the target user is also assigned to other apps through this identity provider, this action does not unassign those apps. Handle them individually if needed.
 -
Once “Account deletion complete” appears, click Close.
