

What is the ID provider function?
Once Microsoft EntraID (Azure AD) is integrated, “Identity Provider” appears under Integrations > Integrations. This feature lets you manage Azure AD apps (e.g., Office 365, Salesforce, Zoom) by linking them to supported services. Linking them means changes on the Azure AD side are automatically reflected. You can then see the usage status of each service in one place.
Comparison of connecting to each SaaS app individually versus syncing them all at once via Entra ID
Preparation before use
To use the identity provider feature, you must have already completed the integration with Microsoft EntraID (Azure AD).Integration method
After integrating with Microsoft EntraID (Azure AD), you can access either the integration screen or the service screen.If your Azure AD client secret expires, all integrations, including IDP integration, will stop. Please renew it as soon as possible before it expires.
How to integrate from the integration screen
From the integration screen, you can register apps registered in Azure AD via IDP integration.-
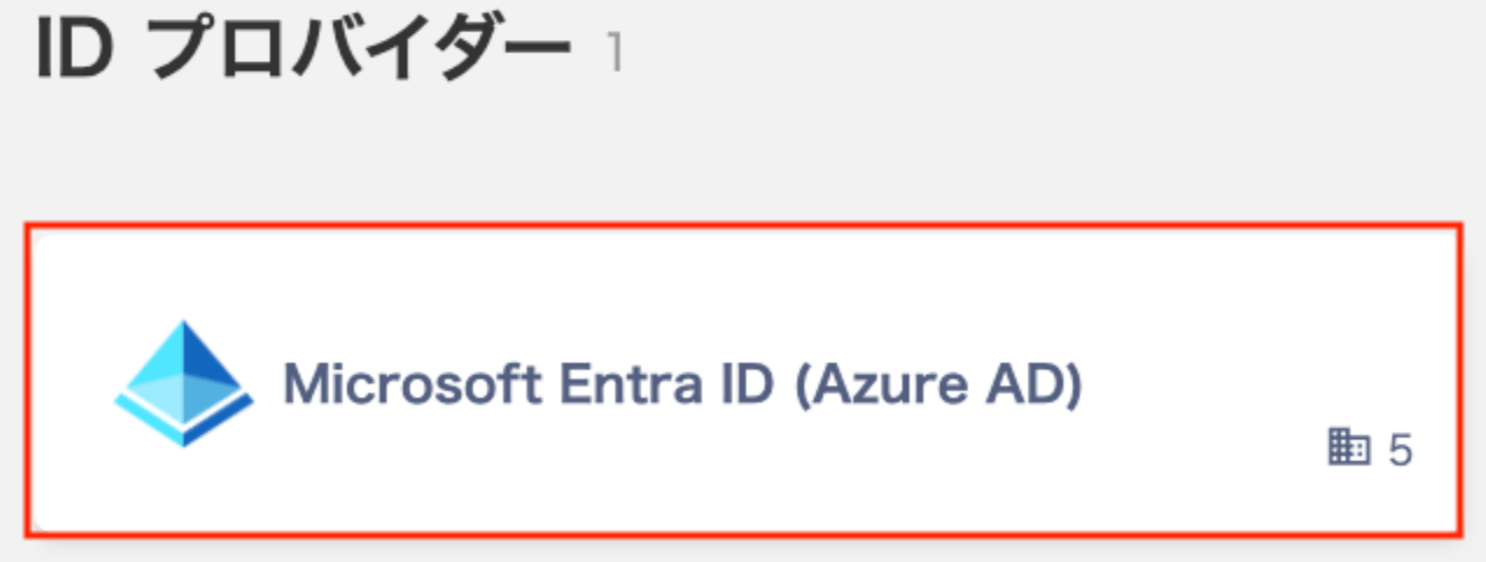
In Integrations, under “Identity Provider,” click Microsoft Entra ID (Azure AD).
-
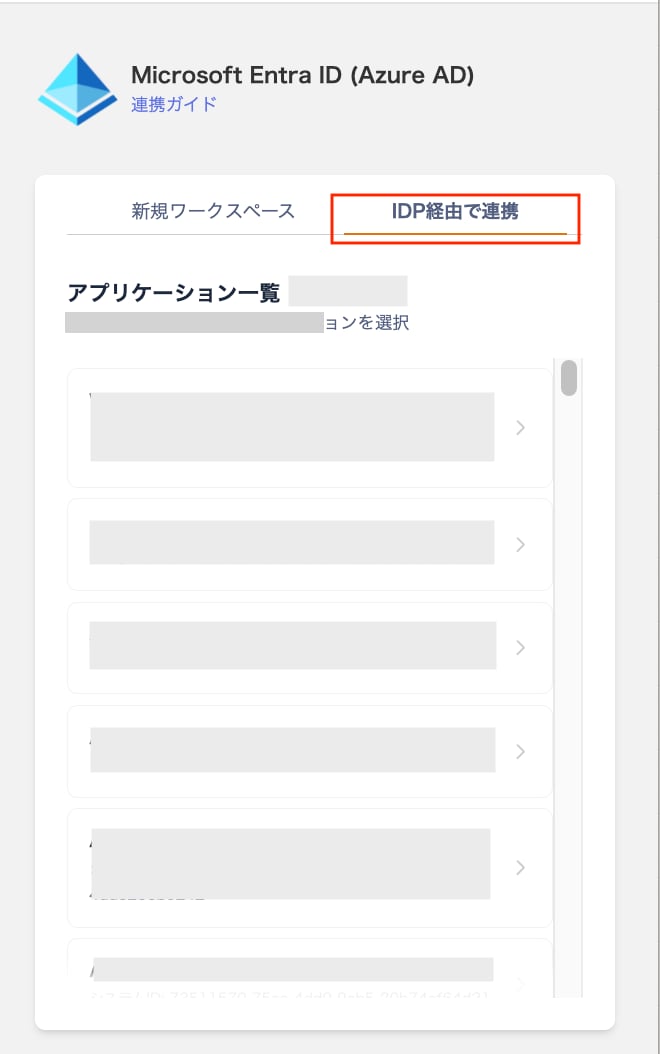
Select the “Integrate via IDP” tab and then select a workspace.
The workspaces where your application is registered will be displayed.
-
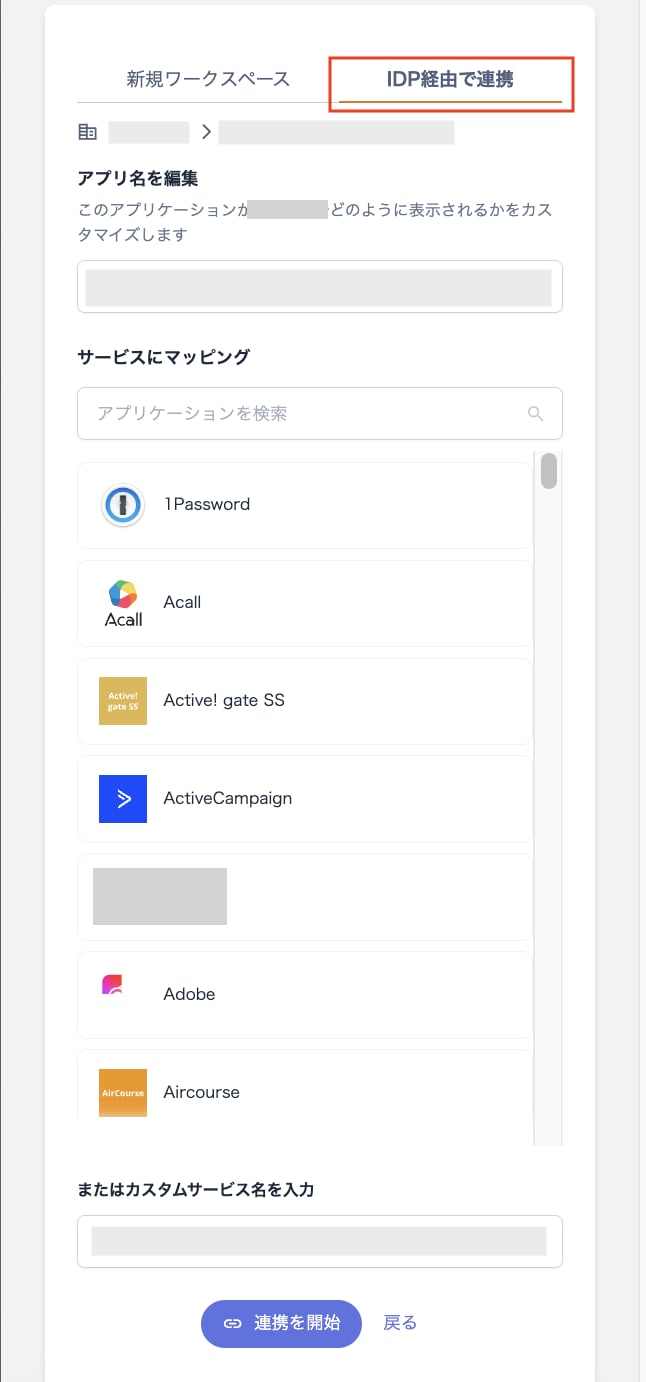
Select the application you want to integrate with.
The applications registered in Azure AD appear in the Application List. Click to select the one you want to integrate.
-
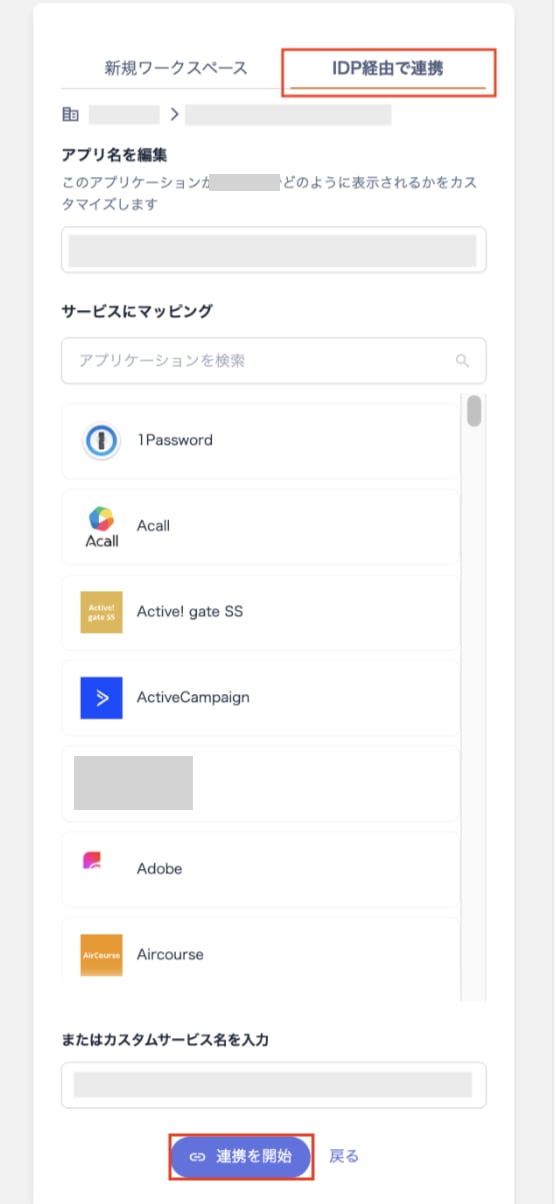
Select the service you want to map and click [Start Integration].
Once you select an app, a list of corresponding services will appear; select the mapping destination. If there are no corresponding services, you can also enter a custom service name directly.
-
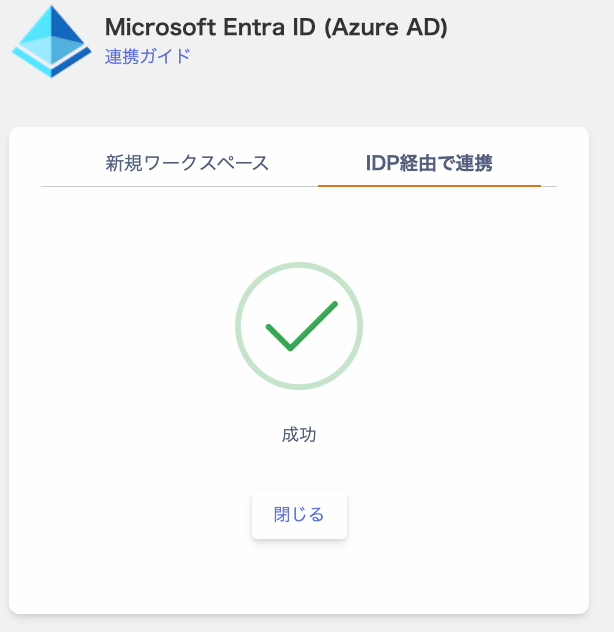
Once the connection is successful, “Success” will be displayed. Click [Close] to finish.
How to link from the service screen
You can also add and manage IDP integrations directly from the service screen.-
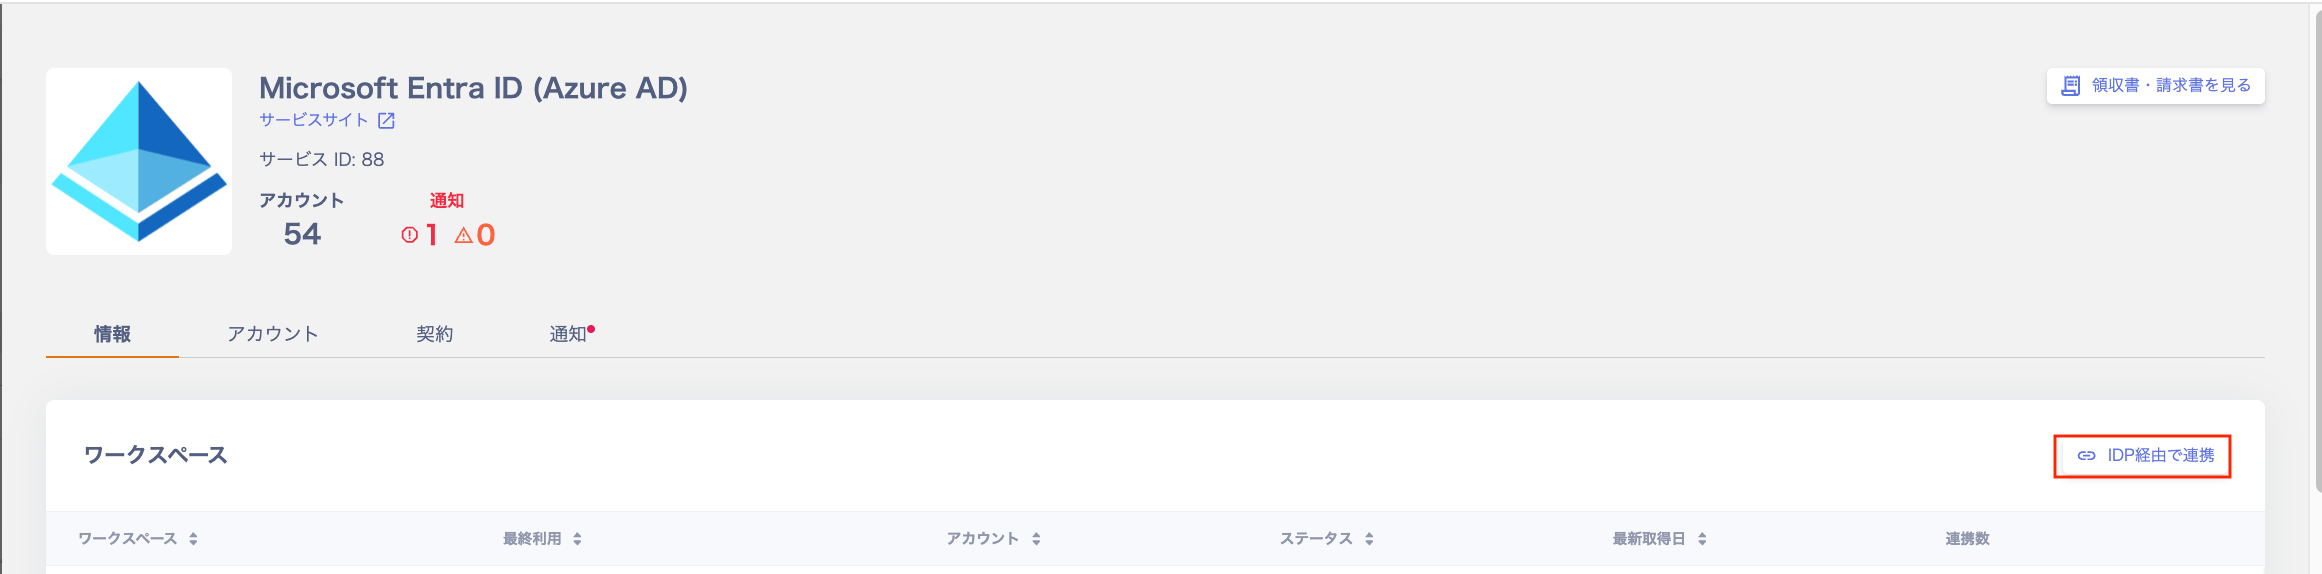
Click Services > Microsoft Entra ID (Azure AD) > Information > Workspaces > Connect via IDP.
-
Select the “Integrate via IDP” tab and then select a workspace.
The workspaces where your application is registered will be displayed.
-
Select the application you want to integrate with.
The applications registered in Azure AD appear in the Application List. Click to select the one you want to integrate.
-
Select the service you want to map and click [Start Integration].
Once you select an app, a list of corresponding services will appear; select the mapping destination. If there are no corresponding services, you can also enter a custom service name directly.
-
Once the connection is successful, “Success” will be displayed. Click [Close] to finish.
How to verify after integration
You can view all services integrated via IDP in Services > Microsoft Entra ID (Azure AD) > Information > Integrations. You can also search for your Microsoft Entra ID (Azure AD) workspace name in Services > Services List. Under Services > Select SaaS > Information, services linked via IDP are shown as “[Via IDP]” in the workspace.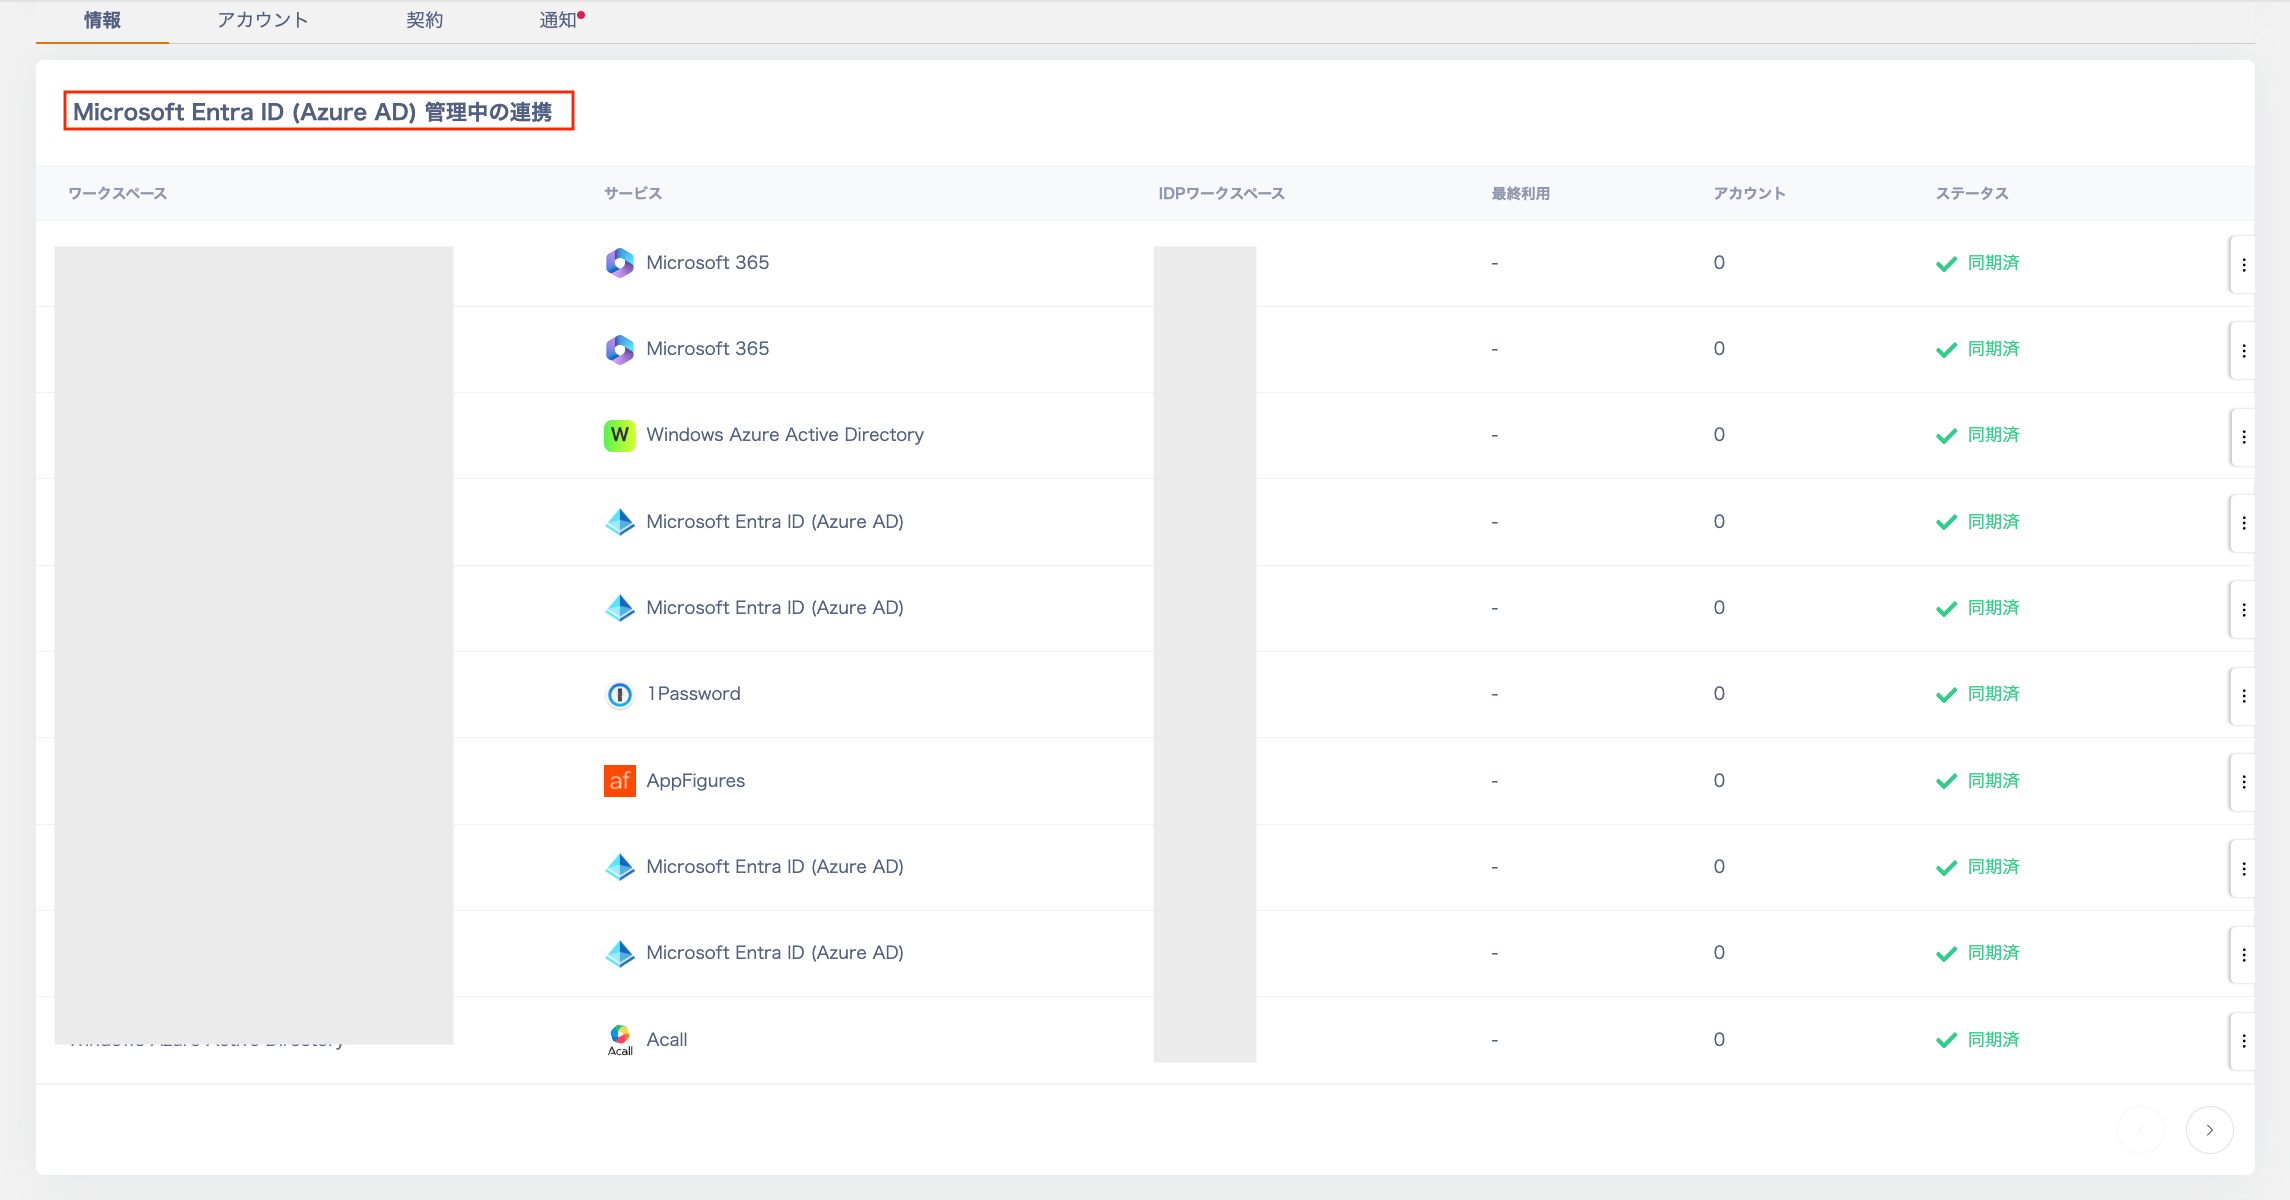
Synchronization method
For the timing of automatic sync, see 3. How to Connect Your SaaS. You can also sync manually, either all services linked via IDP at once or each service individually.When synchronizing all services linked via IDP
To delete a workspace, go to Services > Microsoft Entra ID (Azure AD) > “Information” tab. Click the three dots [ ︙ ] next to it, then click “Sync All”. This will sync all services connected via IDP.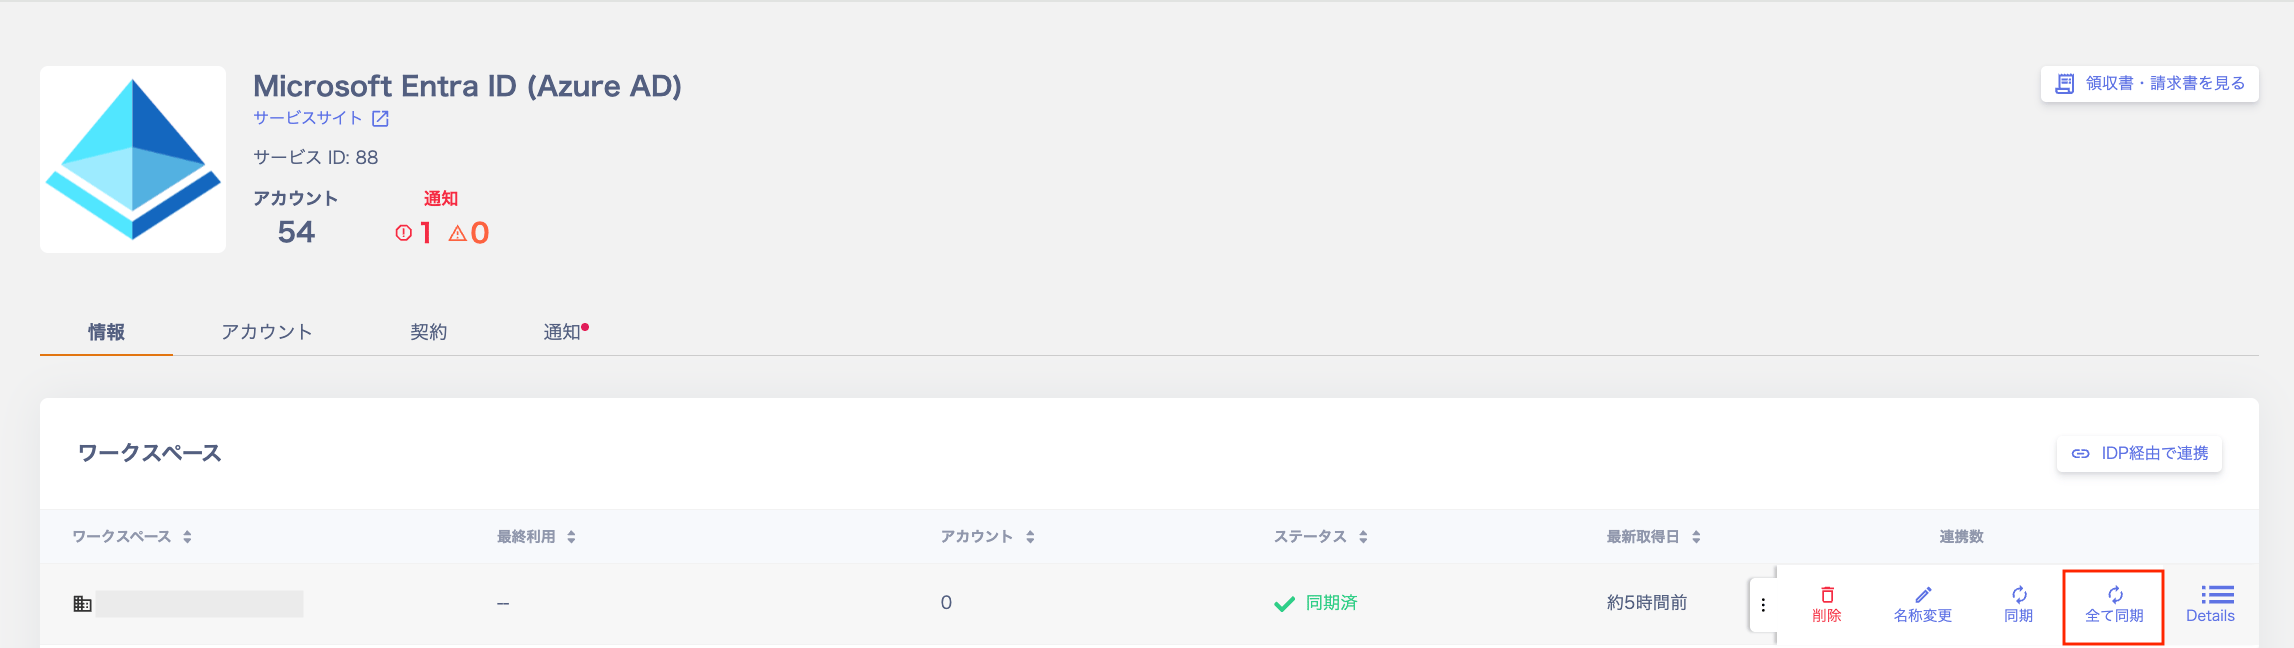
When synchronizing services individually via IDP
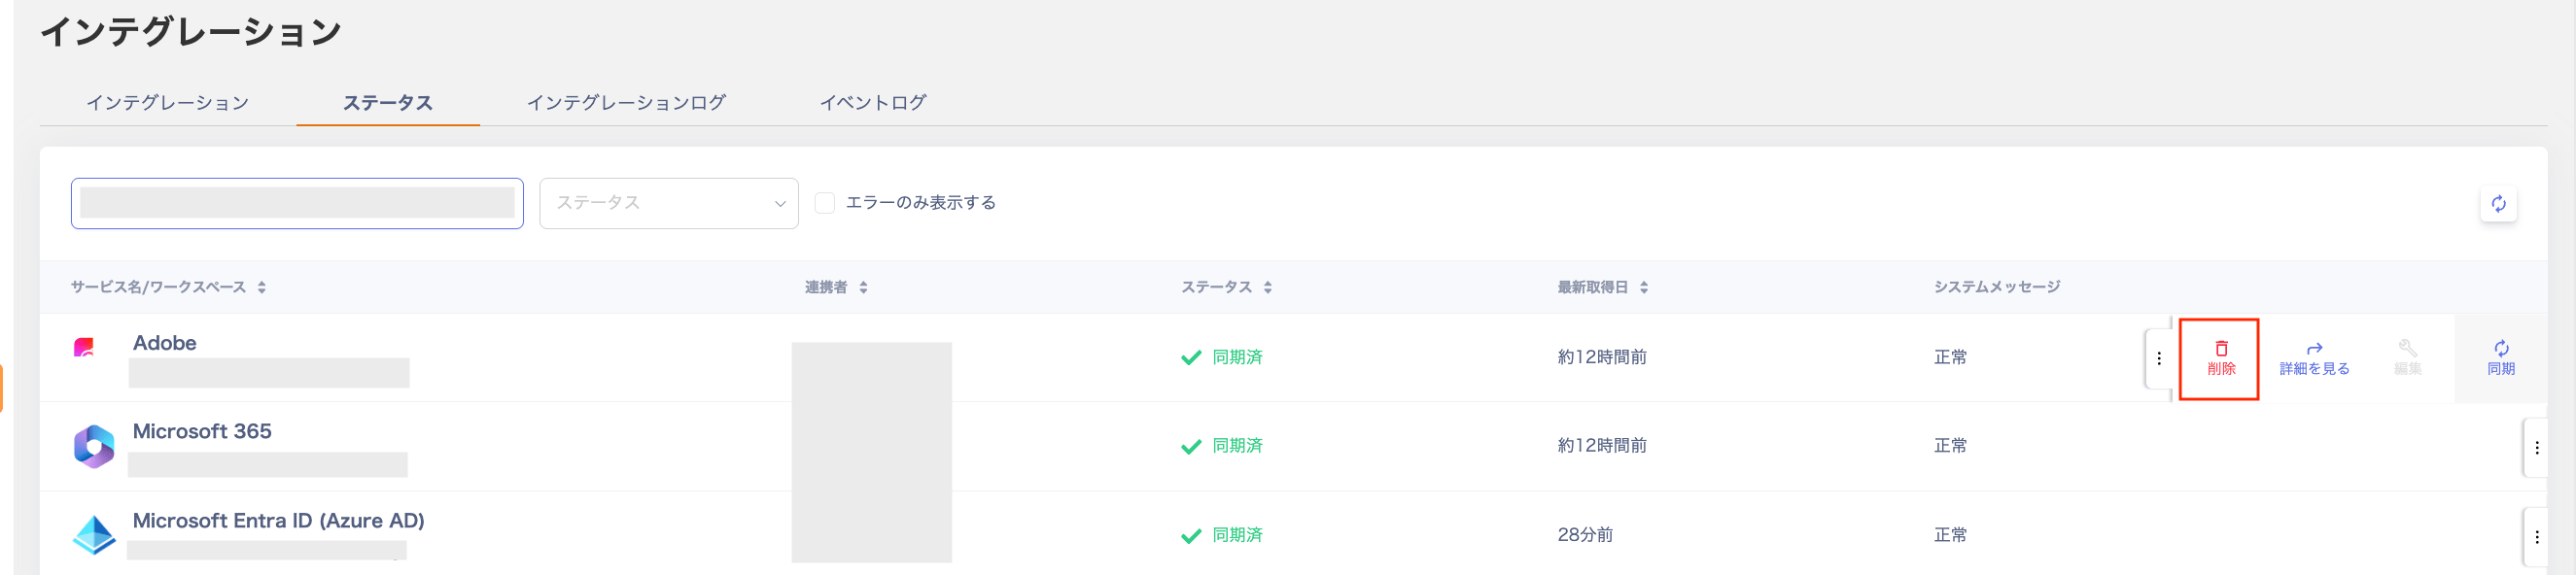
Service screen: You can synchronize by tapping the three dots [︙] on the following screen. This is a method for individually synchronizing services linked via IDP.- Services > Microsoft Entra ID (Azure AD) > “Information” > “Microsoft Entra ID (Azure AD) Integrations under Management”

How to delete
If you want to delete all services linked via IDP
Go to Services > Microsoft Entra ID (Azure AD) > “Information” tab. Click “Delete” from the three dots [︙] next to the workspace you want to delete. This will delete all services that were connected via IDP.When individually deleting services via IDP
Service screen: You can delete services individually by clicking the three dots [︙] on the following screen. This is how to delete services linked via IDP.- Services > Microsoft Entra ID (Azure AD) > “Information” > “Microsoft Entra ID (Azure AD) Integrations under Management”
