

Installation steps
Step 1: Generate an API key
Admina Tracker requires an organization-specific API key to send data.- Log in to the Admina management console.
- Open the Settings > Admina Tracker tab.
- In the API Key section, click Generate new API key.
- Copy the generated API key.
The API key is only displayed when generated. Copy it and store it securely. If lost, you can issue a new key by clicking Recreate, but you will need to update all existing Admina Tracker installations.
Step 2: Download the installer
- Open the Downloads section on the Settings > Admina Tracker tab.
- Download the Windows (x64) installer.
Step 3: Install
- Run the downloaded installer.
- Select the installation folder (the default location is recommended).
- Enter the following on the next screen:
API key— The API key generated in Step 1Organization ID— The Organization ID displayed in the management consoleUser email(optional) — The user’s email address
- Click Install.
- Installation is complete when “Installation complete” is displayed.
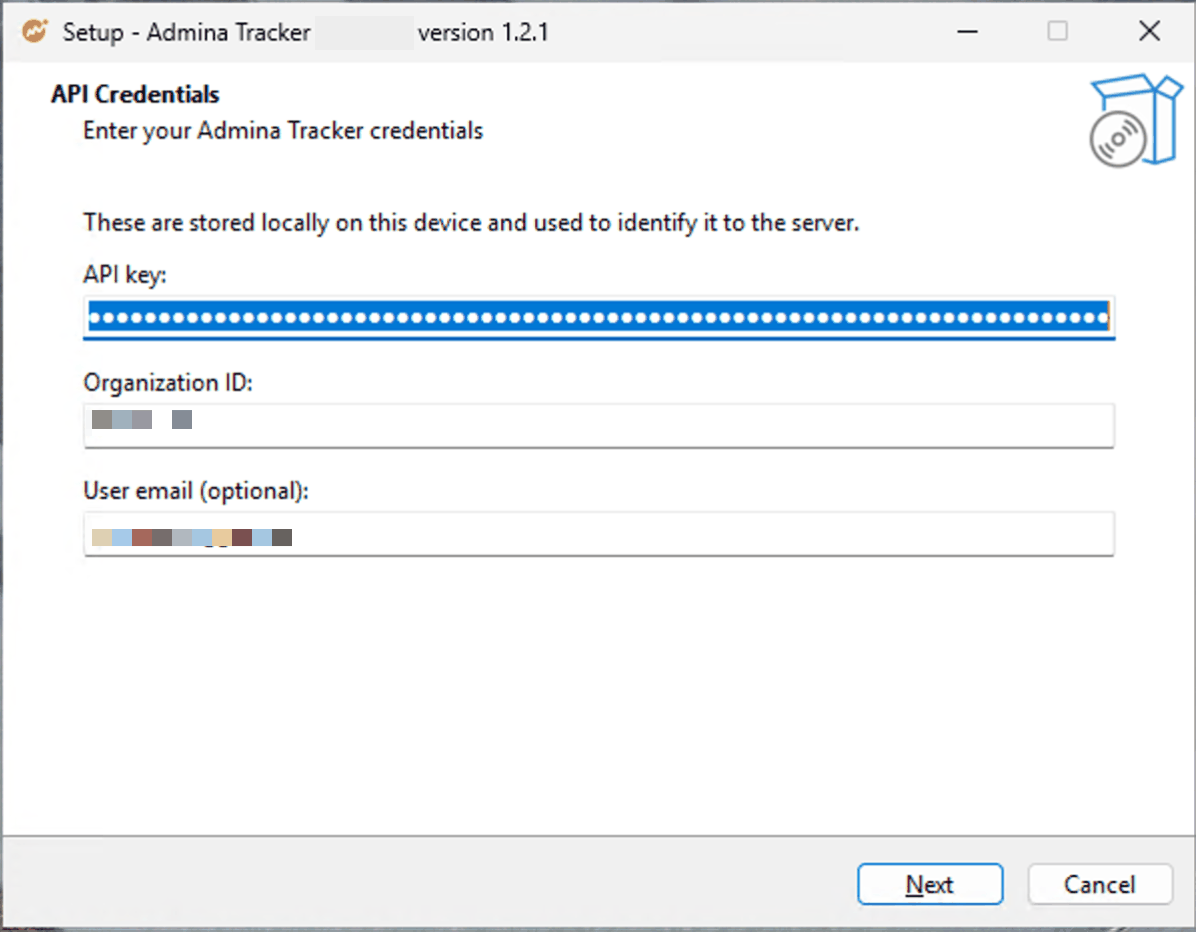
The installer's API Credentials screen
Admina Tracker works with only
API key and Organization ID, even if you leave User email empty. Admina identifies the device by its serial number and adds it to the device list. If a device with the same serial number already exists, Admina does not create a new device and uses the existing one.Application usage is still recorded in Admina. Usage is tied to the device instead of the user’s email address. Each record includes the device’s host name, or the serial number if the host name is unavailable. You can tell which device was used, but not which user used it.Verify operation
Run the following command in Command Prompt to verify that Admina Tracker is running properly. It uses the full path so that it works right after installation.Uninstall
Uninstall from Apps & features
- Open Settings > Apps > Apps & features.
- Locate Admina Tracker in the list.
- Click Uninstall.
- Choose whether to remove data and logs:
- Select Yes to delete all data and logs.
- Select No to keep data and logs for a future reinstall.
- Uninstallation is complete when “Admina Tracker was successfully removed from your computer.” is displayed.
The scheduled tasks, the
PATH entry, and the registry values used for install detection are removed either way.
To carry over your previous settings when reinstalling, we recommend keeping the data. If data is kept, the API key, Organization ID, and User email are automatically filled in during reinstall.