

Overview
This page explains how to add, edit, and hide directory management fields linked to employee information (People). Use these fields to match your organization’s operations. Optimizing your own management fields (such as department and job title) improves employee master visibility. This also lets you manage SaaS account linking (deduplication) more efficiently.Set or change a data source in Directory Settings
When you have configured an employee master, you can set a data source for each directory field. You can choose from this service or the HRM service set as the employee master. For supported services, see Supported cloud services.-
Click [🔧 Edit table] in the top-right corner of the Directory.

-
In the Directory Fields screen, set the data source in the Data Source column. You can select from the dropdown for configurable fields. After setting, click Apply.
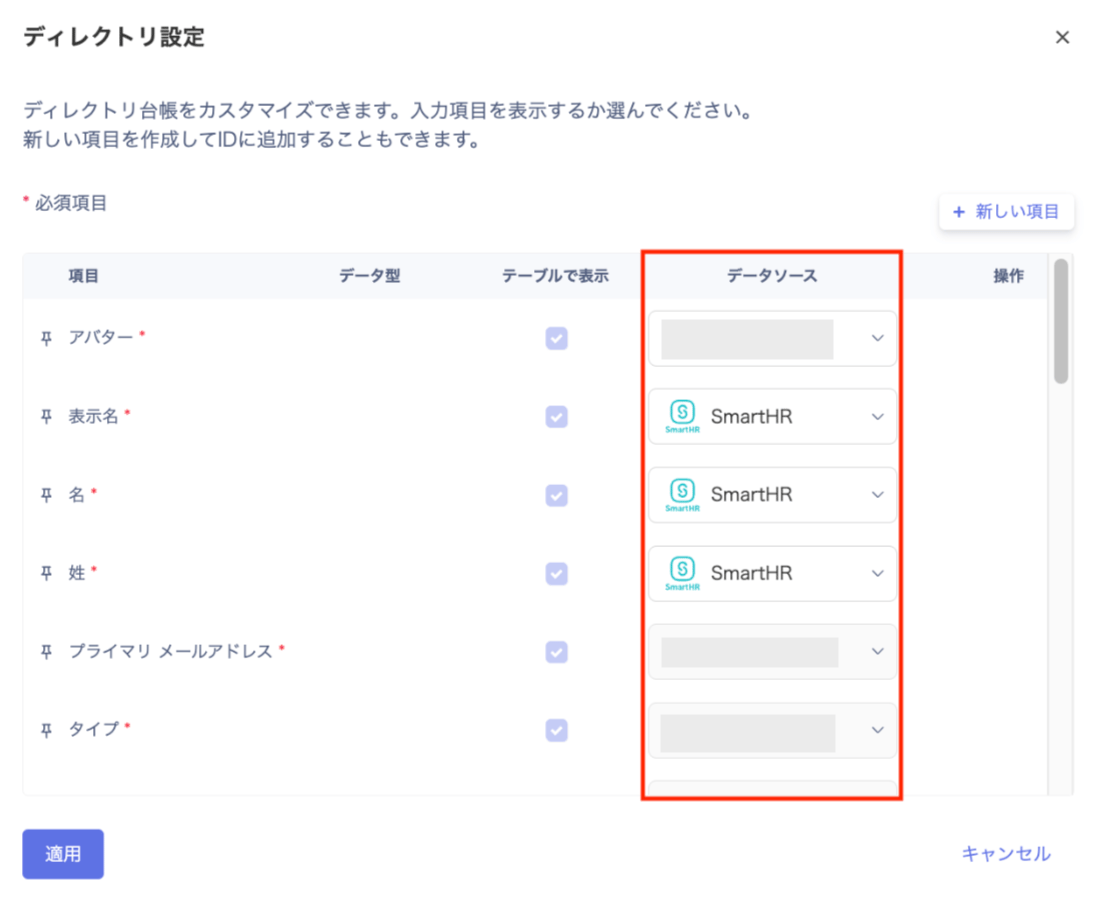
-
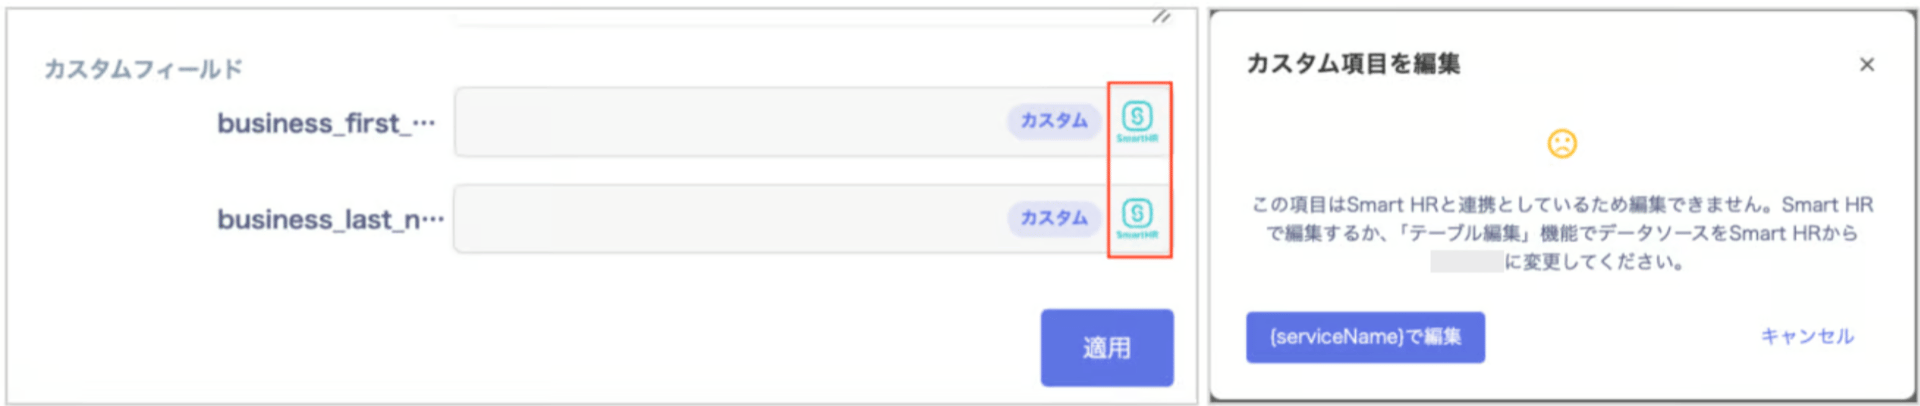
After setting the data source and syncing, the settings take effect and appear under User Info > Custom Fields. Clicking an input field displays “Edit custom field”. To edit a custom field, update it in the connected service or change the data source setting. Note: fields with the employee master icon cannot be edited.
Add a custom input field in Directory Settings
You can add up to 25 custom attributes.
-
Go to Directory > Settings (🔧 Edit table) and click it.

-
In the Directory Settings screen, click New input field.
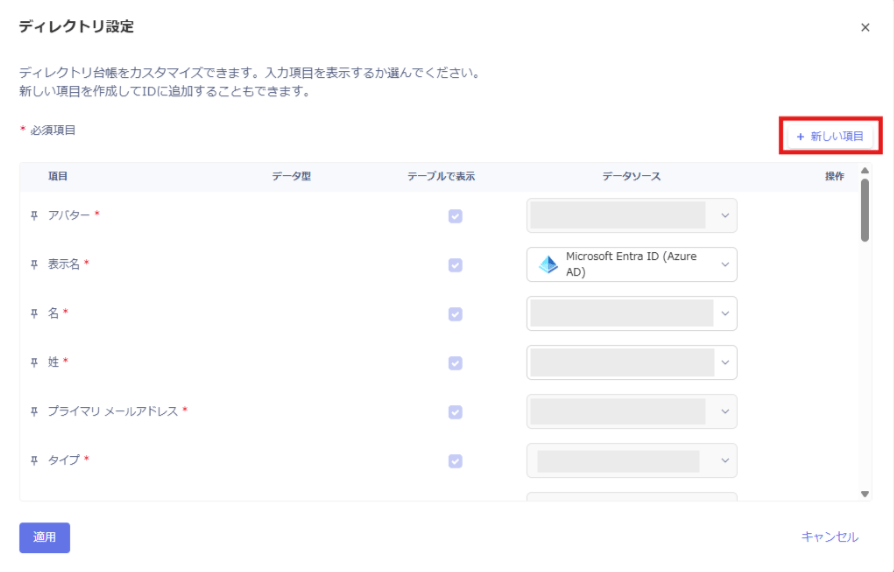
-
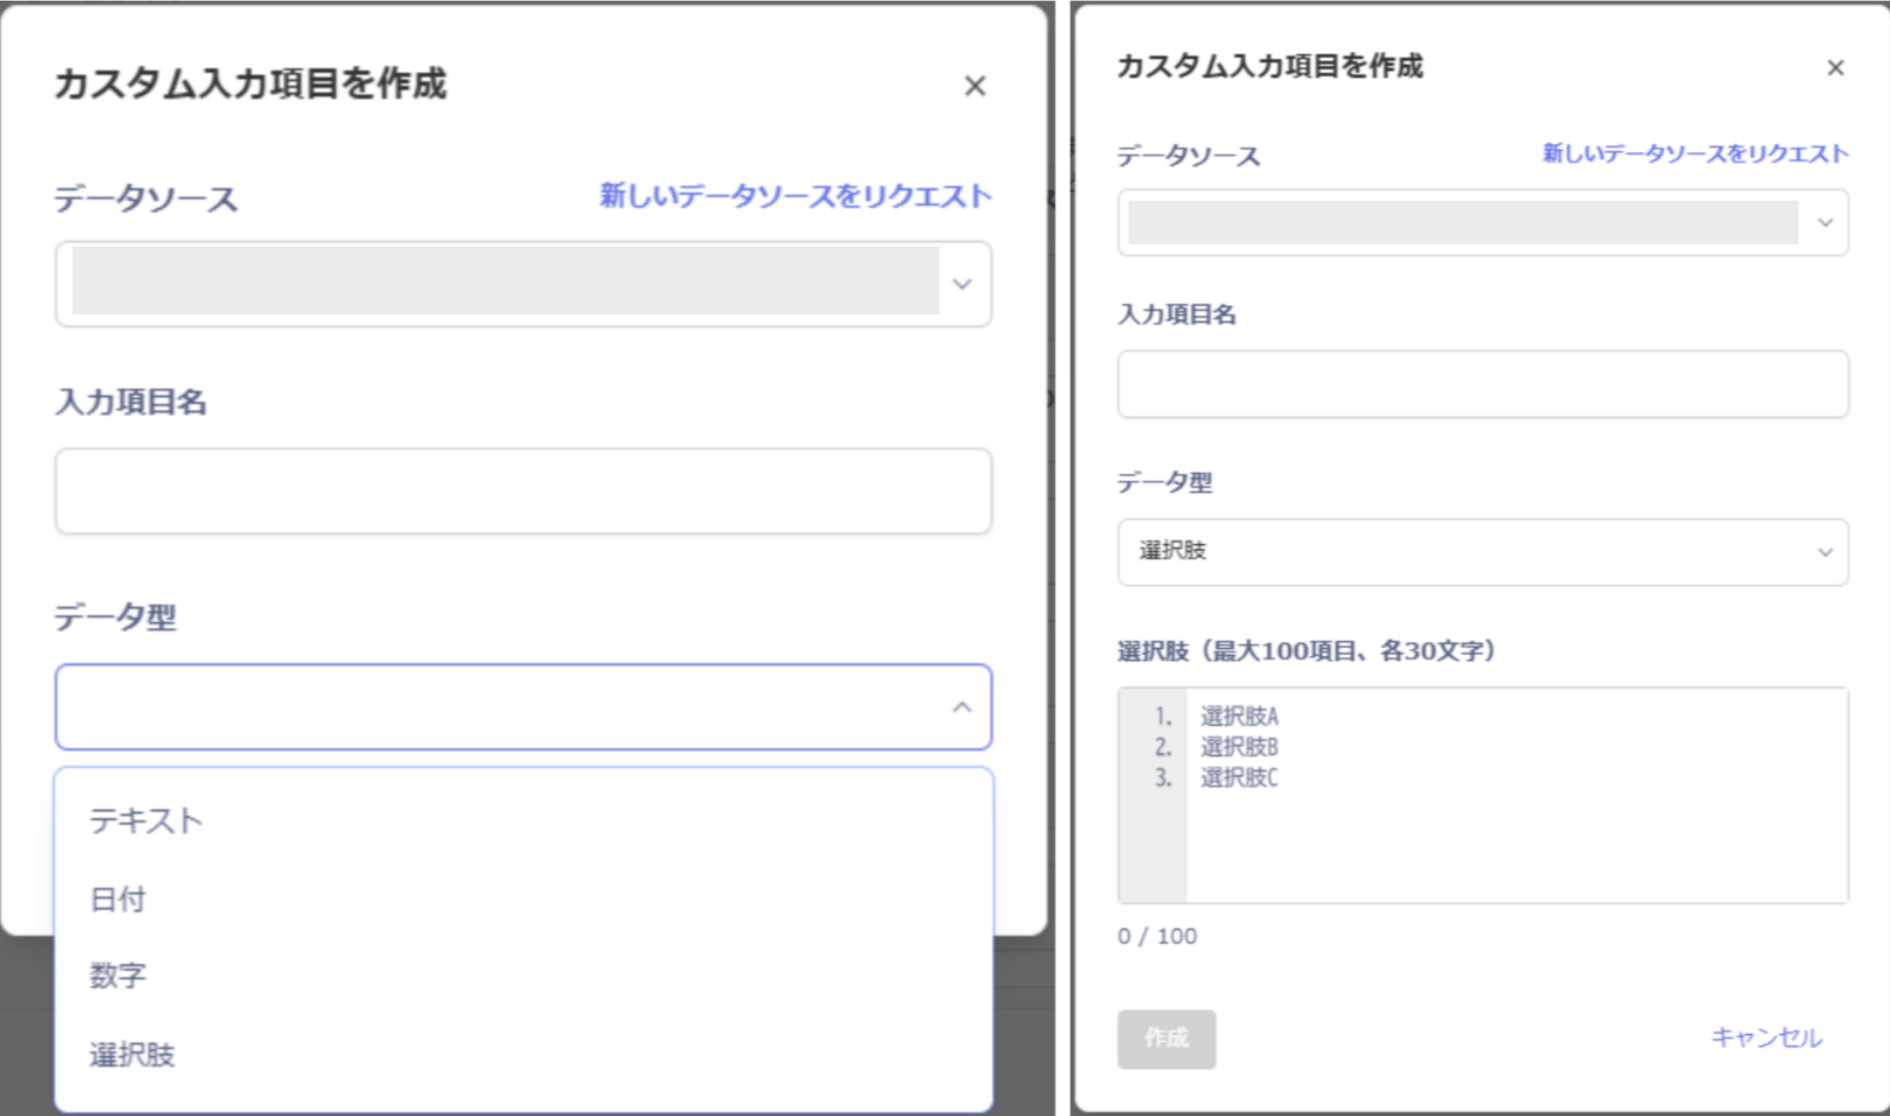
In the “Create custom input field” screen, configure the Data Source, Field Name, and Data Type, then click Create. When the data source is “this service (non-HRM)”, the data types are as follows.
-
After creating the custom input field, a [Custom] label appears. You can view it in the Directory screen and the User Info screen.
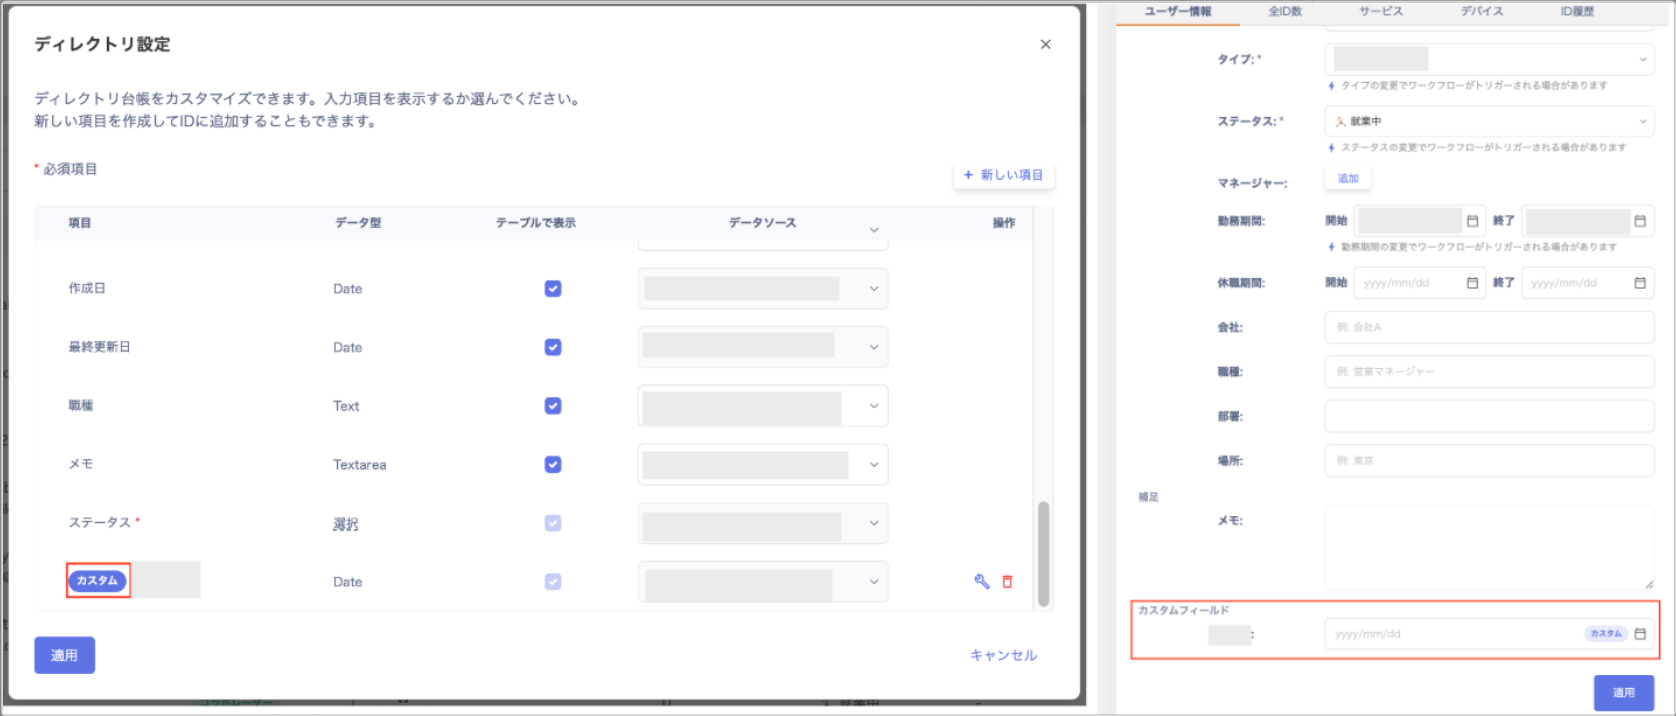
Edit a custom input field
Before deleting some options from a custom field (Dropdown type), take a backup first.
-
Go to Directory > Settings > Edit fields, then click the edit icon (wrench icon) in the Actions column.
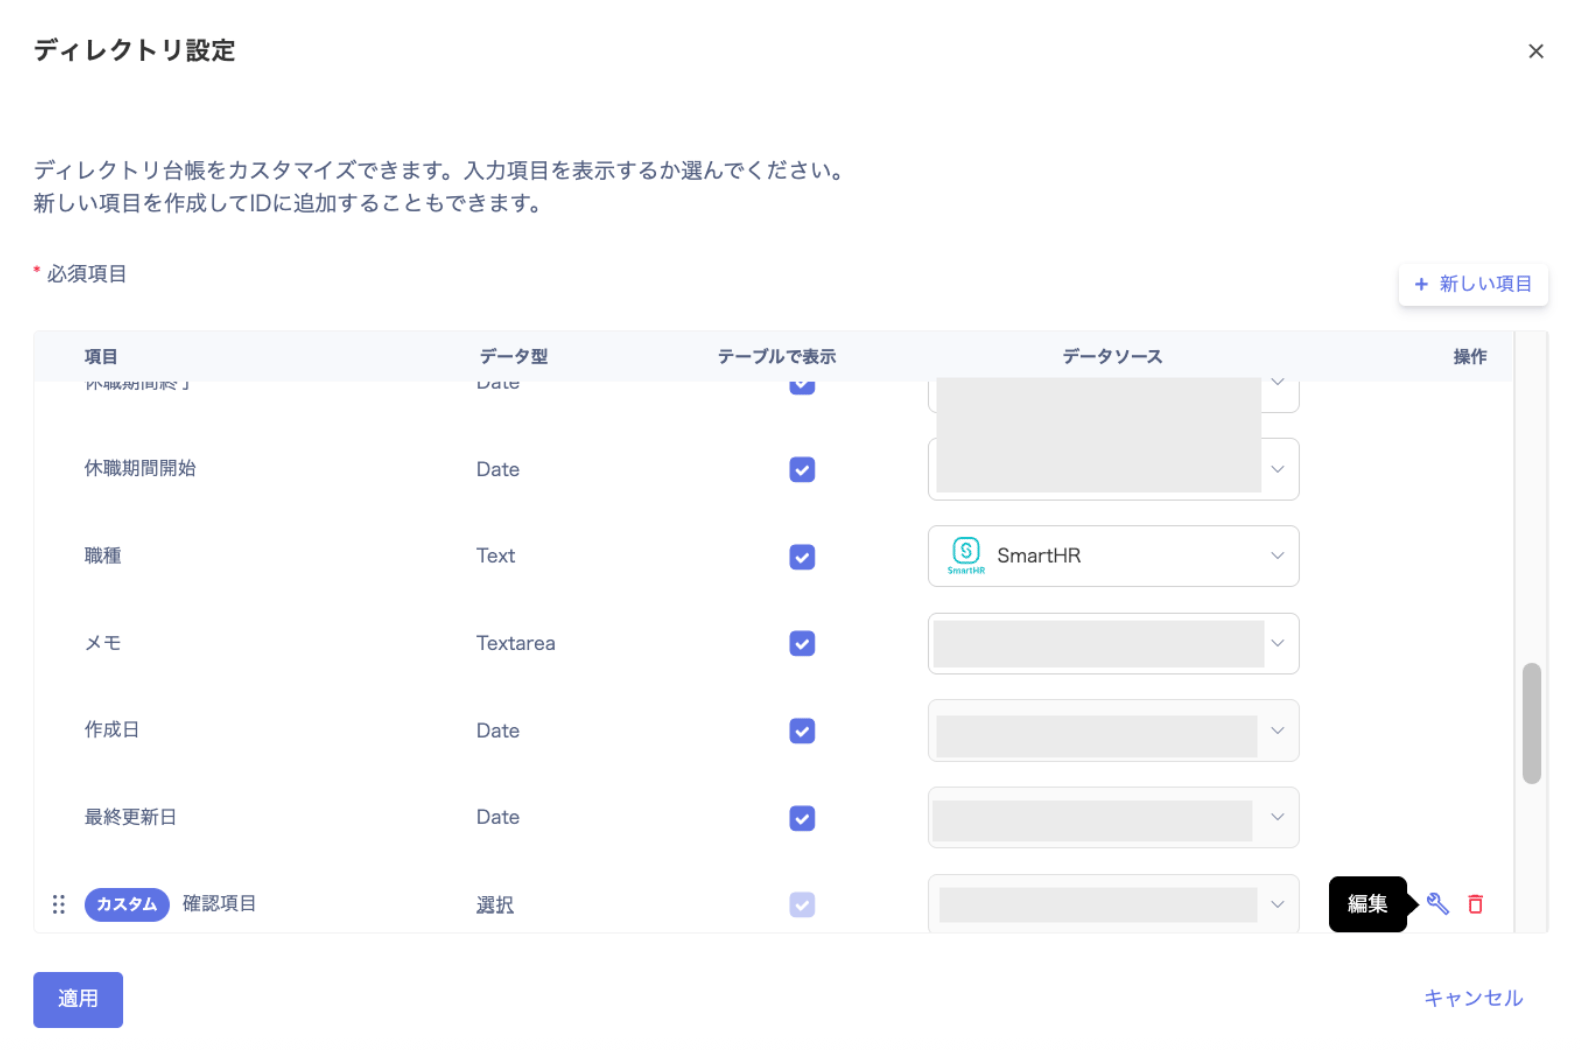
-
In the “Edit custom attribute” screen, add or edit the options, then click Apply.
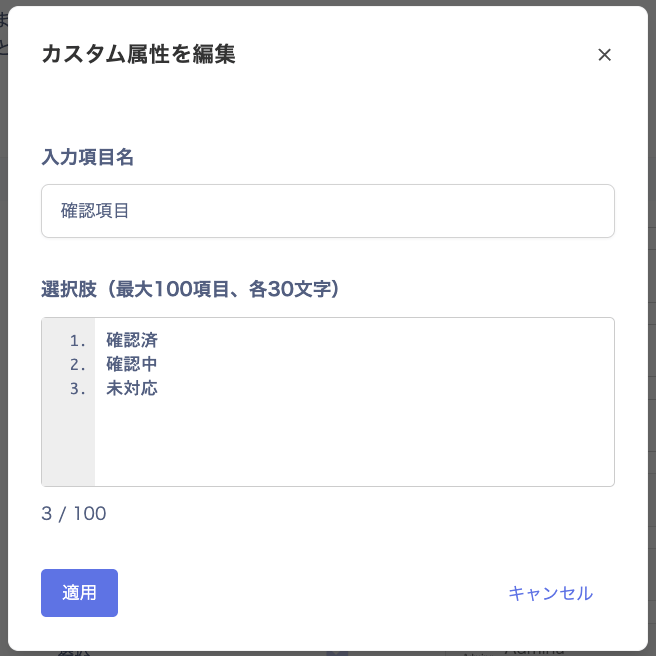
Delete a custom input field
Use this procedure to delete a custom field you created.-
Go to Directory > Settings > Edit fields, then click the delete icon in the Actions column.
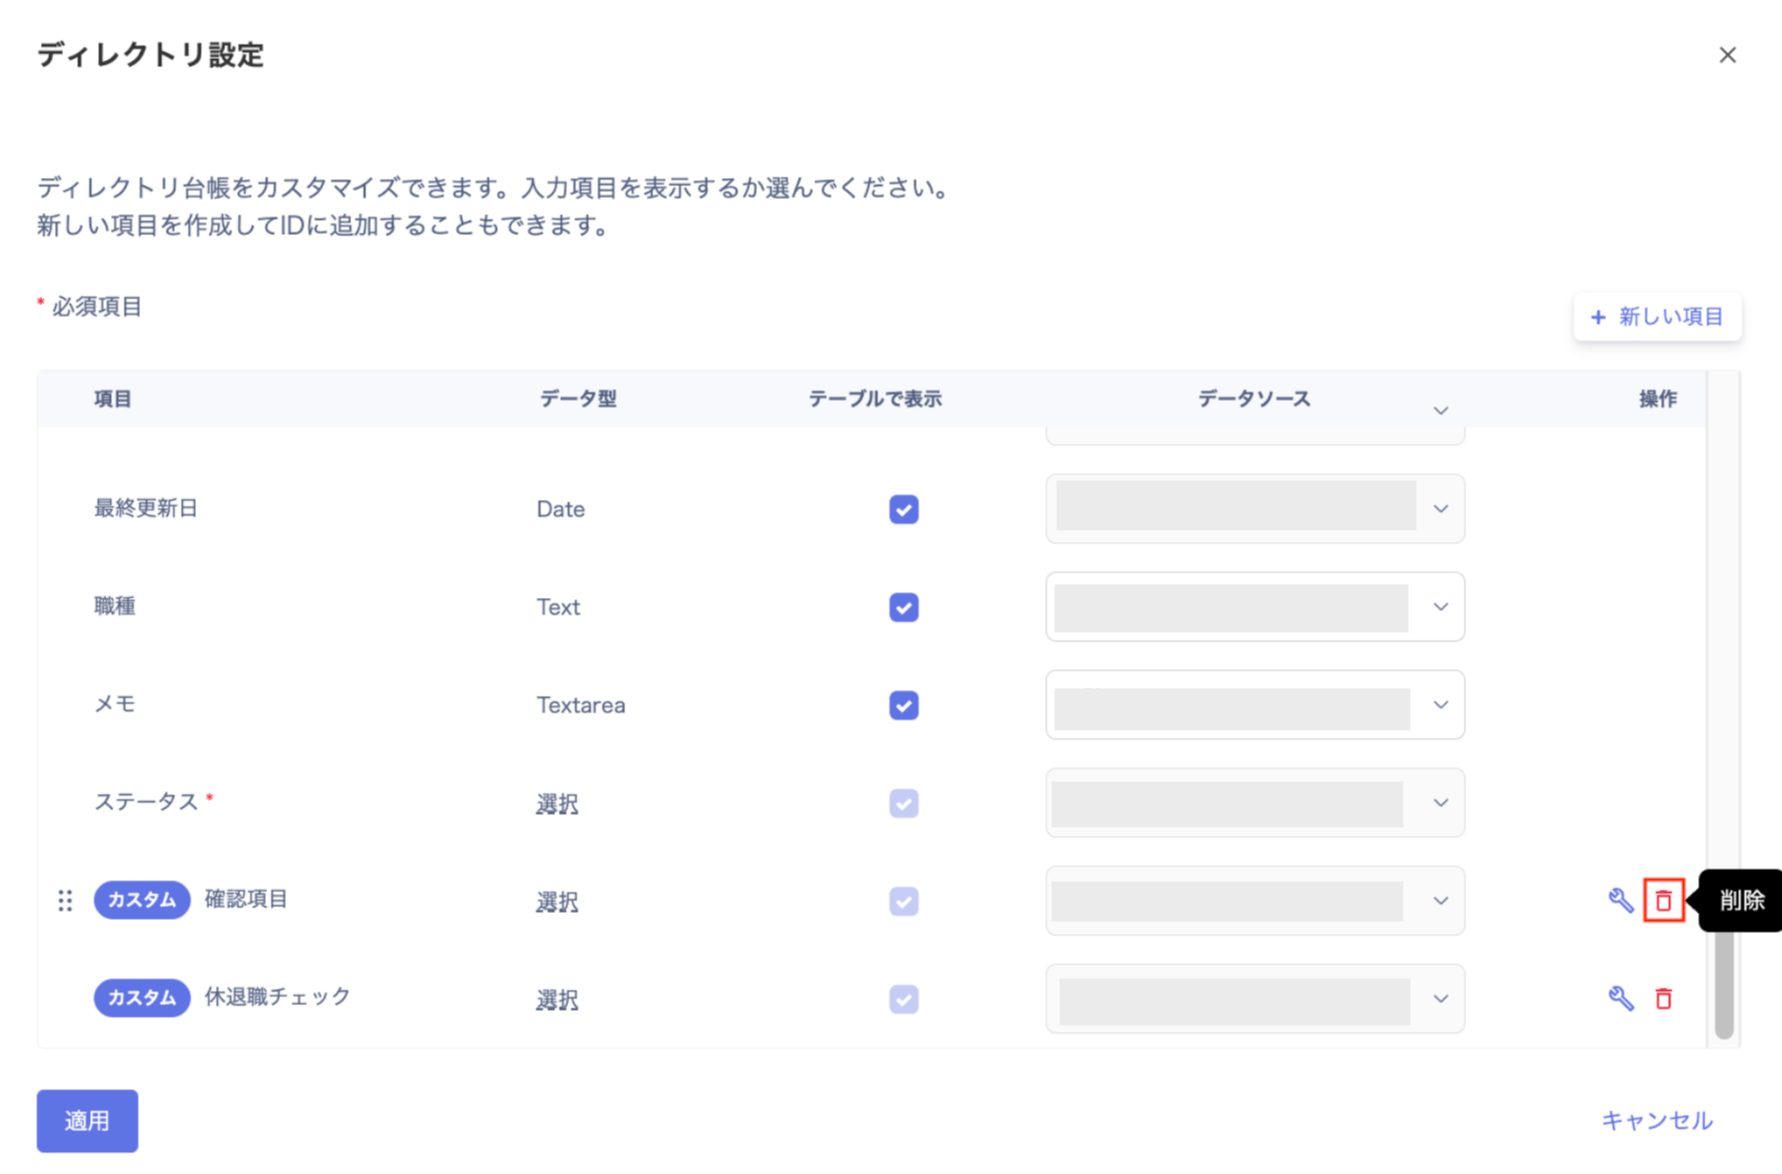
-
A confirmation screen appears. Review the message and click Delete.
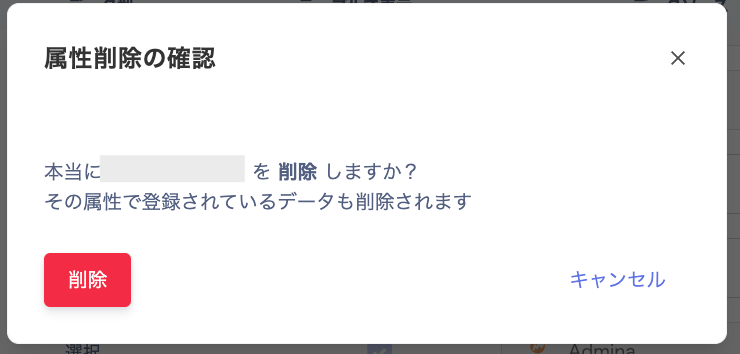
-
The following message appears to confirm the deletion is complete.

Set a data source for a custom input field in Directory Settings
-
Go to Directory > Settings (🔧 Edit table) and click it.

-
In the Directory Settings screen, click New input field.
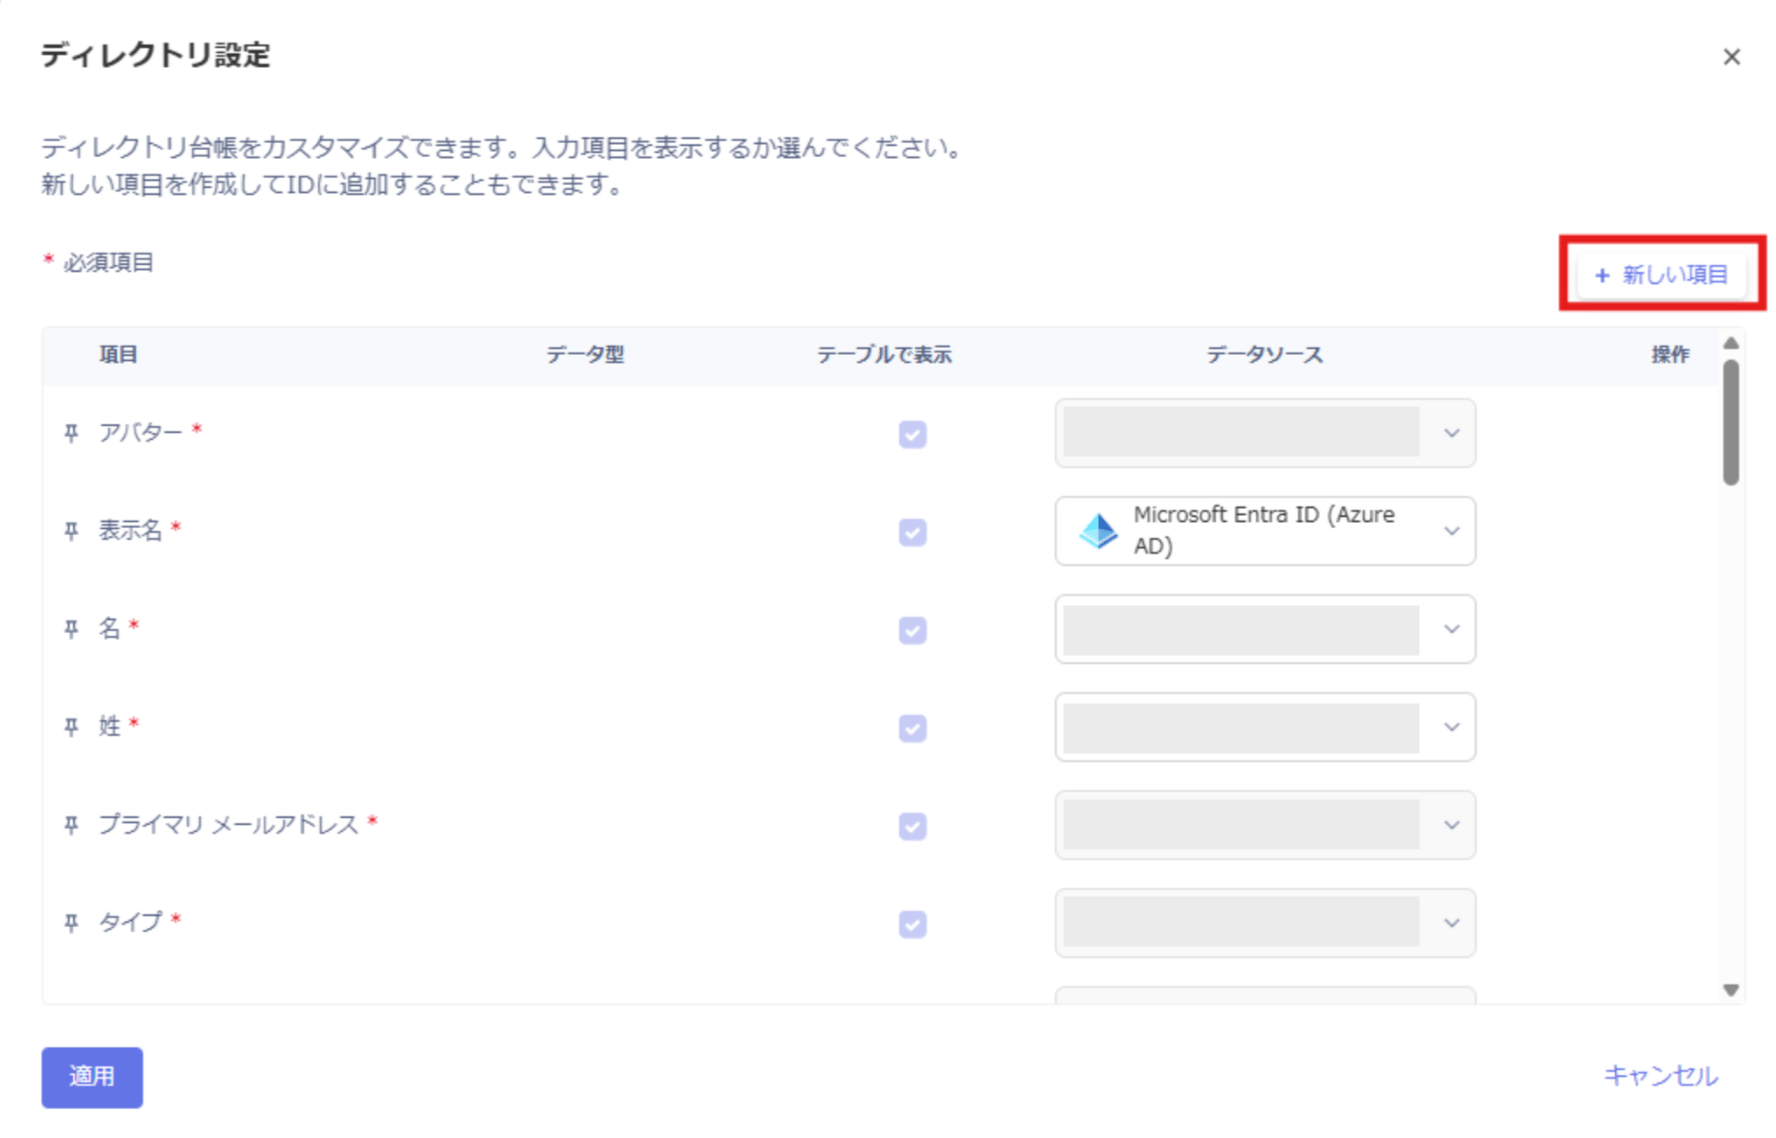
-
In the “Create custom input field” screen, set a data source other than “this service”. Configure the Data Source, Workspace, Data to aggregate, and Field Name, then click Create.
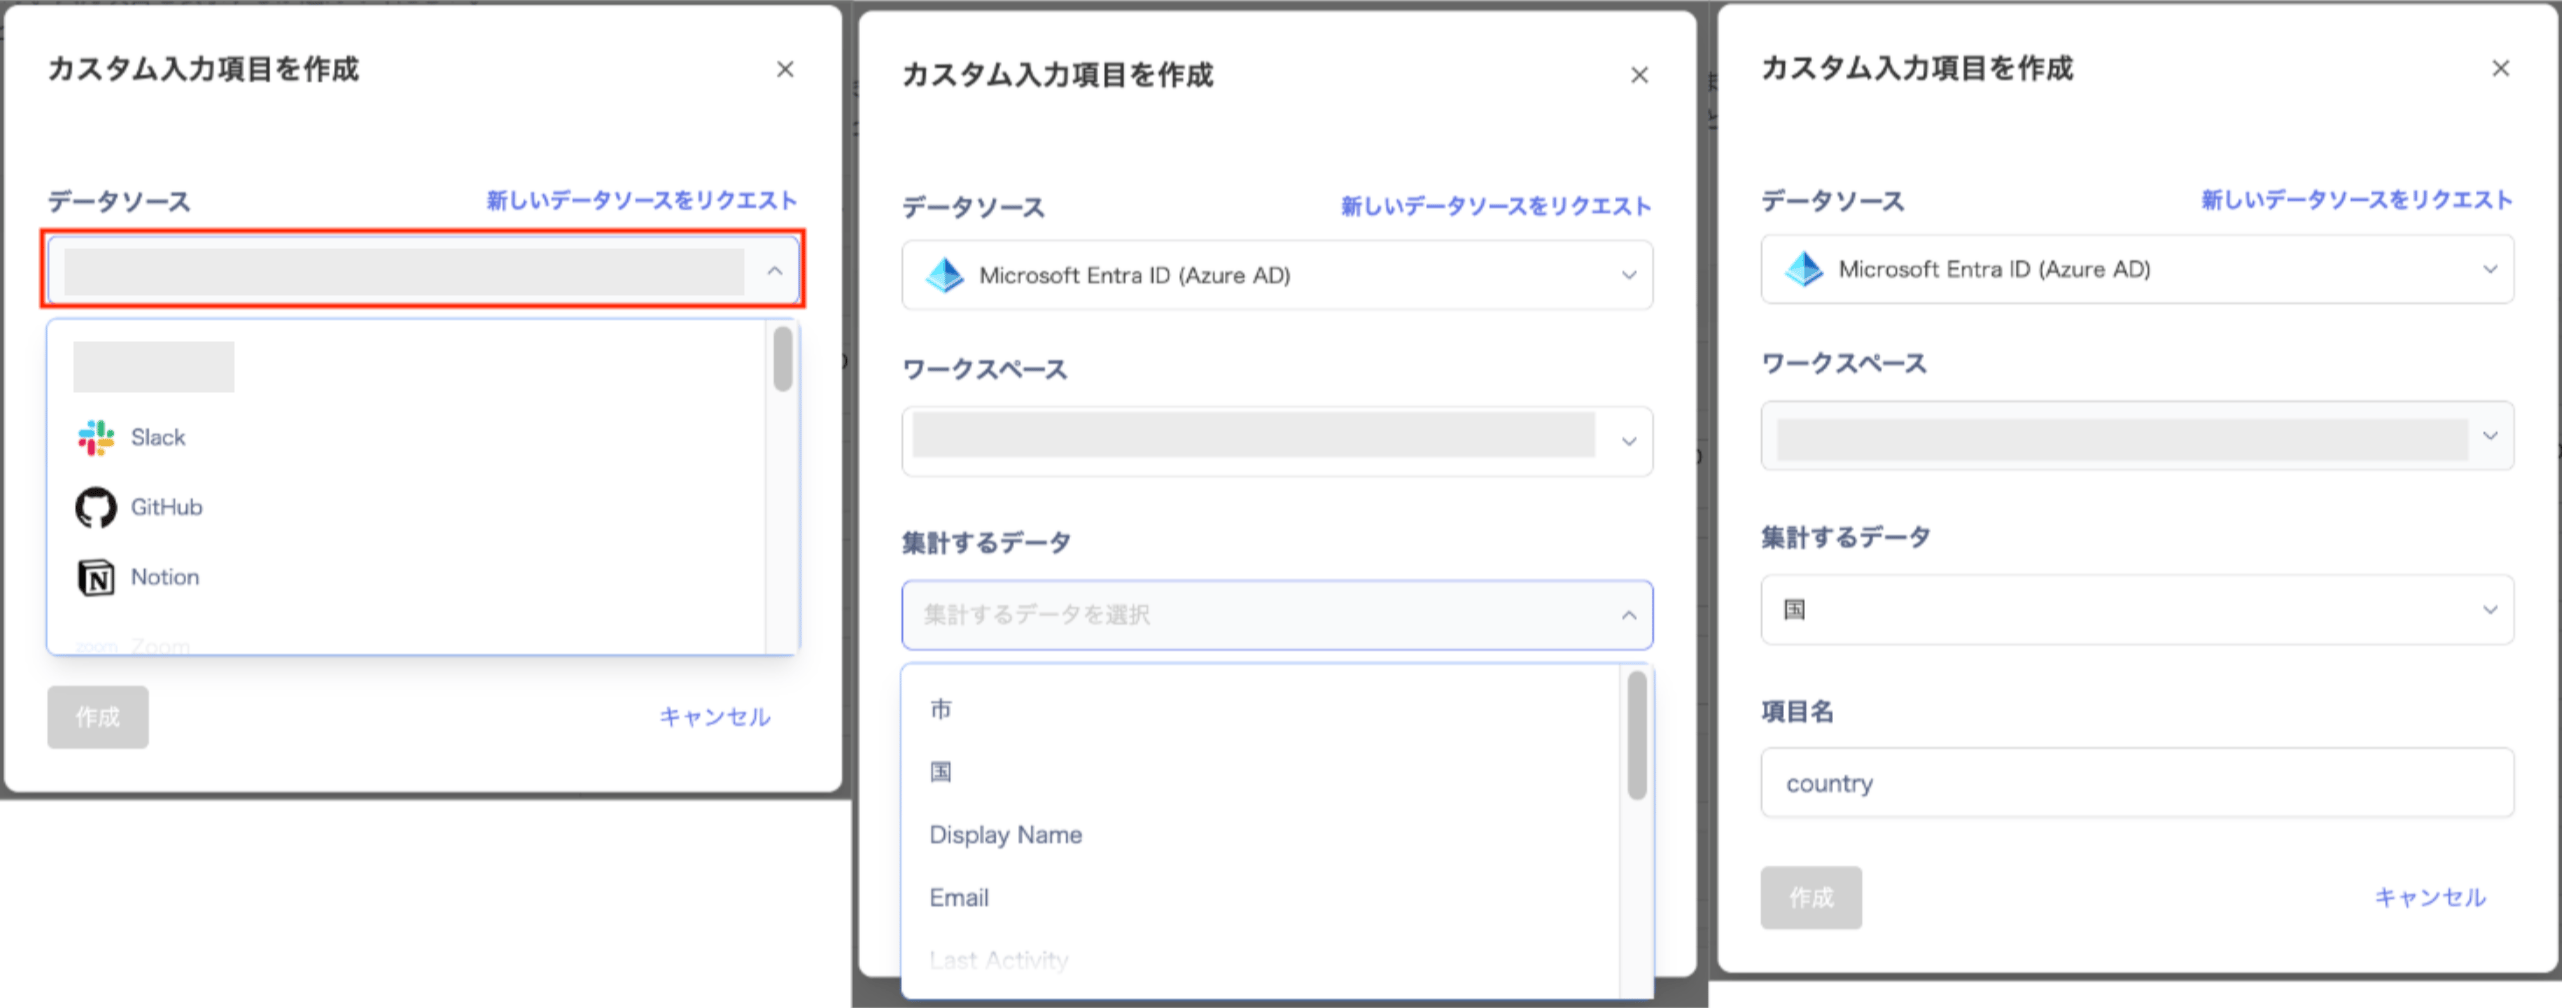
-
After creating the custom input field, a [Custom] label appears. You can view it in the Directory screen and the User Info screen. After setting the data source and syncing, the settings take effect and appear under User Info > Custom Fields.
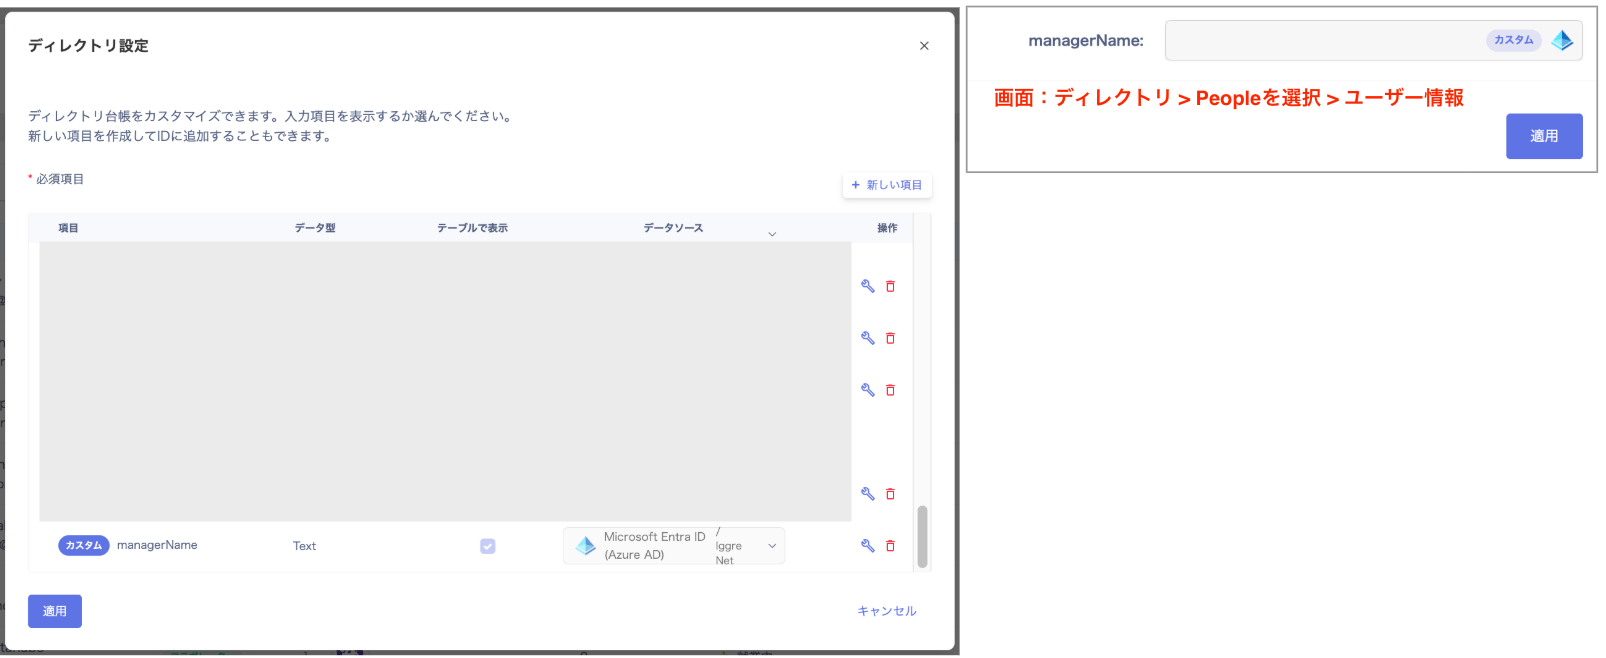
Select displayed fields and change their order
You can select which fields to display and change their display order.Select displayed fields
Use the checkboxes in the table to show or hide each field. Note: Hiding a field by unchecking it does not delete its data. Note: You cannot hide the following fields. Avatar / Display Name / First Name / Last Name / Primary Email Address / Type / Status.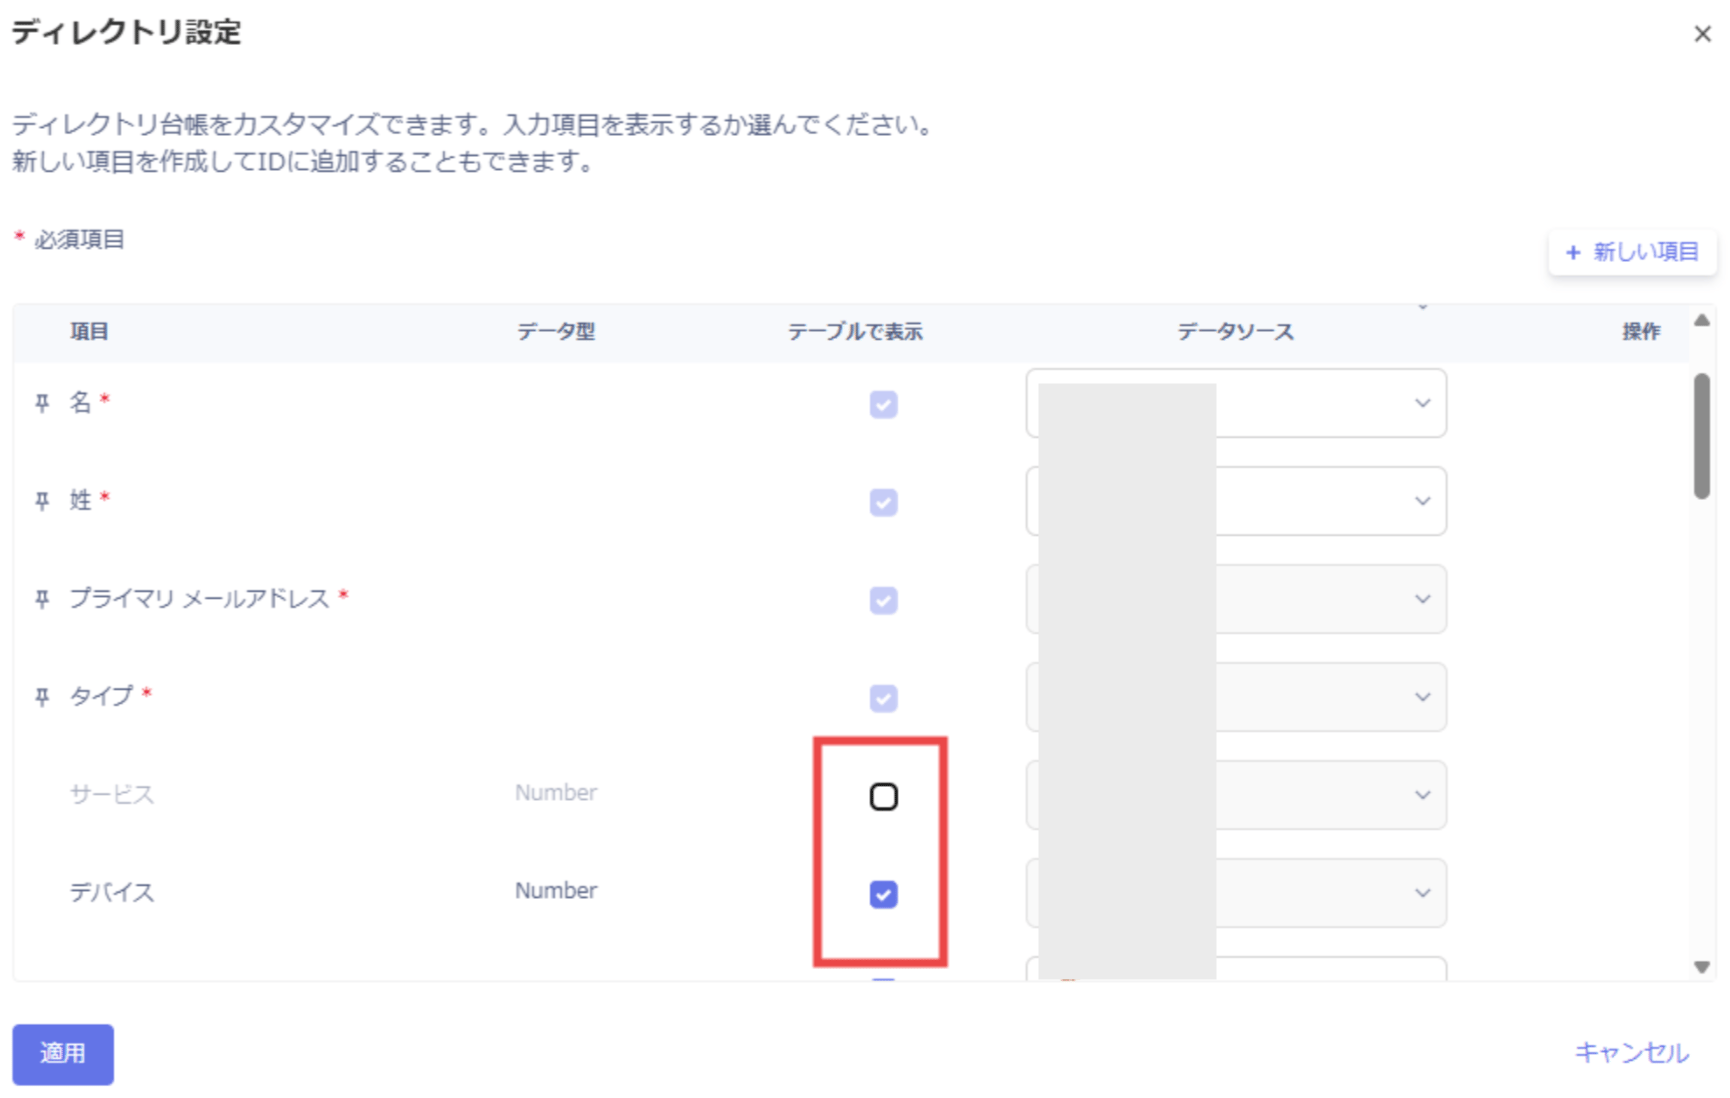
Change the field display order
Drag and drop the rows in the table to reorder the fields.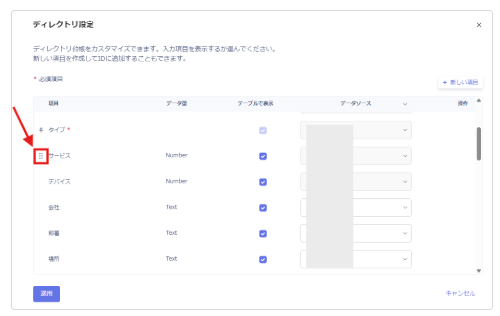
Data sources in Directory Settings
Feature details
Configurable custom input fields
The fields available for custom input vary by the service configured as the employee master.FAQ
Q. If I disconnect the employee master, will the settings be lost?
A. No, the settings remain and are not deleted.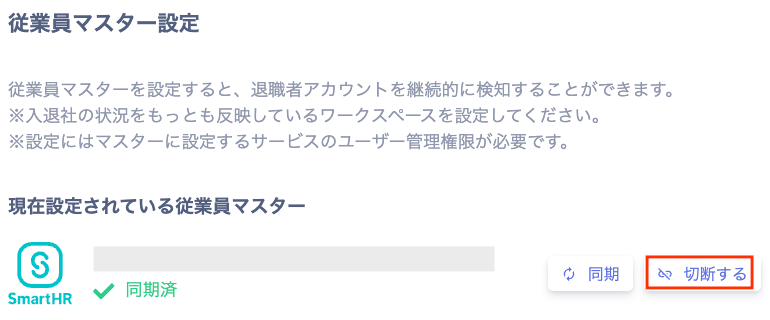
Q. If I delete the workspace set as the employee master, will the settings be lost?
A. Yes, the settings are deleted and the field reverts to a standard custom field.Q. Can I specify a SaaS other than the employee master as the data source in the Directory Fields screen?
A. Yes. SaaS services selectable as new input fields in the Directory Settings screen can also be set as data sources.Q. I have configured an employee master, but SaaS fields are not syncing. What should I check?
A. In addition to the employee master settings, check the following:- Confirm that you have set a data source in Directory Settings.
- Available fields vary by the employee master service you configured. Check Data sources in Directory Settings for the fields available for your service.
- Confirm that the sync completed after setting the data source in Directory Settings. If it did not, try a manual sync and check whether the data then appears.
- Confirm that the relevant fields are filled in on the SaaS side.