

Prerequisites
Before setting up Webhook-based automation, confirm the following:Template Overview and How to Choose
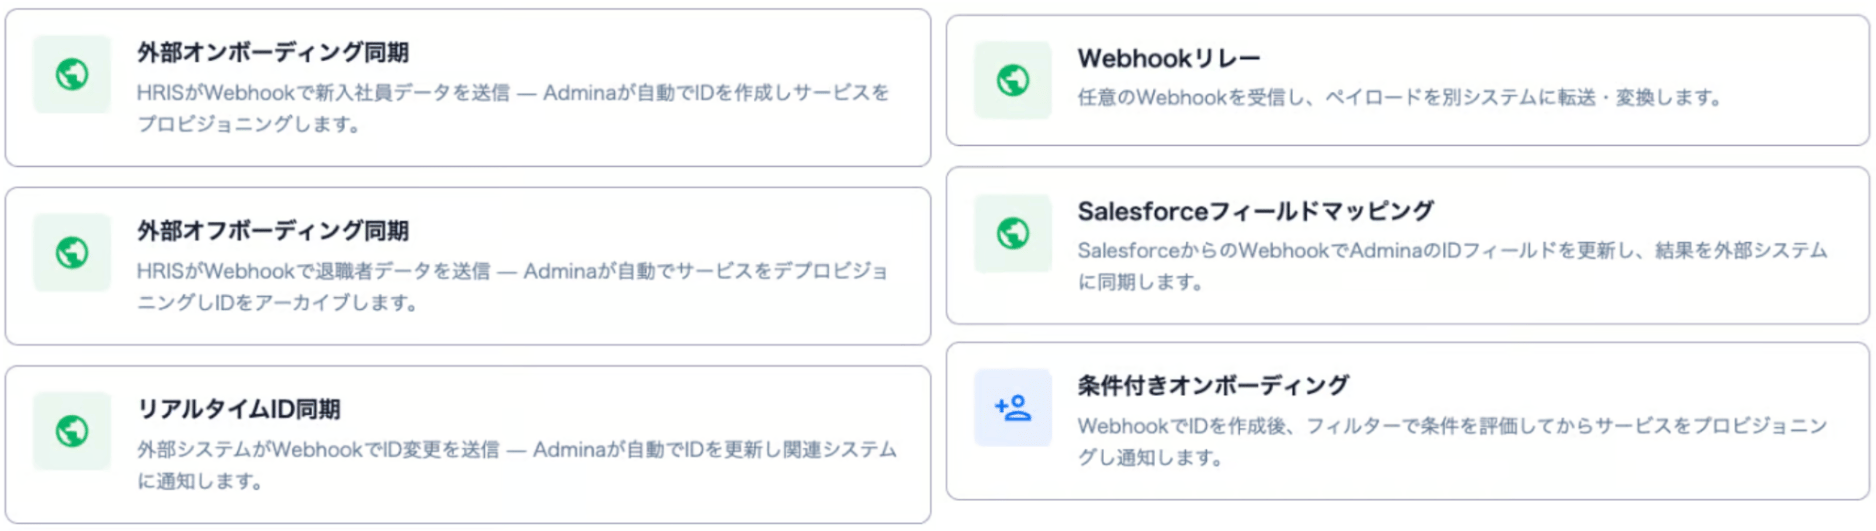
We offer six pre-built Webhook sync templates to match your needs.Employees you add in your employee master SaaS (such as Google Workspace) sync to the directory. They then become targets of the New employee onboarding workflow. If they meet the conditions you set, you can automate onboarding account creation without sending Webhooks. For setup, see Configure an onboarding workflow.
Setup Steps
- Go to Automation > click [Create Automation].
- In the dialog, click the name of the Webhook template you want to use.
-
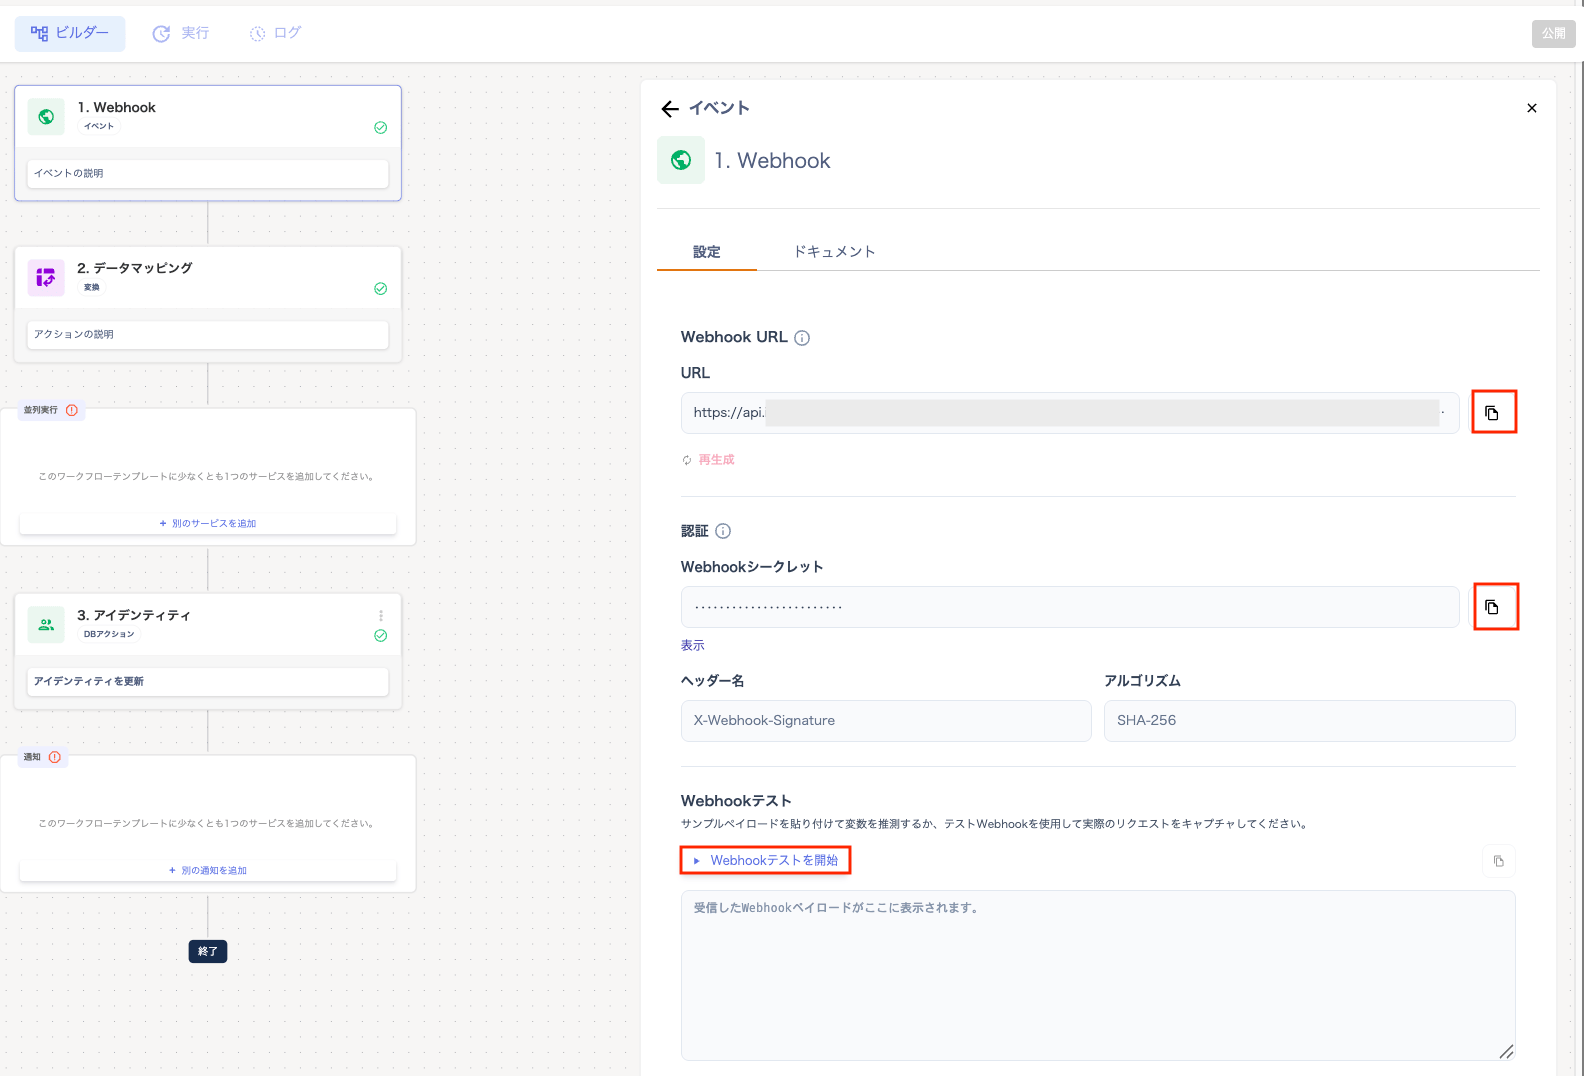
In the “Builder” screen, configure “1. Webhook” under the “Settings” tab. You can also refer to the “Documentation” tab for details.
Copy and save the URL from “Webhook URL” and the secret from “Webhook Secret”. Then configure the copied URL and secret in your sending system and publish.
-
After “1. Webhook”, the screens displayed differ per selected template. Refer to the linked instructions for details.
- Real-Time Identity Sync: “Data Mapping” > “Identity” > “HTTP Request”
- External Onboarding Sync: “Data Mapping” > “Identity” > Service Selection (Parallel Execution) > Notification
- External Offboarding Sync: “Data Mapping” > Service Selection (Parallel Execution) > “Identity” > Notification
- Salesforce Field Mapping: “Identity”
- Conditional Onboarding: “Identity” > Service Selection (Parallel Execution) > Notification
- Webhook Relay: “HTTP Request”
-
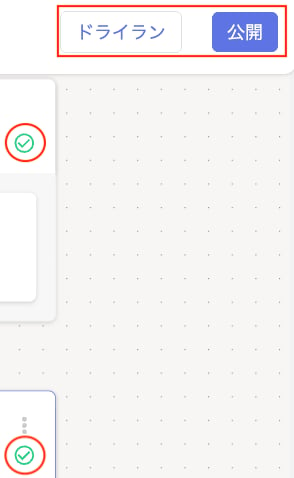
Once all checks in the “Builder” turn green, click [Publish] or [Dry Run].
For dry runs, see Dry-run a workflow.
-
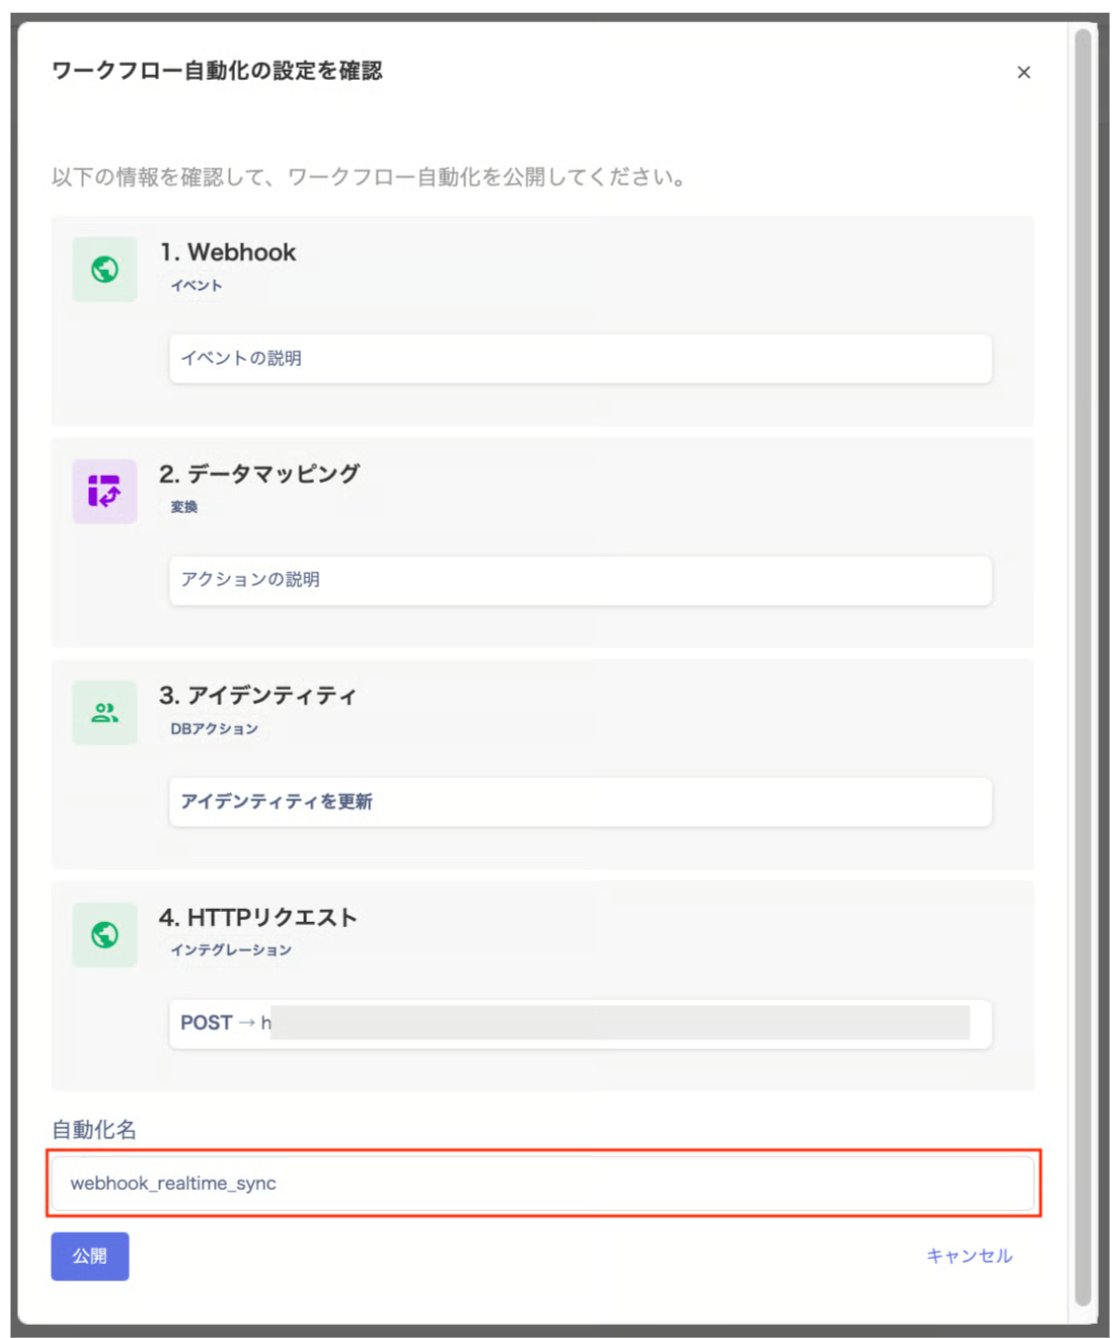
The “Confirm Workflow Automation Settings” screen appears. Enter an automation name and click [Publish].
Note: You cannot reuse a name that is already registered for the automation name.
-
When “Workflow has been published” is displayed, click [OK].
Data Mapping
Select “Data Mapping” in the “Builder” screen to see a list of standard identity fields and your custom identity fields. Click [Auto-fill from Sample Payload] to automatically infer each field based on the keys received during the test. Matching priority is exact match, then prefix/suffix match.Be sure to review the content before saving. Fields that were not matched are left blank and are skipped at runtime.To override, click a field and select a variable from [Insert Variable]. Alternatively, directly enter the path (e.g.,
{{trigger.user_displayName}}) to override.Only one {{trigger.X}} can be set per field. Entering multiple values makes the field invalid.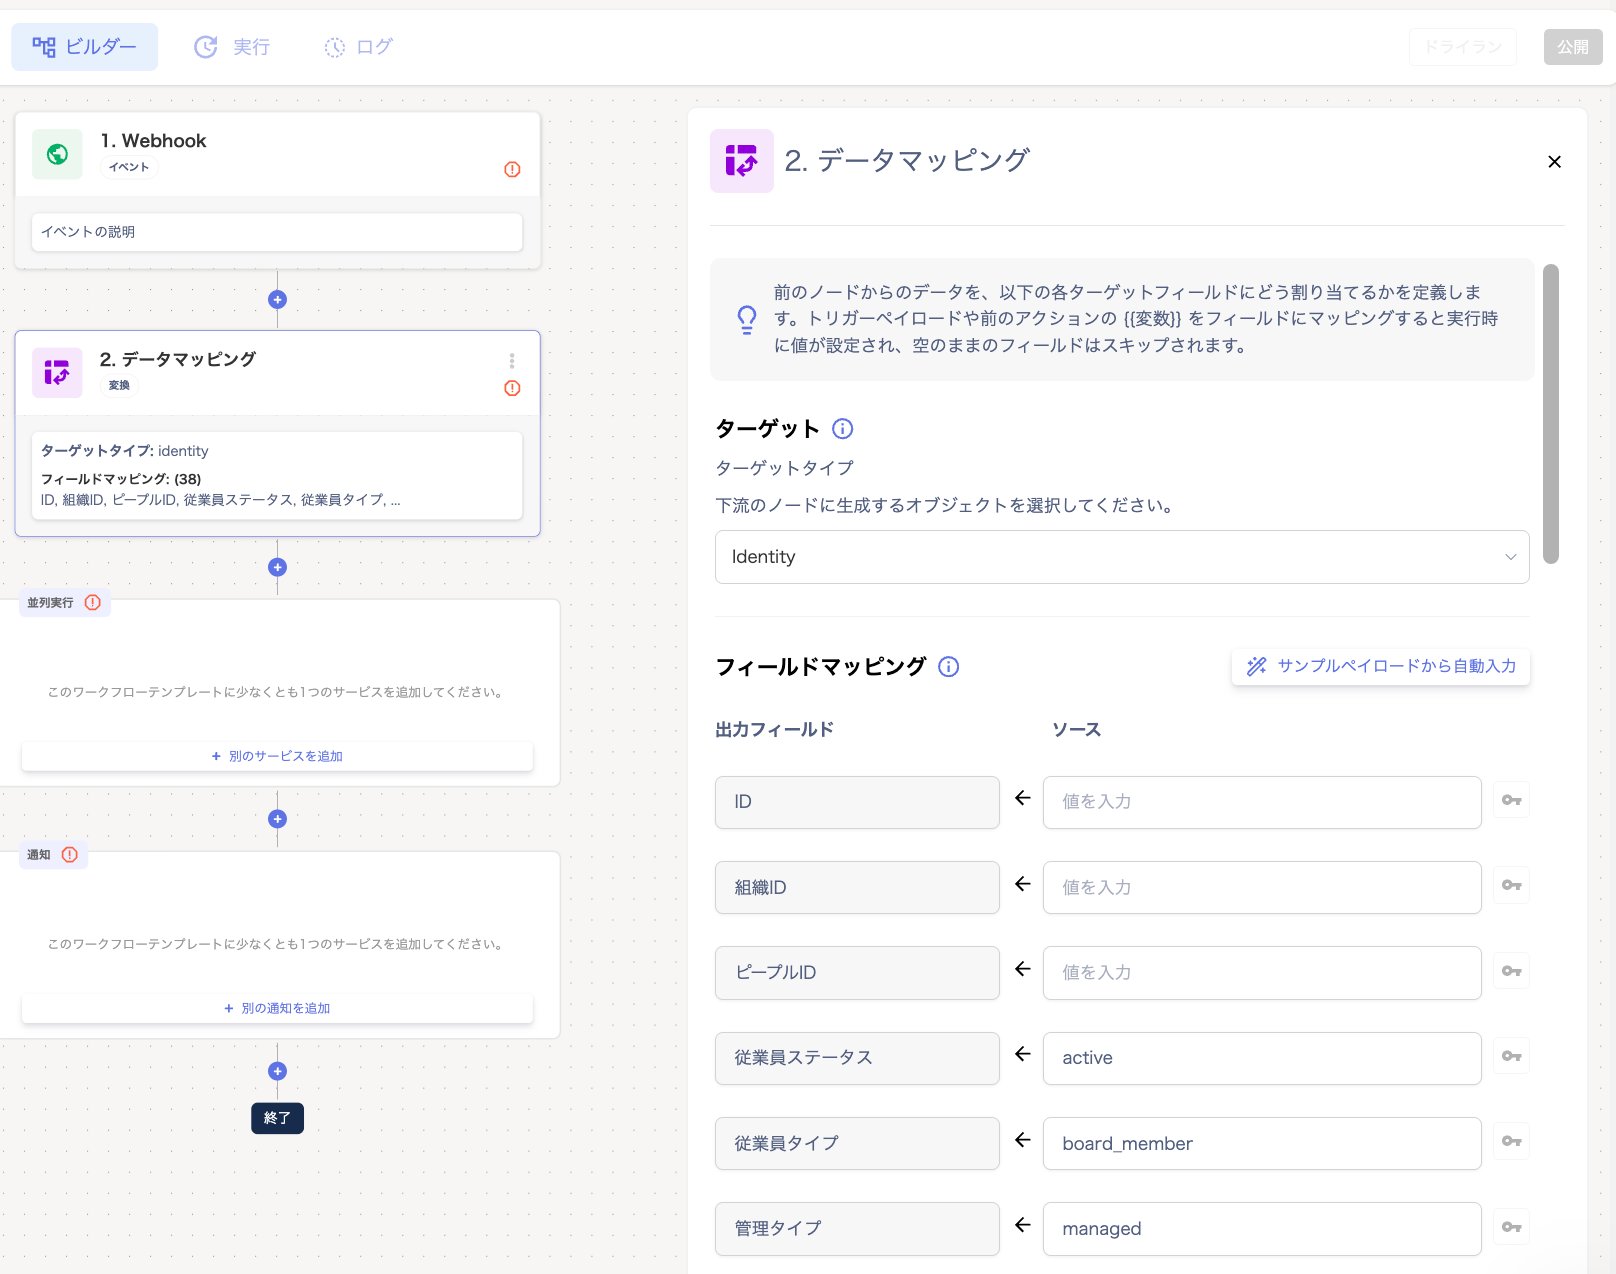
Identity
In the “Builder” screen, under “3. Identity”, perform the following actions on the target user.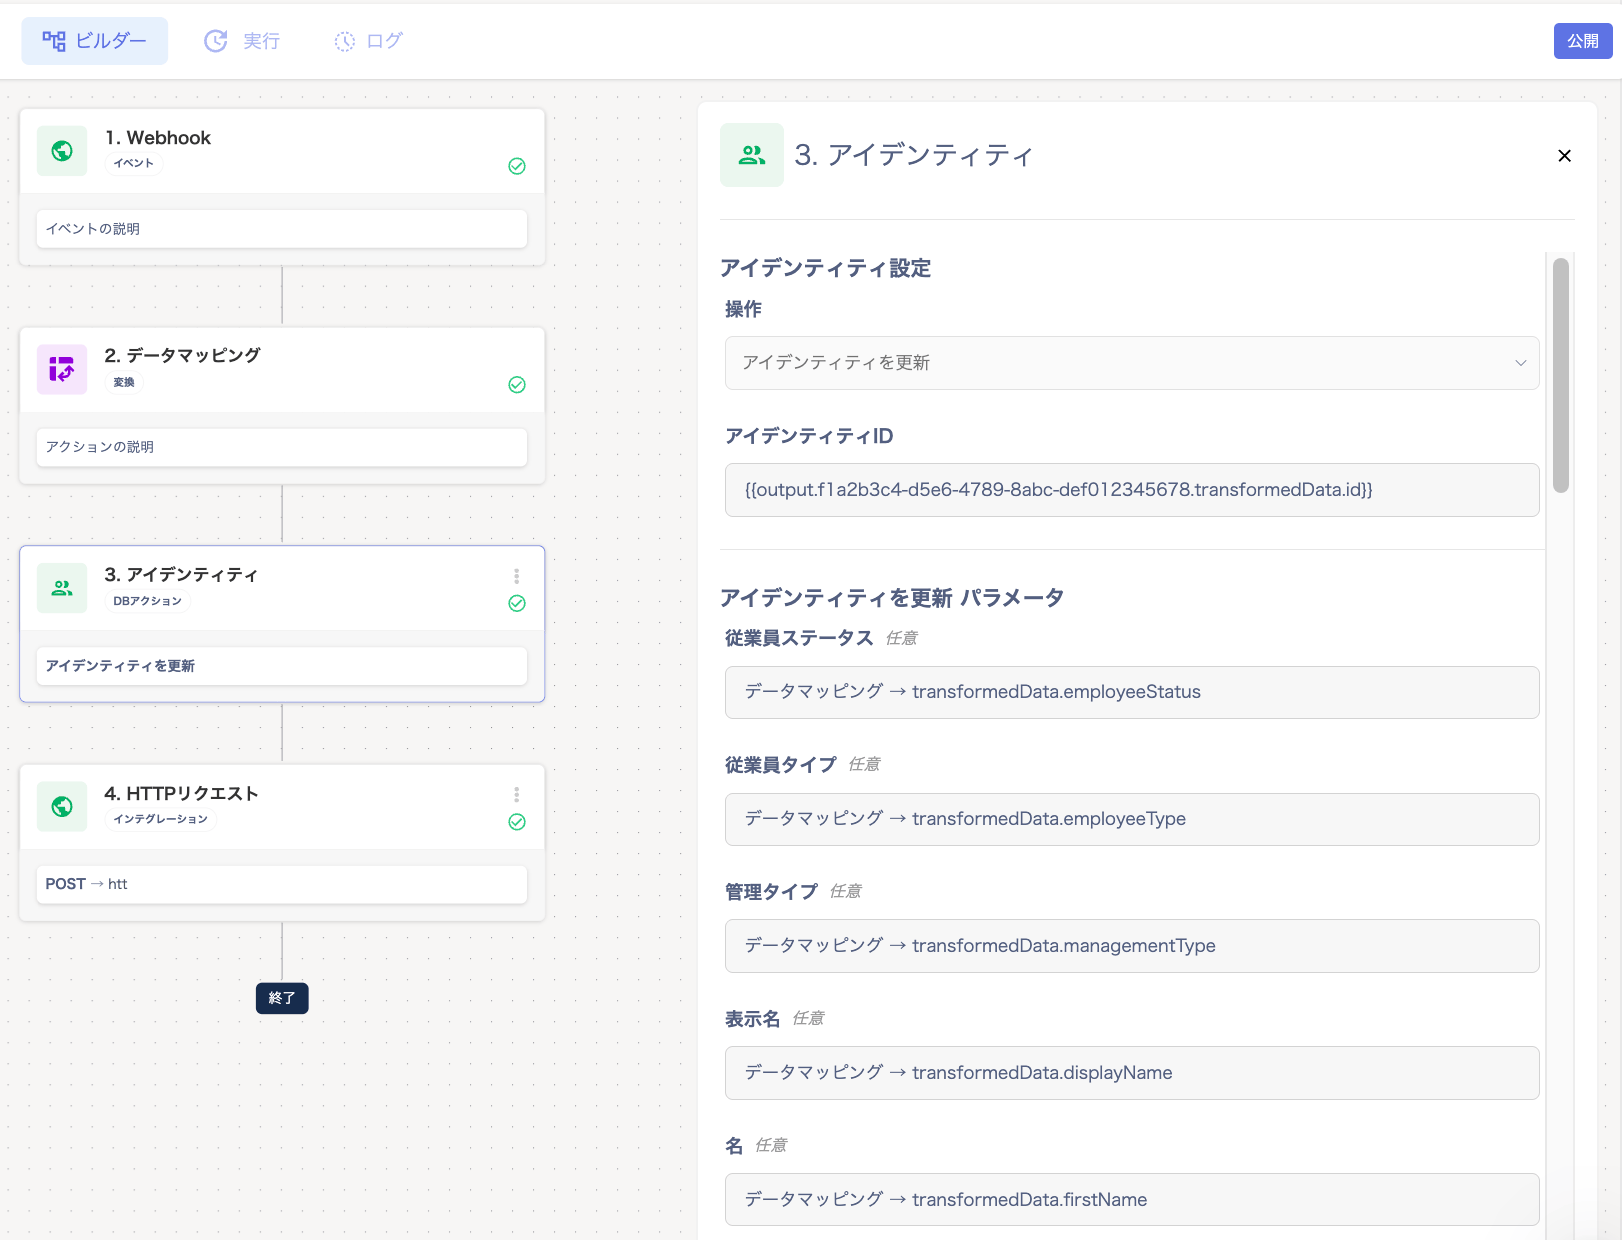
Service Selection (Parallel Execution)
-
Under “Parallel Execution”, click [+ Add Another Service] to add the services you want to configure in the workflow.
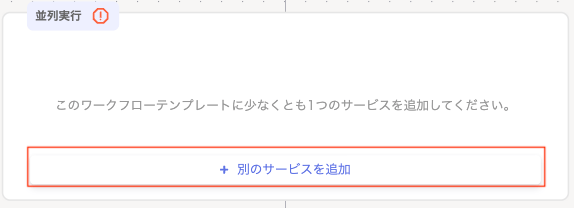
- Select the service shown under “Provisioning” or “Deprovisioning”. The displayed services are those preconfigured (mapped). If configuring multiple services in the workflow, turn on “Multiple Selection”.
- On the “Parallel Execution” screen, click a selected service to display the “Settings” panel on the right. Select “Service Settings - Workspace Name” from the dropdown. To configure multiple services, click [+ Add Another Service].
Notification
- Under “Notification”, click [+ Add Another Notification].
- On the “Message” screen, select the notification method “Slack/Email”. If you want to set up multiple notifications, turn on “Multiple Selection”. For Slack setup steps, see Notification Method “Slack” Setup Instructions.
- On the “Notification” screen, click the selected message to display the “Settings” panel on the right.
HTTP Request
In “HTTP Request”, configure a request that calls an external system’s API. The workflow waits for the response before it continues.Automatic Execution and How to Verify
This workflow does not need to be started manually. It runs automatically each time it receives a signed POST request. When a valid request reaches the Webhook URL, it immediately validates the “timestamp” and “signature”. Once validation passes, it saves the payload and starts the workflow in the background. You can verify the payload values actually used in the latest execution in the following locations:- Editor: View actual values in the variable picker.
- Execution Details: Detailed data of expanded values is displayed in the Variable Resolution panel.
Steps to Verify Operation
Check the “Run” and “Log” tabs to verify that the built workflow is operating correctly. Open the “Run” and “Log” tabs to see detailed information. This includes “Received Payload”, “Resolved Variables”, and “Success/Failure of Each Action”. Send real data (or use the debug panel) from your sending system. Then verify that the status progresses fromPending to complete. Also verify that identity creation and notifications occur as expected.
If execution does not progress from
Pending: This may not be a configuration error, but rather a system-side queuing issue.