SaaS status: The target SaaS must be connected with administrator privileges (including API permissions) sufficient to create and delete accounts.
What are custom fields?
Custom fields let you add company-specific attributes beyond standard fields (such as name and email address). Examples include employee numbers or automation flags. Custom fields display a [Custom] label. The custom fields supported in automation are directory custom fields. To use custom fields in automation, you must first add a custom input field in Directory Settings.
Custom field configuration screens in automation
You can configure custom fields on the following screens in automation:- Automation > “Services” tab
- Automation > “Automation” tab
”Services” tab
When creating accounts for a specific SaaS, you can assign custom fields to SaaS attributes such as roles and groups.How to configure
-
Go to Automation > “Services” tab > “Connection Settings” screen, then click [Add Connection]. Alternatively, click the three-dot menu [︙] on the right side of the target service and select [Edit].

-
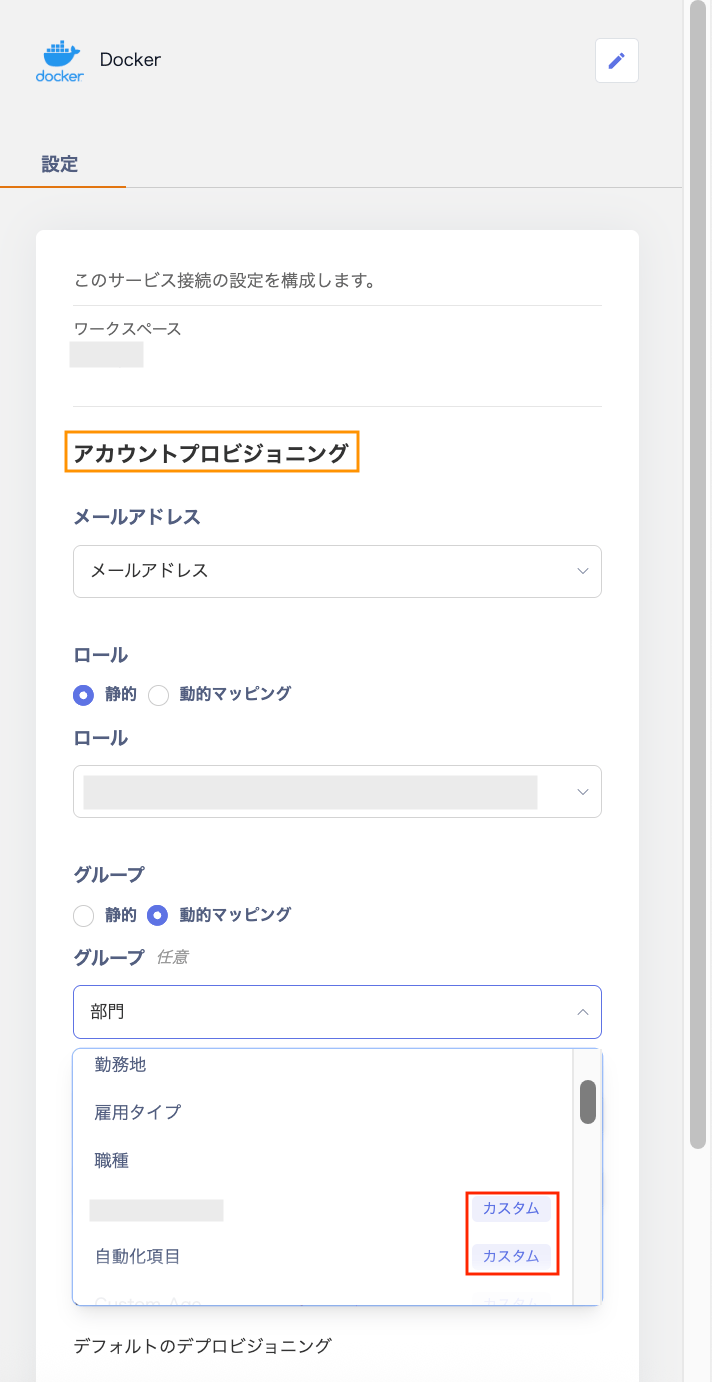
On the “Settings” screen, under “Account Provisioning,” select “Dynamic Mapping” via the radio button for each field. Then choose a “Custom” field from the dropdown menu. Custom fields display a “Custom” label. For details on dynamic and static mapping, see Differences in Mapping Methods.
”Automation” tab
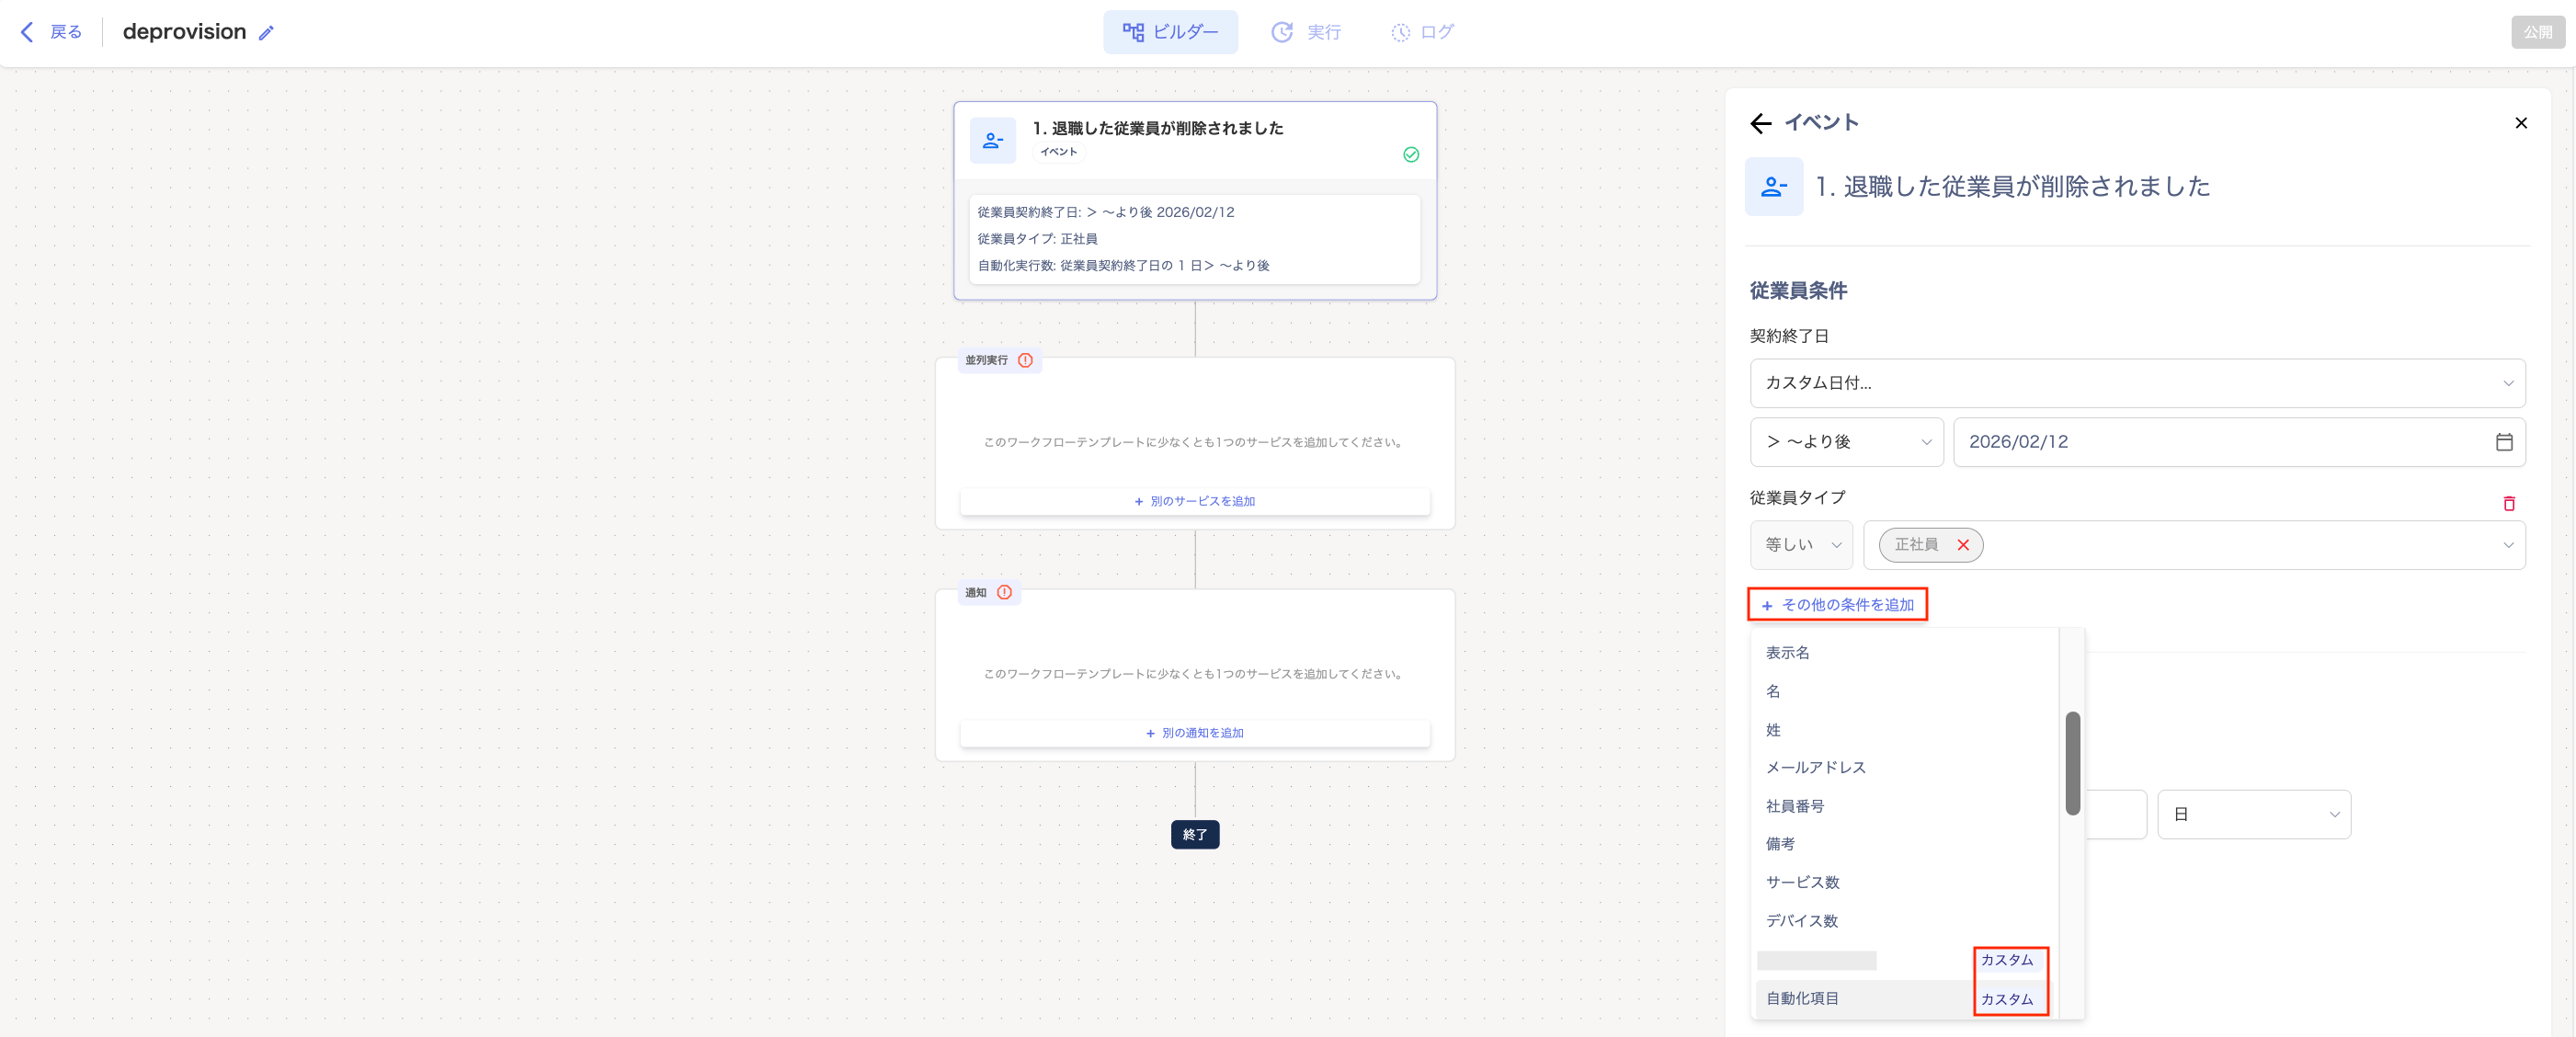
In the Workflow > “Builder” screen, you can use custom fields as trigger conditions. You can also use them as data mapping sources on the following screens.”1. A new employee has been added” / “1. A retired employee has been deleted” screen
Click “Add another condition” and select a previously created custom field from the dropdown. This restricts the workflow to users with specific attributes.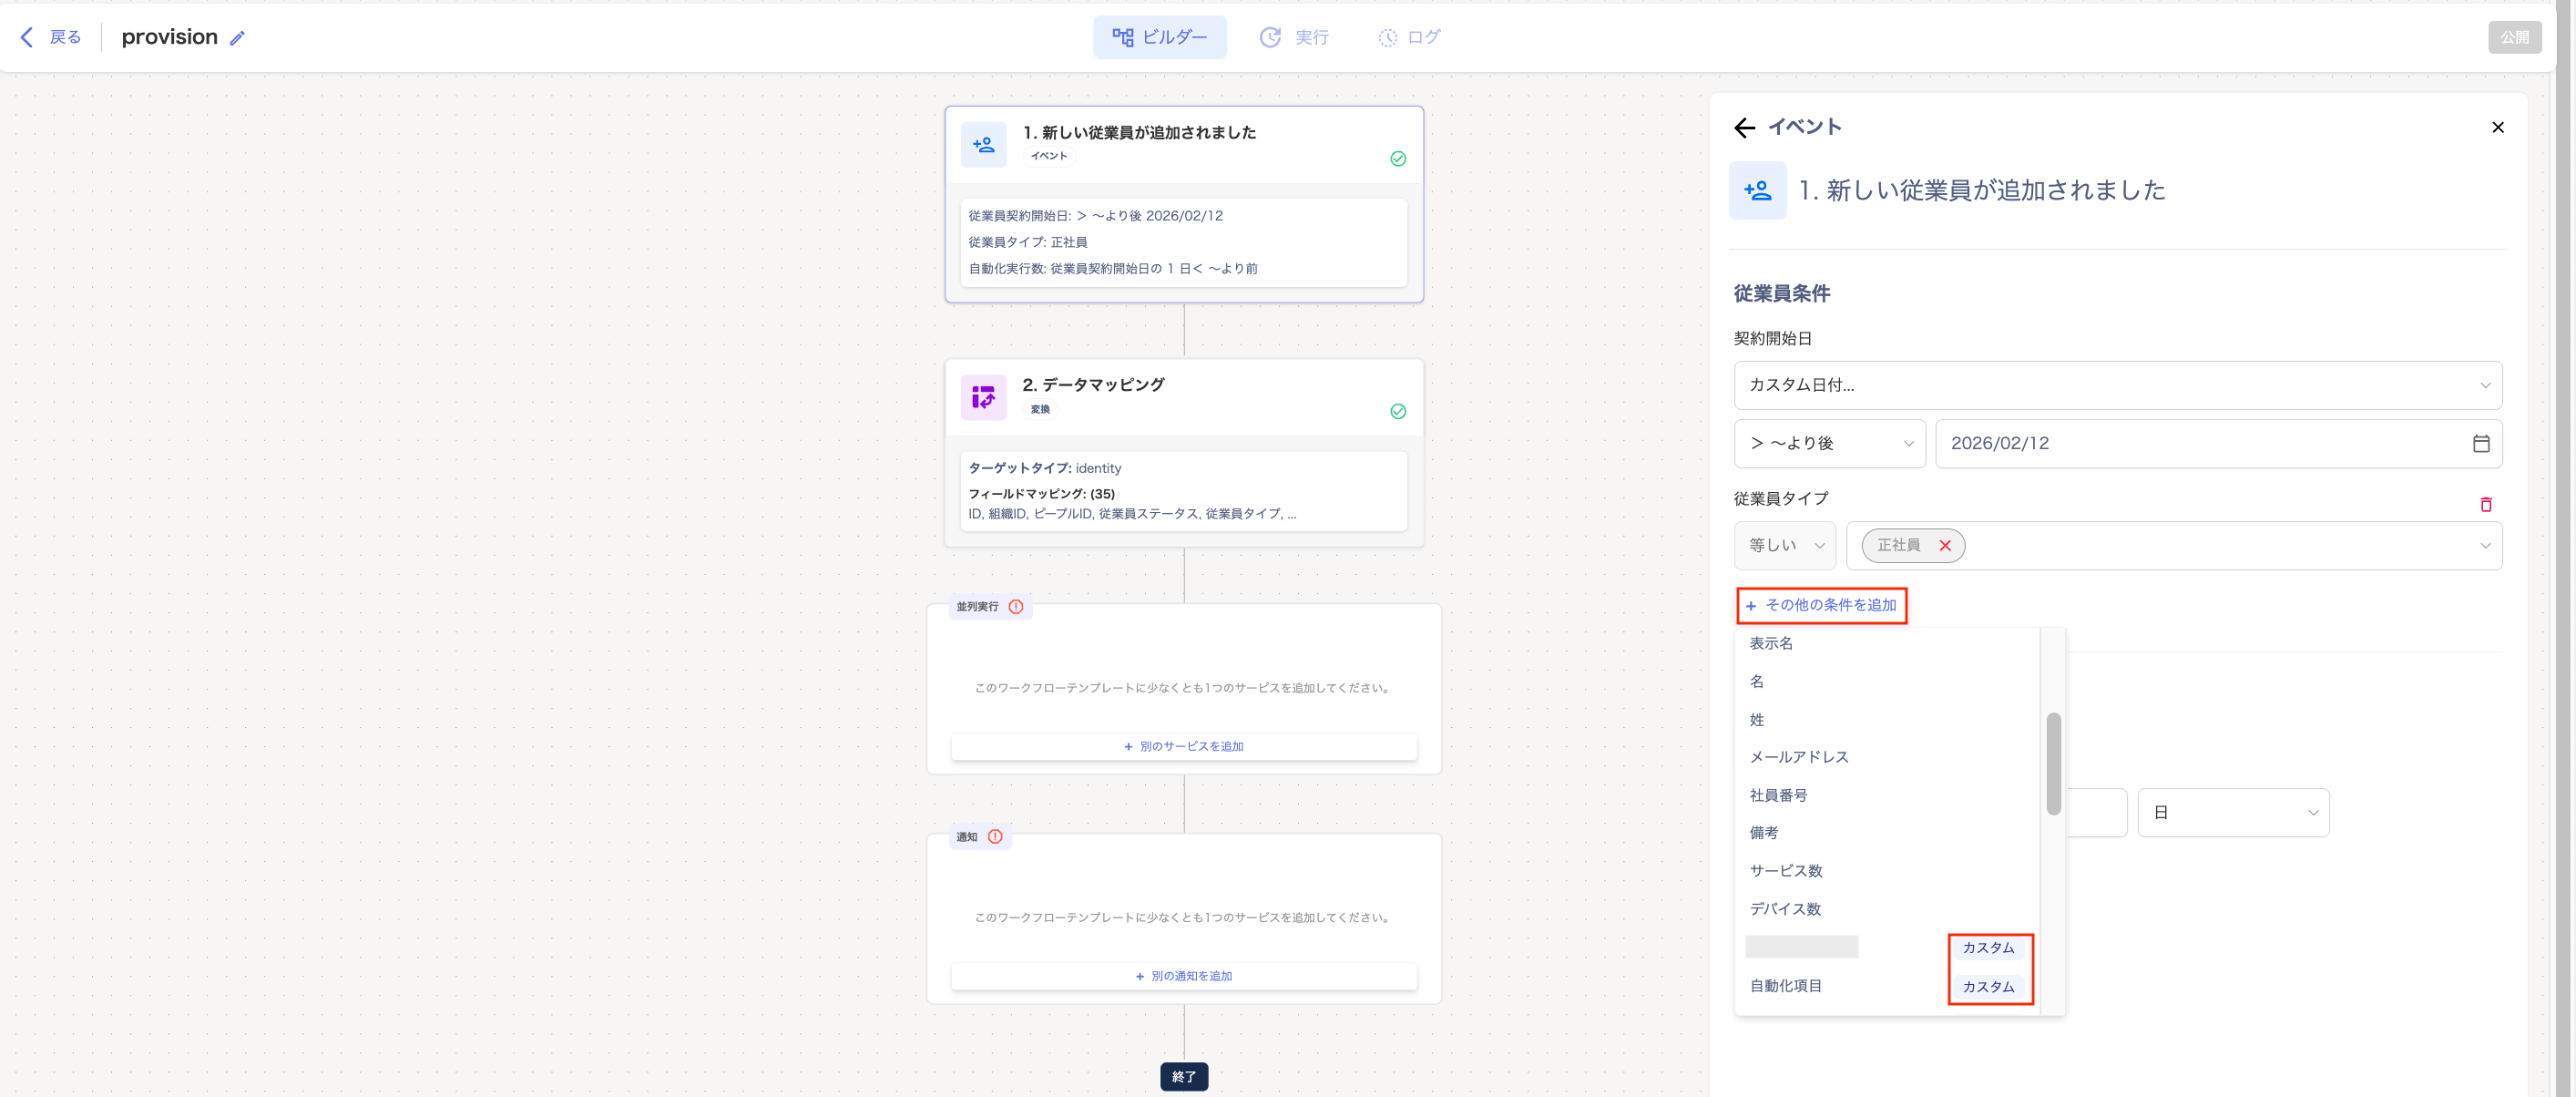
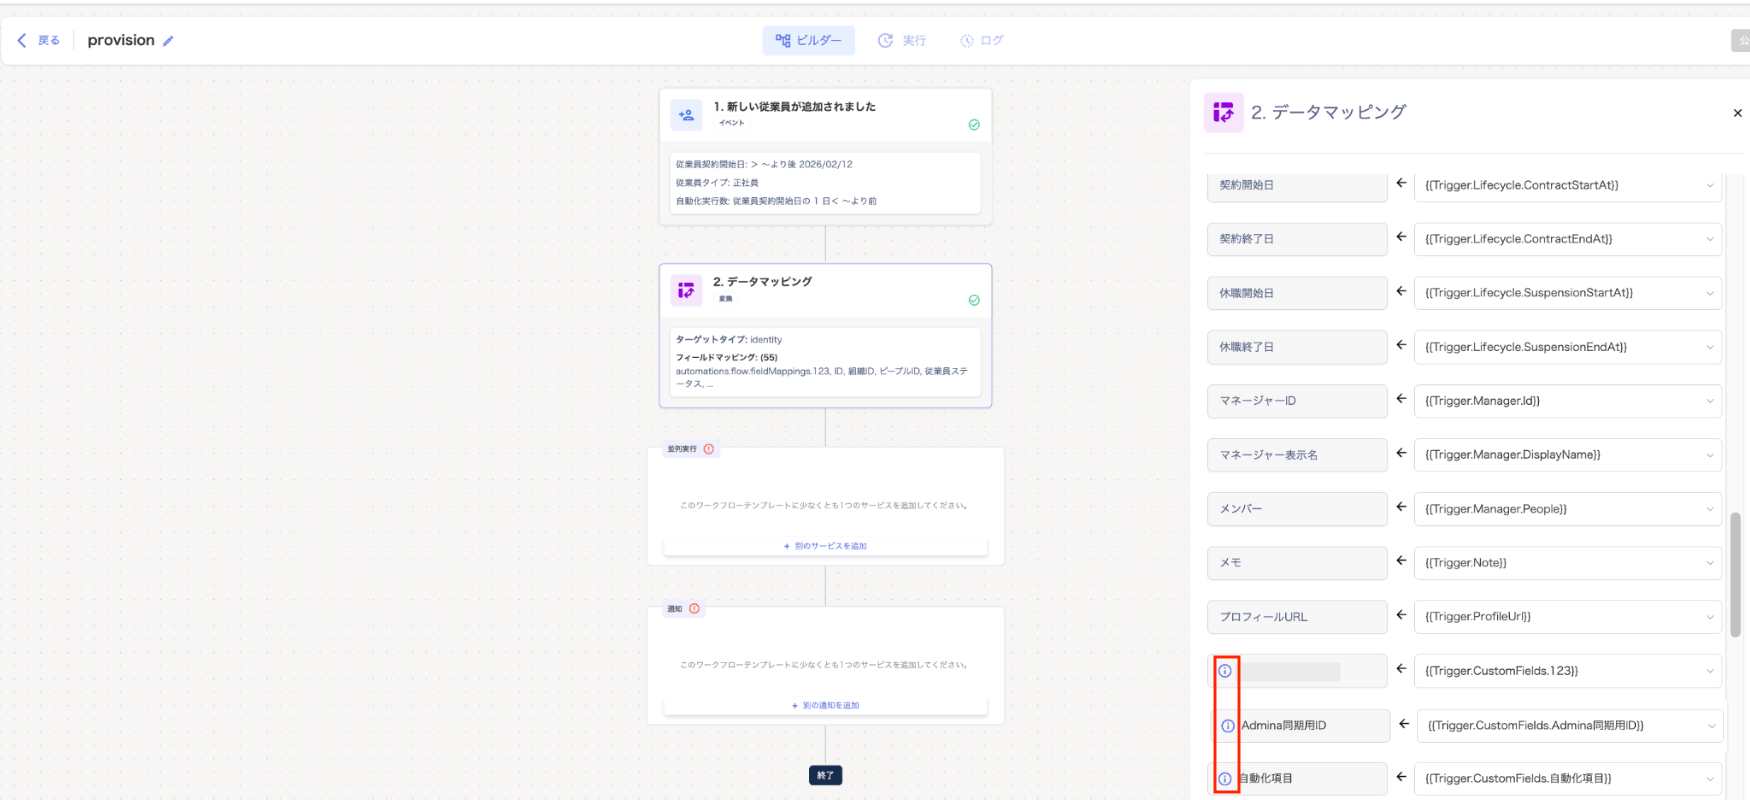
”2. Data Mapping” screen
On the “Data Mapping” screen, you can specify a custom field as a mapping target. You can also use it as a source (the value reference). Use the format{{Trigger.CustomFields.FieldName}} in the input field on the right side of the screen. This references a custom field value and assigns it to each field.