

Integration Specifications
Prerequisites
An account with administrator privileges is required for the prerequisites.
How to Log In to Netsuite
Go to the Netsuite login page, enter your email address and password, and log in.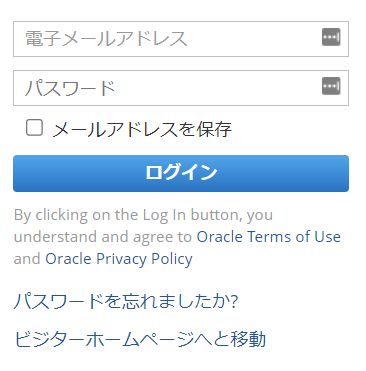
Enable Token-Based Authentication
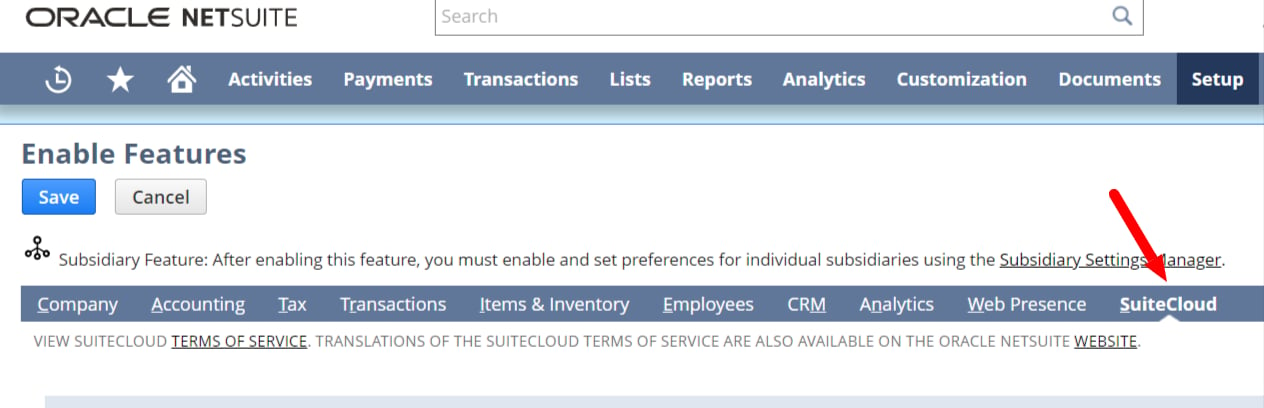
- After logging in to Netsuite, go to Setup > Company > Enable Features from the top menu.
-
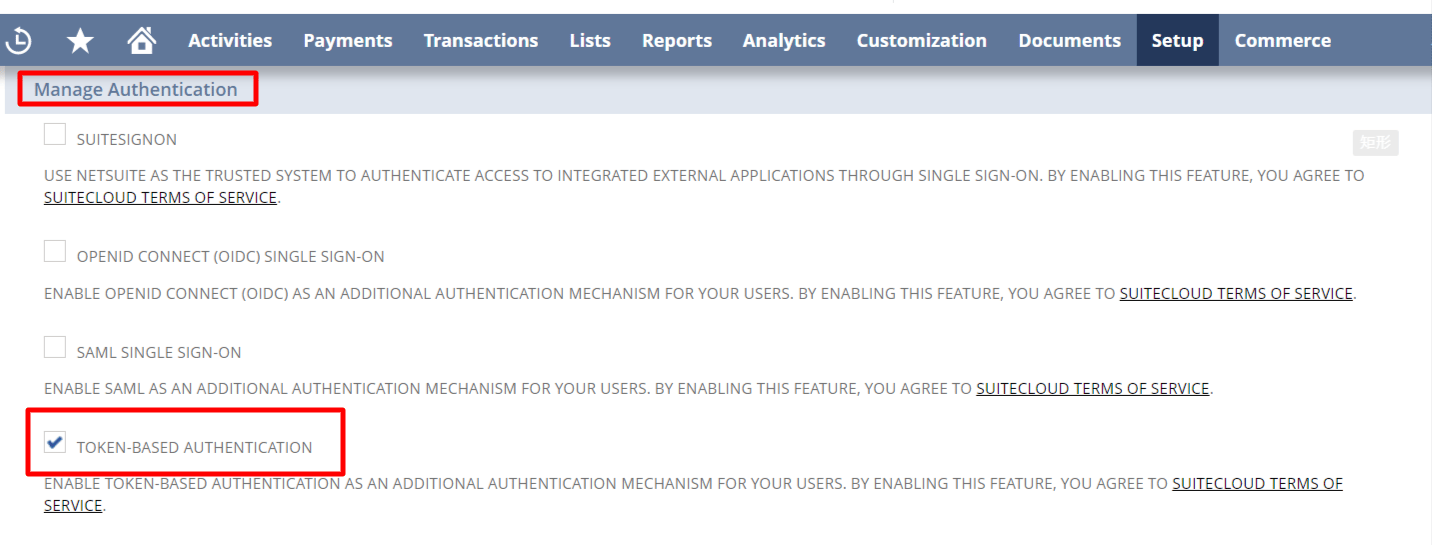
Select SuiteCloud from the Enable Features page menu, and scroll down to the Manage Authentication section.
-
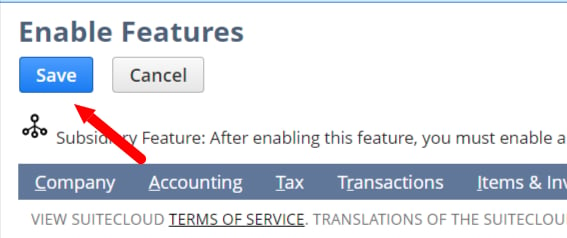
Check the TOKEN-BASED AUTHENTICATION checkbox, then click the SAVE button at the bottom or top of the page.
Create an Integration Record
- Go to Setup > Integration > Manage Integrations > New from the top menu.
-
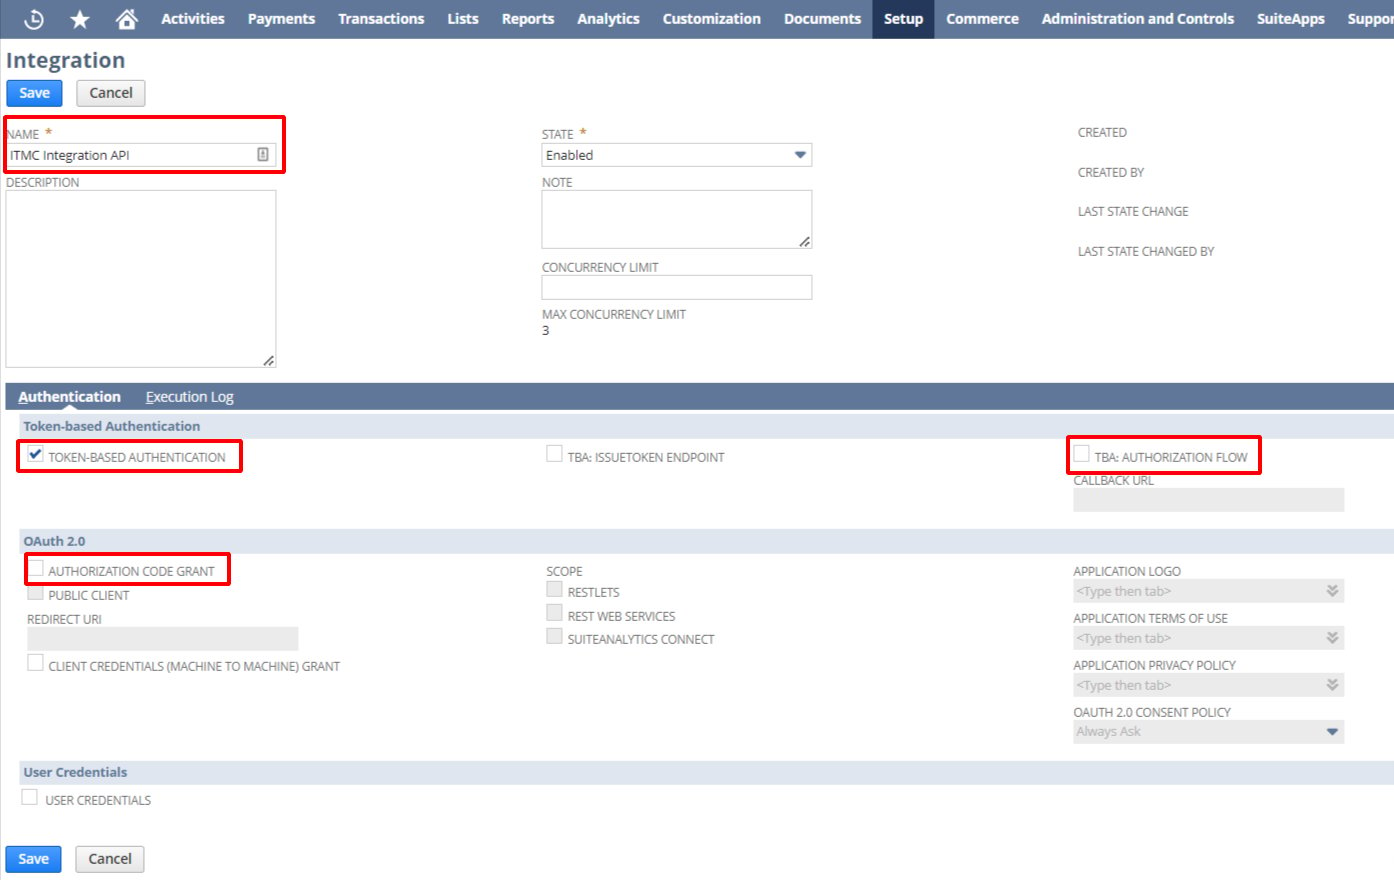
The Integration input form will appear. Fill it in as follows:
- Enter
ITMC Integration APIin the NAME field - Under Token-based Authentication: check TOKEN-BASED AUTHENTICATION
- Under Token-based Authentication: uncheck TBA: AUTHORIZATION FLOW
- Under OAuth 2.0: uncheck AUTHORIZATION CODE GRANT
- Enter
-
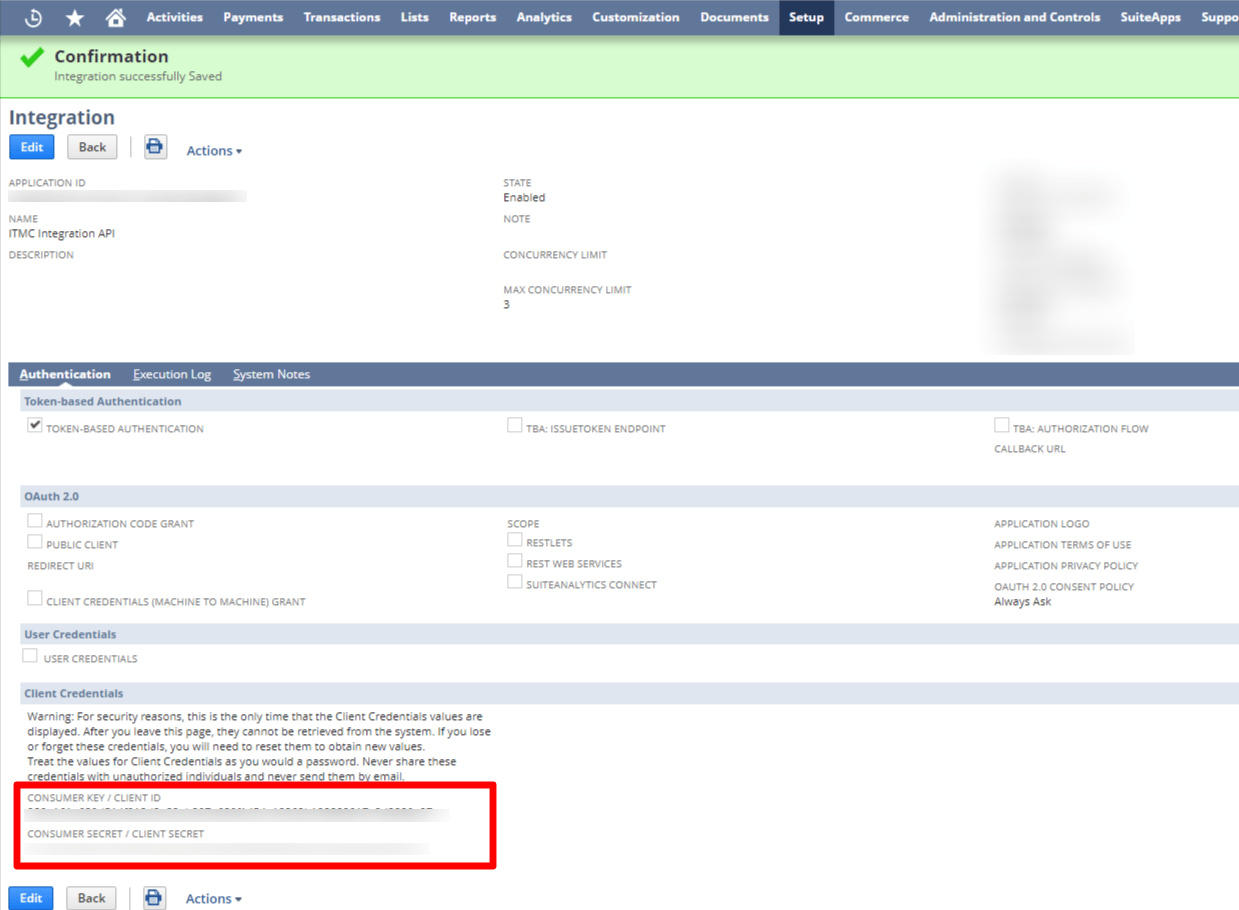
After filling in the form, click SAVE. The CONSUMER KEY / CLIENT ID and CONSUMER SECRET / CLIENT SECRET will appear at the bottom of the page — save them. Click Back to finish.
Note that CONSUMER KEY / CLIENT ID and CONSUMER SECRET / CLIENT SECRET will not be displayed again.
Create a Role (Preparation for Token Creation)
To create a Token, it must be associated with a Role.- Go to Setup > Users/Roles > Manage Roles from the top menu.
-
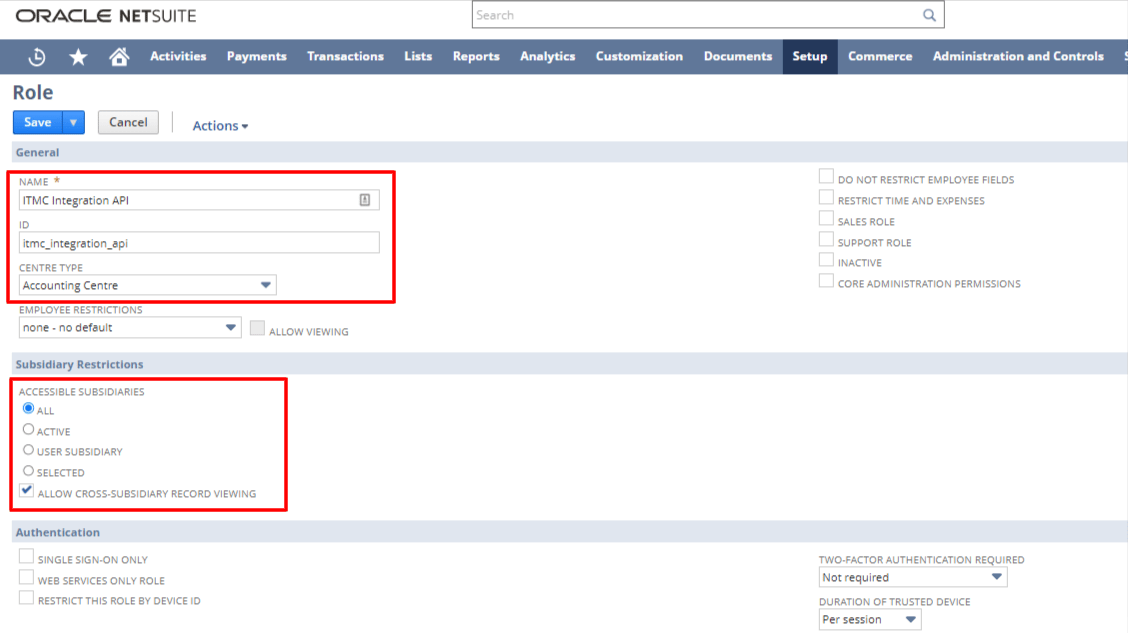
The Role input form will appear. Fill it in as follows:
- Enter ITMC Integration API in the NAME field
- Enter itmc_integration_api in the ID field
- Select Accounting Centre for CENTRE TYPE
- Under Subsidiary Restrictions, select ALL and check ALLOW CROSS-SUBSIDIARY RECORD VIEWING
-
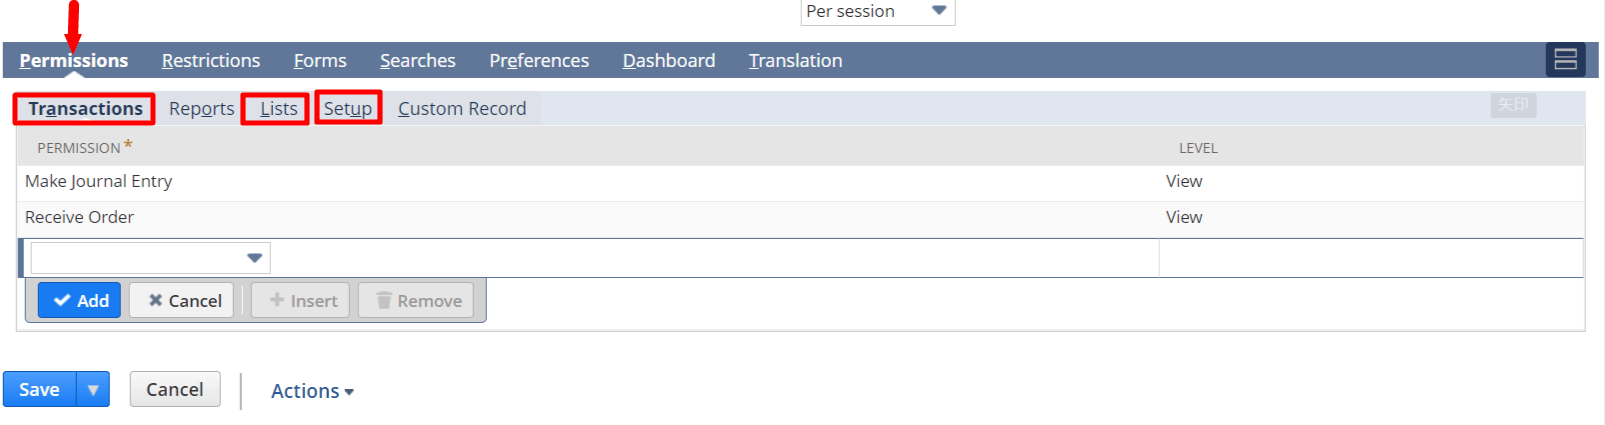
Then enter the Permissions as shown below and click SAVE. Some items may not appear depending on your configuration — that is fine; add the available permissions.
Create or Update an Employee
- Go to Lists > Employees > Employees from the top menu. Select New to create a new employee, or Search to find the Employee whose Role you want to update.
-
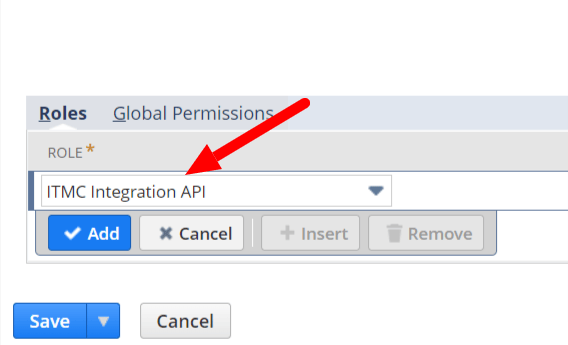
In the Role section at the bottom of the Employee form, add ITMC Integration API.
Create an Access Token
- Go to Setup > Users/Roles > Access Tokens > New from the top menu.
-
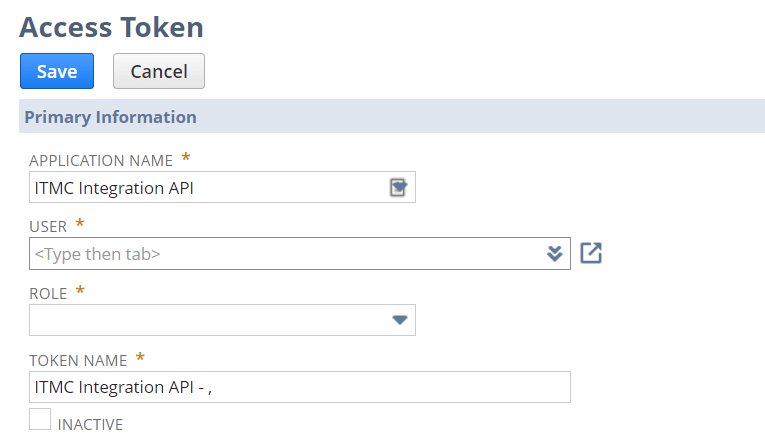
The Access Token creation form will appear. Fill it in as follows and click SAVE.
- Select ITMC Integration API for APPLICATION NAME
- For USER, select the Employee whose Role was created or updated in the “Create or Update an Employee” step
- Select ITMC Integration API for ROLE
-
The TOKEN ID and TOKEN SECRET will be generated — save them.
Note that TOKEN ID and TOKEN SECRET will not be displayed again.
Upload the Suitelet Script File
-
Go to Customization > Scripting > Scripting > New from the top menu. Hover over the SCRIPT FILE tab and a
+ iconwill appear — click it.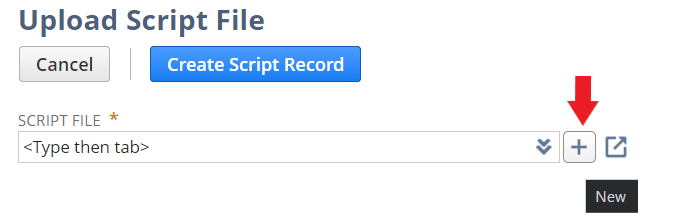
-
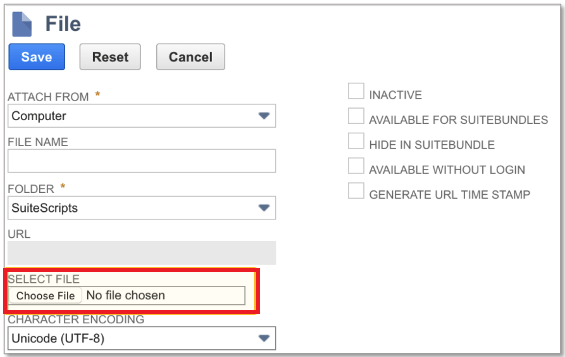
A file form popup will appear.
Download and extract the zip file below. There is a .js file named tmc_integration_api_restlest — click SELECT FILE to select it, then click SAVE. ※Do not change the file name or add any text input to the downloaded file.
itmc_integration_api_restlest.js.zip
-
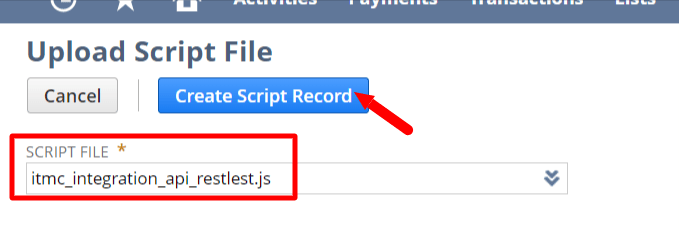
Next, verify that the SCRIPT FILE matches the file name you just saved, then click Create Script Record.
-
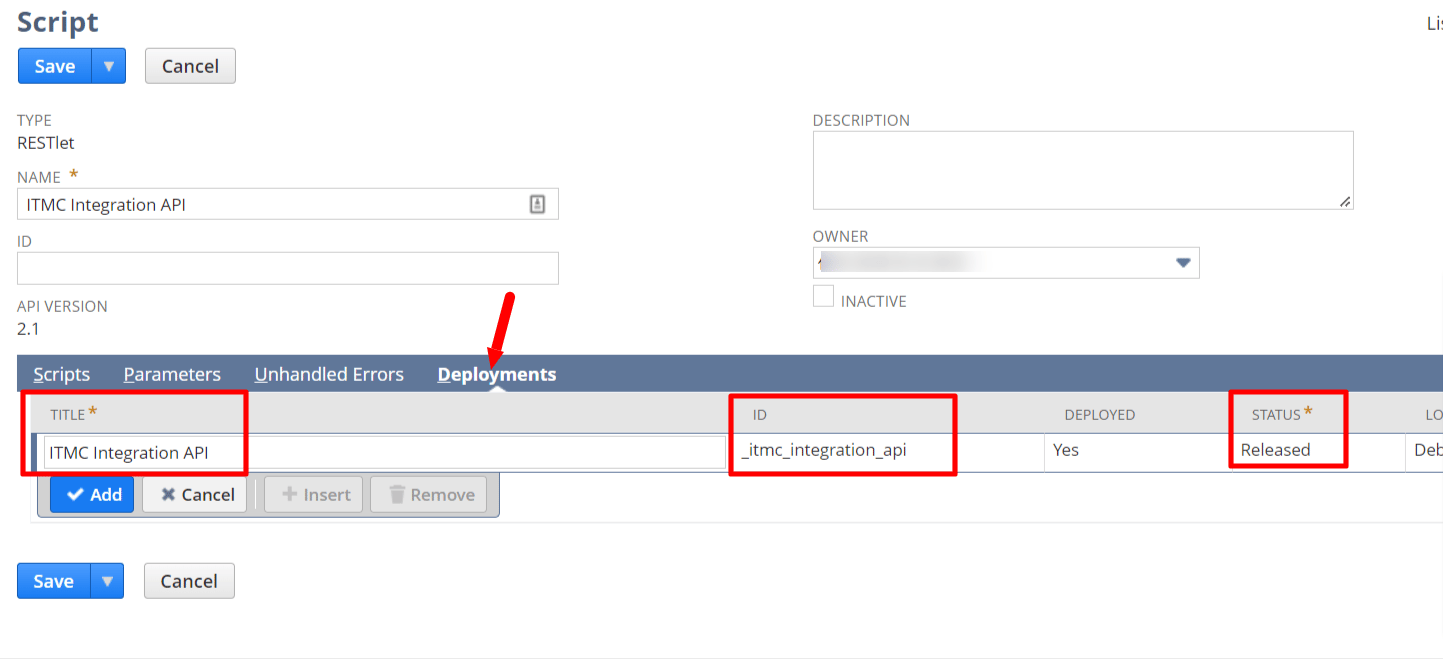
The Script form will appear. Fill it in as follows and click SAVE.
- NAME: ITMC Integration API
- Under Developments, enter the following and click Add for each:
- TITLE: ITMC Integration API
- ID: _itmc_integration_api
- STATUS: Released
-
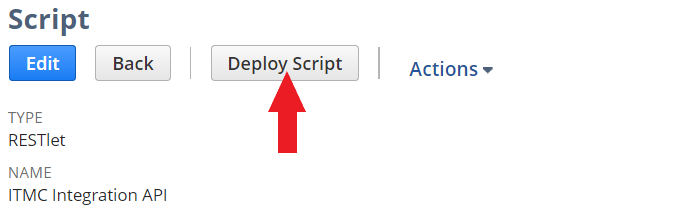
On the next screen, select Deploy Script.
-
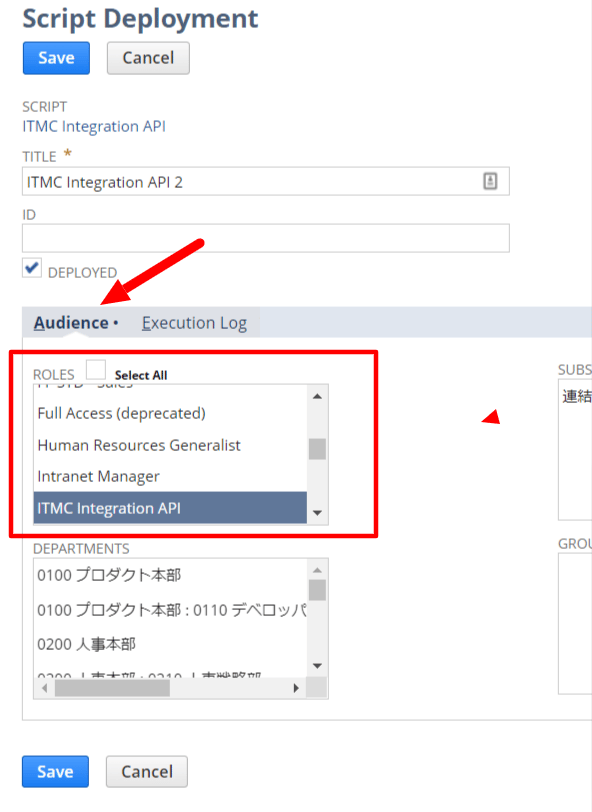
The Script Deployment form will appear. Select ITMC Integration API from Audience ROLES and click SAVE.
-
The EXTERNAL URL will be displayed — save it.
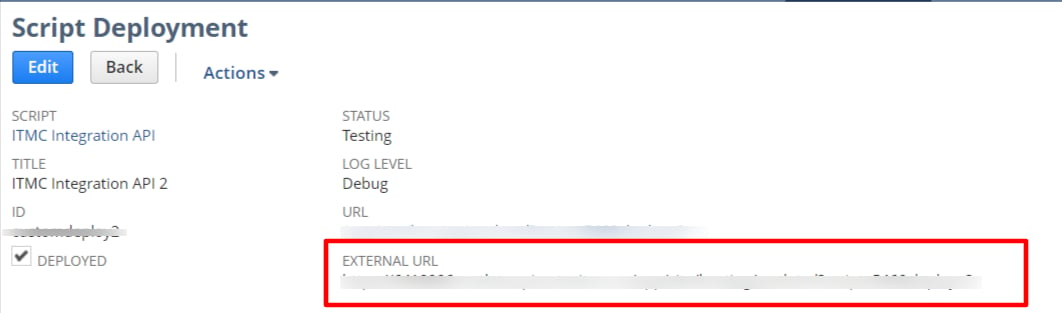
How to Obtain Your Account ID
Go to Setup > Company > Company Information from the top menu and save the ACCOUNT ID.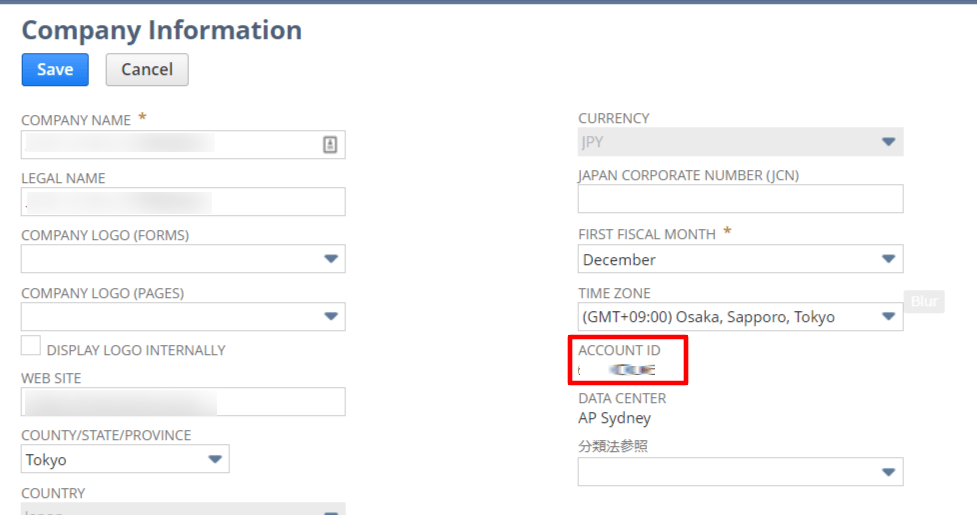
Integration Setup
- In the integration screen, search for Netsuite.
-
Enter the information obtained in the previous steps as follows, then click Connect.
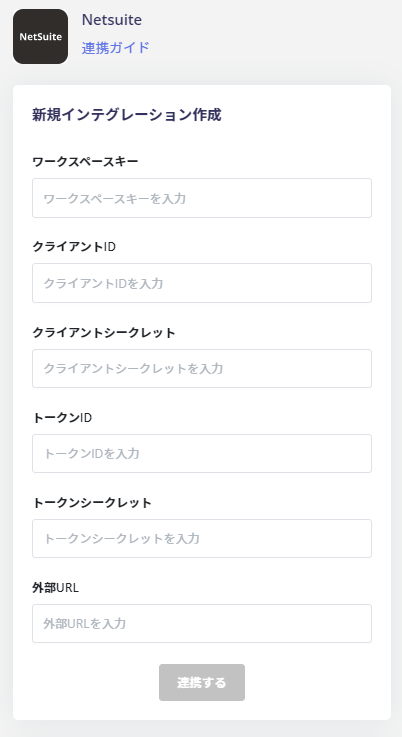
- Workspace Key: ACCOUNT ID (from “How to Obtain Your Account ID”)
- Client ID: CONSUMER KEY / CLIENT ID (from “Create an Integration Record”)
- Client Secret: CONSUMER SECRET / CLIENT SECRET (from “Create an Integration Record”)
- Token ID: TOKEN ID (from “Create an Access Token”)
- Token Secret: TOKEN SECRET (from “Create an Access Token”)
- External URL: EXTERNAL URL (from “Upload the Suitelet Script File”)
- Once the integration with Netsuite is successful, the registered user information will appear in the account list. If the process does not complete successfully, go to the Status tab on the integration screen, click Edit. Try connecting again. If the issue persists, please contact us via chat.