

Integration Specifications
OneDrive Integration
These are the instructions for integrating with Microsoft OneDrive. Once connected, the integration retrieves information about publicly shared files. About the external shared content management feature- Account information is not retrieved.
- Only the names and links of publicly shared files are retrieved. Data is not synced.
- Viewing files requires the Admin role.
- About the Admin role
- This integration can also be used for SharePoint synchronization.
Prerequisites
Global administrator privileges are required for this setup.
Registering the Integration Application (Azure app portal)
- Navigate to the Azure app registration portal, click [+ New registration], and register an application with any name. Enter the values as shown in the image and click Register.
- Click the application you created. From the left menu, go to API permissions > + Add a permission. Select Microsoft Graph, then select Application permissions.
-
Add the following 6 permissions:
Application.Read.AllDirectory.Read.AllFiles.ReadWrite.AllOrganization.Read.AllSites.Read.AllUser.Read.All
- After adding, click Grant admin consent for Default Directory and change the status to Granted for Default Directory.
-
Issuing a Certificate
From the left menu, go to
Certificates & secrets>Client secrets>New client secret. Enter the following values and click Add.- Description: The name for the key. Enter any name.
- Expires: The expiration period for the API key. Select any duration. (If the key expires, the integration will error and you will need to reissue it.)
-
Copy the
Valueof the created key and save it (the value is only displayed once, so be sure to copy it at this stage). This will be used as this service’s client secret. -
From the left menu, display Overview and confirm and save the following values:
Directory (tenant) ID: Used as this service’s workspace key.Application (client) ID: Used as this service’s client ID.
Integration Setup
-
In the integrations screen, search for OneDrive.
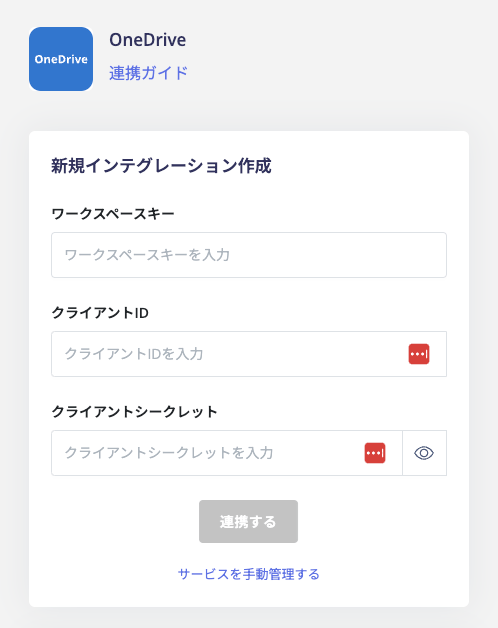
-
Enter the following values and click [Connect].
- Once the OneDrive integration is successful, the Files tab will appear under Services. It will display information about shared files. (Synchronization may take some time depending on the number of files.)
- If the integration does not complete successfully. Click Edit on the status tab of the integrations screen and try connecting again. If the issue persists, please contact us via chat.