Supported Features

Account Deletion Account Provisioning

Prerequisites

How to Log In to Kibela

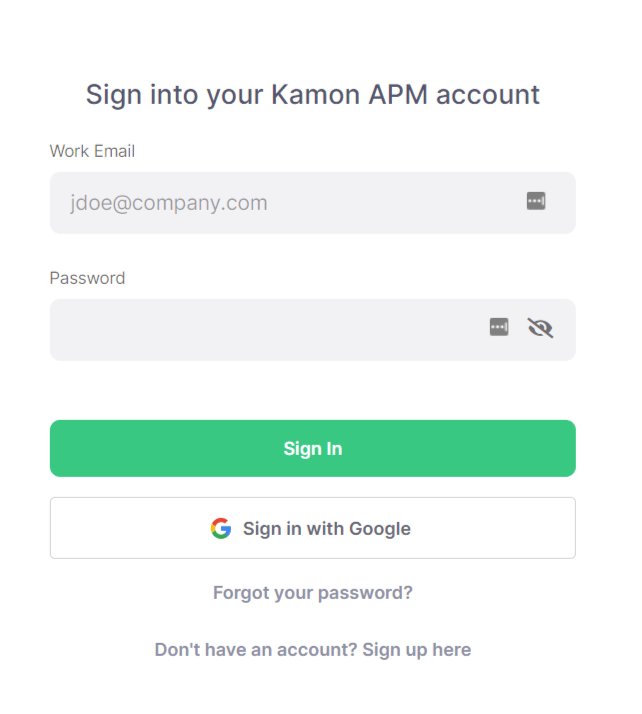
Go to the Kibela login page, enter your email address and password, and log in. Kibela login screen

How to Get Your Workspace Key

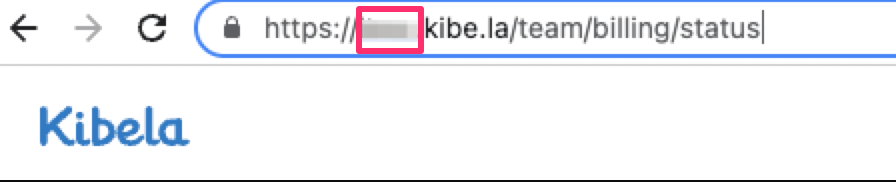
After logging in to Kibela, the URL portion is your workspace key — save it for later. https://{workspace key}.kibe.la (do not include https:// or kibe.la) Kibela workspace key confirmation screen

How to Get Your Access Token

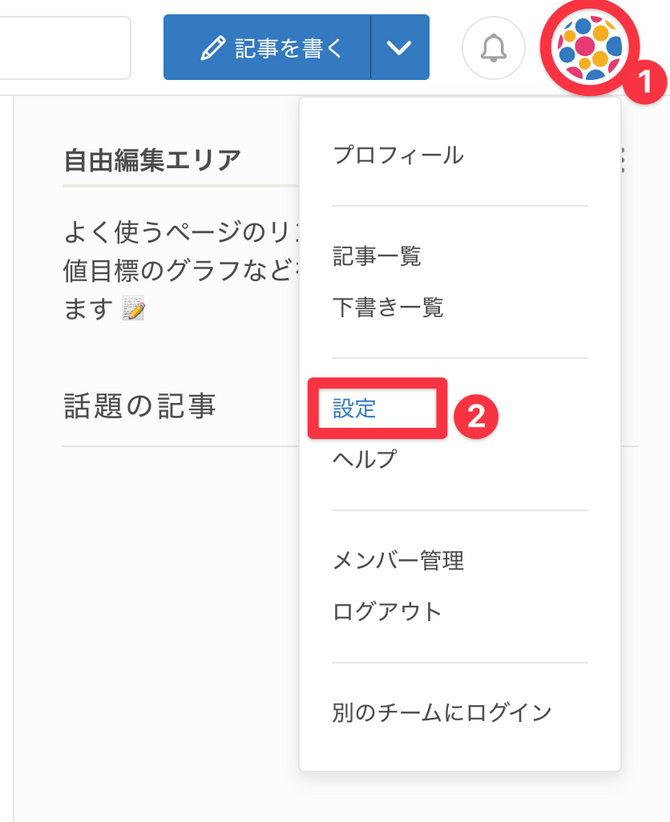
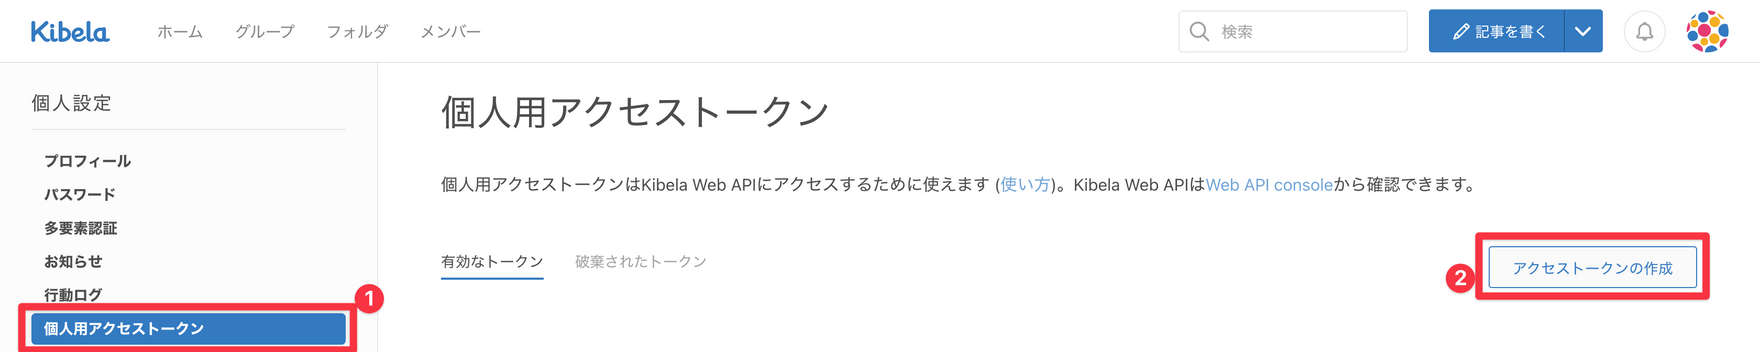
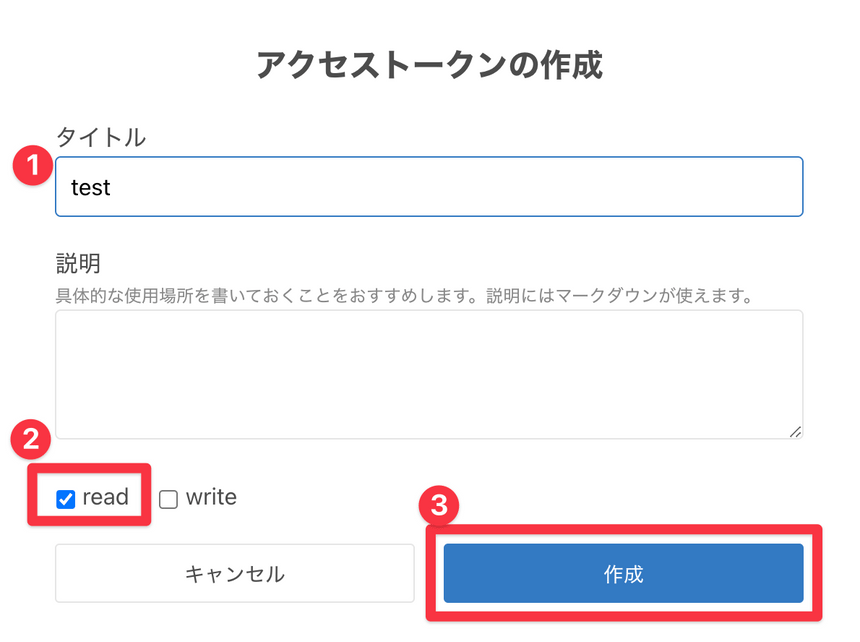
Click on the profile photo in the upper right corner of the screen and select Settings. Kibela profile settings screen From the personal settings menu on the left, select Personal Access Tokens, then click Create Access Token. Personal access token settings screen The access token creation screen will appear. Enter any title and description (e.g., intended use), check read, and click Create.
If you plan to use Admina’s account provisioning feature, also check Write.
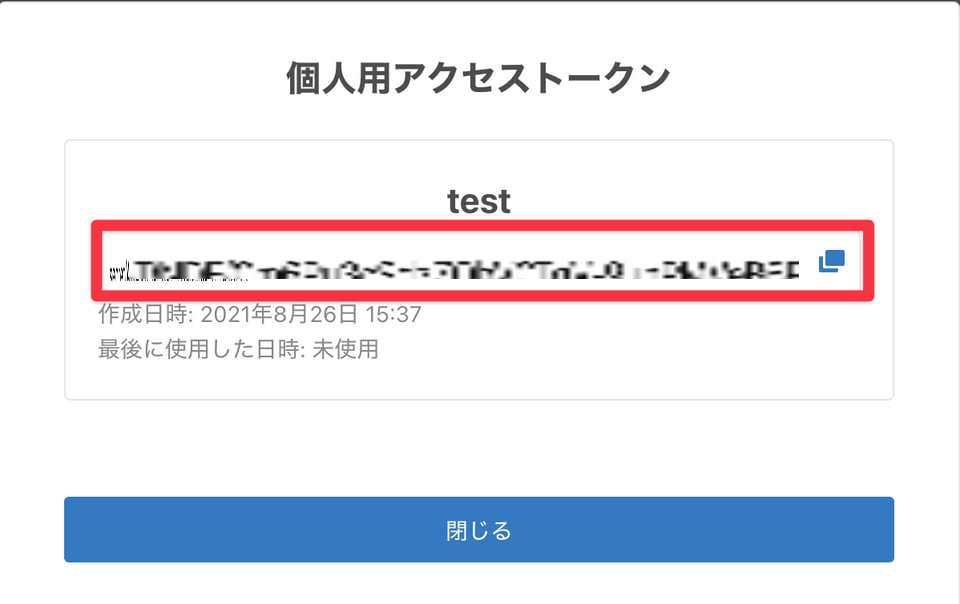
Access token creation screen The access token is your access key — copy it and save it. Access token confirmation screen

Integration Setup

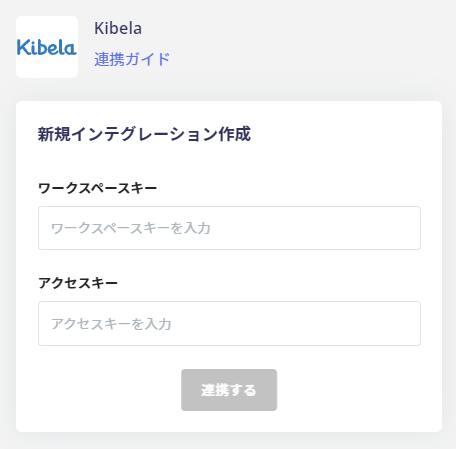
Search for Kibela on the MoneyForward Admina integrations page. Kibela integration search screen Enter the workspace key and access key obtained in the previous steps, then click Connect. Kibela integration setup screen Once the integration with Kibela is successful, registered user information will appear in the account list. If the integration did not complete successfully, click Edit from the Status tab on the integrations page and try connecting again. If the issue persists, please contact us via chat. For an overview of the Kibela integration, visit the integration page.

Last modified on June 18, 2026