

Integration Specifications
- Administrator account and developer privileges are required for LINE WORKS integration.
- The procedure has been updated following the API upgrade to version 2.0. Customers who previously connected via API 1.0 should reconnect using this procedure.
- For details on API usage, please also refer to the LINE WORKS official documentation. The steps for using LINE WORKS API 2.0 are as follows:
- In the LINE WORKS Admin Console, go to Security > Administrator Permissions to grant Developers permission to the app developer (reference).
- If you are unable to use the API even after granting permissions, please contact LINE WORKS.
Prerequisites
How to Log in to LINE WORKS Developers
Go to the LINE WORKS Developers login page, enter your ID and password, and log in.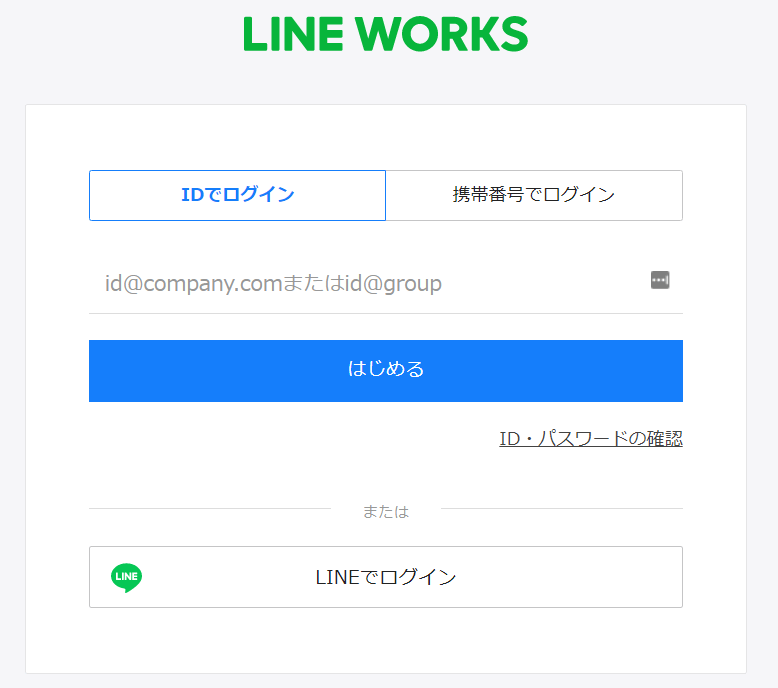
How to Obtain the Workspace Key
-
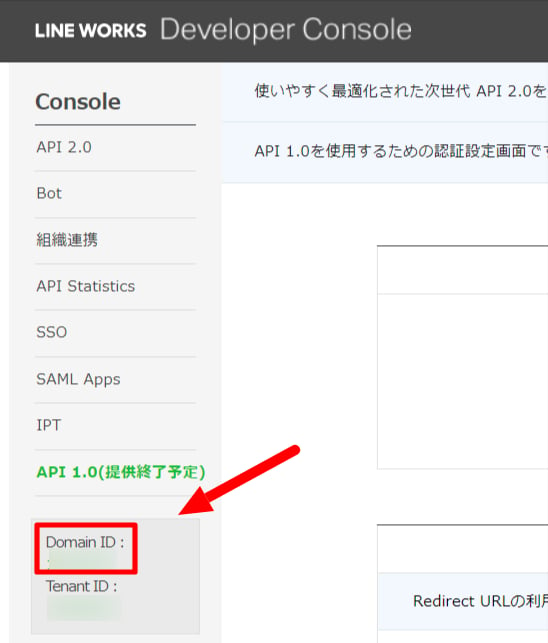
After logging in to LINE WORKS Developers, click Developer Console in the upper right corner.

-
The Domain ID is displayed at the bottom of the left-side menu tab. The Domain ID is your workspace key — save it.
Adding an OAuth App
-
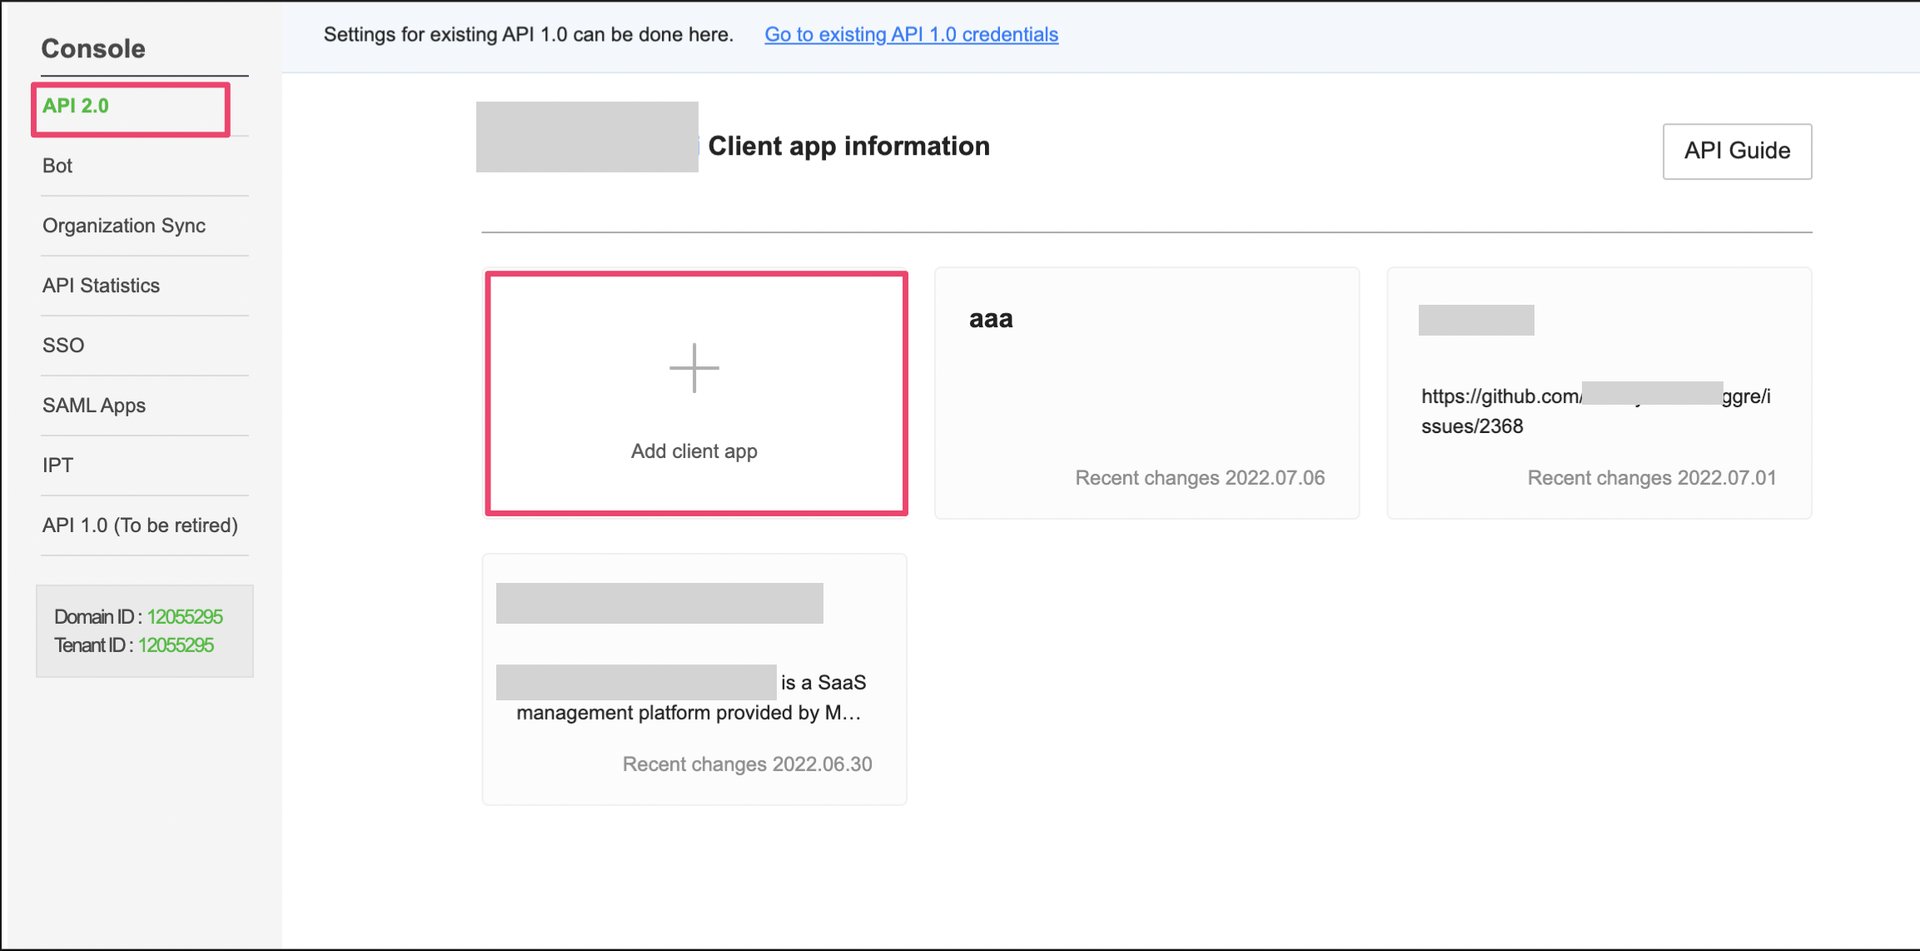
Click API2.0 > Add client app in the Developer Console.
-
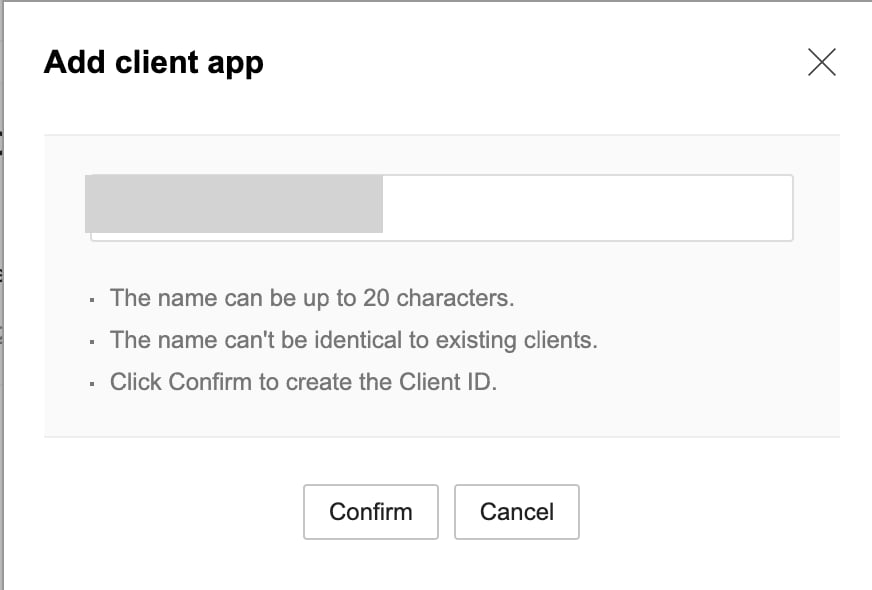
Enter a name for the Client app (up to 20 half-width characters) and click Confirm.
-
Enter the following values for the app client settings:
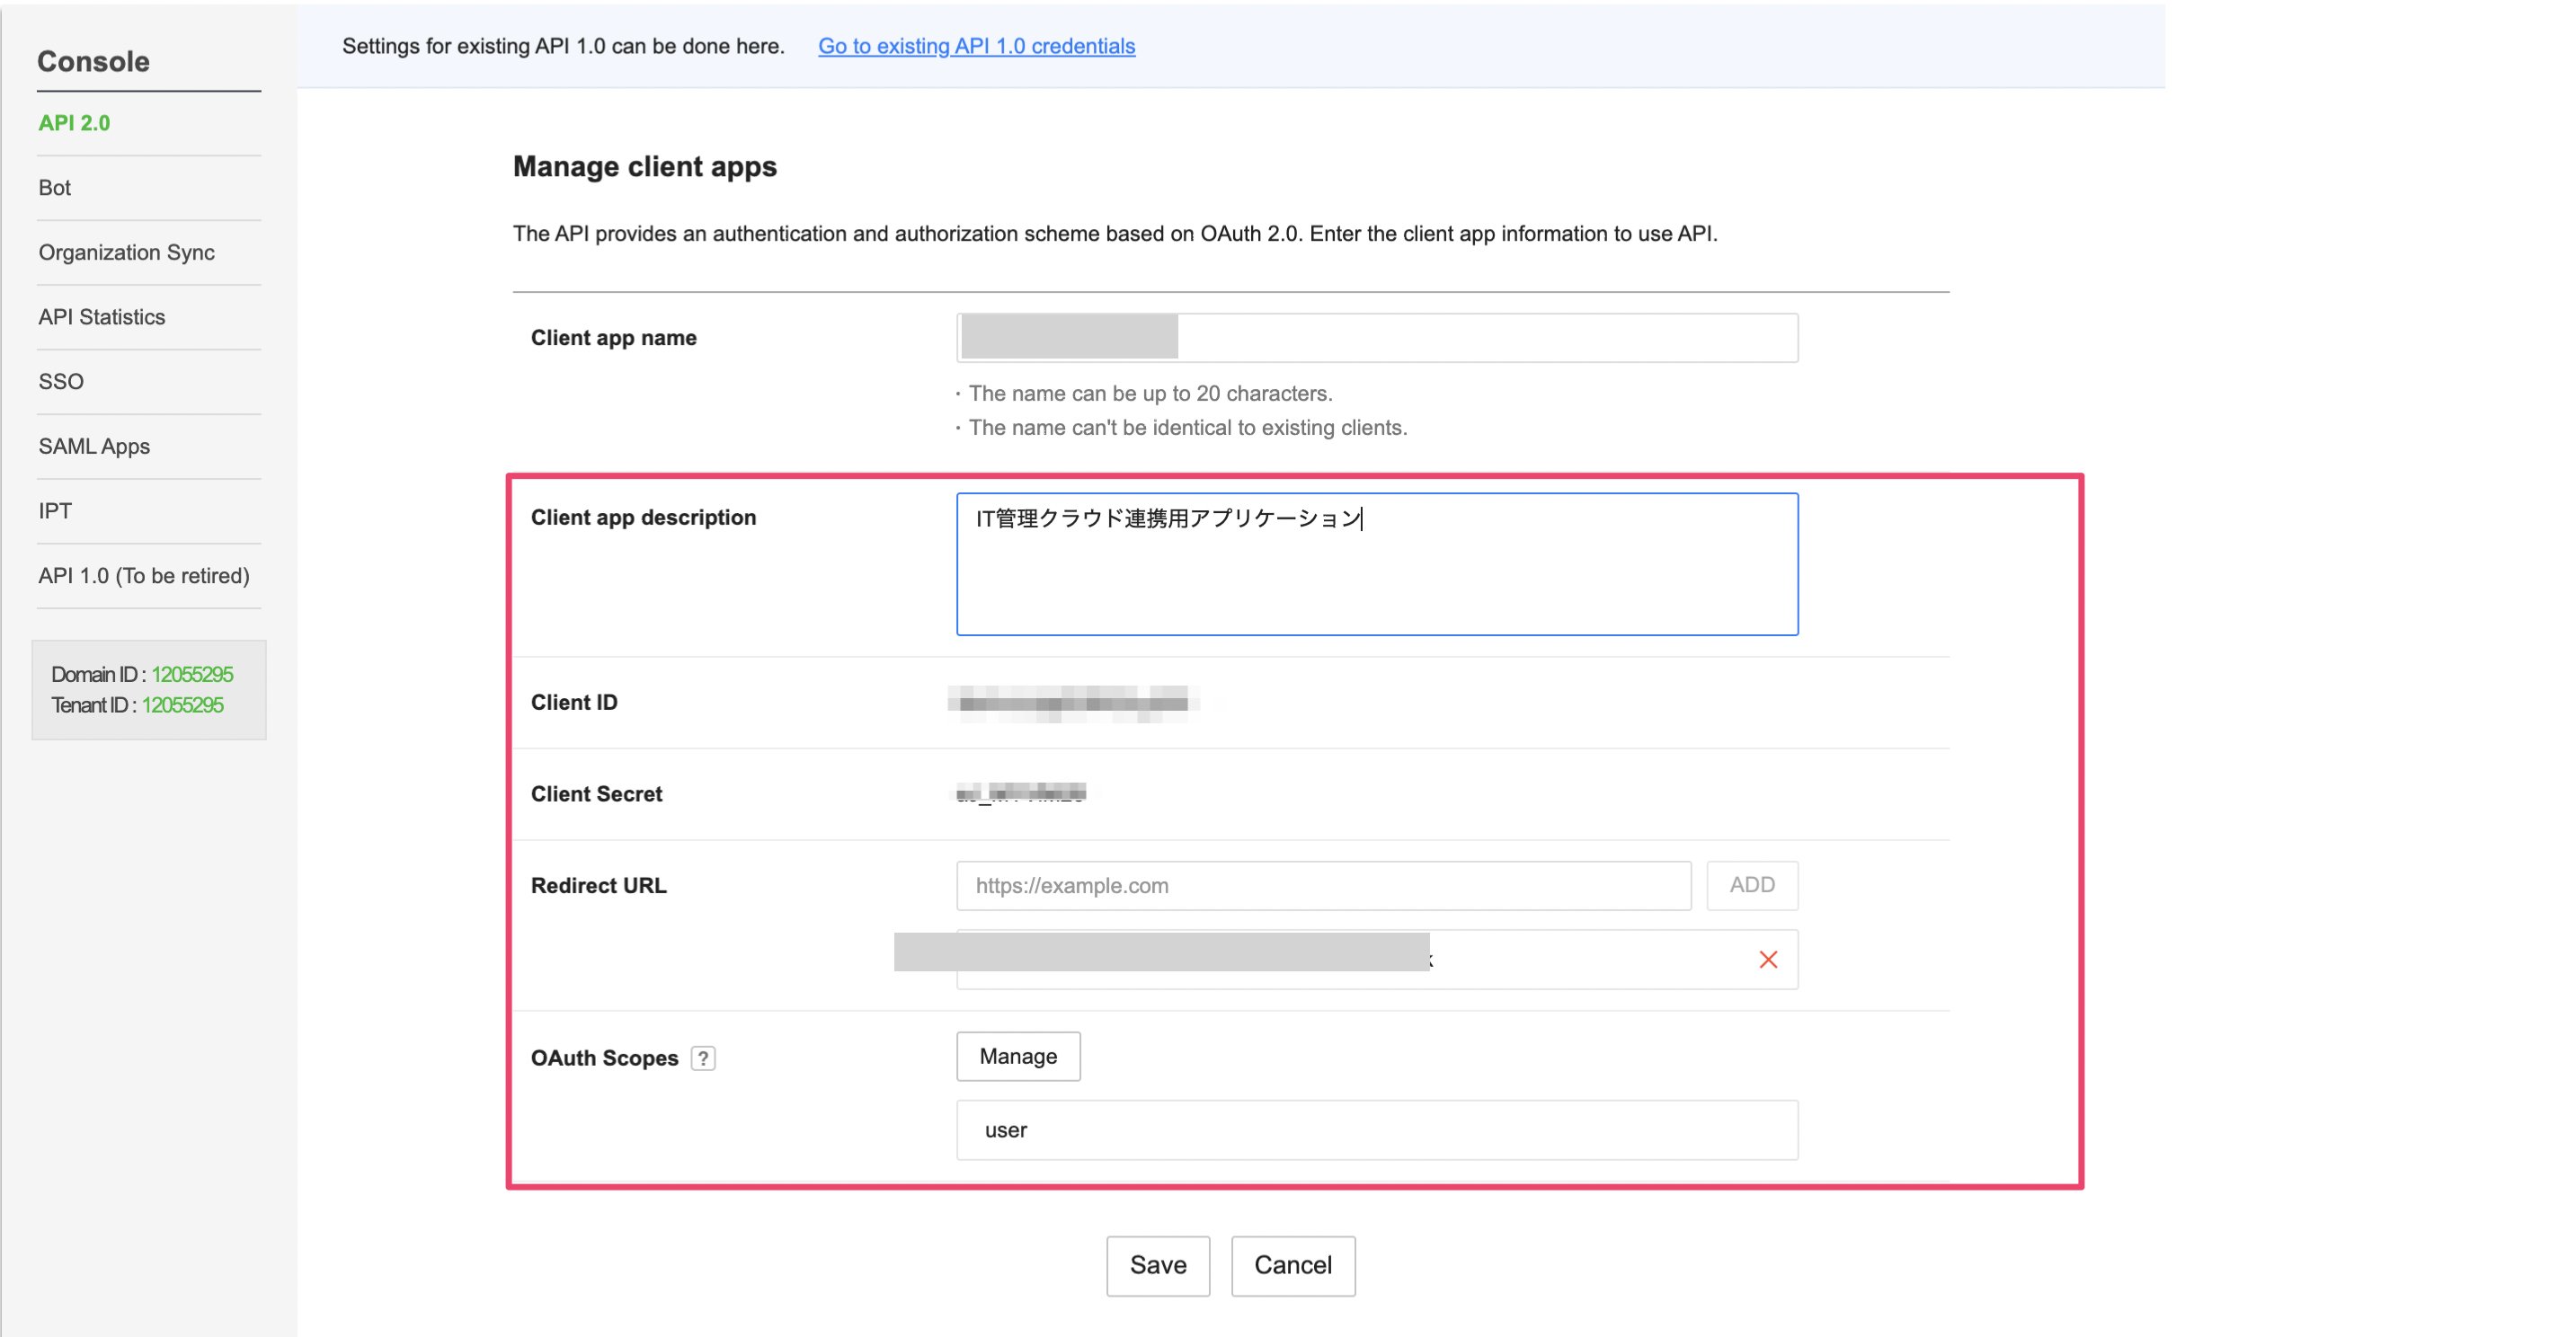
- Client app description: Any text for description purposes.
- Redirect URL: Enter
https://itmc.i.moneyforward.com/oauth/callbackand click Add. (Be sure to click Add, or the URL will not be saved.) - OAuth Scopes: Click the Manage button and select
user.
-
After entering all values, click Save.
Depending on your plan (e.g., Free plan), the
userscope may not be available. In that case, please refer to the Read Only integration procedure described below.
Obtaining the Client ID and Client Secret
Copy and save the Client ID and Client Secret for the application you created.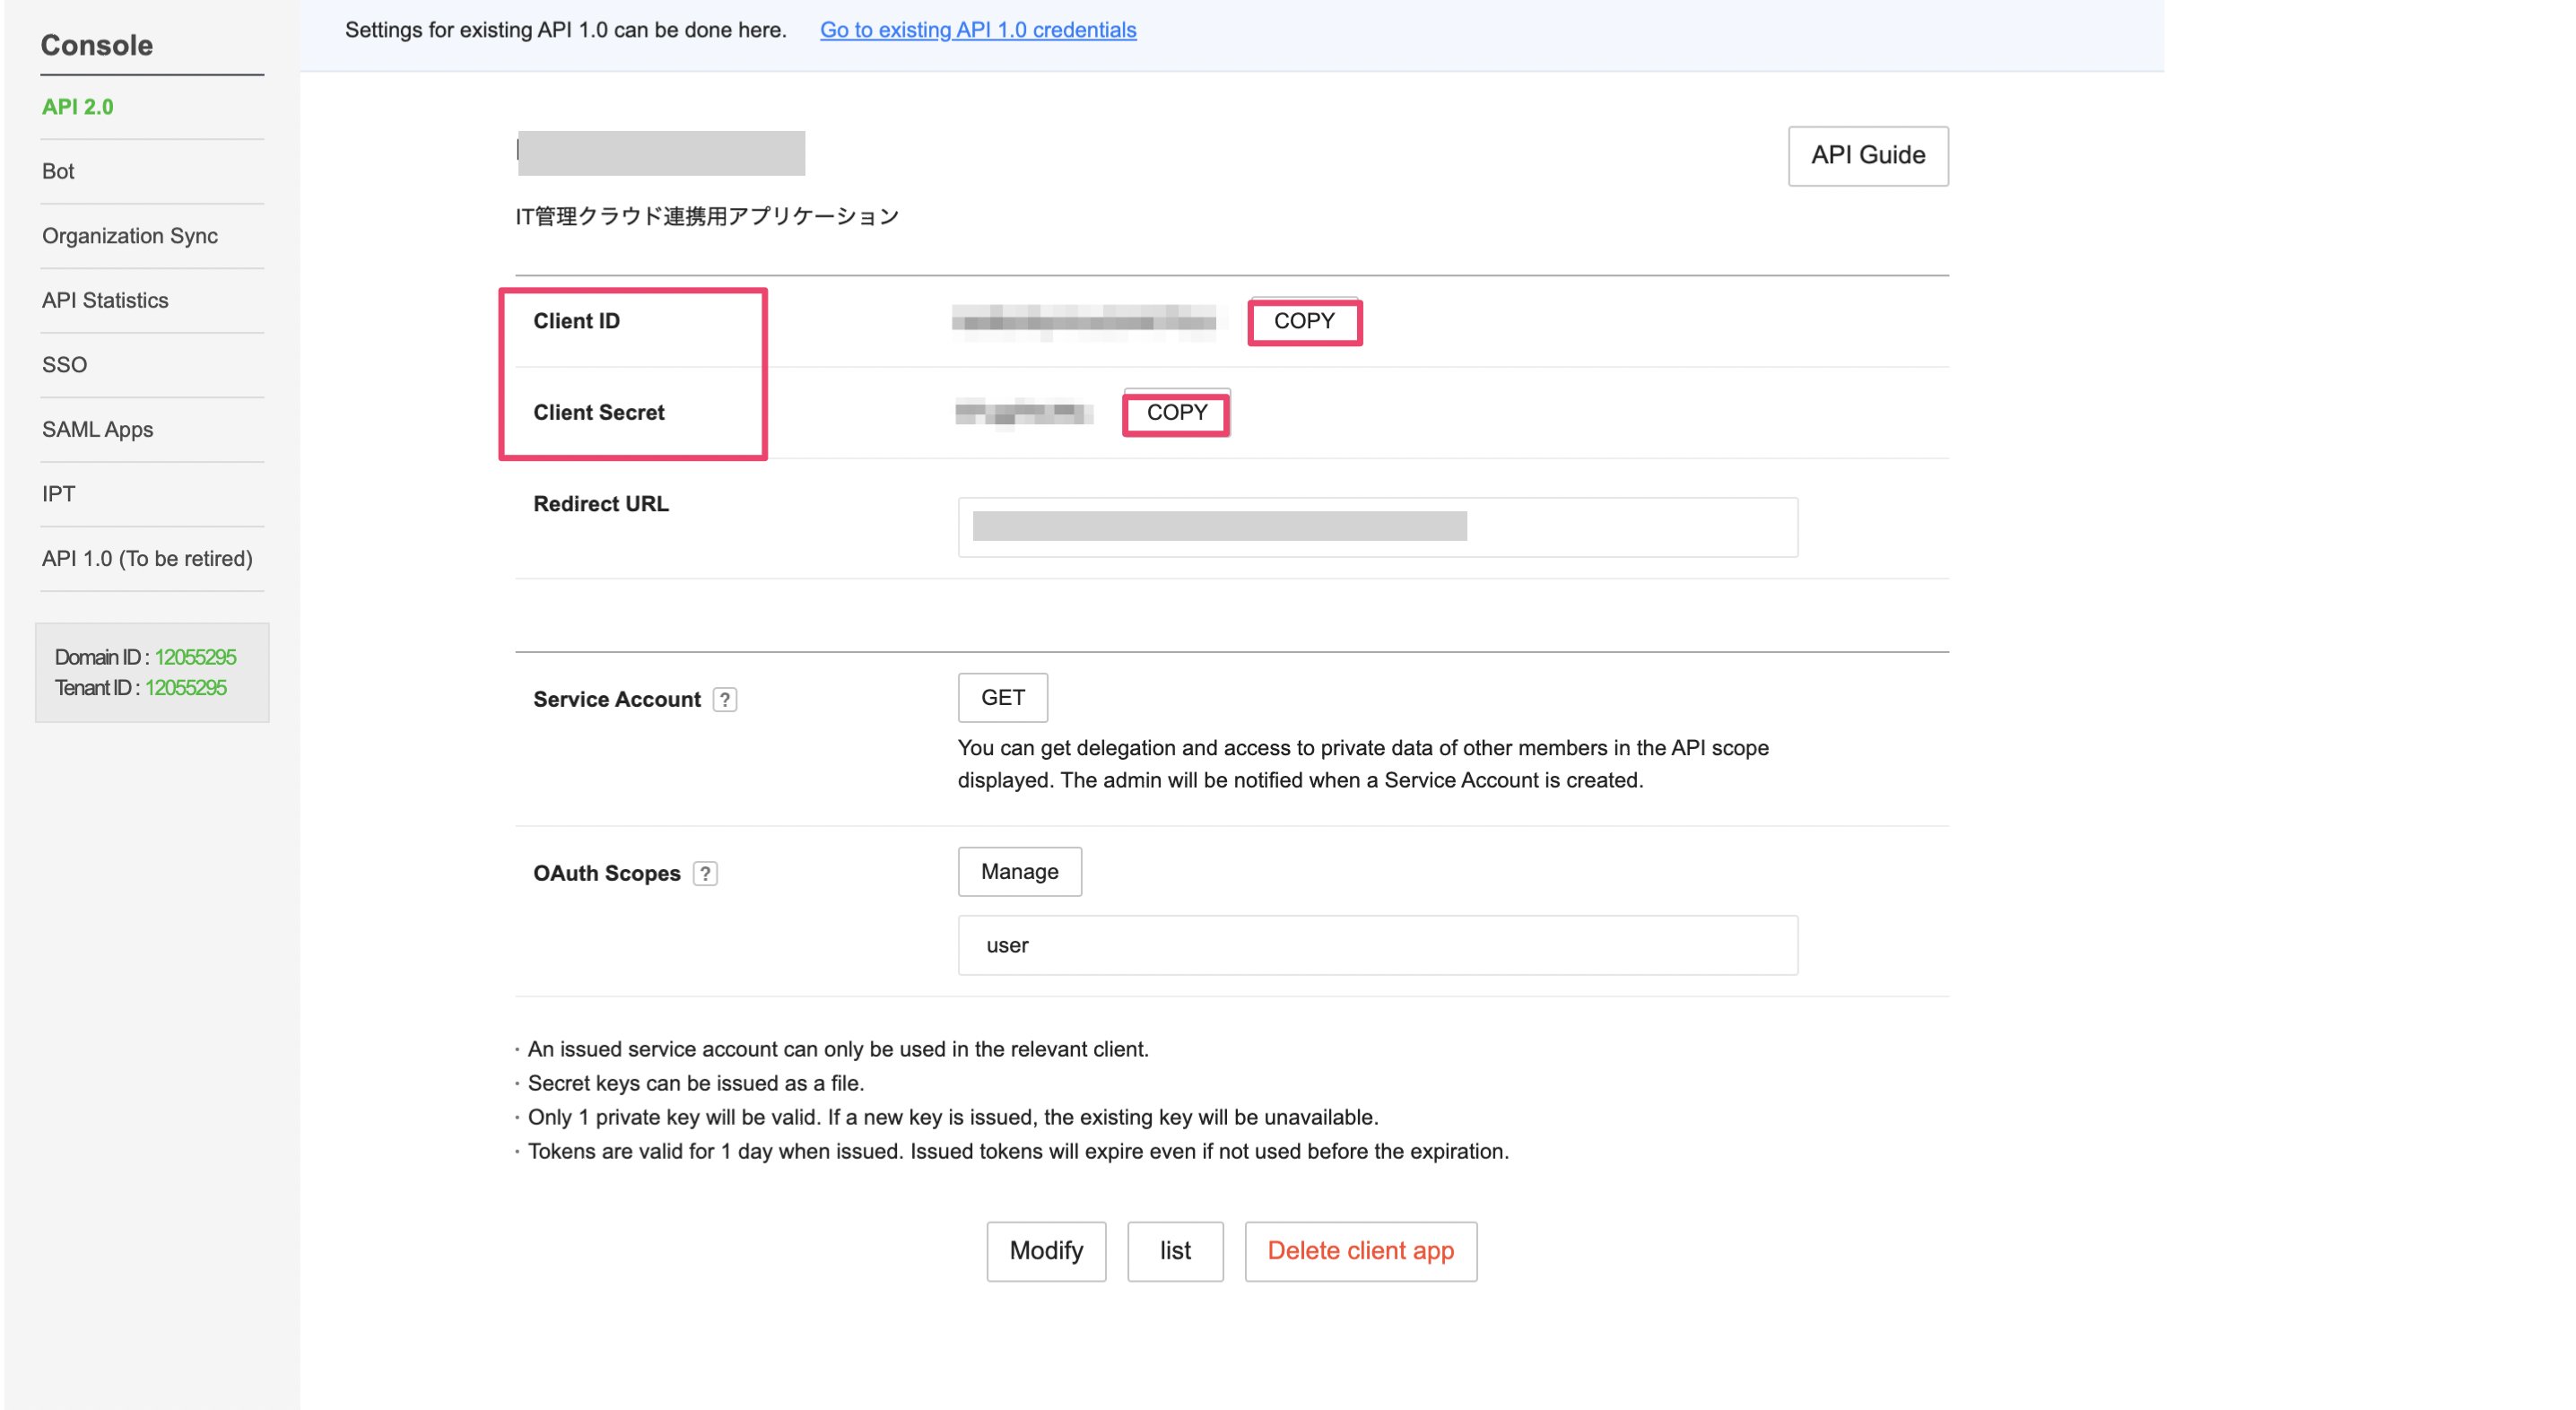
Integration Setup
- Search for LINE WORKS in the integration screen.
-
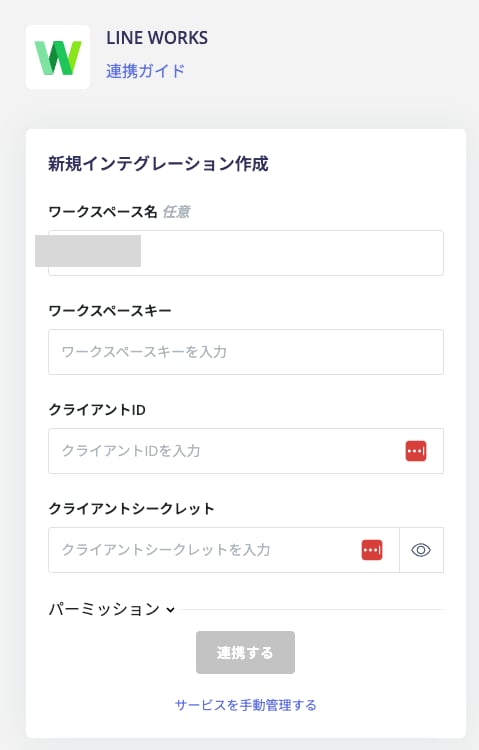
Enter the following values and click Connect.
If you are logged out of LINE WORKS Developers, a login screen will appear after clicking Connect. Enter your administrator account ID and password to log in and start the integration.
- Workspace Name: Any name (e.g., company name)
- Workspace Key: The Domain ID obtained in the previous steps
- Client ID: The Client ID obtained in the previous steps
- Client Secret: The Client Secret obtained in the previous steps
- Once the LINE WORKS integration is successful, the registered user information will appear in the account list. If the process does not complete successfully. Click Edit from the Status tab on the integration screen and try connecting again. If the issue persists, please contact us via chat.
Read Only Integration Procedure
If you are on the Free plan and theuser scope is not available, you can use Read Only integration. You can also use it if you do not want to grant write or delete permissions to the OAuth app.
OAuth Scope Settings
Set the OAuth Scopes to the following instead ofuser:
user.email.readuser.profile.readuser.read
Read Only permissions cannot be used with scopes other than those listed above (e.g.,
user).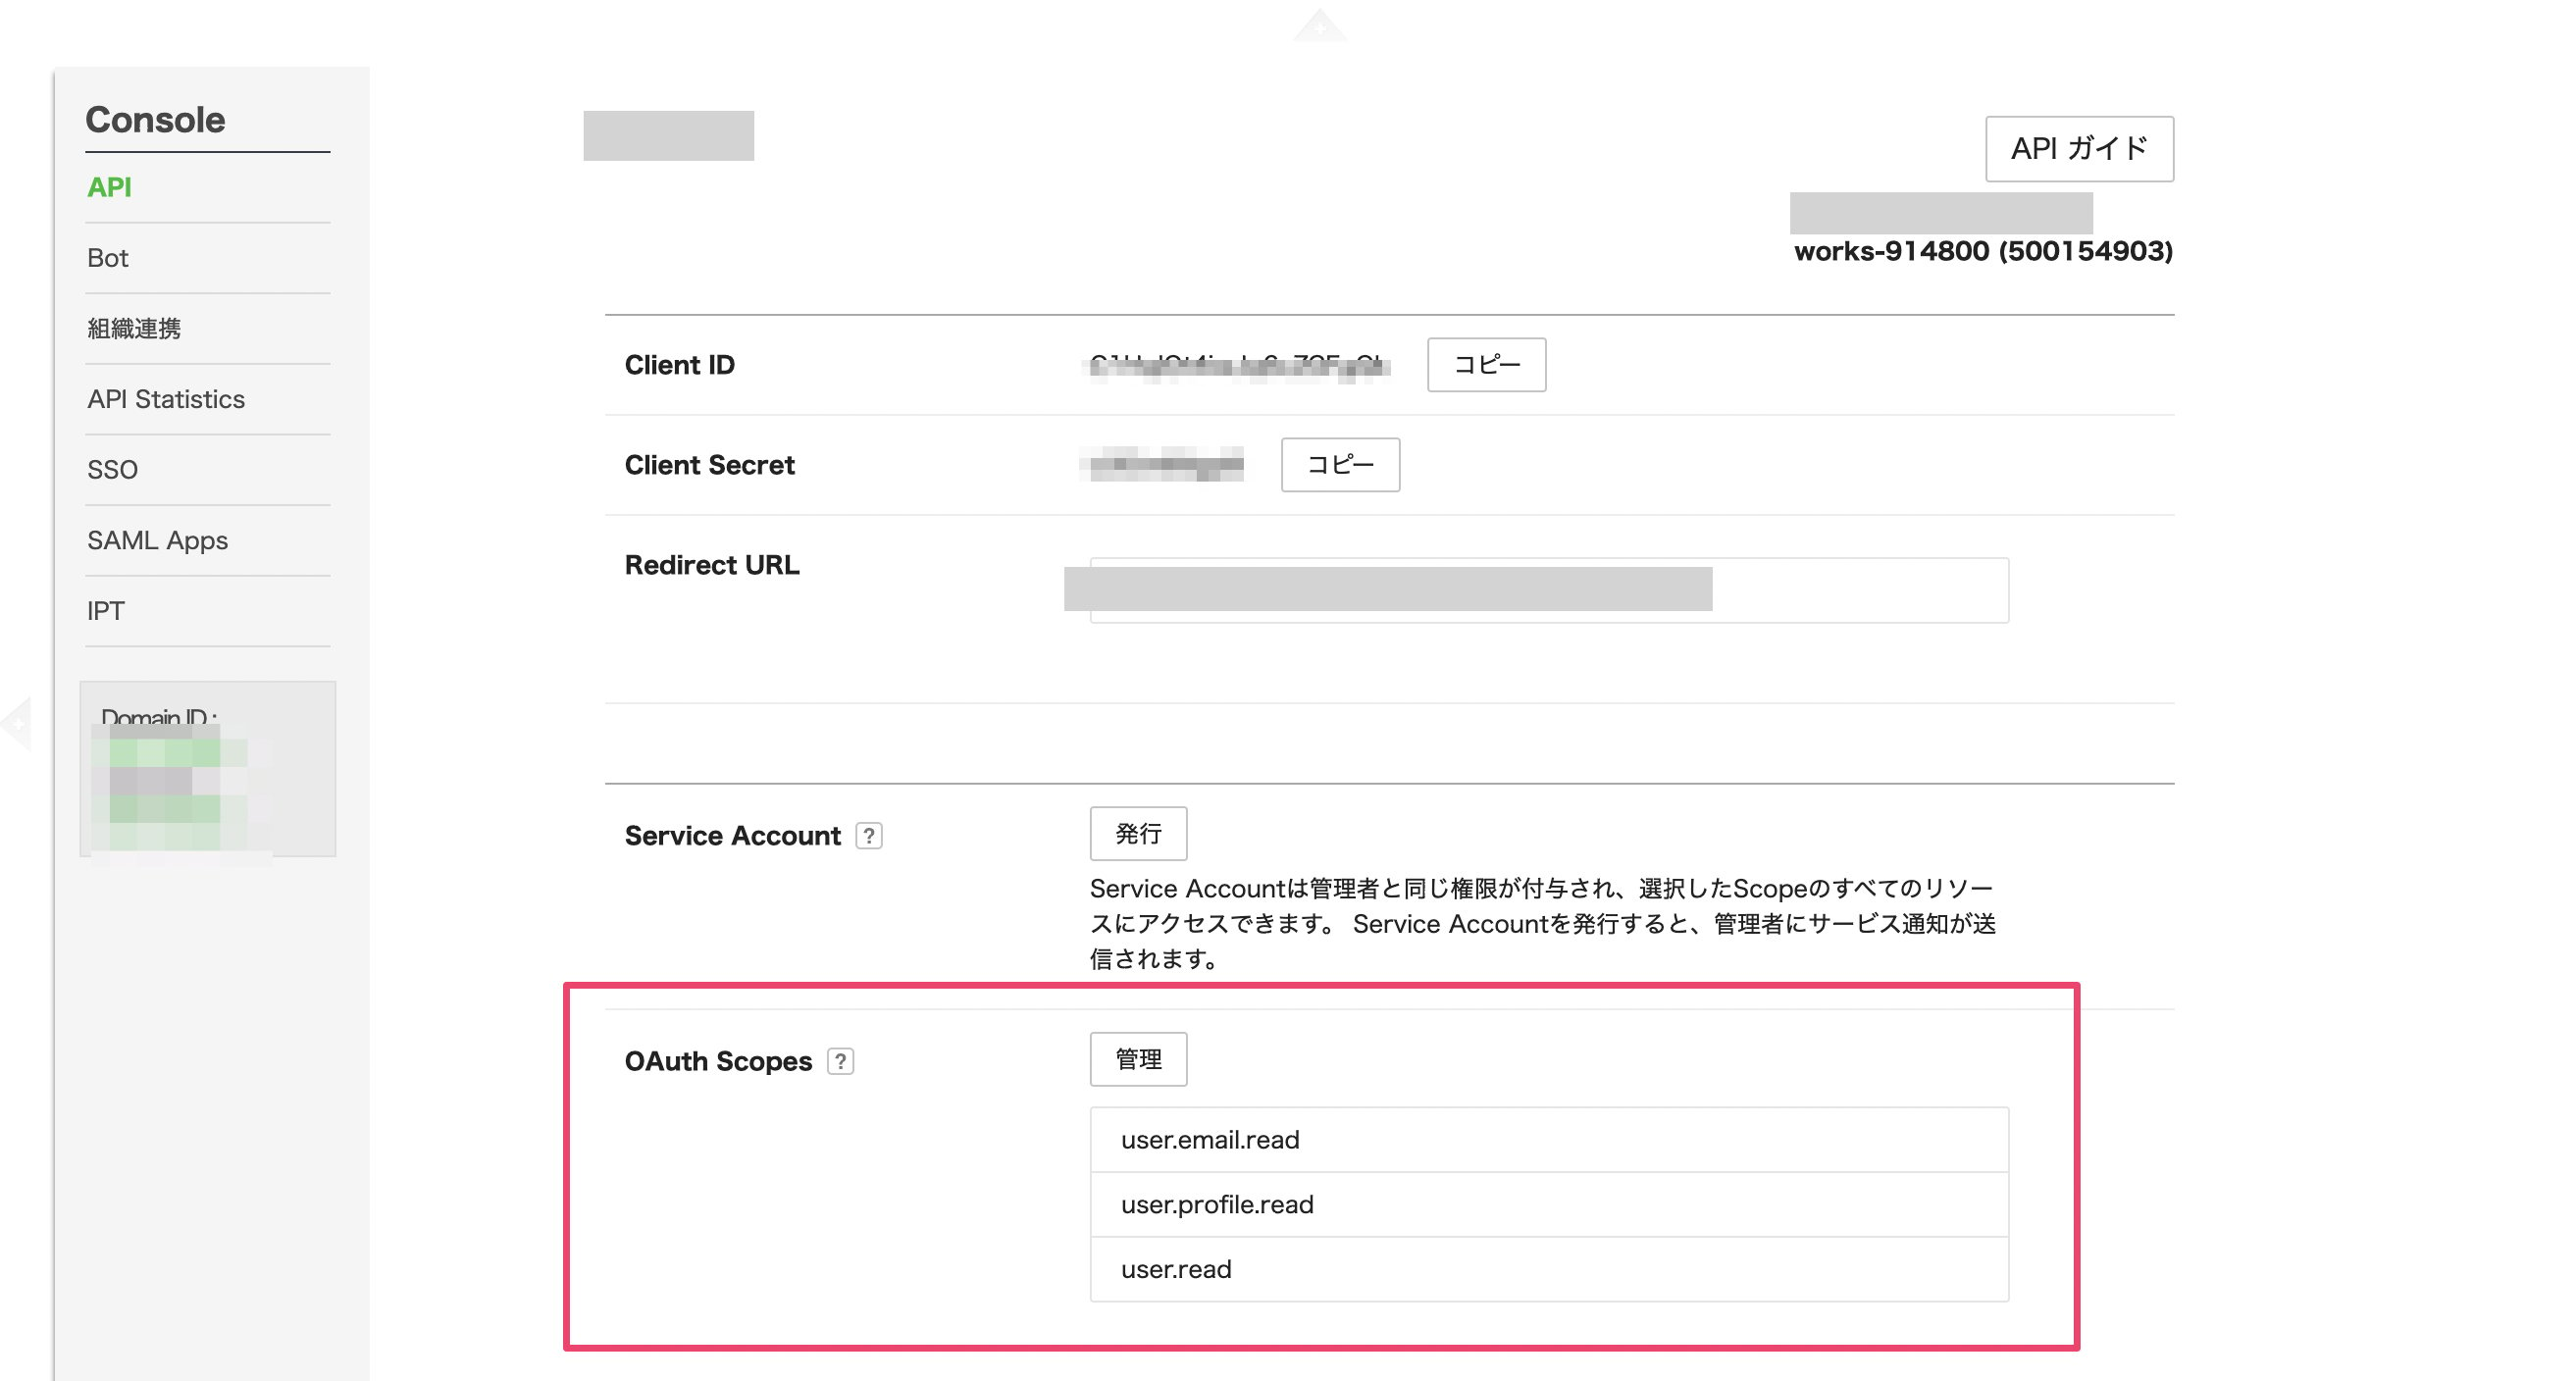
Integration Setup for Read Only
-
Select
Read Onlyfor the permission setting and click Connect. With Read Only integration, account creation and deletion are not available.