Integration Specifications

Prerequisites

Getting your API key

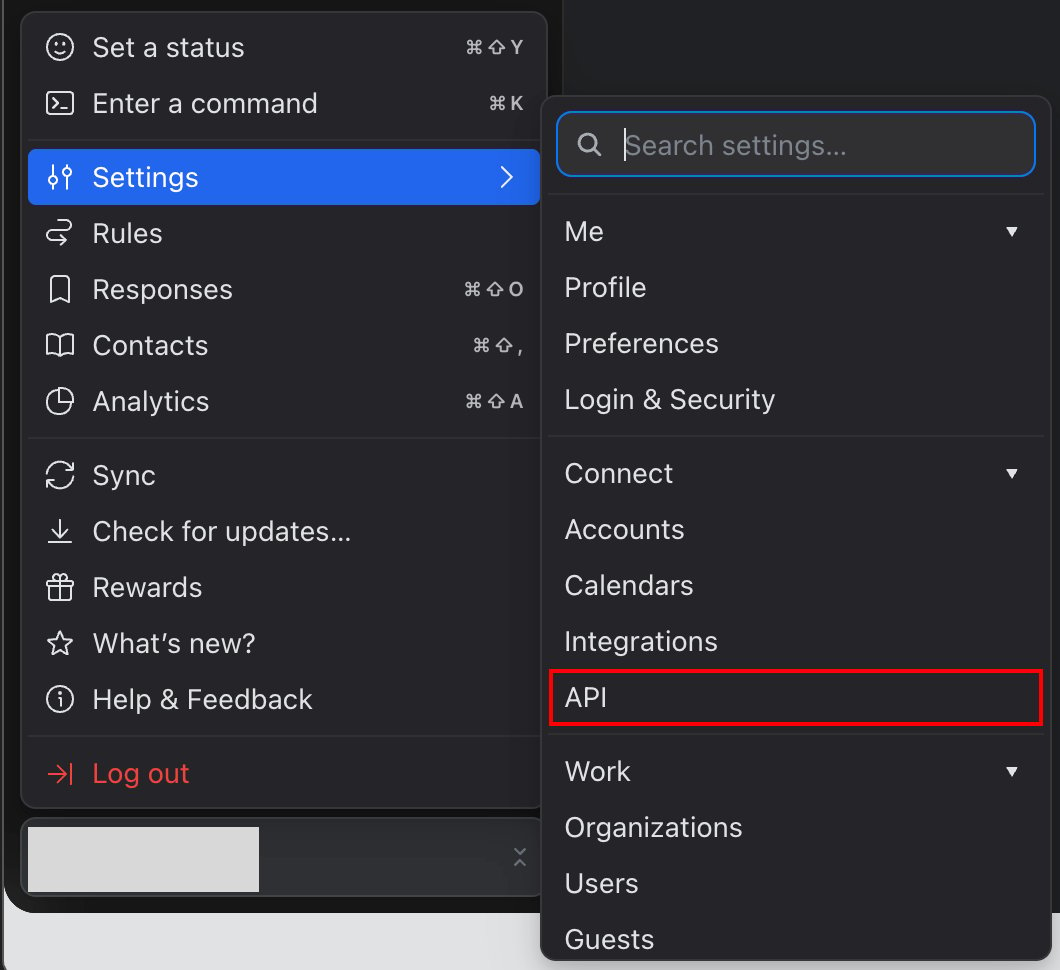
  1. After logging in to Missive, click your avatar in the lower-left corner. Then select API under Settings. Missive menu in the lower-left corner with API in the Settings submenu highlighted
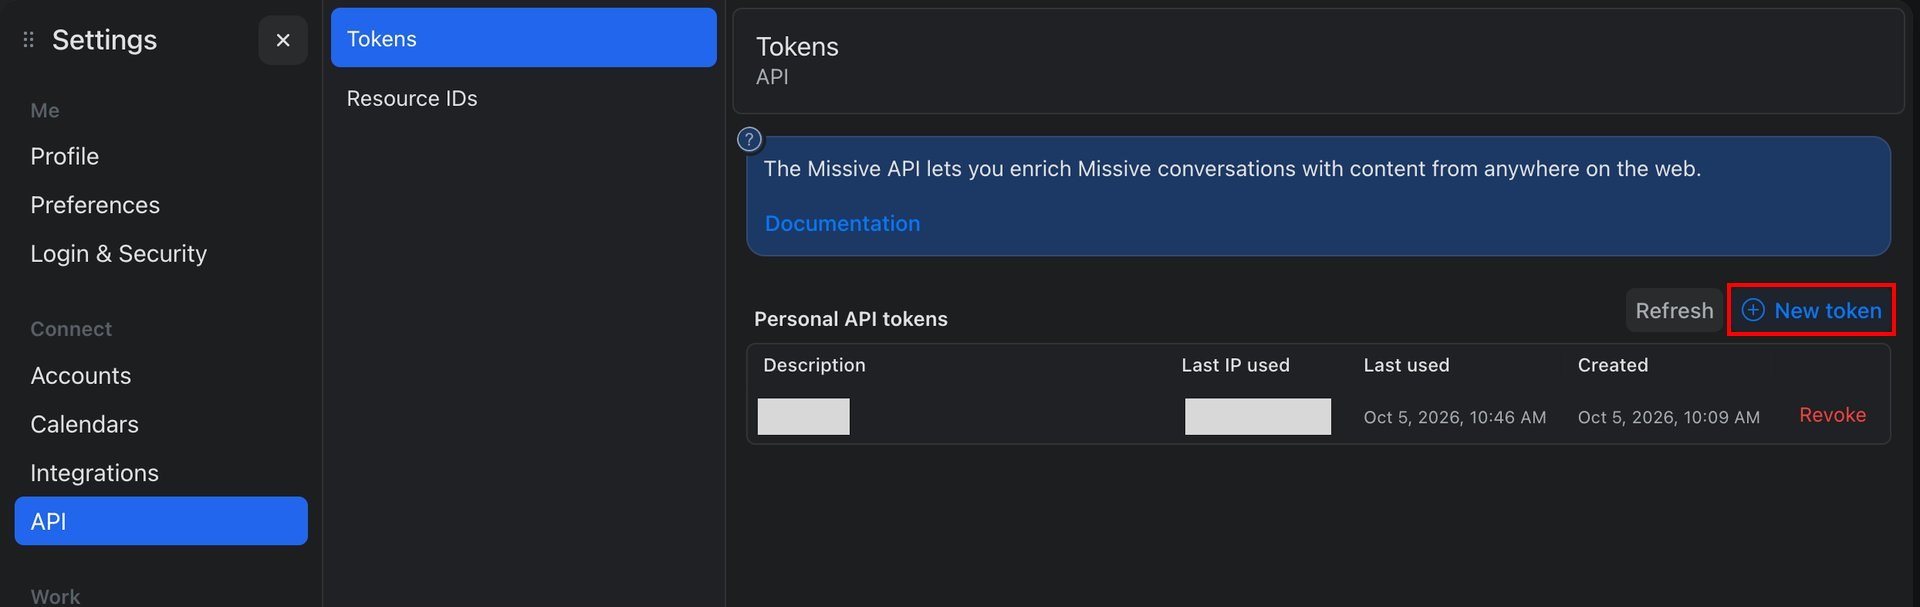
  2. Under Personal API tokens, click New token to create an API key. Save the API key. You need it to set up the integration. Missive API settings screen with the New token button for Personal API tokens highlighted

Finding the workspace key

Use your Missive organization ID as the workspace key.
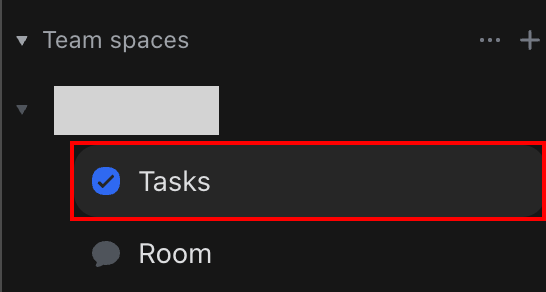
  1. In the left sidebar, select the organization to integrate under Team spaces, and click Tasks.
    Missive sidebar with Tasks under an organization in Team spaces highlighted
  2. In the URL of the page that opens, copy the string after organization/. This string is the workspace key (organization ID). Missive page URL with the organization ID after organization/ masked

Setting up the integration

  1. On the integration screen, search for Missive.
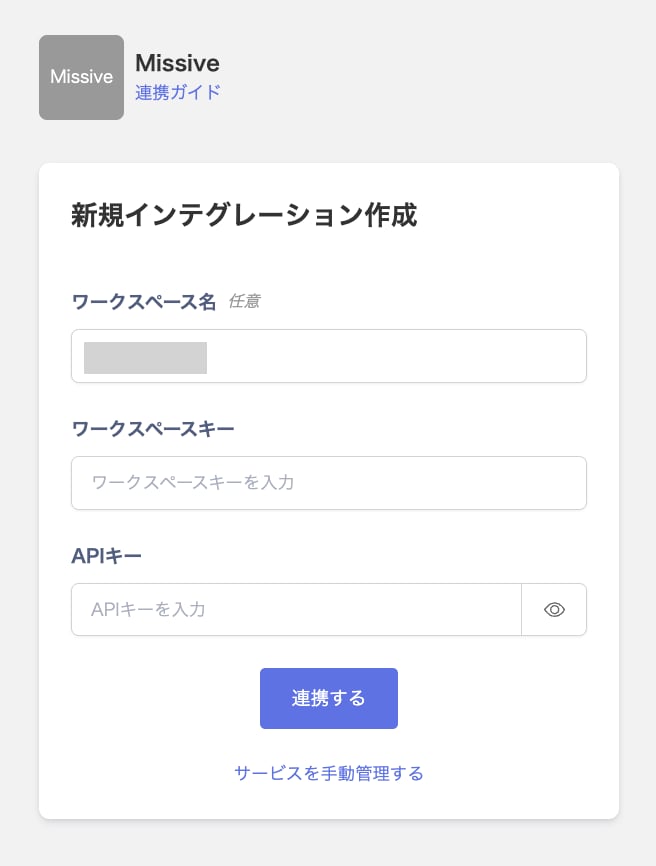
  2. Enter the organization ID you found into Workspace key and the API key you created into API key. Then click Connect. Workspace name is optional. Missive integration setup screen showing the Workspace name, Workspace key, and API key fields
  3. Once the integration with Missive succeeds, registered user information appears in the account list. If it doesn’t complete successfully, first try the steps in Troubleshoot SaaS integration errors. If that doesn’t resolve it, check Information to provide and contact support.
  • Enter into Workspace key the ID of an organization that the API key can access. You can’t use the ID of an organization that the API key can’t access.

Last modified on October 15, 2026