

Integration Specifications
Prerequisites (Jamf Pro)
Creating an API Role
To grant permissions to an API client in Jamf Pro, you must first create an API Role that defines the permission set. You can assign one or more API Roles to a client to grant permissions. For more details, see API Roles and Clients (external site).- In the Jamf Pro sidebar, click Settings.
- Under the System section, click API Roles and Clients.
- Click the API Roles tab at the top of the pane.
- Click New.
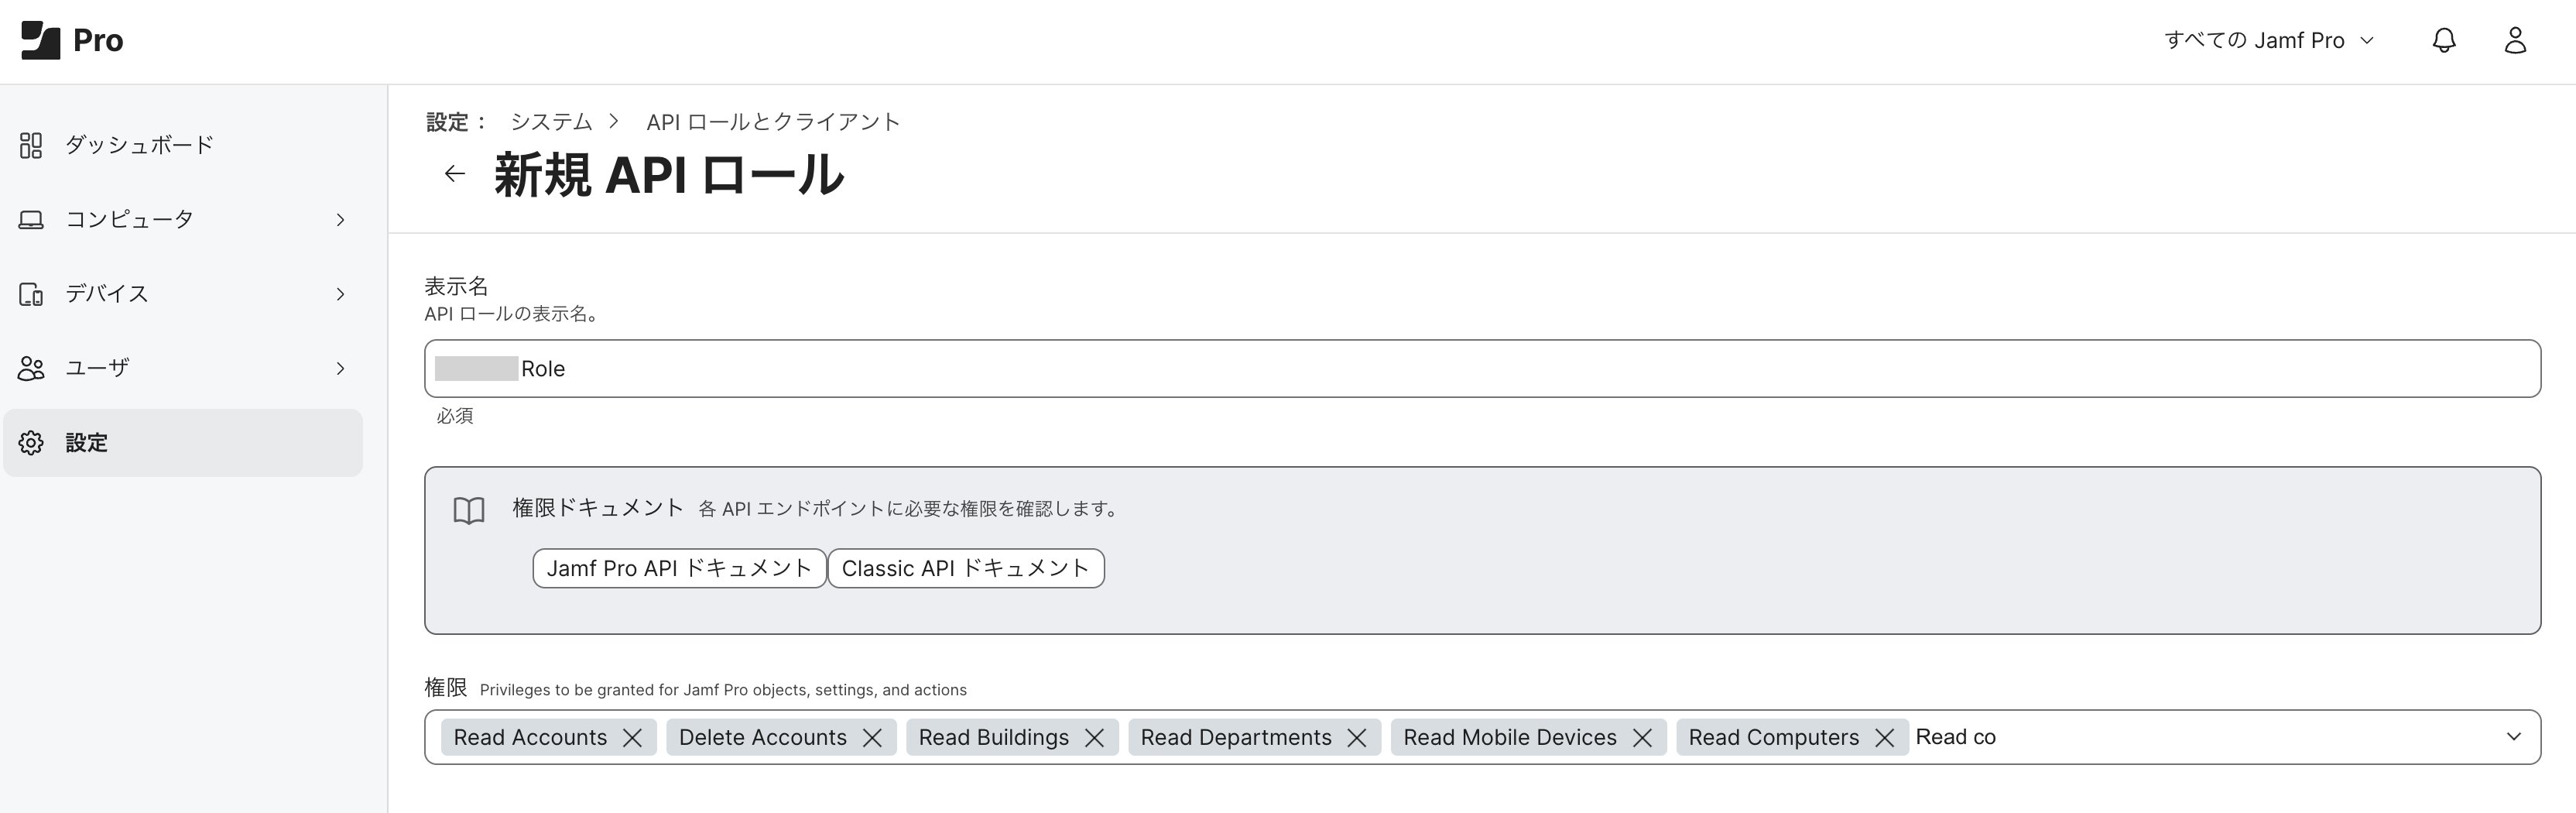
- Enter a display name for the API Role. You can enter any name you like.
-
Enter the permission set. Set the following permissions:
If you are implementing MDM integration, also set the following permissions in addition to the above:
-
Click Save.
Creating an API Client
- In the Jamf Pro sidebar, click Settings.
- Under the System section, click API Roles and Clients.
- Click the API Clients tab at the top of the pane.
- Click New.
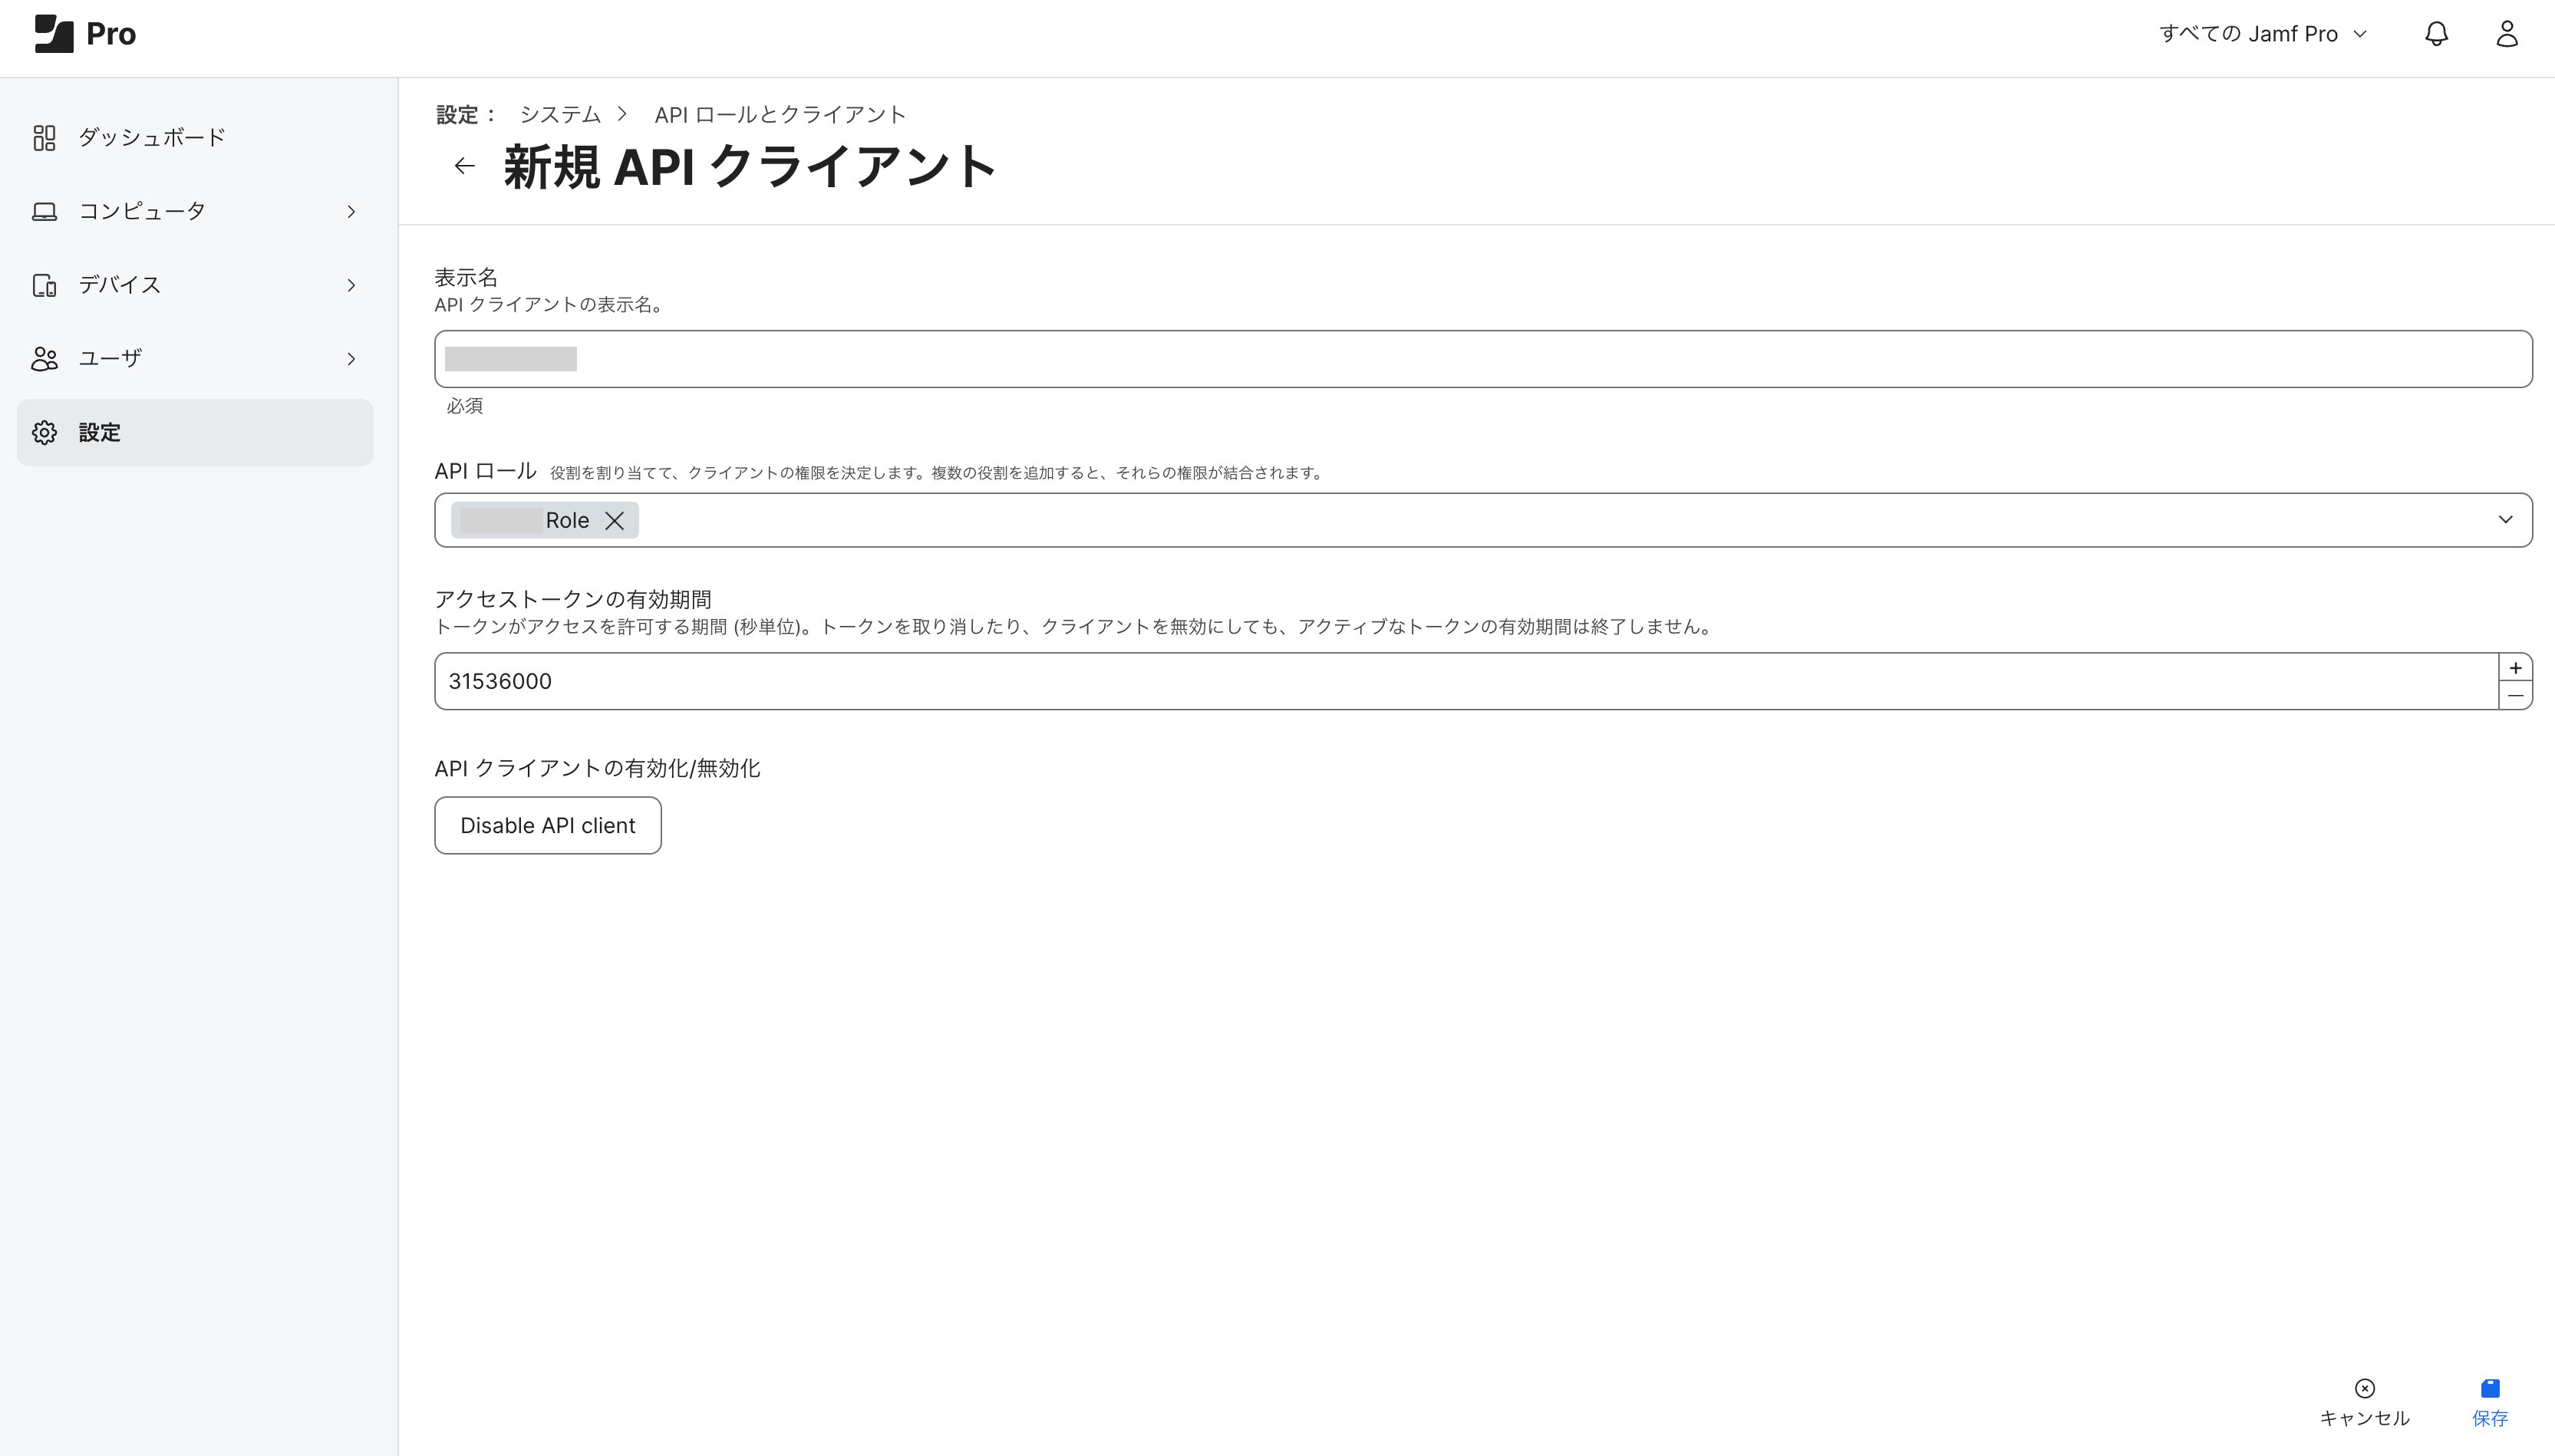
- Enter a display name for the API Client.
- In the API Roles field, add the API Role you created.
Changing the access token lifetime value later does not affect access tokens previously generated from the API client. Similarly, deleting or disabling a client does not revoke previously generated access tokens that are still valid. It is recommended to set a longer value. However, any changes to the API Roles assigned to a client will immediately affect all access tokens.
- To generate a client secret, click Enable API Client.
- Click Save.
Creating a Client Secret
- In Jamf Pro, navigate to the API Client from which you want to generate an access token.
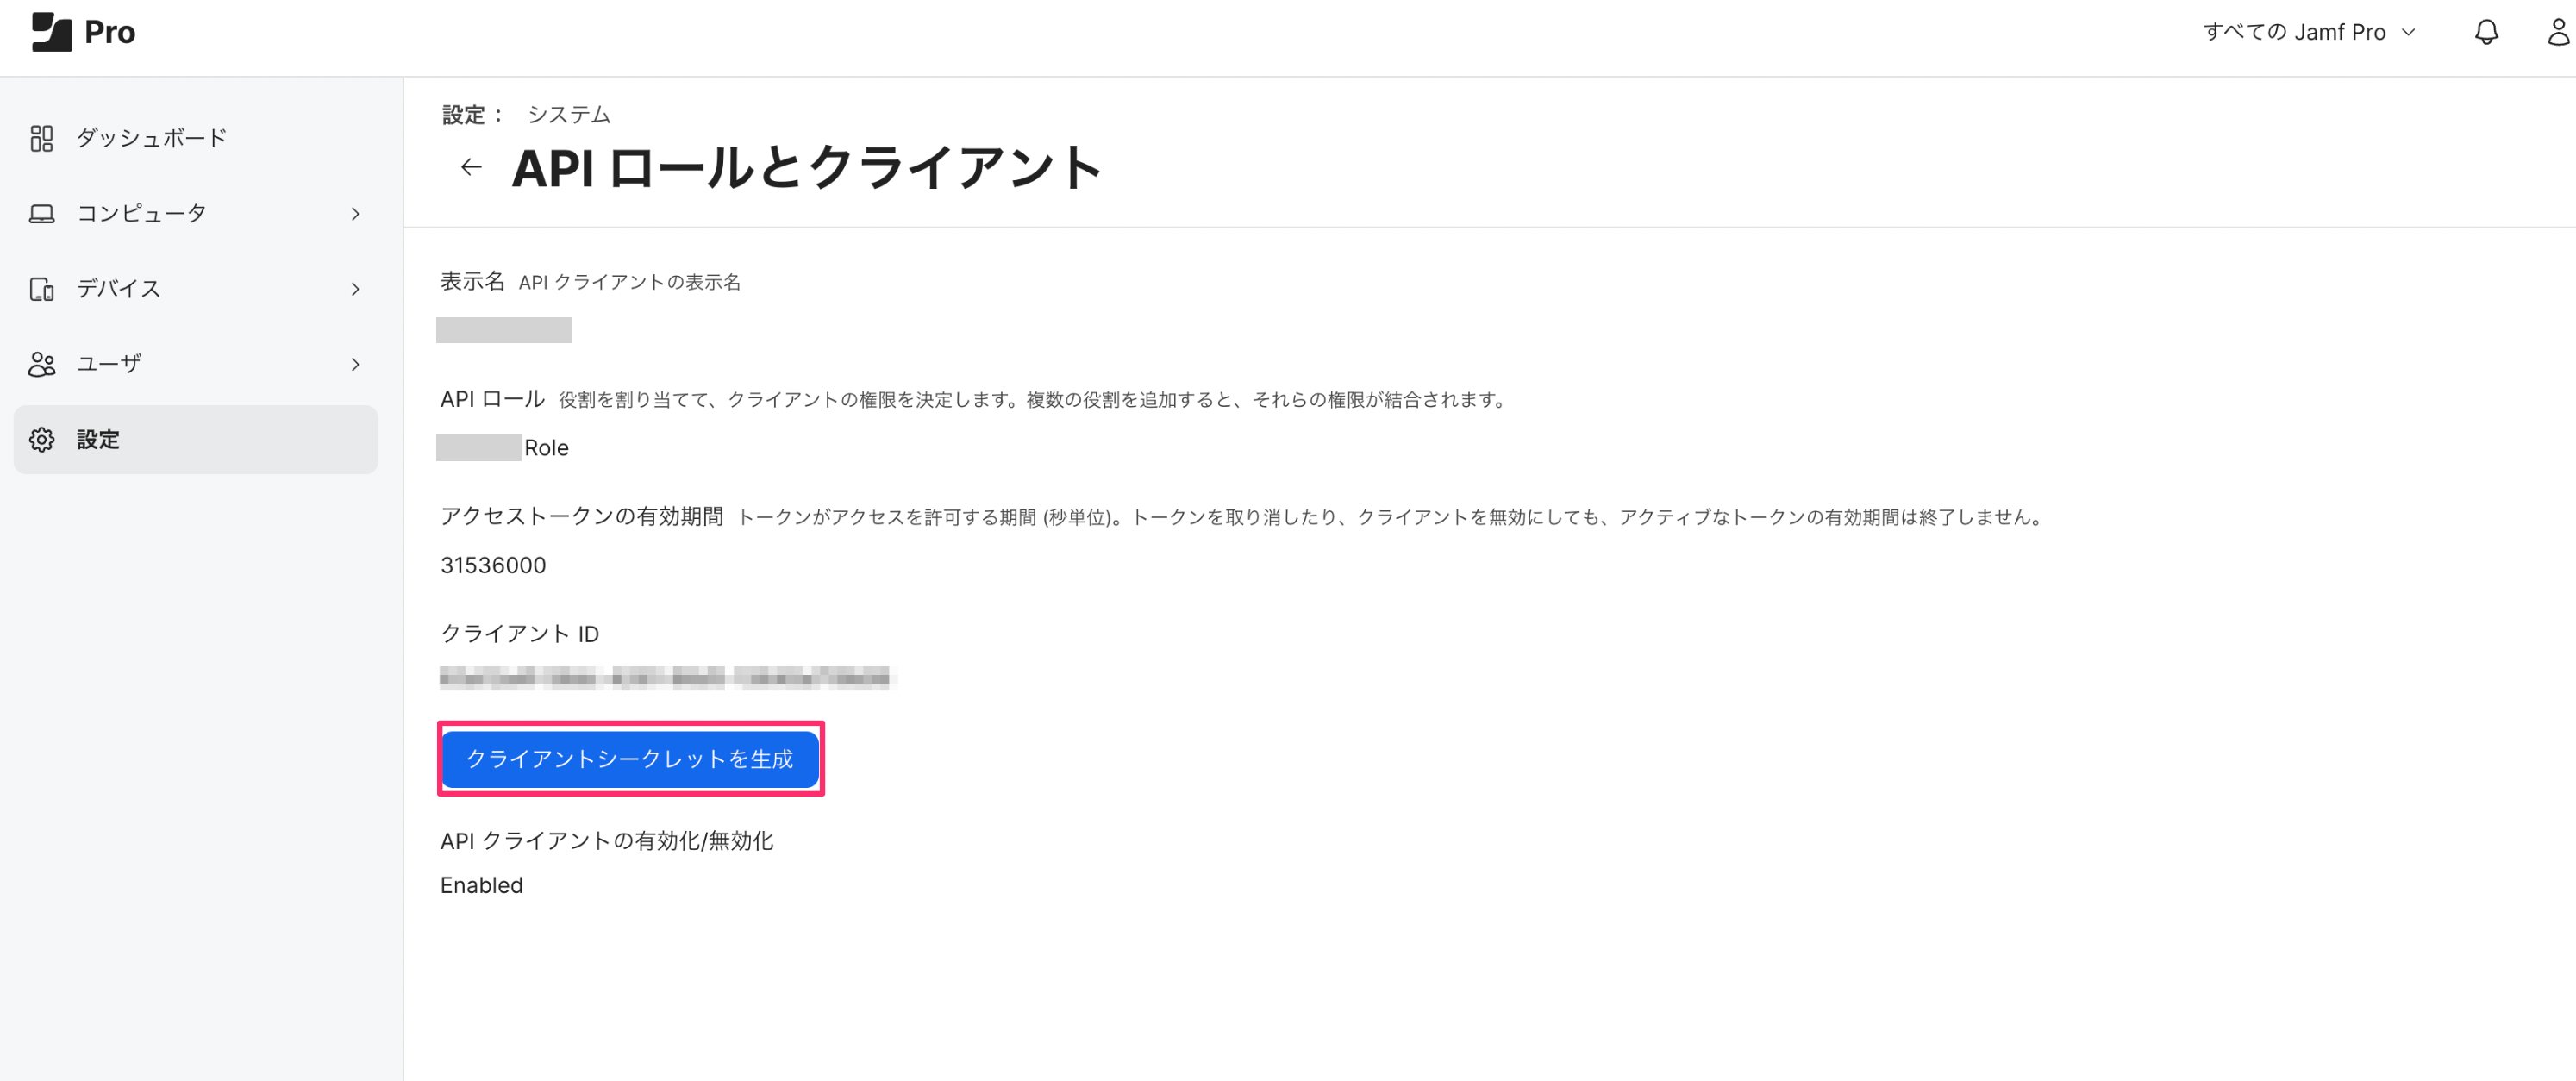
- Click Generate Client Secret. A confirmation dialog will appear.
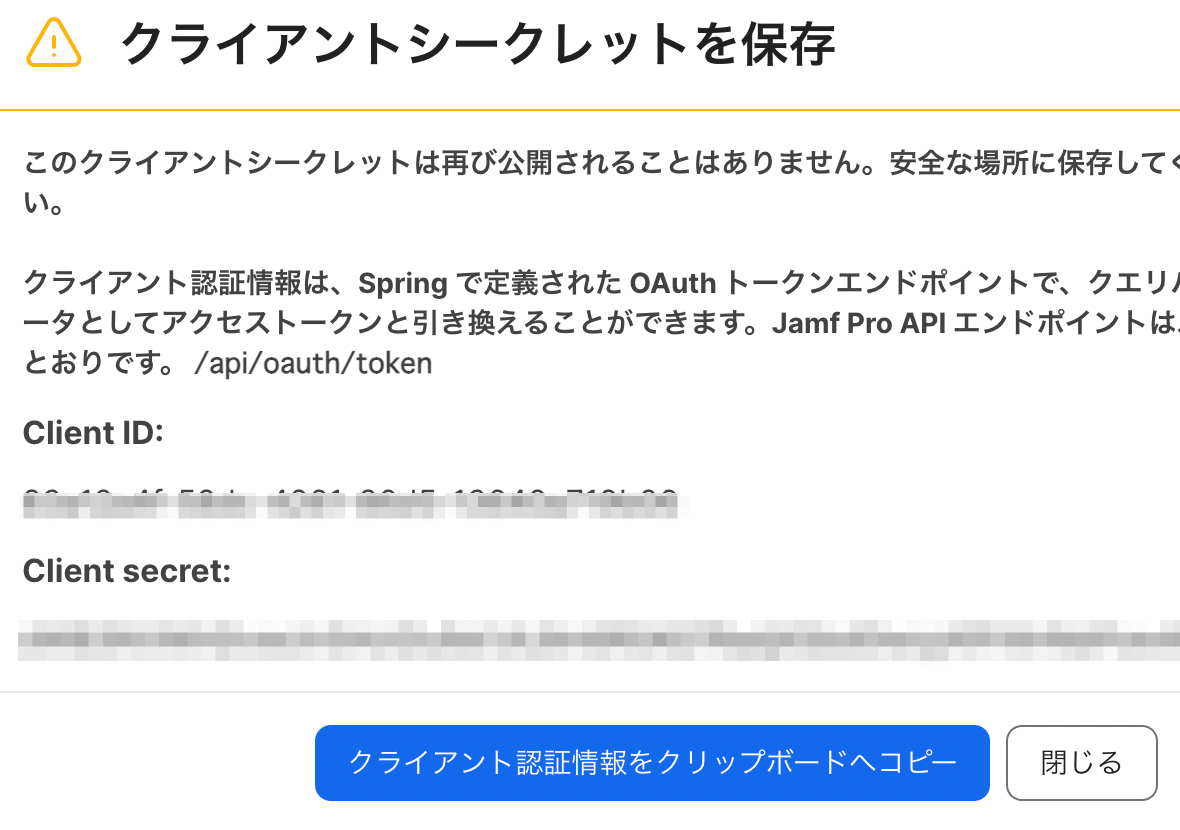
- Click Create Secret. A popup window will display the Client ID and Client Secret — save them.
The client secret is only displayed once. Be sure to save it in a secure location before closing the dialog.
Getting the Workspace Key
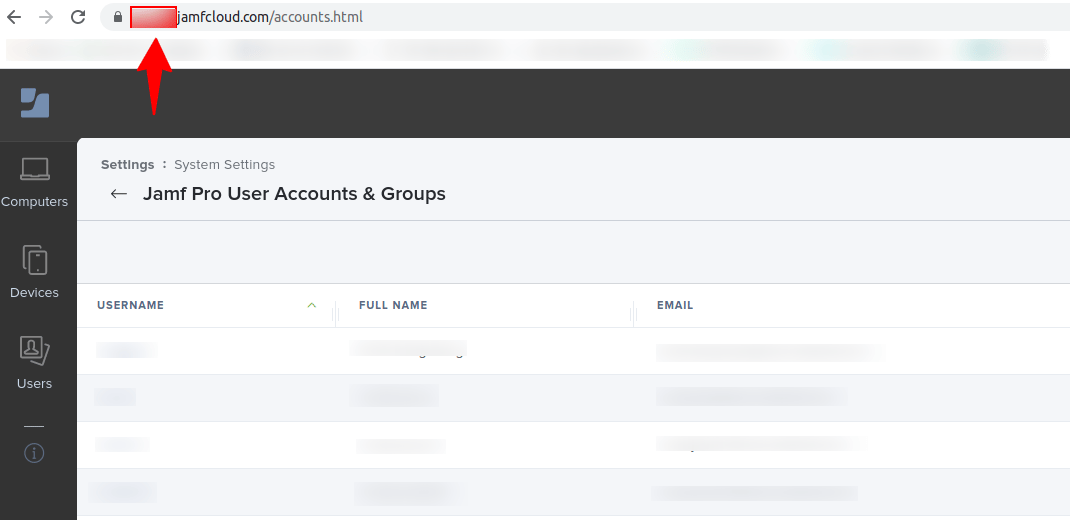
After logging in to Jamf, part of the URL is the workspace key — save it. http://{workspace-key}.jamfcloud.com
Integration Setup
- Go to Integrations > Integrations and search for Jamf.
-
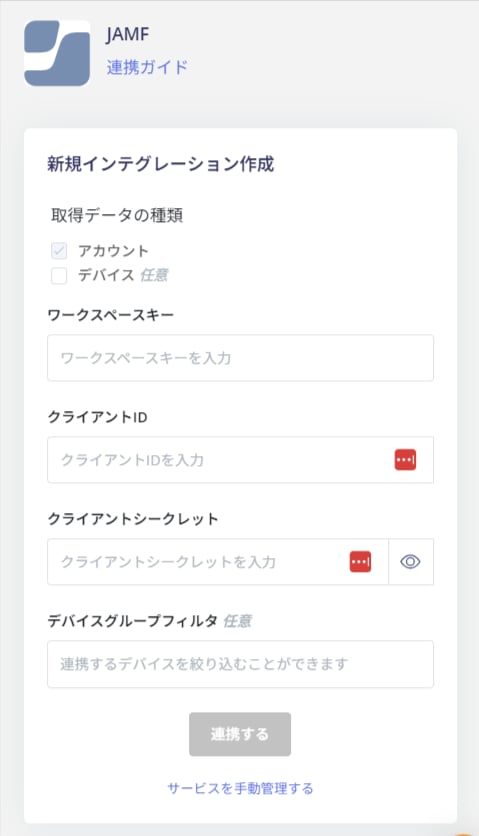
Enter the Workspace Key, Client ID, and Client Secret obtained in the previous steps, then click Connect.
-
For MDM integration, check
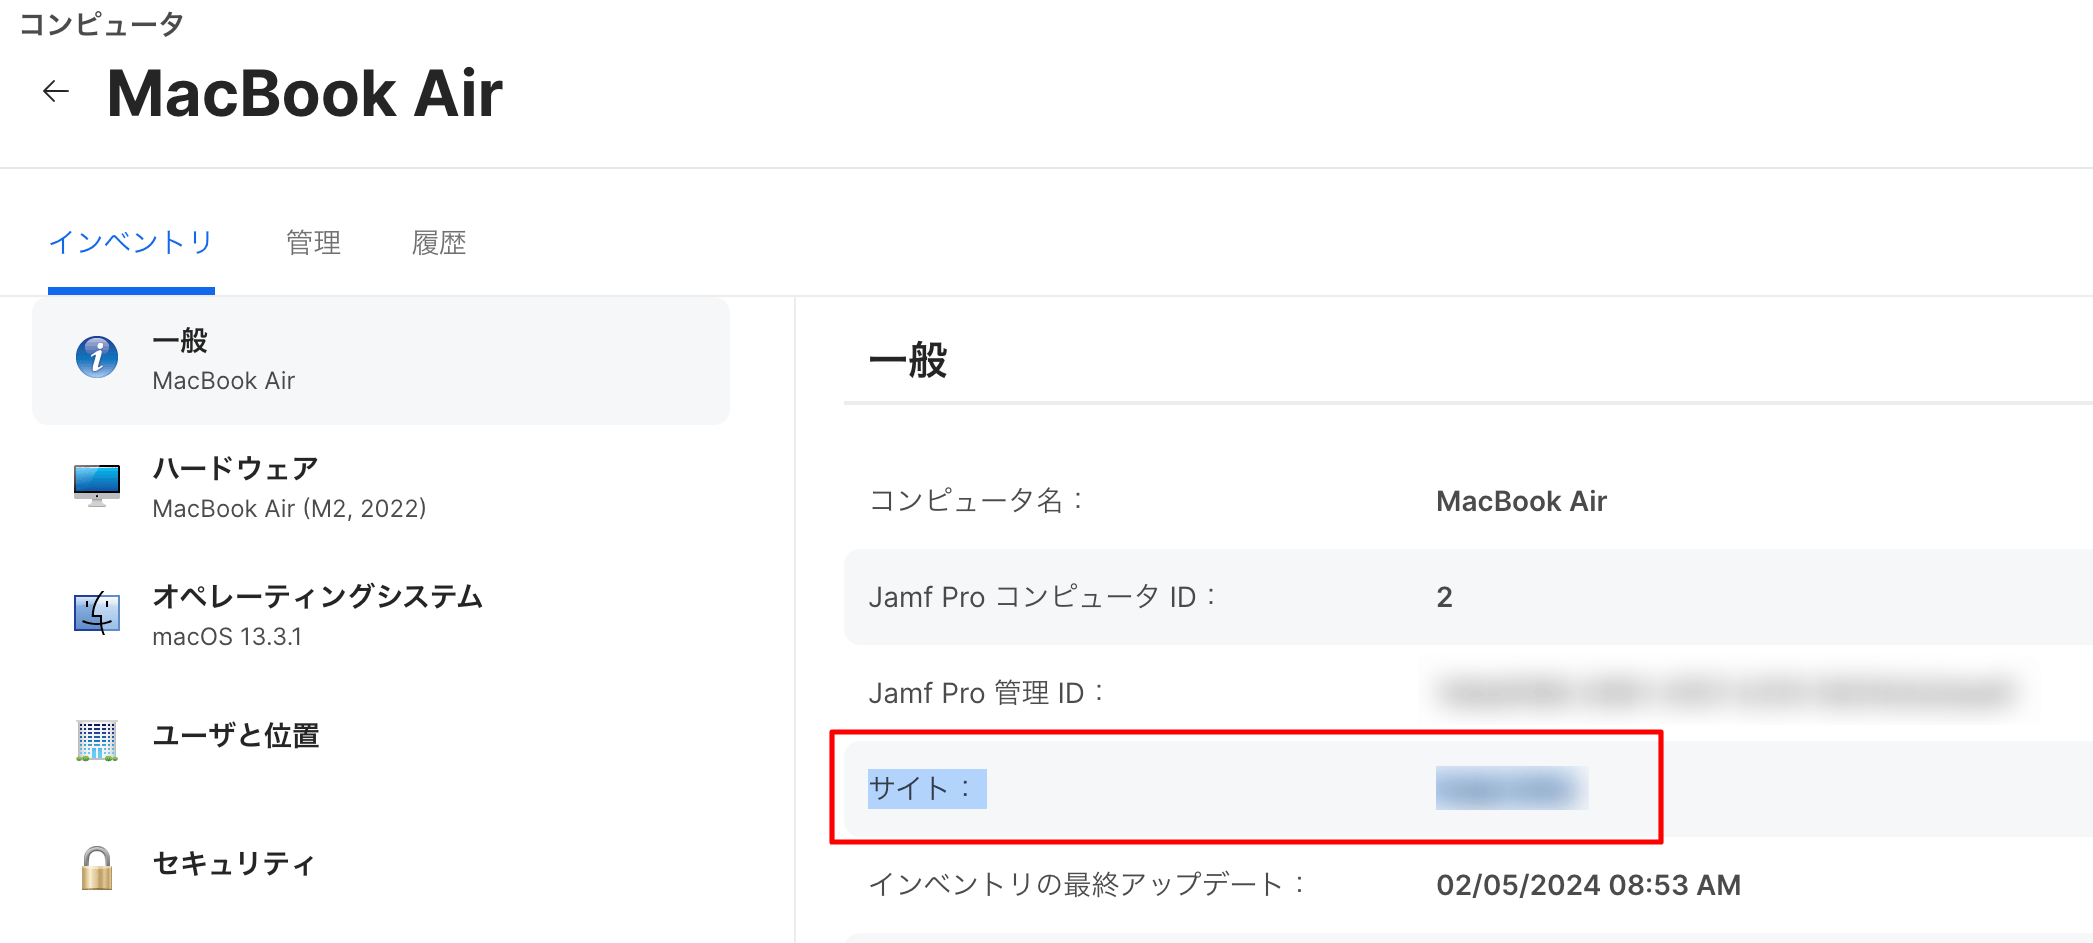
Data type to retrieve: Devicesand click Connect. Entering a Jamf site name in the Device Group Filter limits the retrieved devices to only those belonging to that site.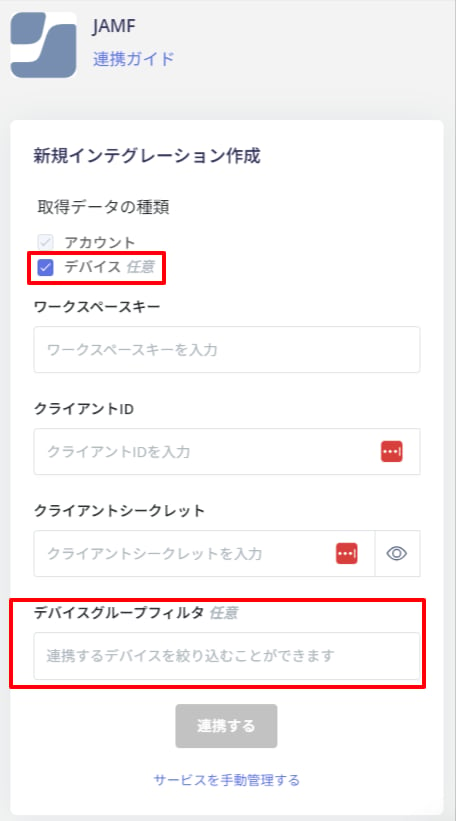
- Once the integration with Jamf is successful, registered user information will be displayed in the account list.