Supported Features

Account Deletion Account Provisioning

Prerequisites

How to Log In to Amazon Web Services

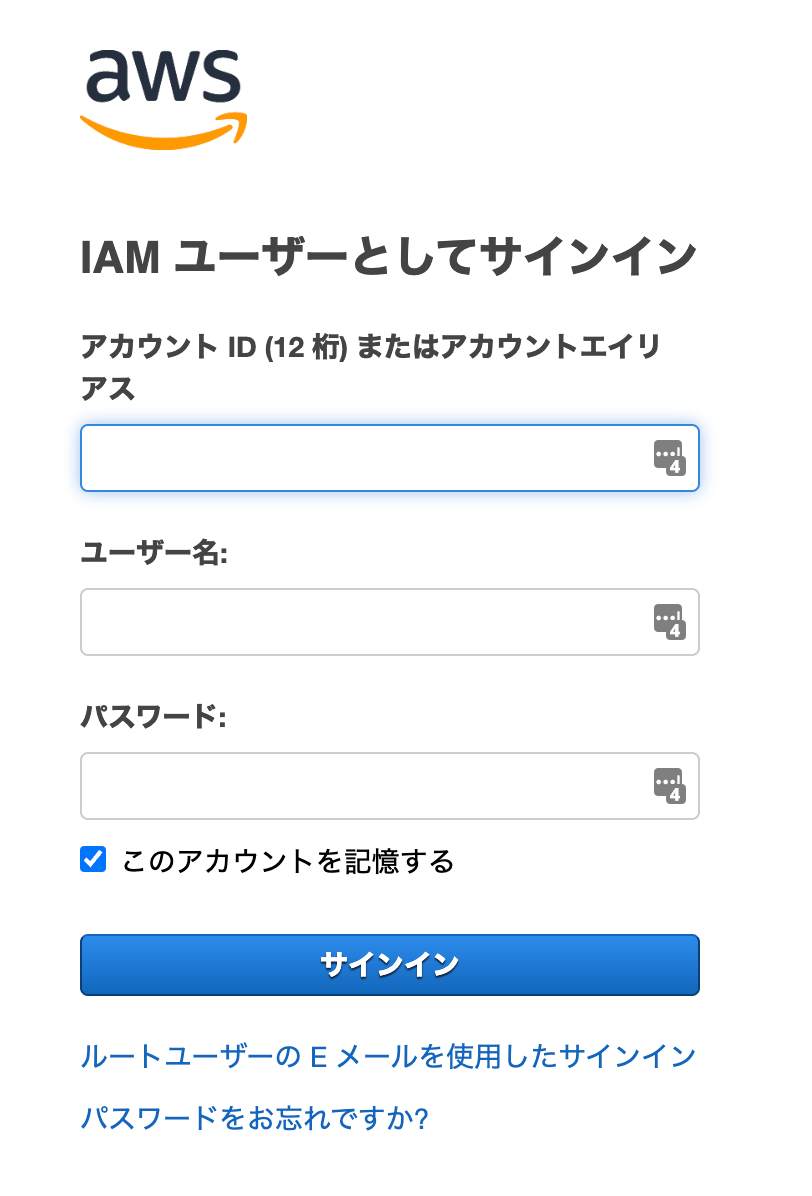
Go to the AWS login page and sign in as a root user or IAM user. AWS login screen

How to Create an Integration Policy

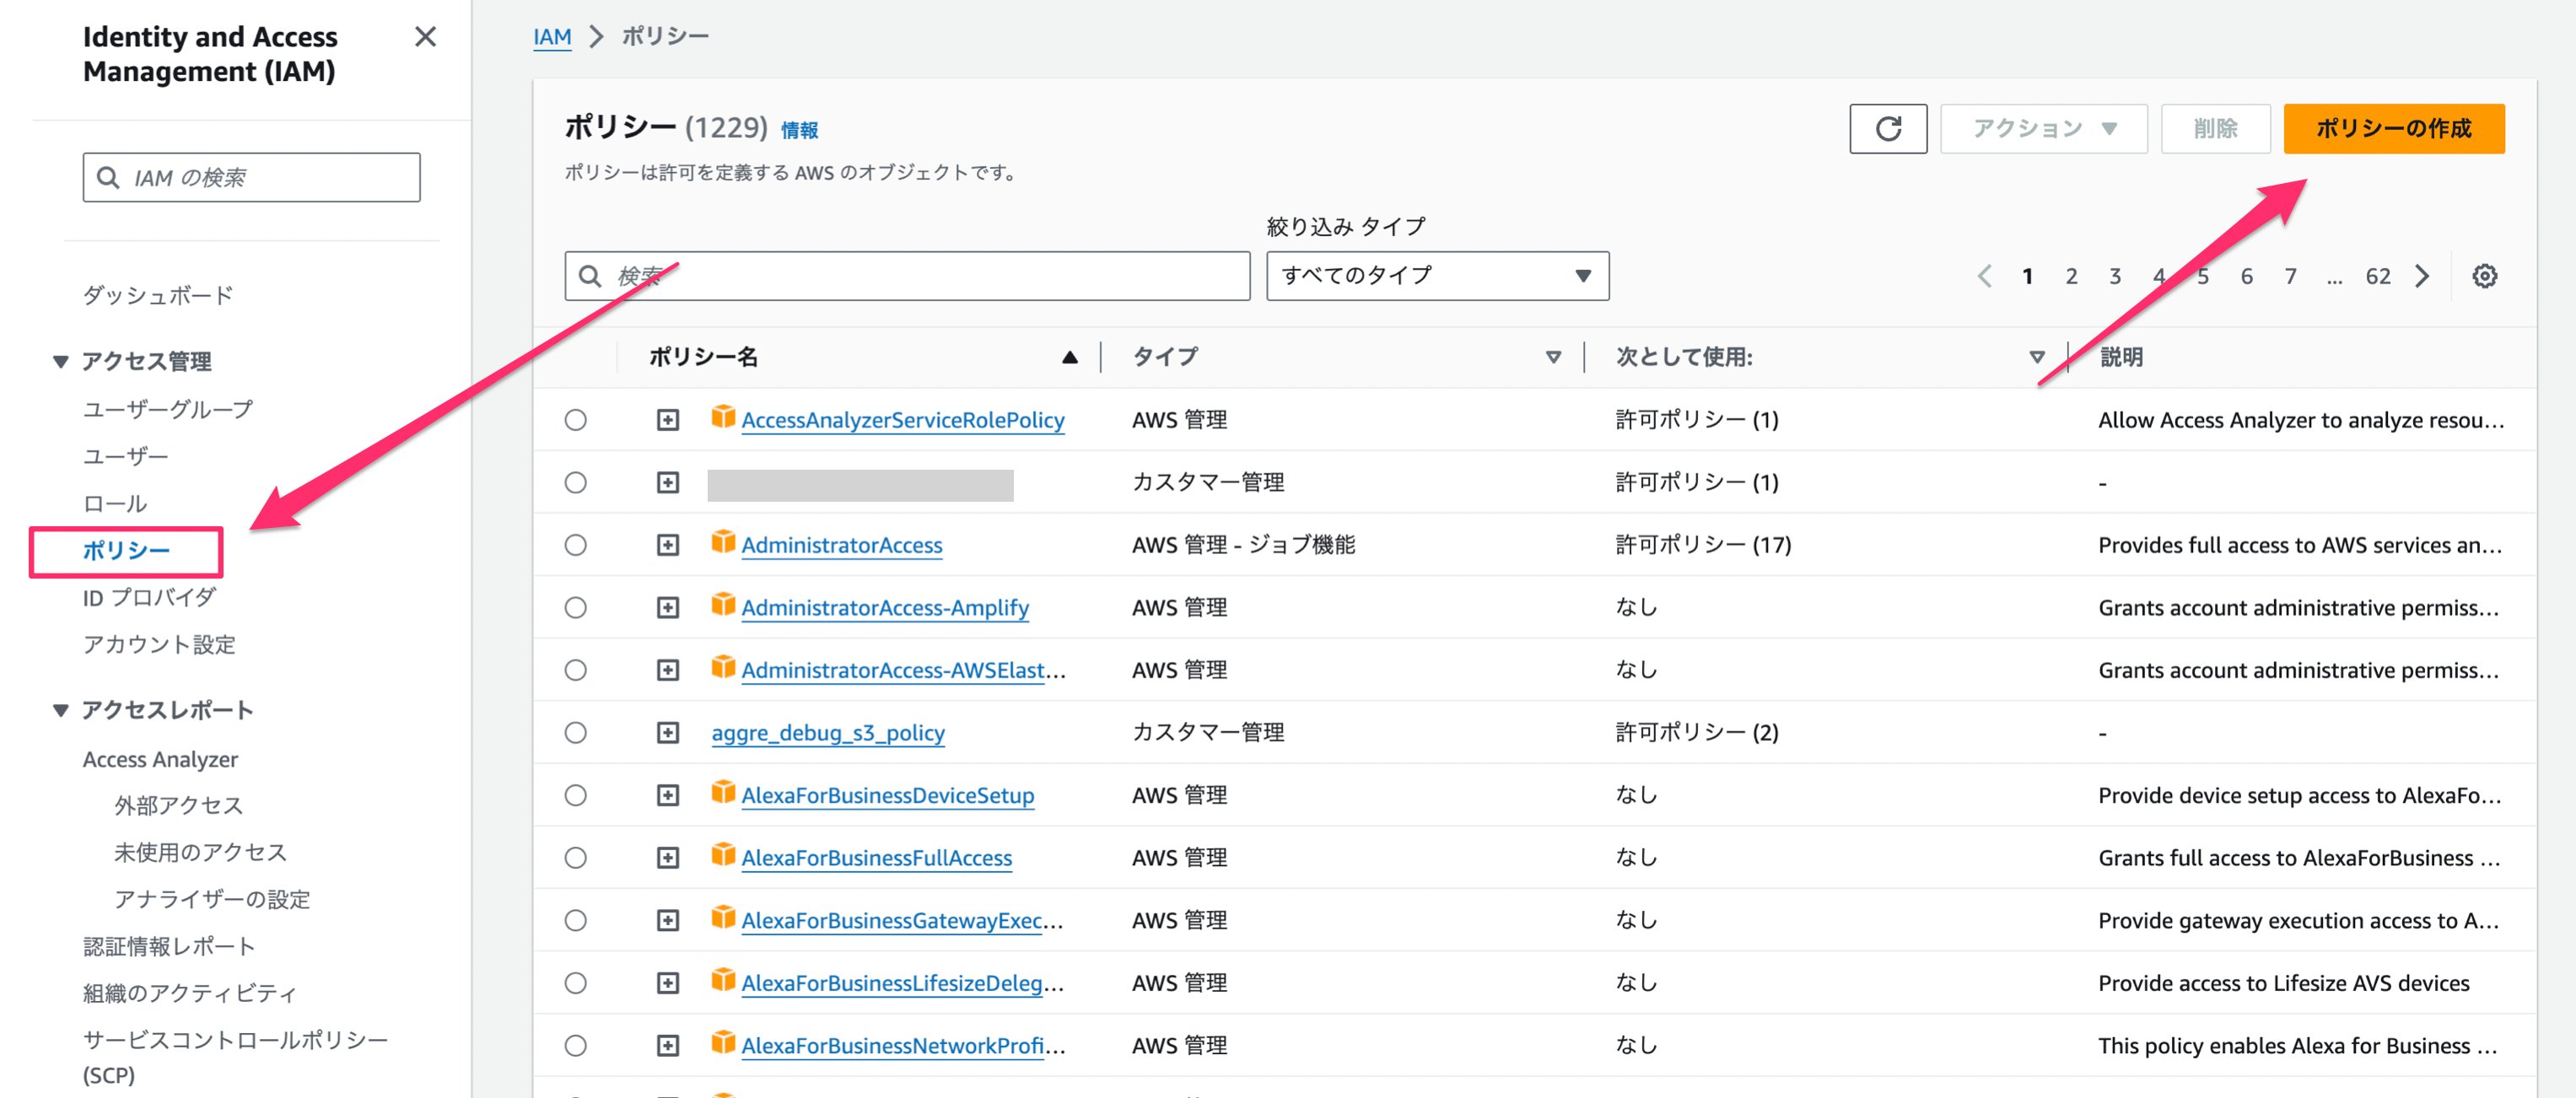
  1. Go to Identity and Access Management (IAM), click Policies in the left menu, then click Create policy.
IAM Policies screen
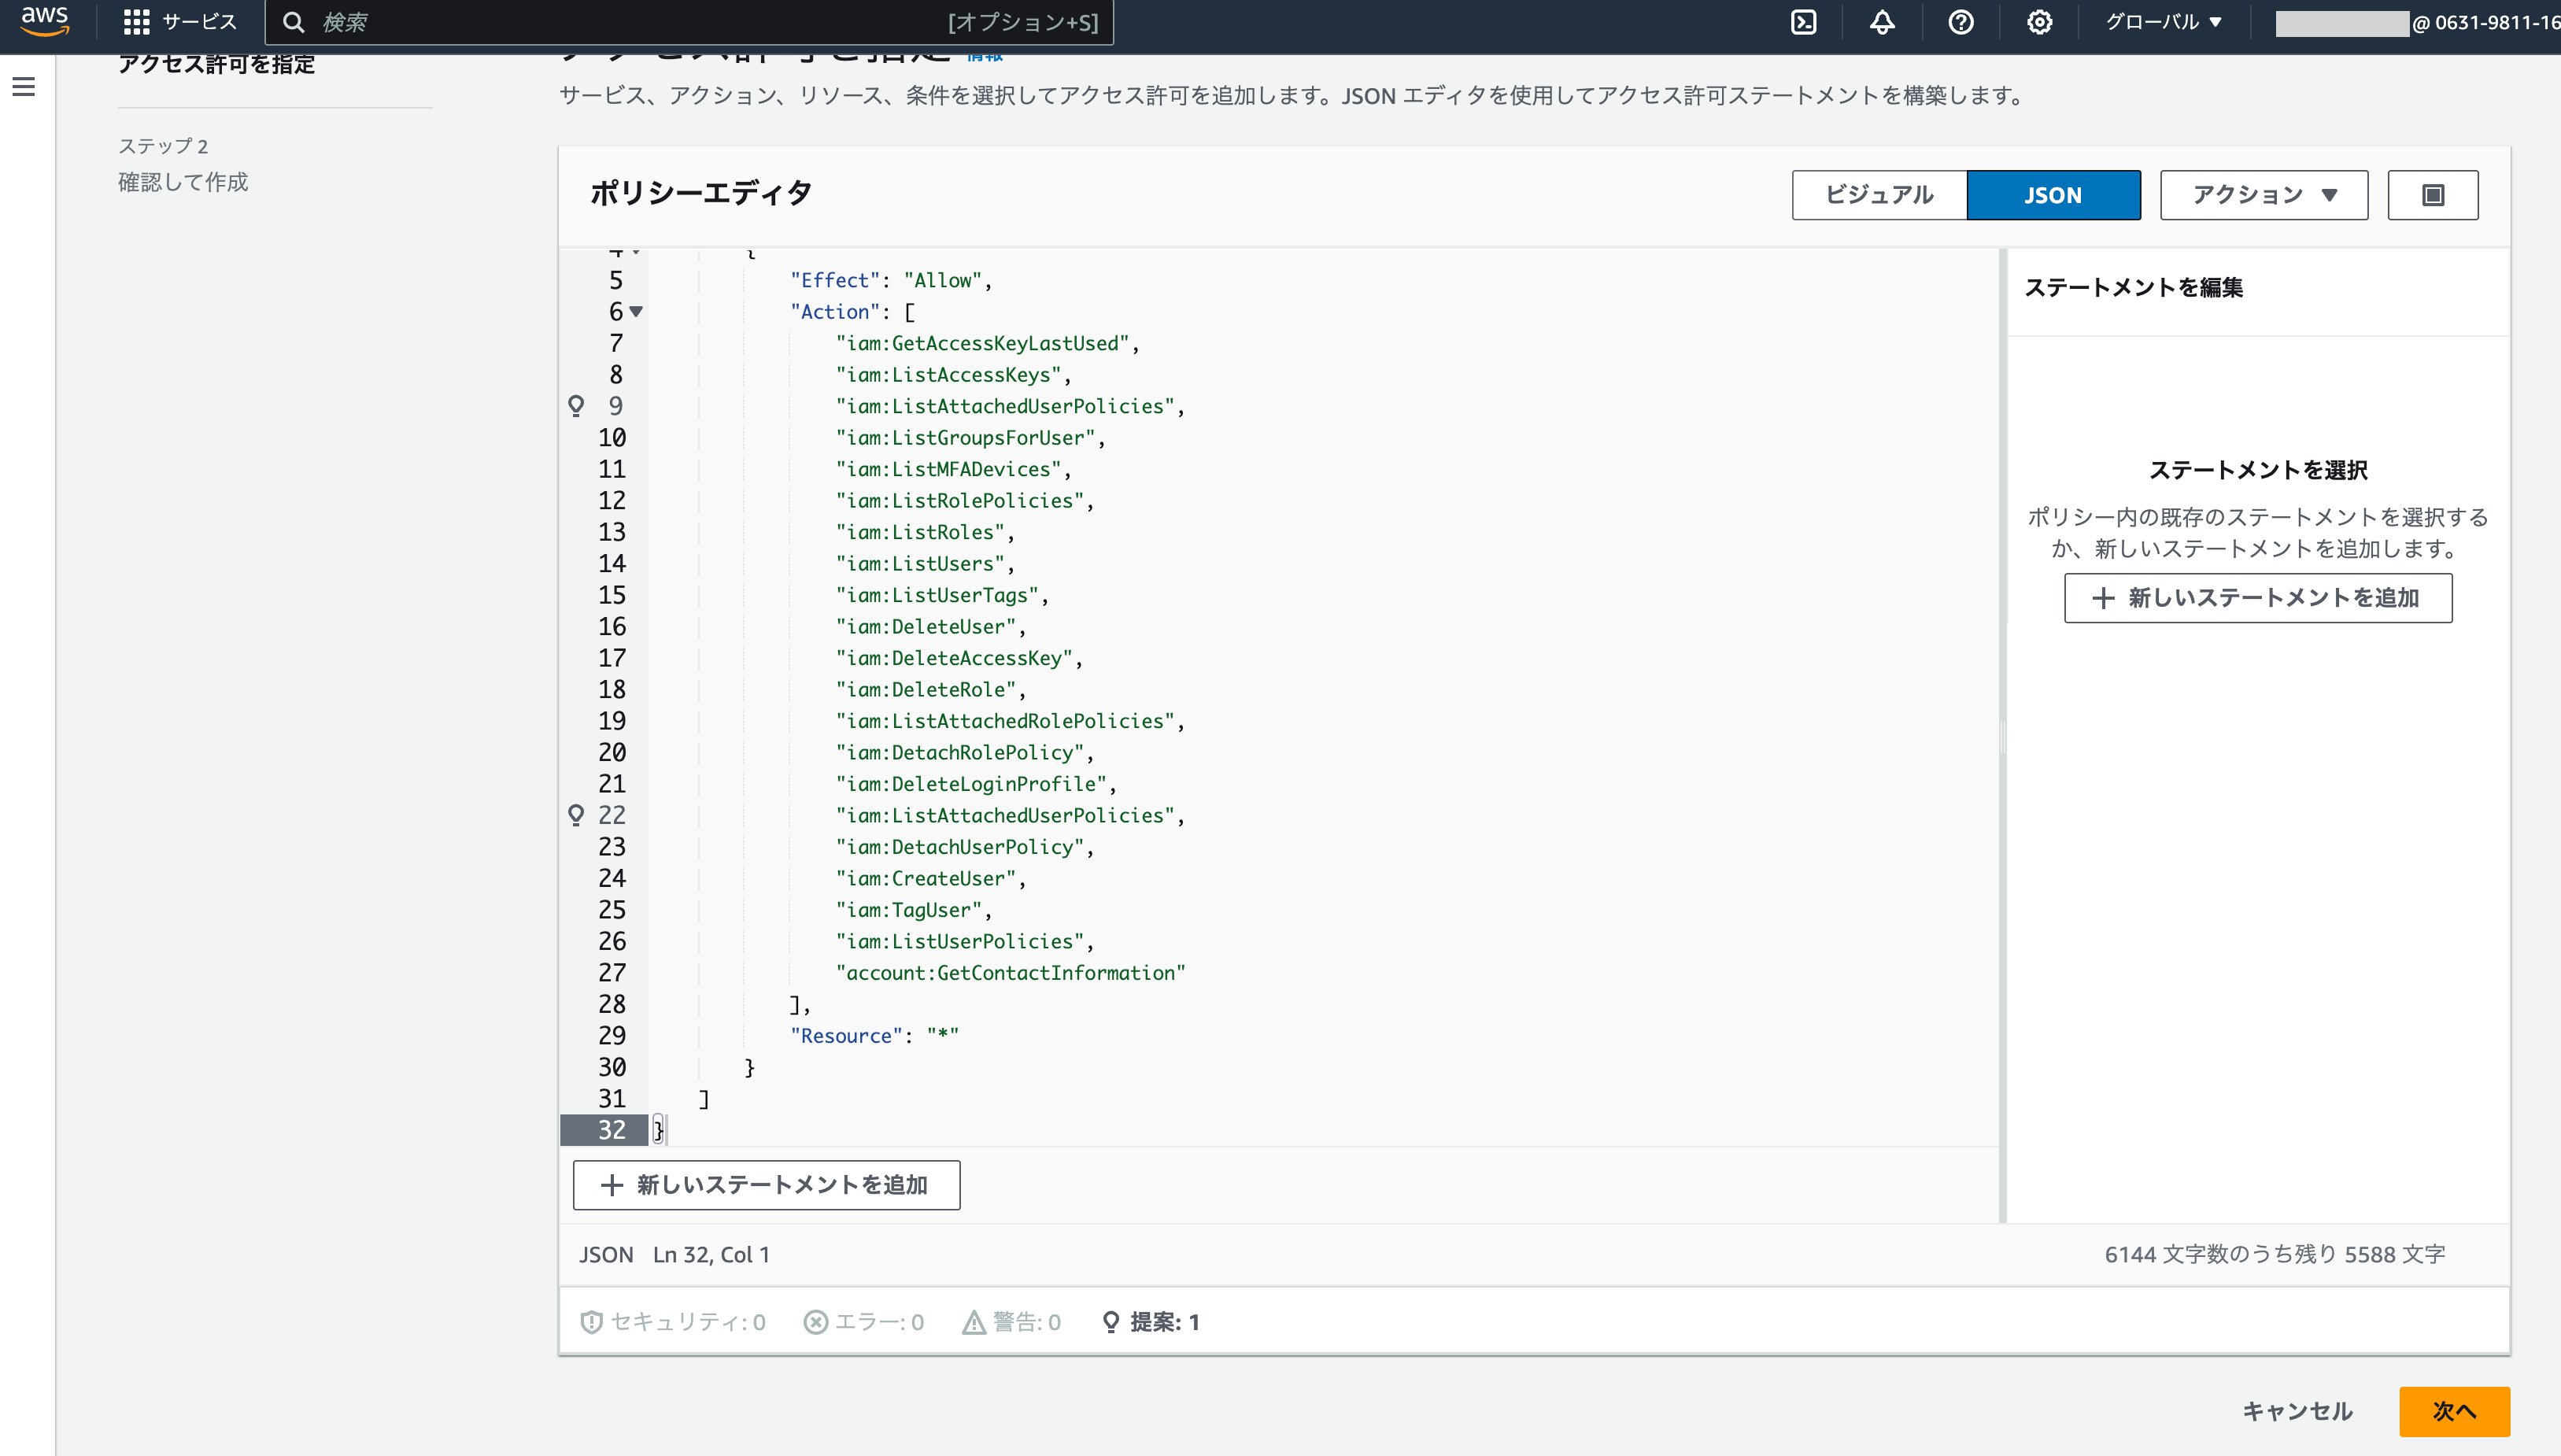
  1. On the Create policy screen, click the JSON tab and overwrite it with the following script.
To retrieve the LastActivity of roles, add "iam:GetRole", below "iam:ListRoles", in the policy script.
{
	"Version": "2012-10-17",
	"Statement": [
		{
			"Effect": "Allow",
			"Action": [
				"iam:GetAccessKeyLastUsed",
				"iam:ListAccessKeys",
				"iam:ListAttachedUserPolicies",
				"iam:ListGroupsForUser",
				"iam:ListMFADevices",
				"iam:ListRolePolicies",
				"iam:ListRoles",
				"iam:GetRole",
				"iam:ListUsers",
				"iam:ListUserTags",
				"iam:DeleteUser",
				"iam:DeleteAccessKey",
				"iam:DeleteRole",
				"iam:ListAttachedRolePolicies",
				"iam:DetachRolePolicy",
				"iam:DeleteLoginProfile",
				"iam:ListAttachedUserPolicies",
				"iam:DetachUserPolicy",
				"iam:CreateUser",
				"iam:TagUser",
				"iam:ListUserPolicies",
				"account:GetContactInformation"
			],
			"Resource": "*"
		}
	]
}
If you do not need account deletion or provisioning from Admina (Read Only), use the following script instead.To retrieve the LastActivity of roles, add "iam:GetRole", below "iam:ListRoles", in the policy script.
{
	"Version": "2012-10-17",
	"Statement": [
		{
			"Effect": "Allow",
			"Action": [
				"iam:GetAccessKeyLastUsed",
				"iam:ListAccessKeys",
				"iam:ListAttachedUserPolicies",
				"iam:ListGroupsForUser",
				"iam:ListMFADevices",
				"iam:ListRolePolicies",
				"iam:ListRoles",
				"iam:GetRole",
				"iam:ListUsers",
				"iam:ListUserTags",
				"iam:ListAttachedRolePolicies",
				"iam:ListAttachedUserPolicies",
				"iam:TagUser",
				"iam:ListUserPolicies",
				"account:GetContactInformation"
			],
			"Resource": "*"
		}
	]
}
  1. After entering the details, click Next.
Policy JSON editing screen
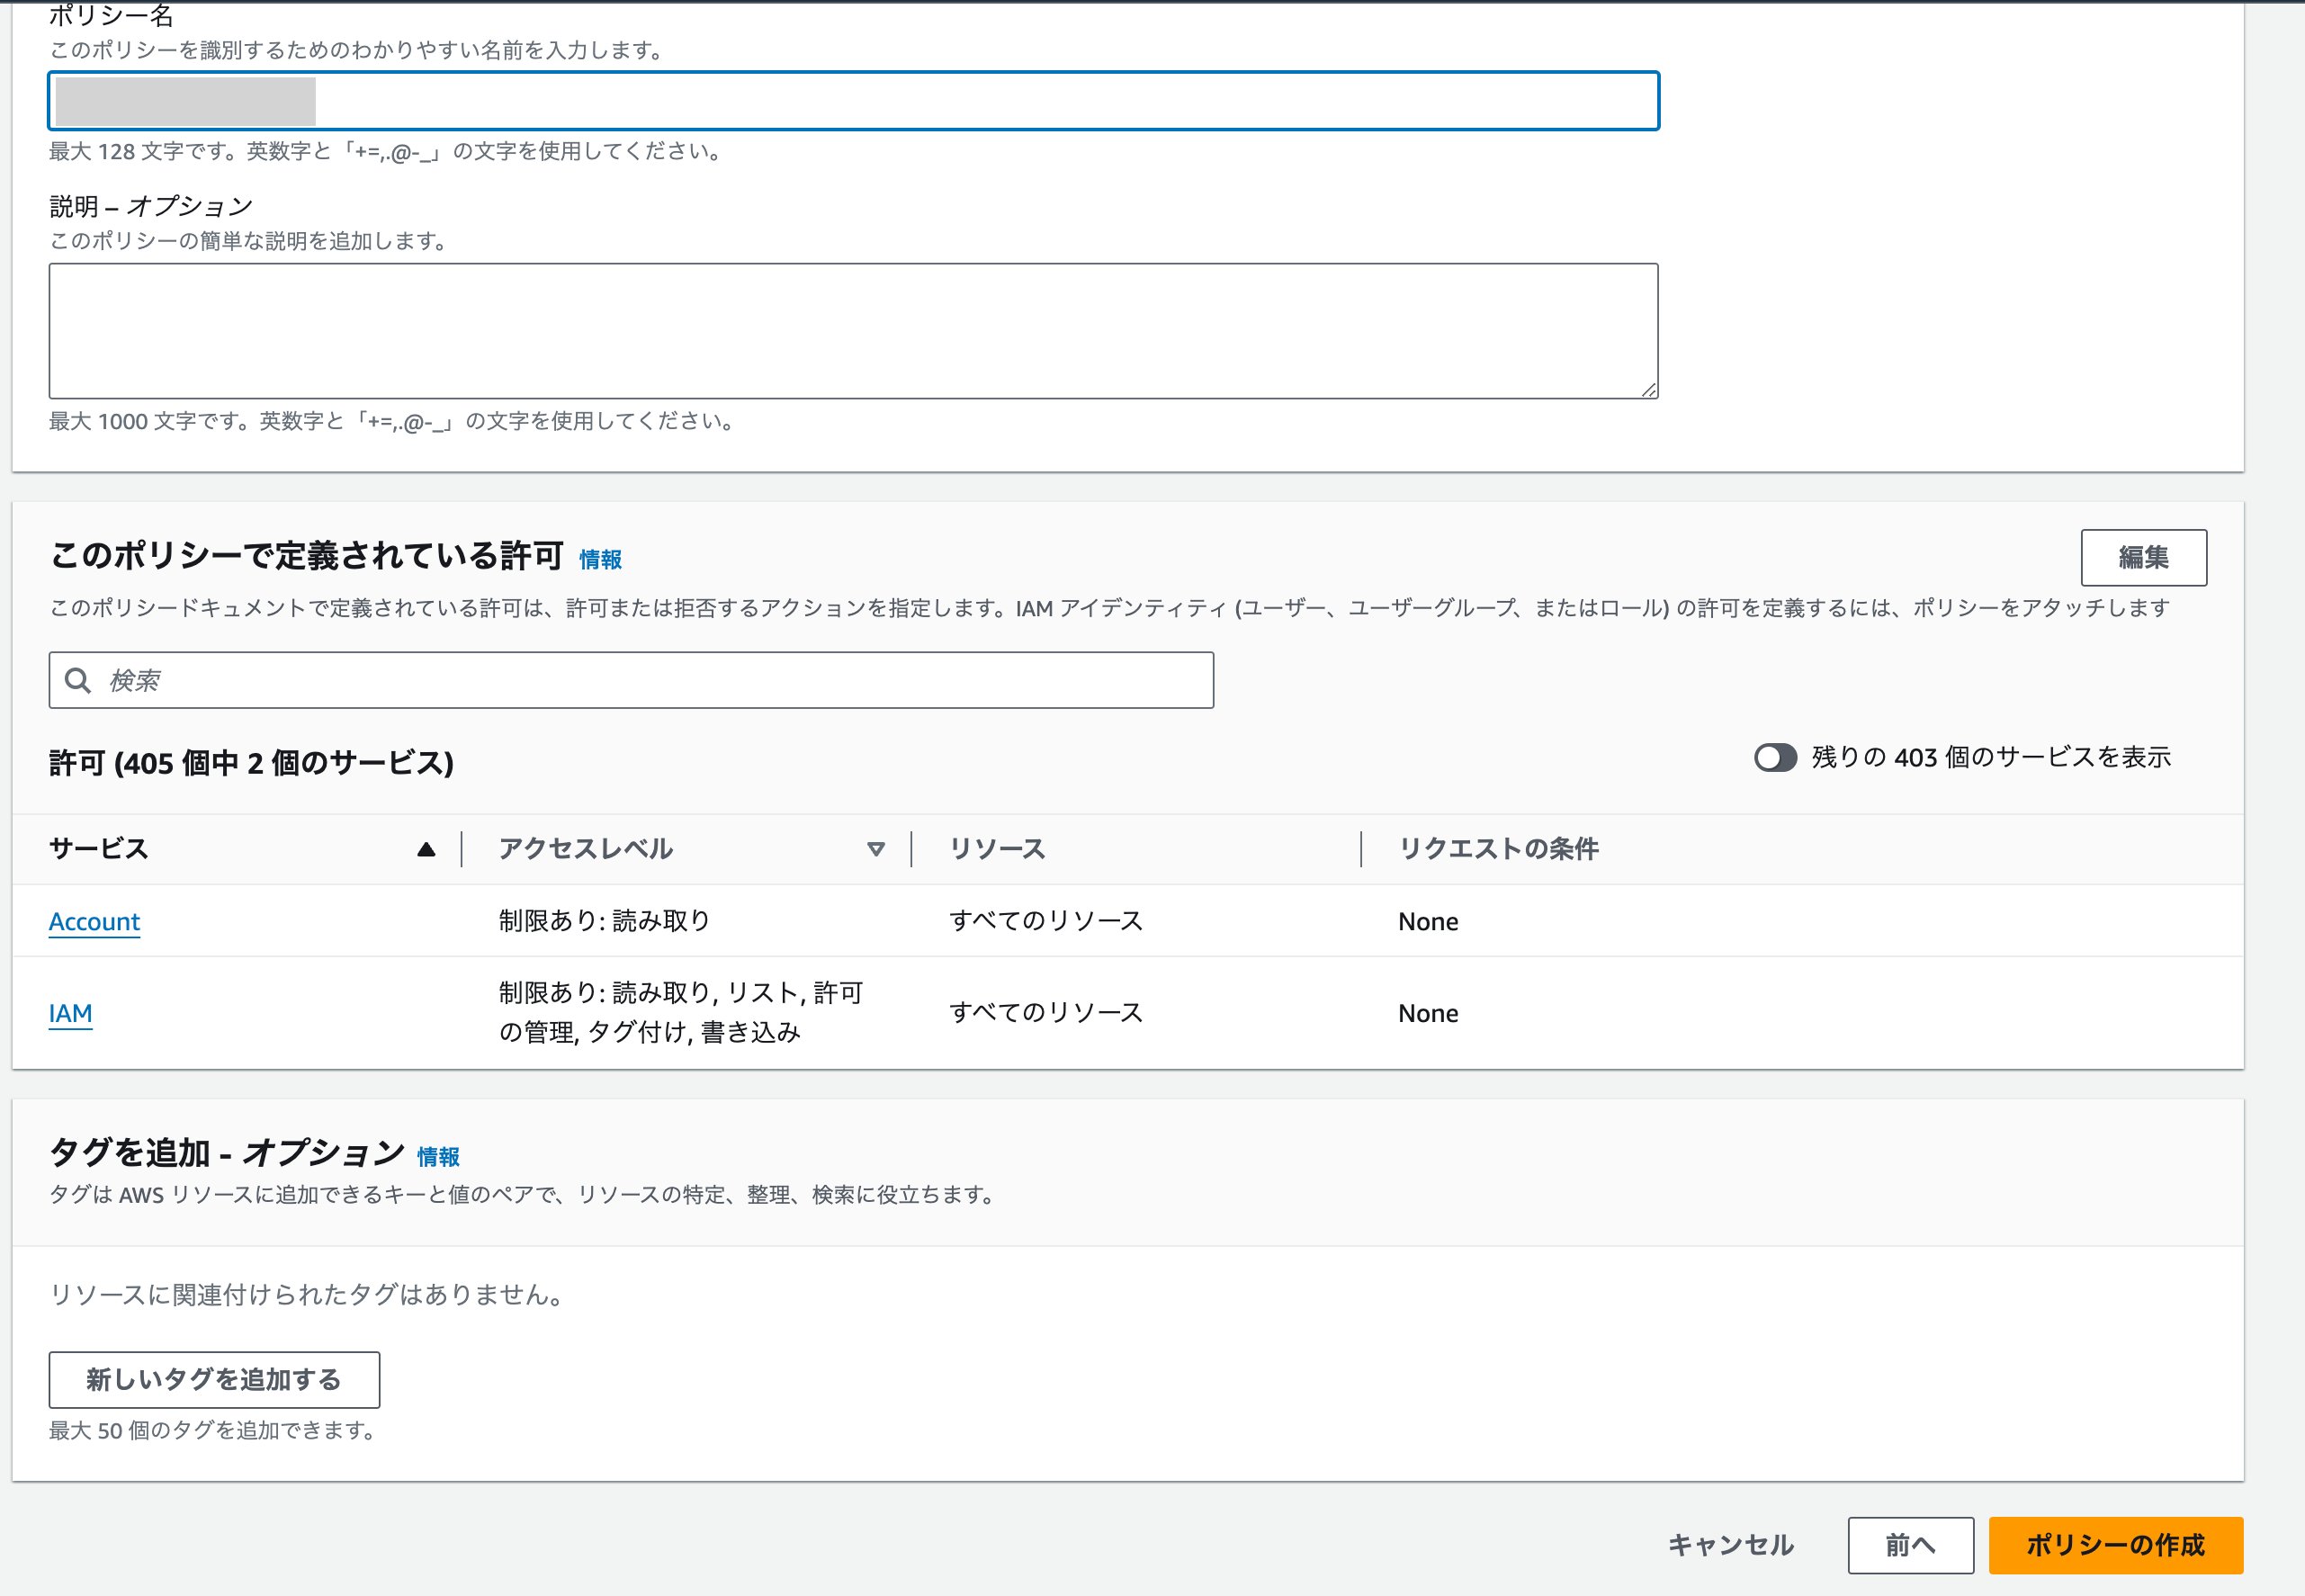
  1. On the next screen, enter any name in the Policy name field and click Create policy. The policy is now created.
Policy name input screen

How to Create an Integration Role

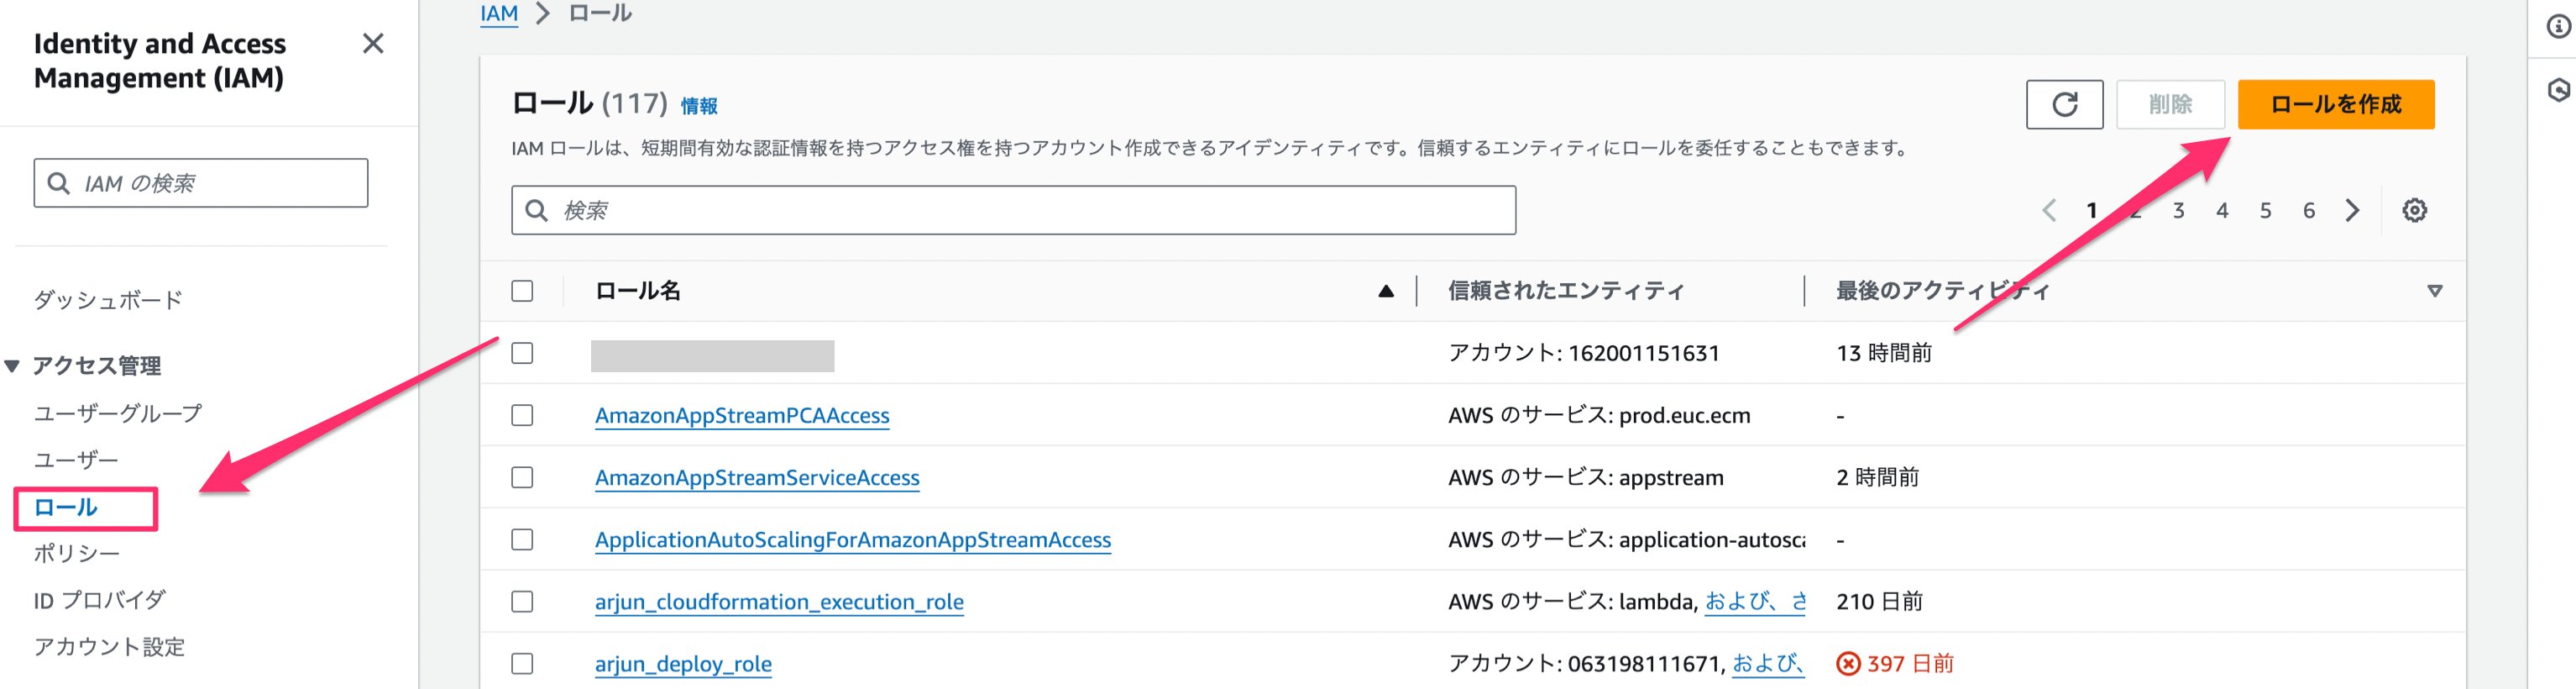
  1. Go to Identity and Access Management (IAM), click Roles in the left menu, then click Create role.
Note: Role LastActivity cannot be retrieved. IAM Roles screen
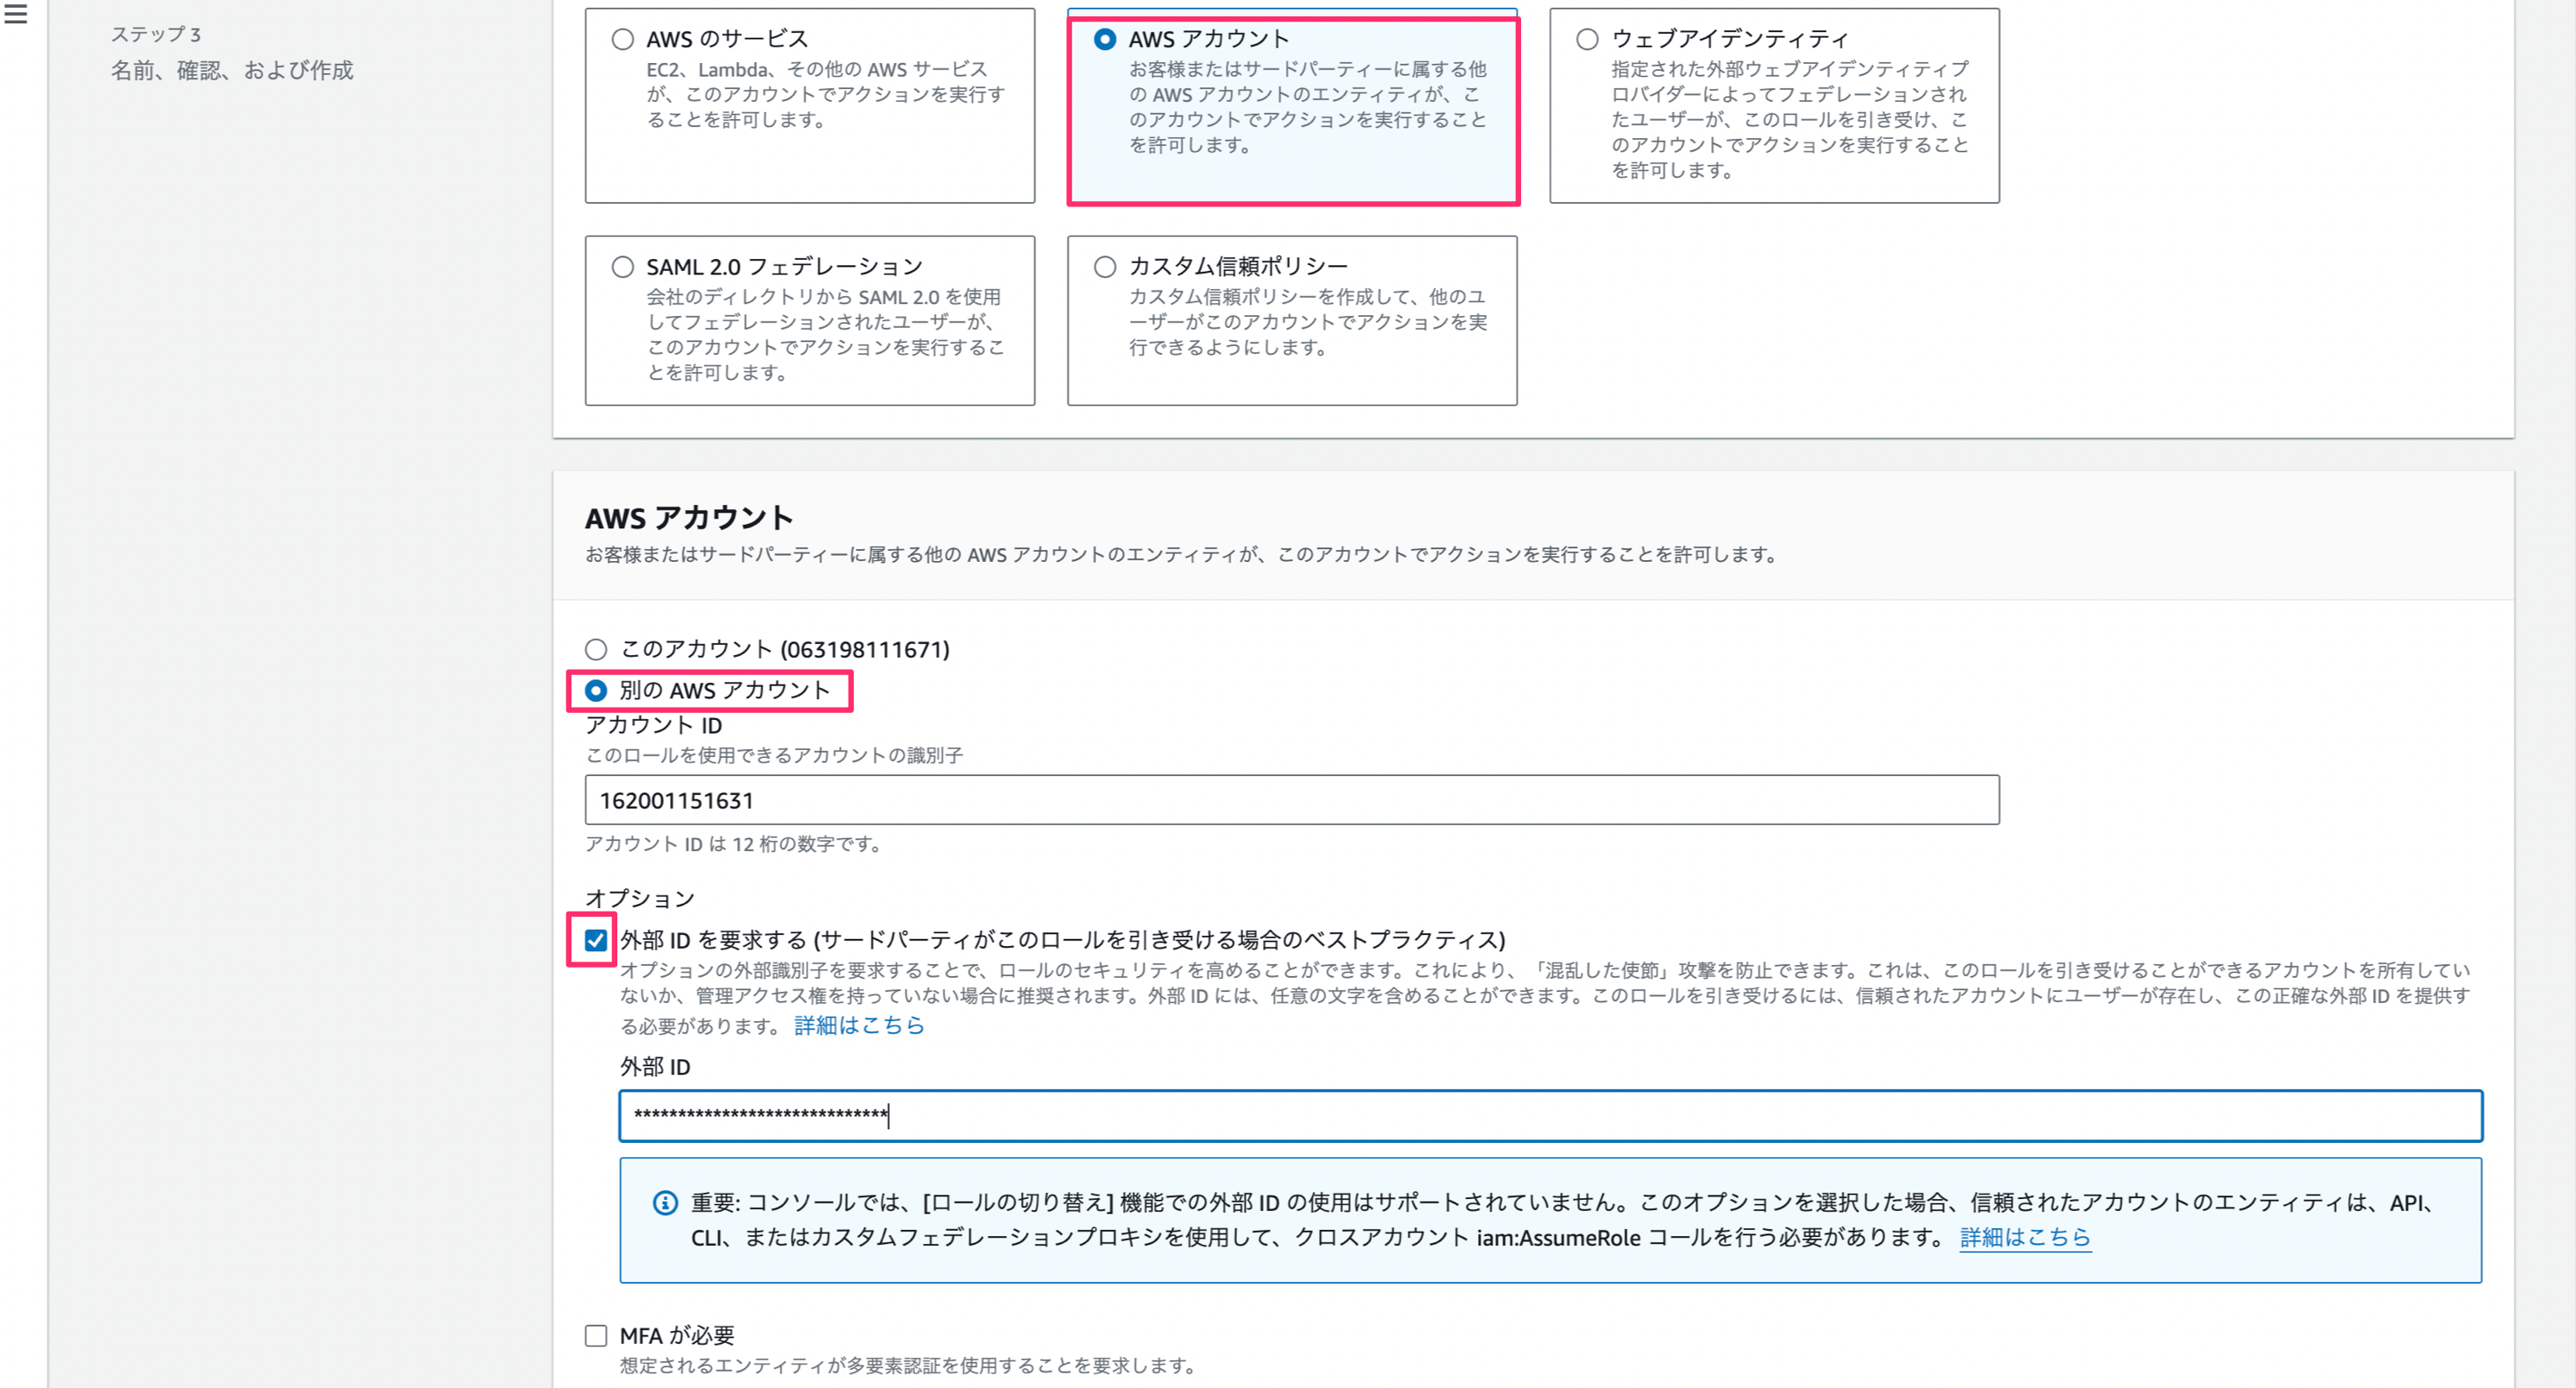
  1. Under Select trusted entity, enter the following values:
  • Trusted entity type: Select AWS account
  • AWS account: Select Another AWS account and enter 162001151631 as the Account ID
  • Check Require external ID (Best practice when a third party will assume this role)
  • For the External ID, enter a random alphanumeric string (at least 24 characters, no symbols recommended)
  • Uncheck Require MFA
Click Next when done. Role creation screen
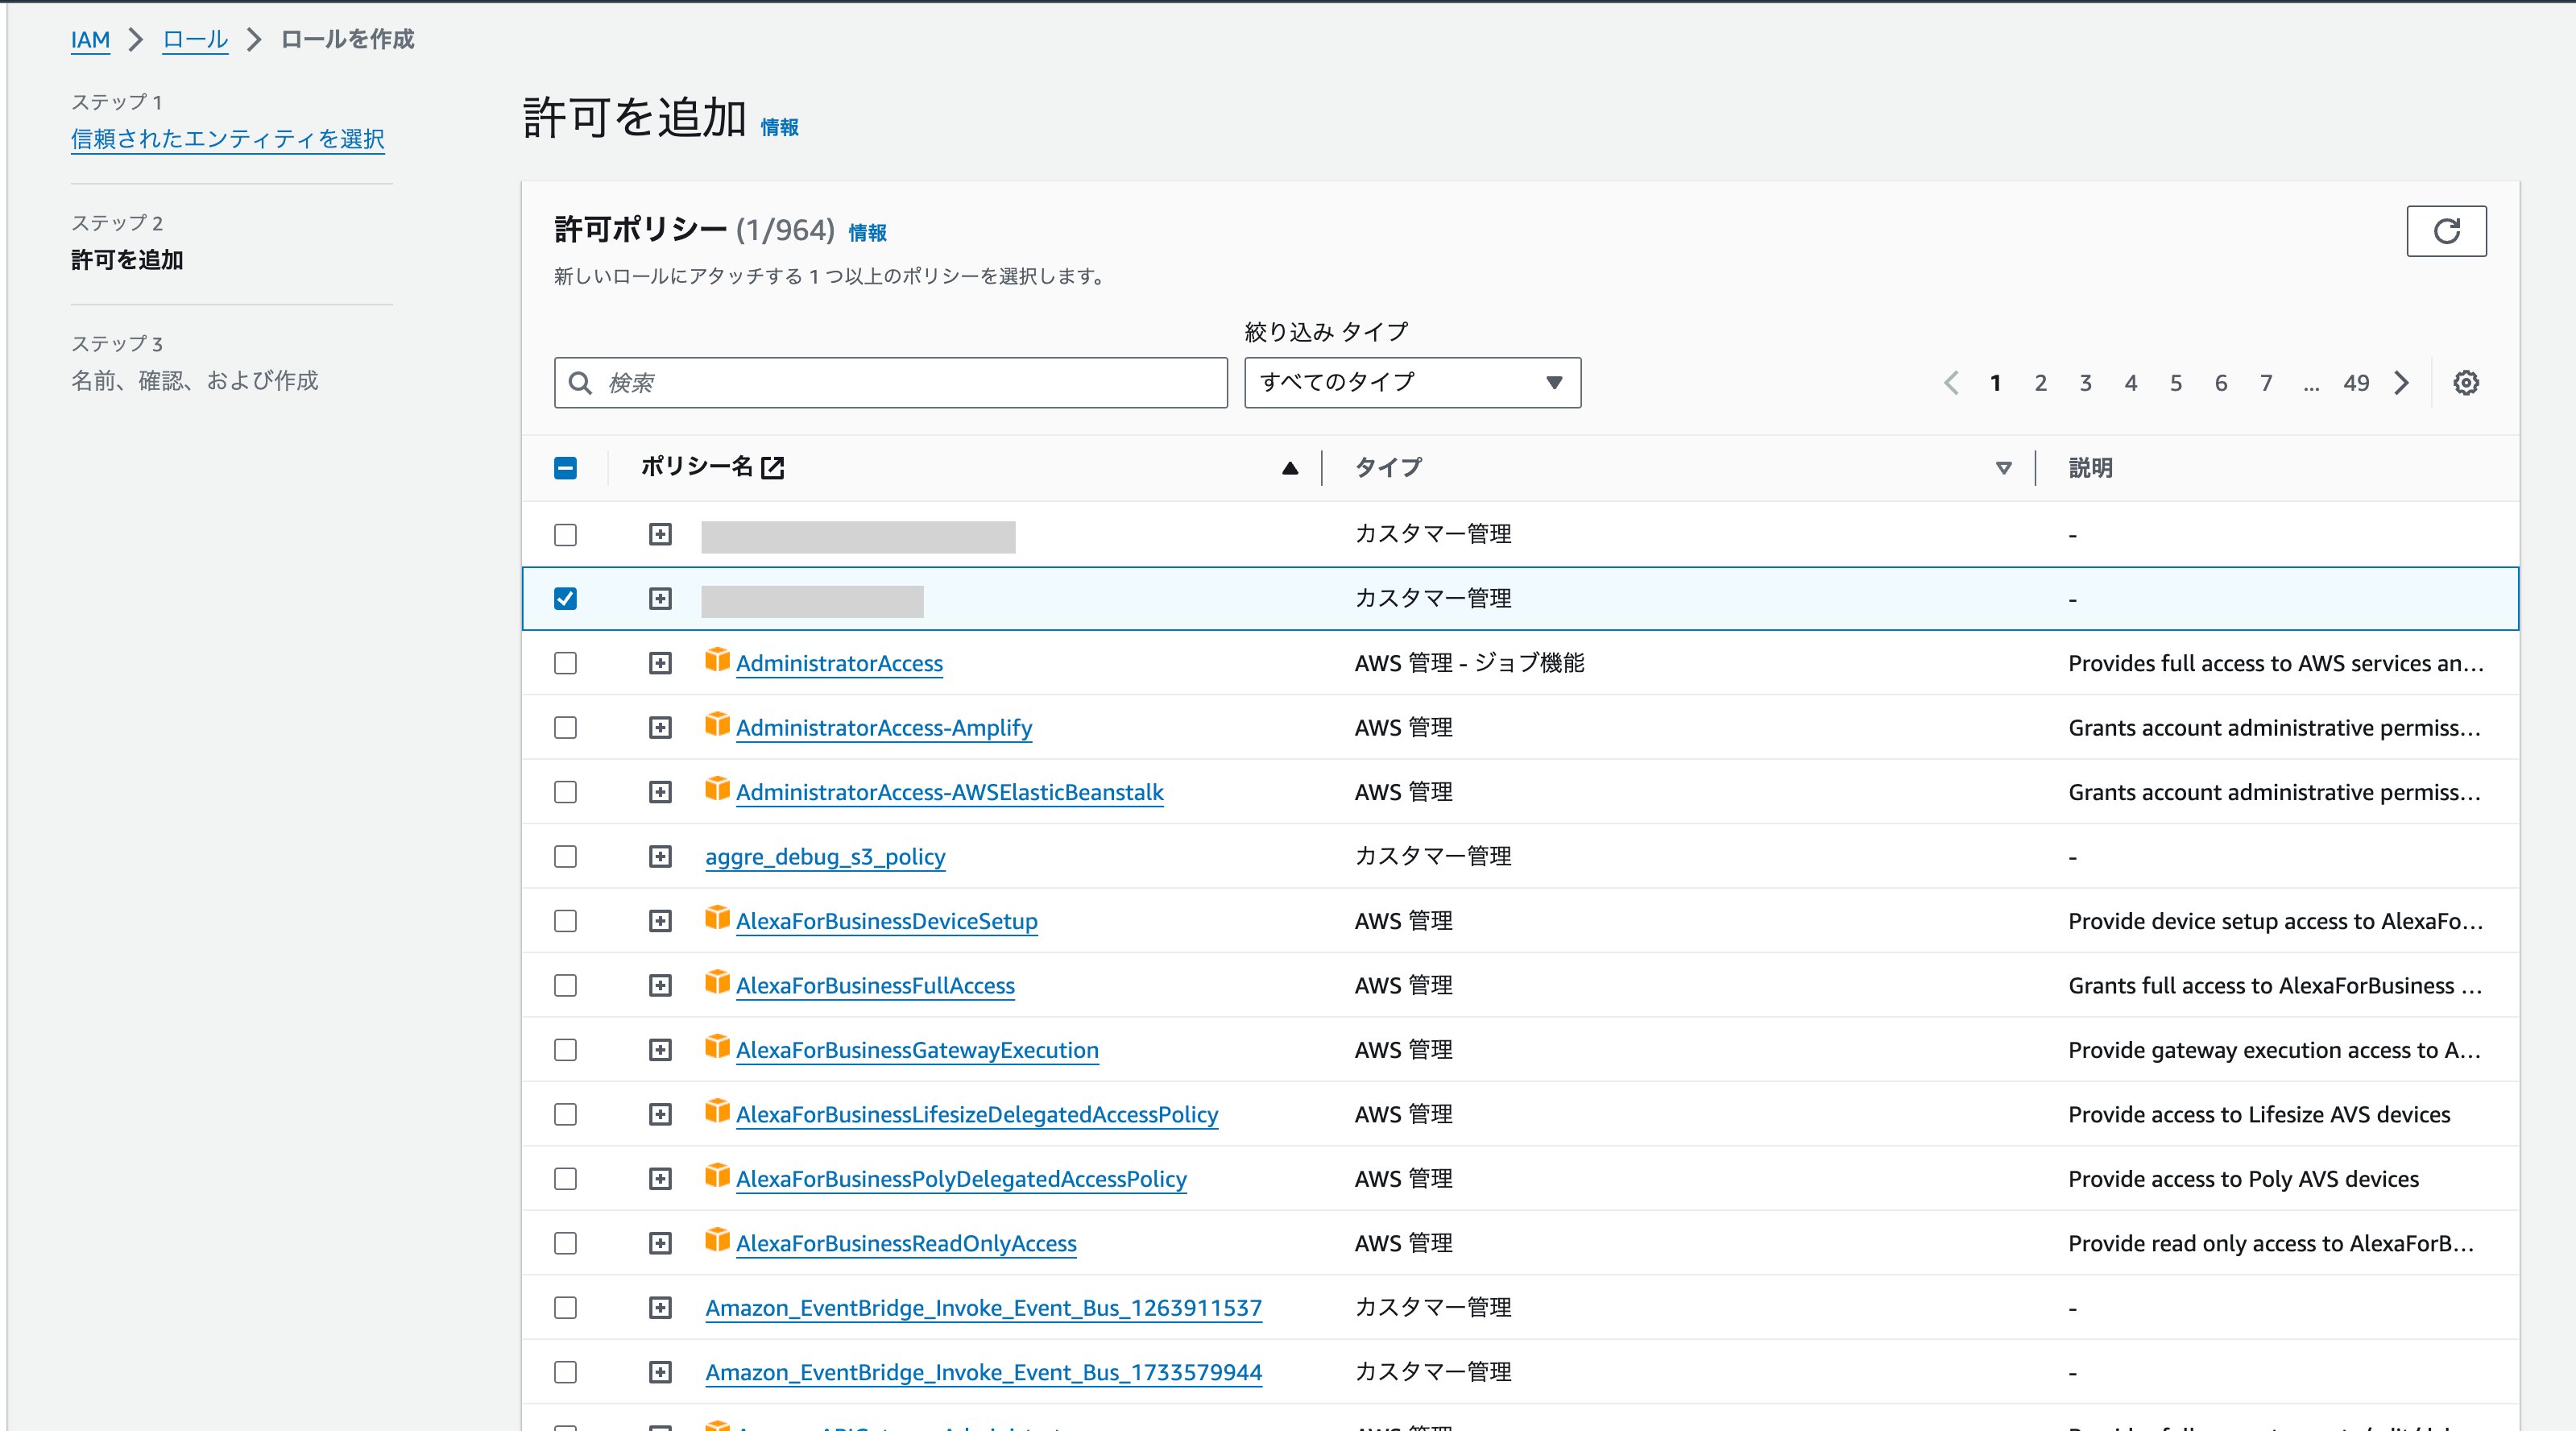
  1. The Add permissions screen will appear. Select the policy created in the previous step, scroll down, then click Next.
Add permissions screen
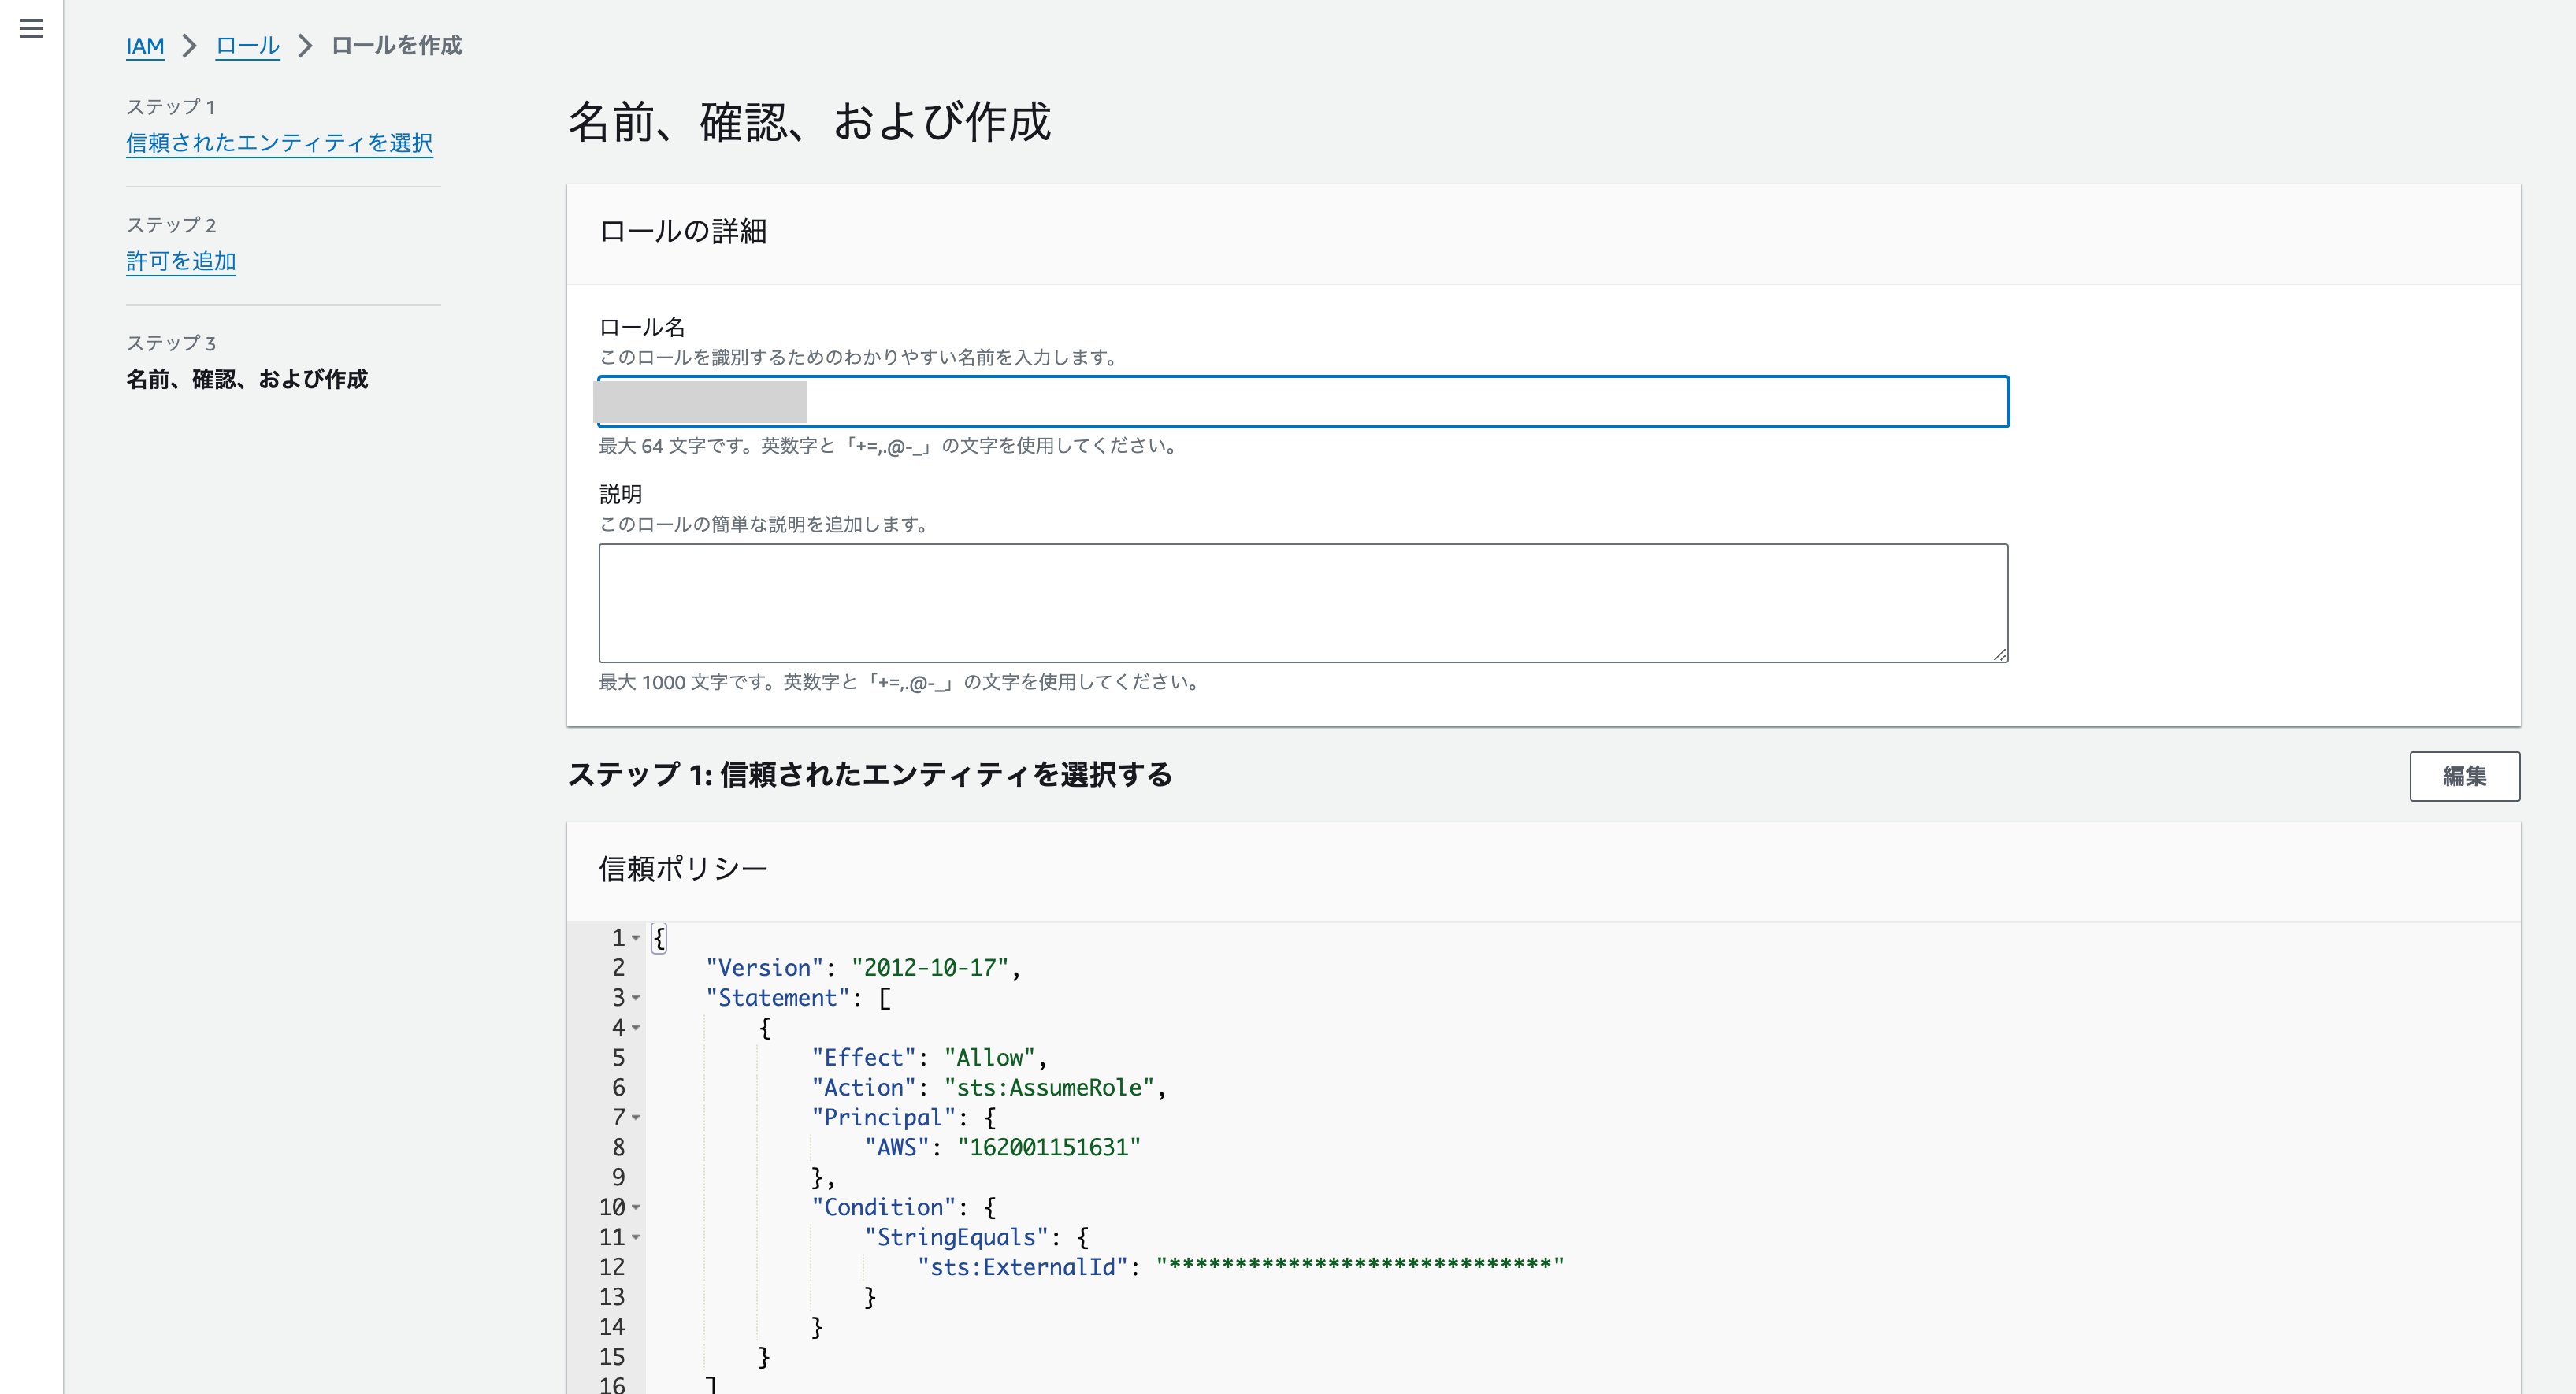
  1. Enter a name for the role (any name), scroll down, then click Create role. The role is now created.
Role name input screen

How to Find the Role ARN

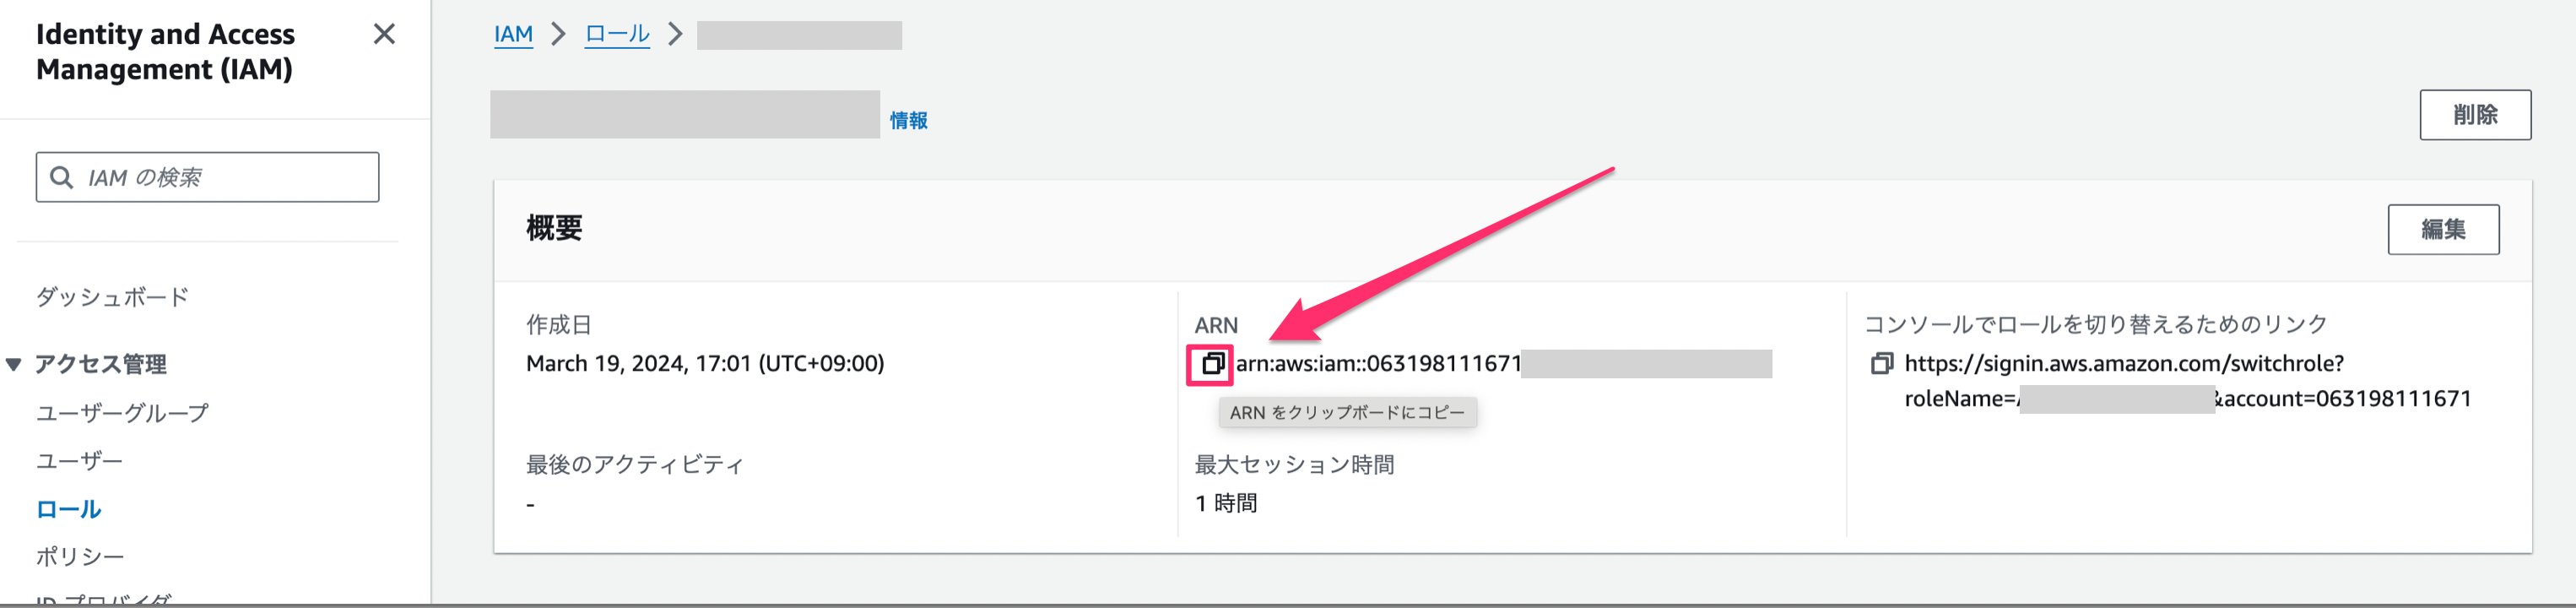
Search for the role you created on the Roles screen and click it. Roles list screen The Role ARN will be displayed. Copy and save it. Role ARN display screen

Integration Setup

  1. In the MoneyForward Admina integration screen, search for AWS IAM.
Admina integration search screen
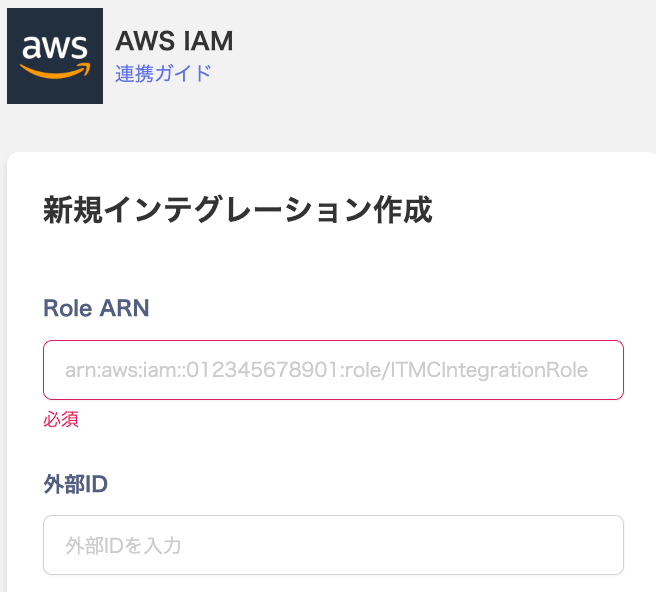
  1. Enter the Role ARN obtained in the previous step and the External ID set when creating the role.
Role ARN input screen
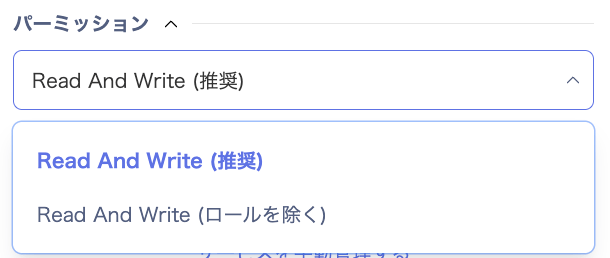
  1. Select the permissions.
If you do not want to retrieve roles during integration, select Read And Write (excluding roles). Permissions selection screen
  1. Review the entered details and click Connect.
Integration confirmation screen
  1. Once the integration with AWS is successful, the registered user information will appear in the account list.
If the integration does not complete successfully, go to the Status tab on the integration screen, click Edit, and try connecting again. If the issue persists, please contact us via chat. For an overview of the AWS integration, visit the integration page.

Supplement: Retrieving Email Addresses

AWS does not retrieve email addresses by default, so the user type will be shown as “Unknown” or “System.” To retrieve email addresses, use one of the following methods:

  1. Use the Account Merge feature
This allows user types to be assigned, enabling more accurate management of offboarded employees.
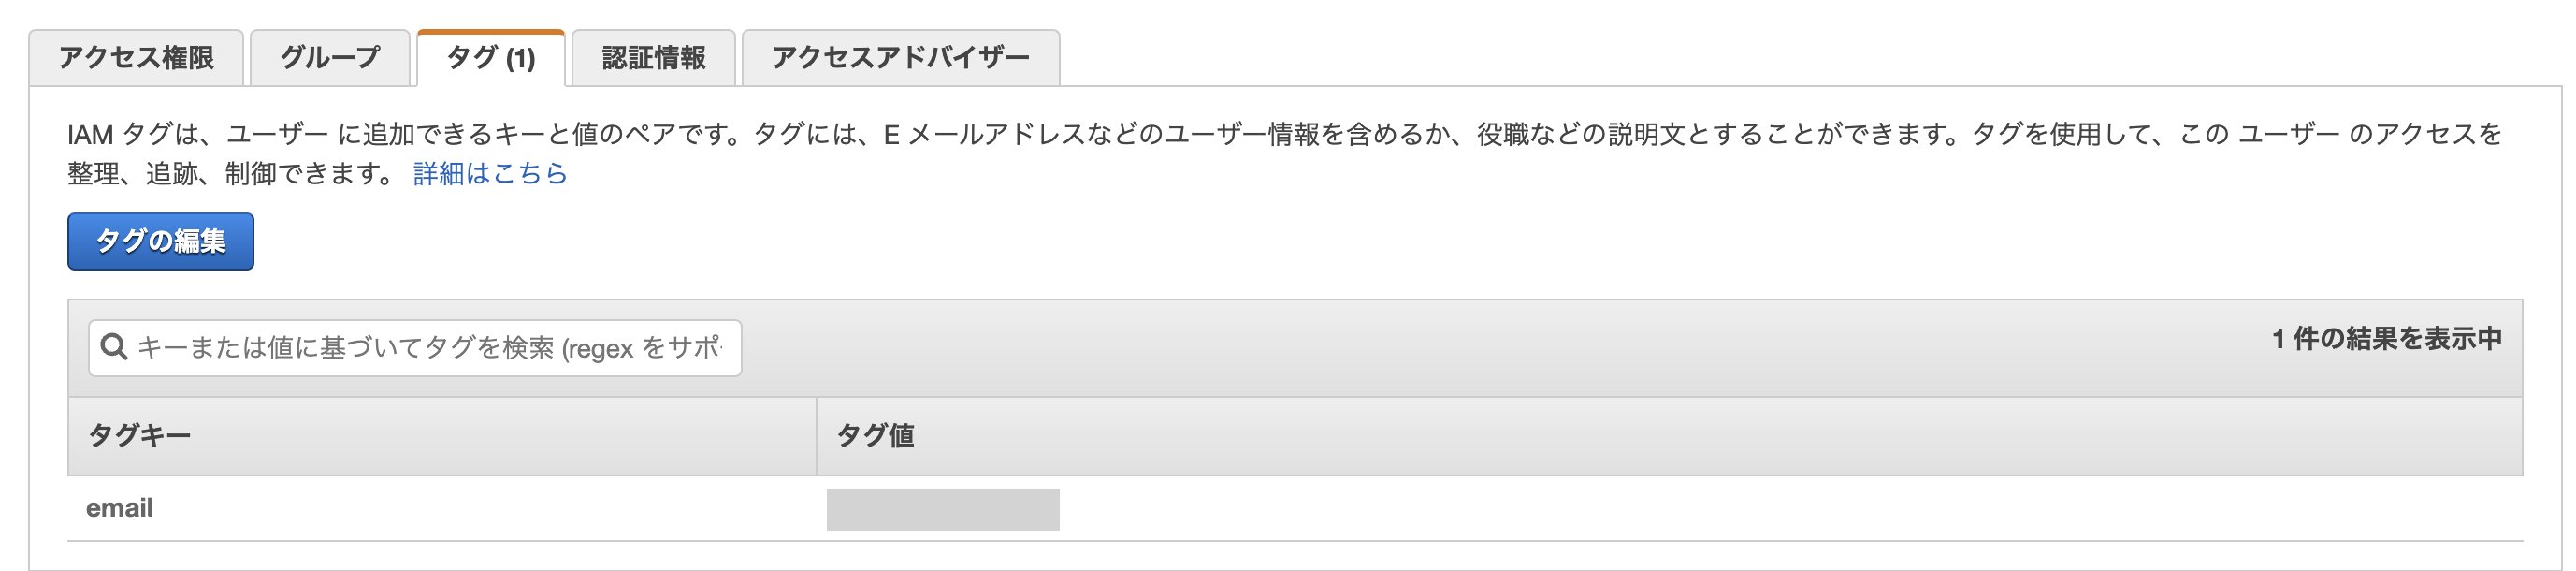
  1. Assign email addresses directly to IAM users using tags.
By setting the tag key to email and the tag value to the email address, MoneyForward Admina will retrieve the email address. IAM tag settings screen
Last modified on June 18, 2026