Supported Features

Account Creation Account Deletion

Prerequisites

Step 1: Creating a Policy for Integration

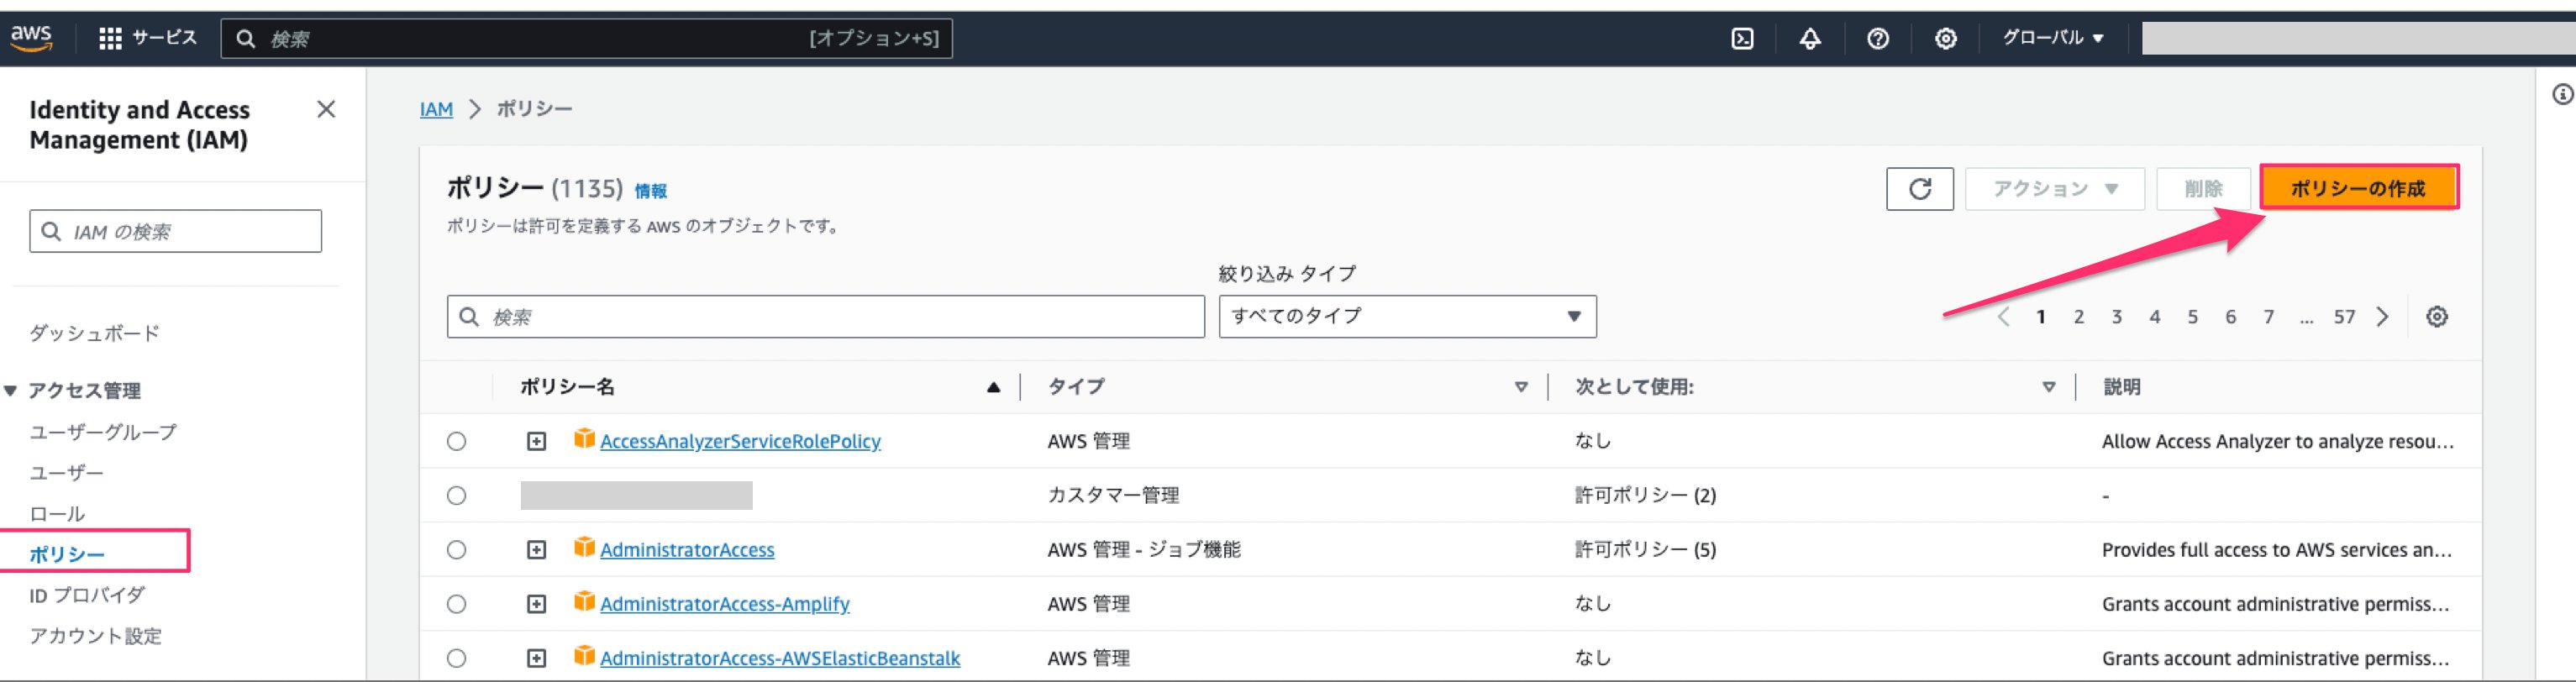
  1. Go to Identity and Access Management (IAM), and click [Create policy] from Policies in the left menu. For details, refer to Creating IAM policies (external site). IAM policy screen
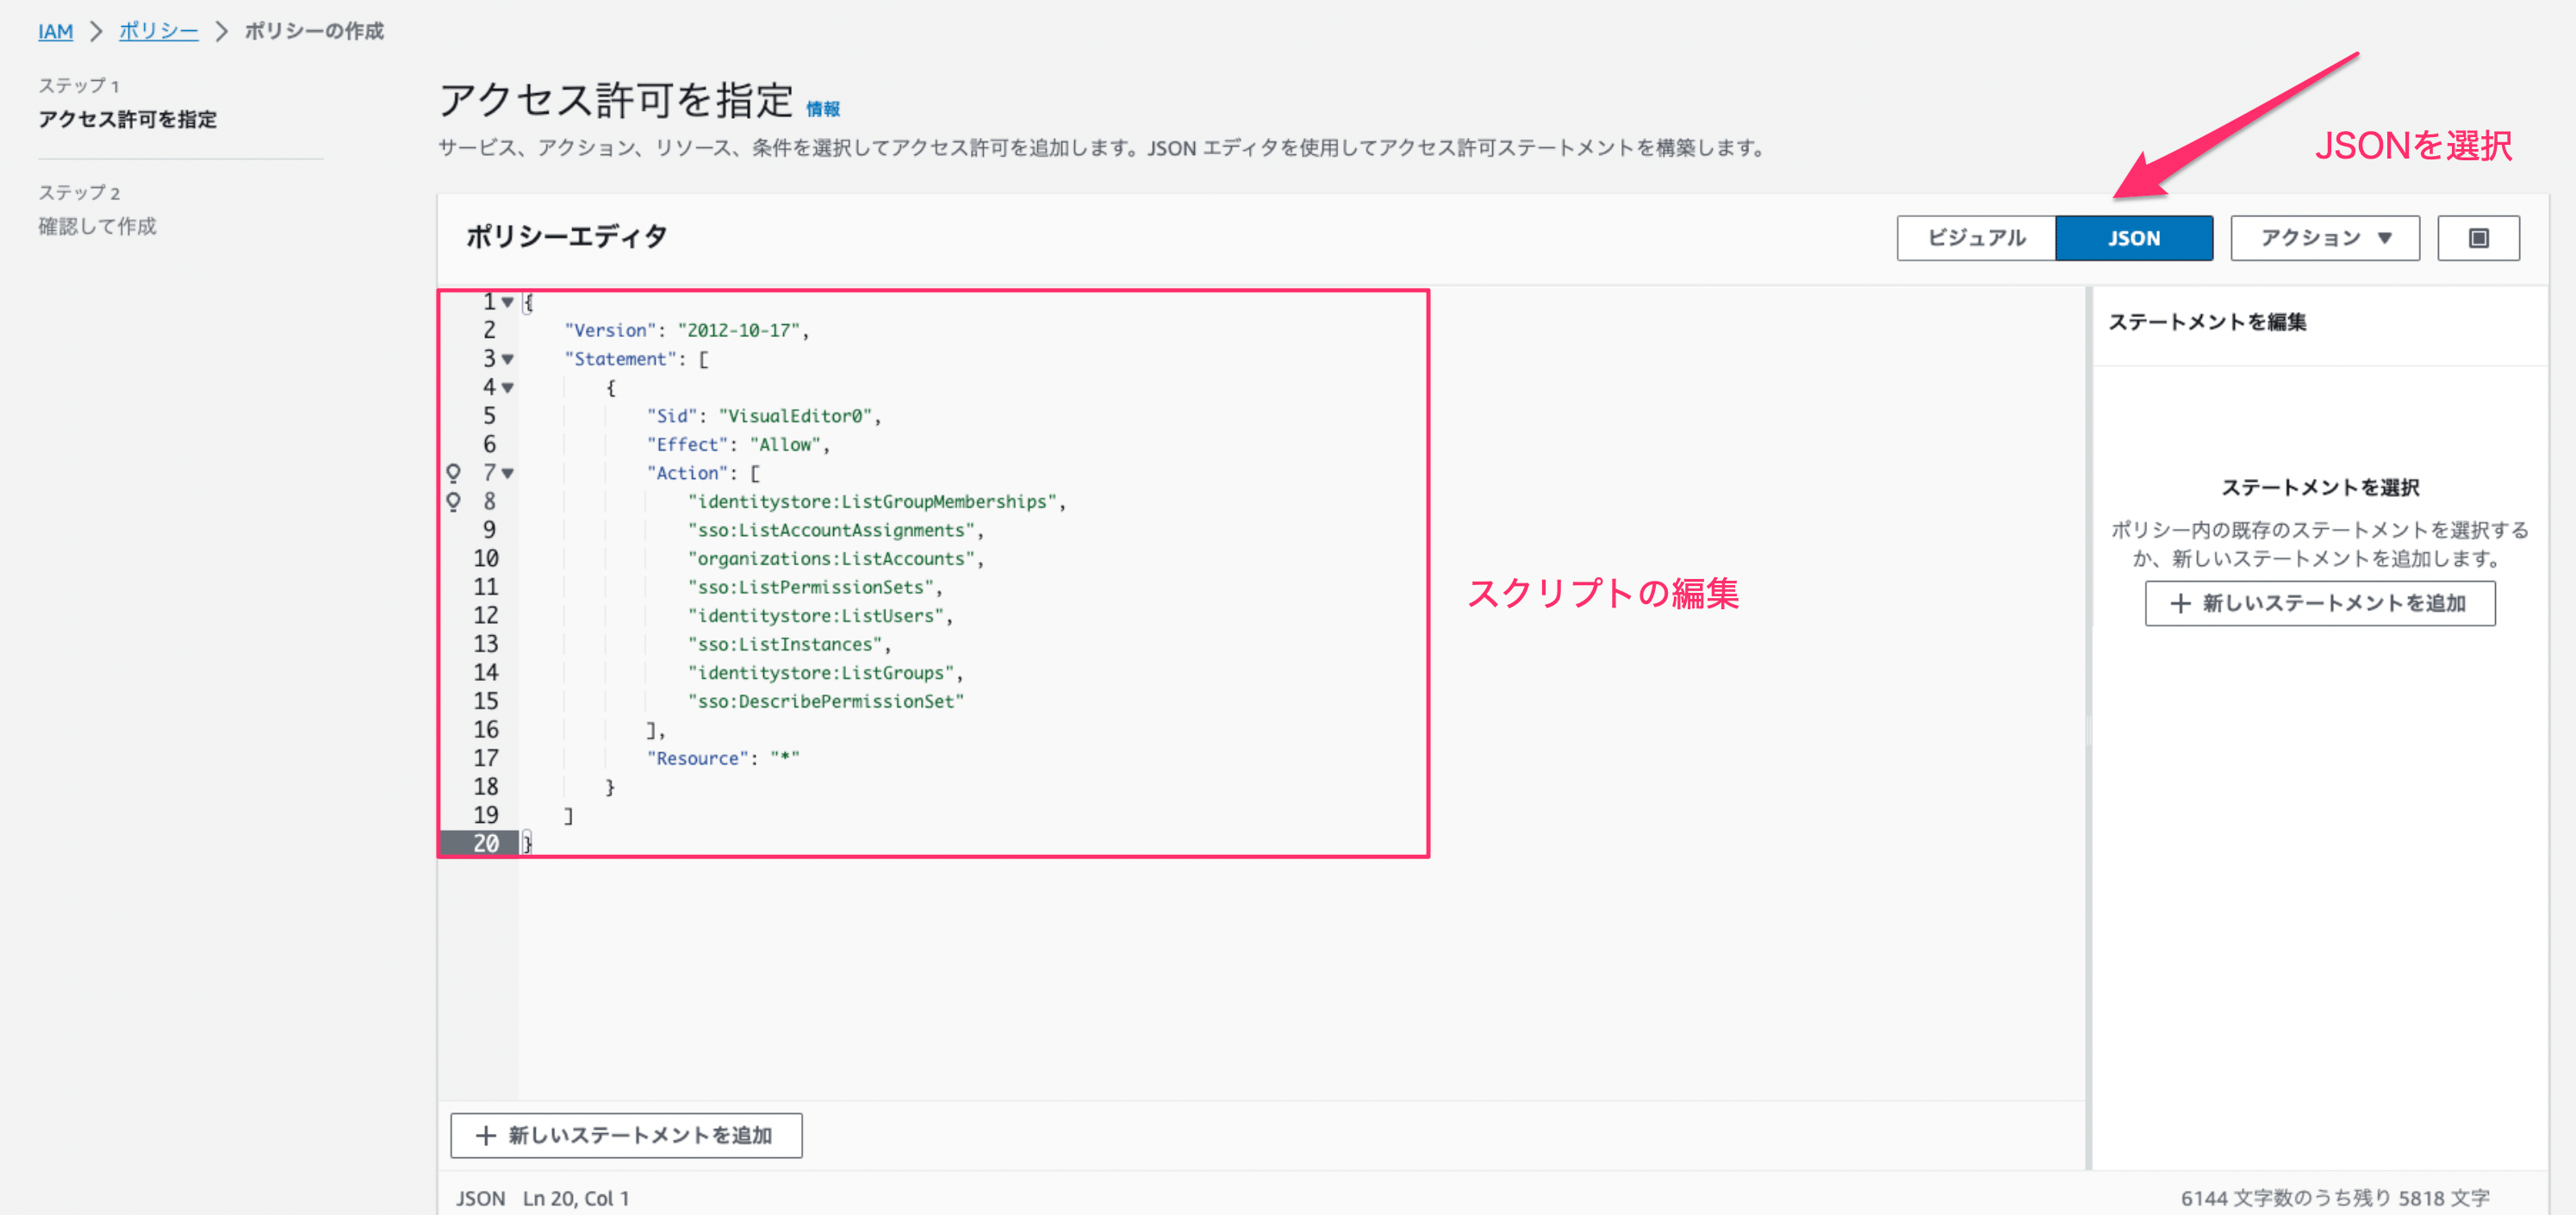
  2. On the Create policy screen, click the JSON tab and overwrite with the following script. Policy JSON edit screen
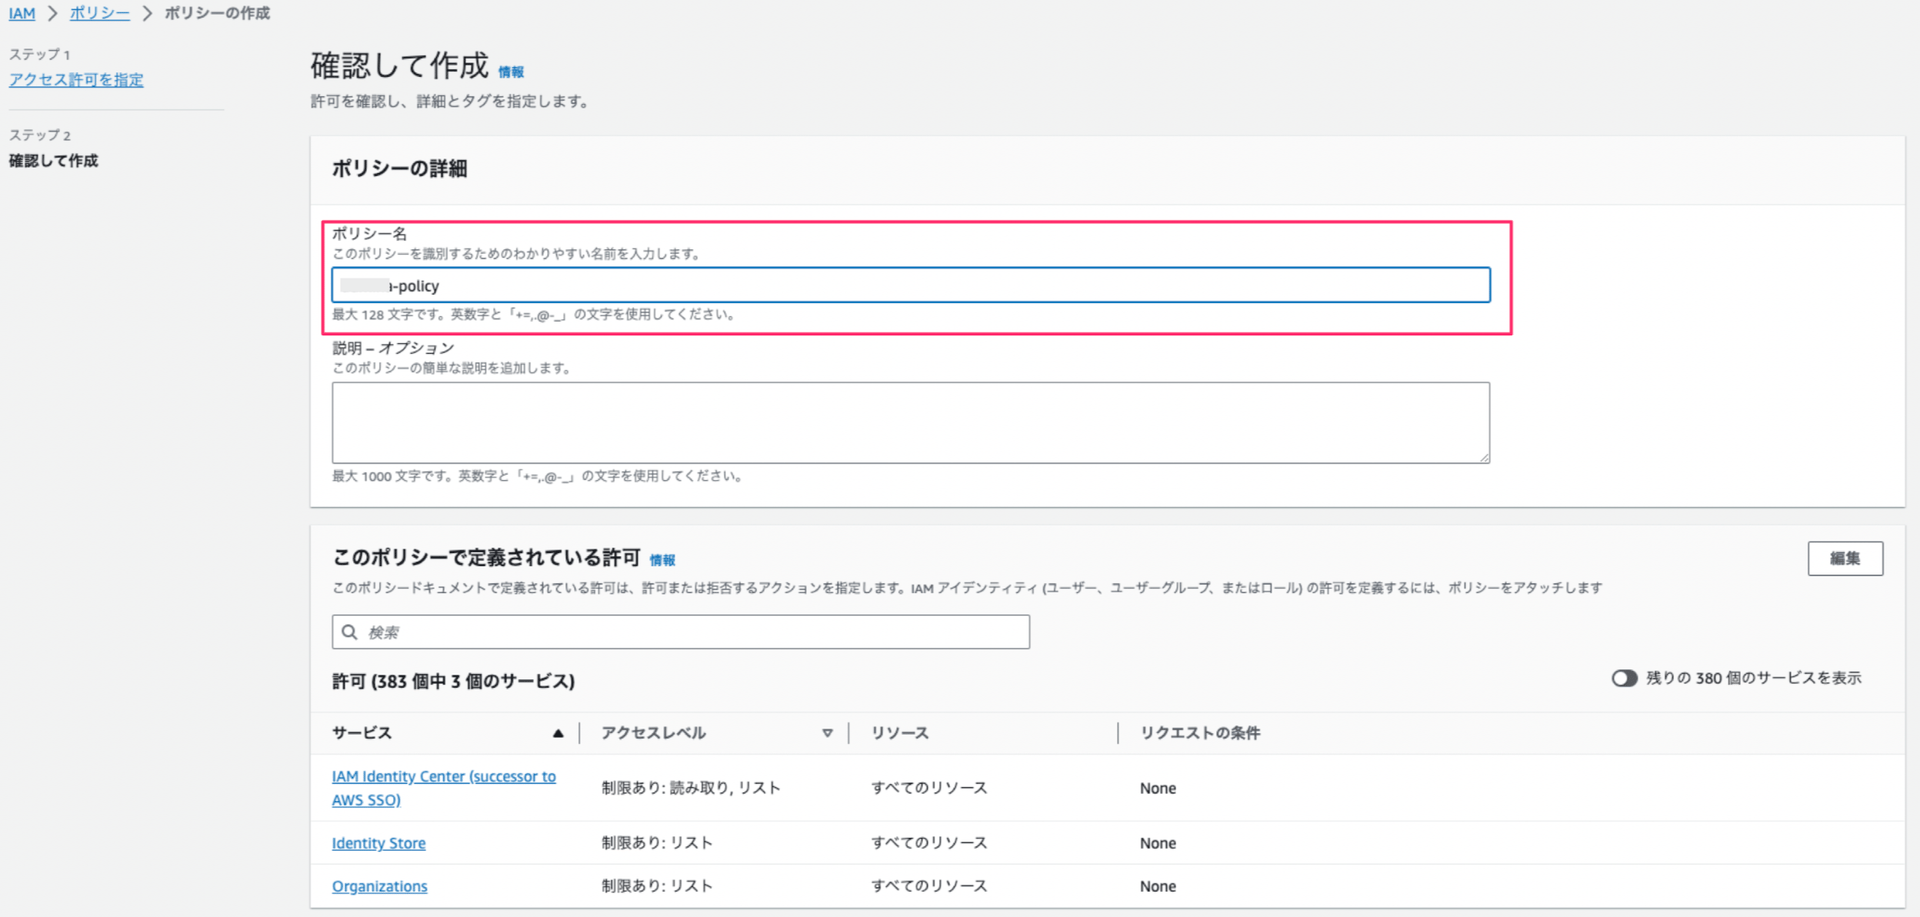
  3. Enter a name of your choice and click [Create policy] to save. (No other fields are required.) Policy creation complete

Step 2: Creating a Role for Integration

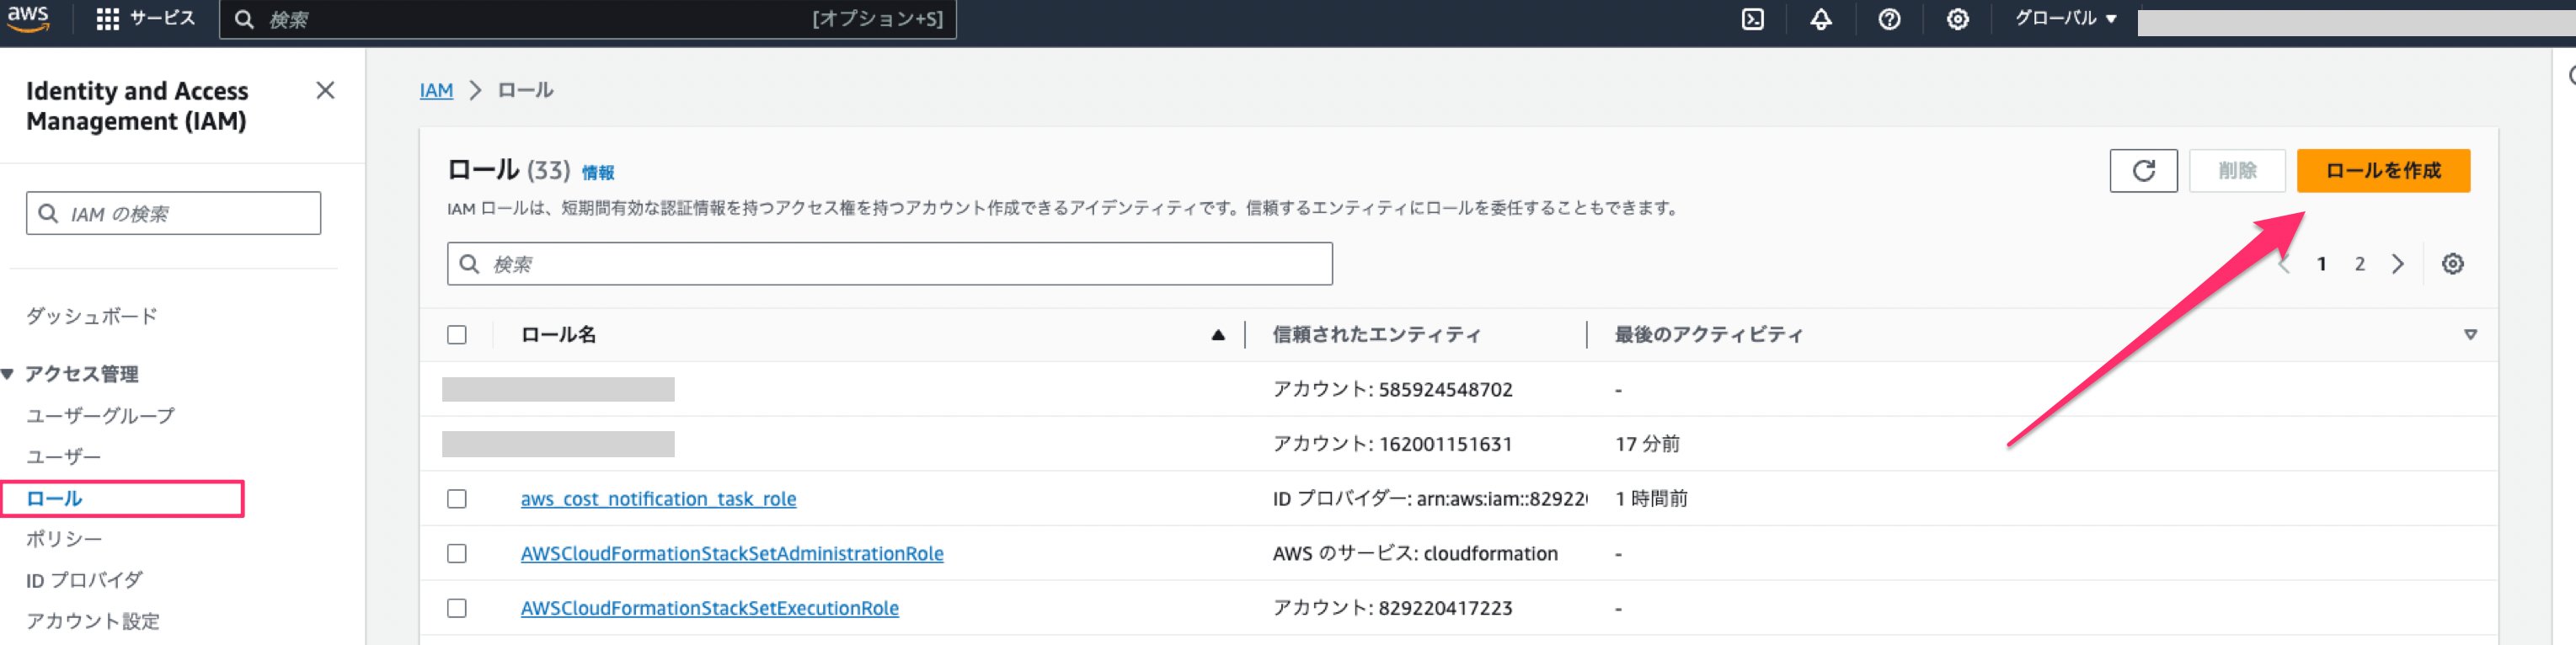
  1. Go to Identity and Access Management (IAM), and click Roles > Create role from the left menu. Role creation screen
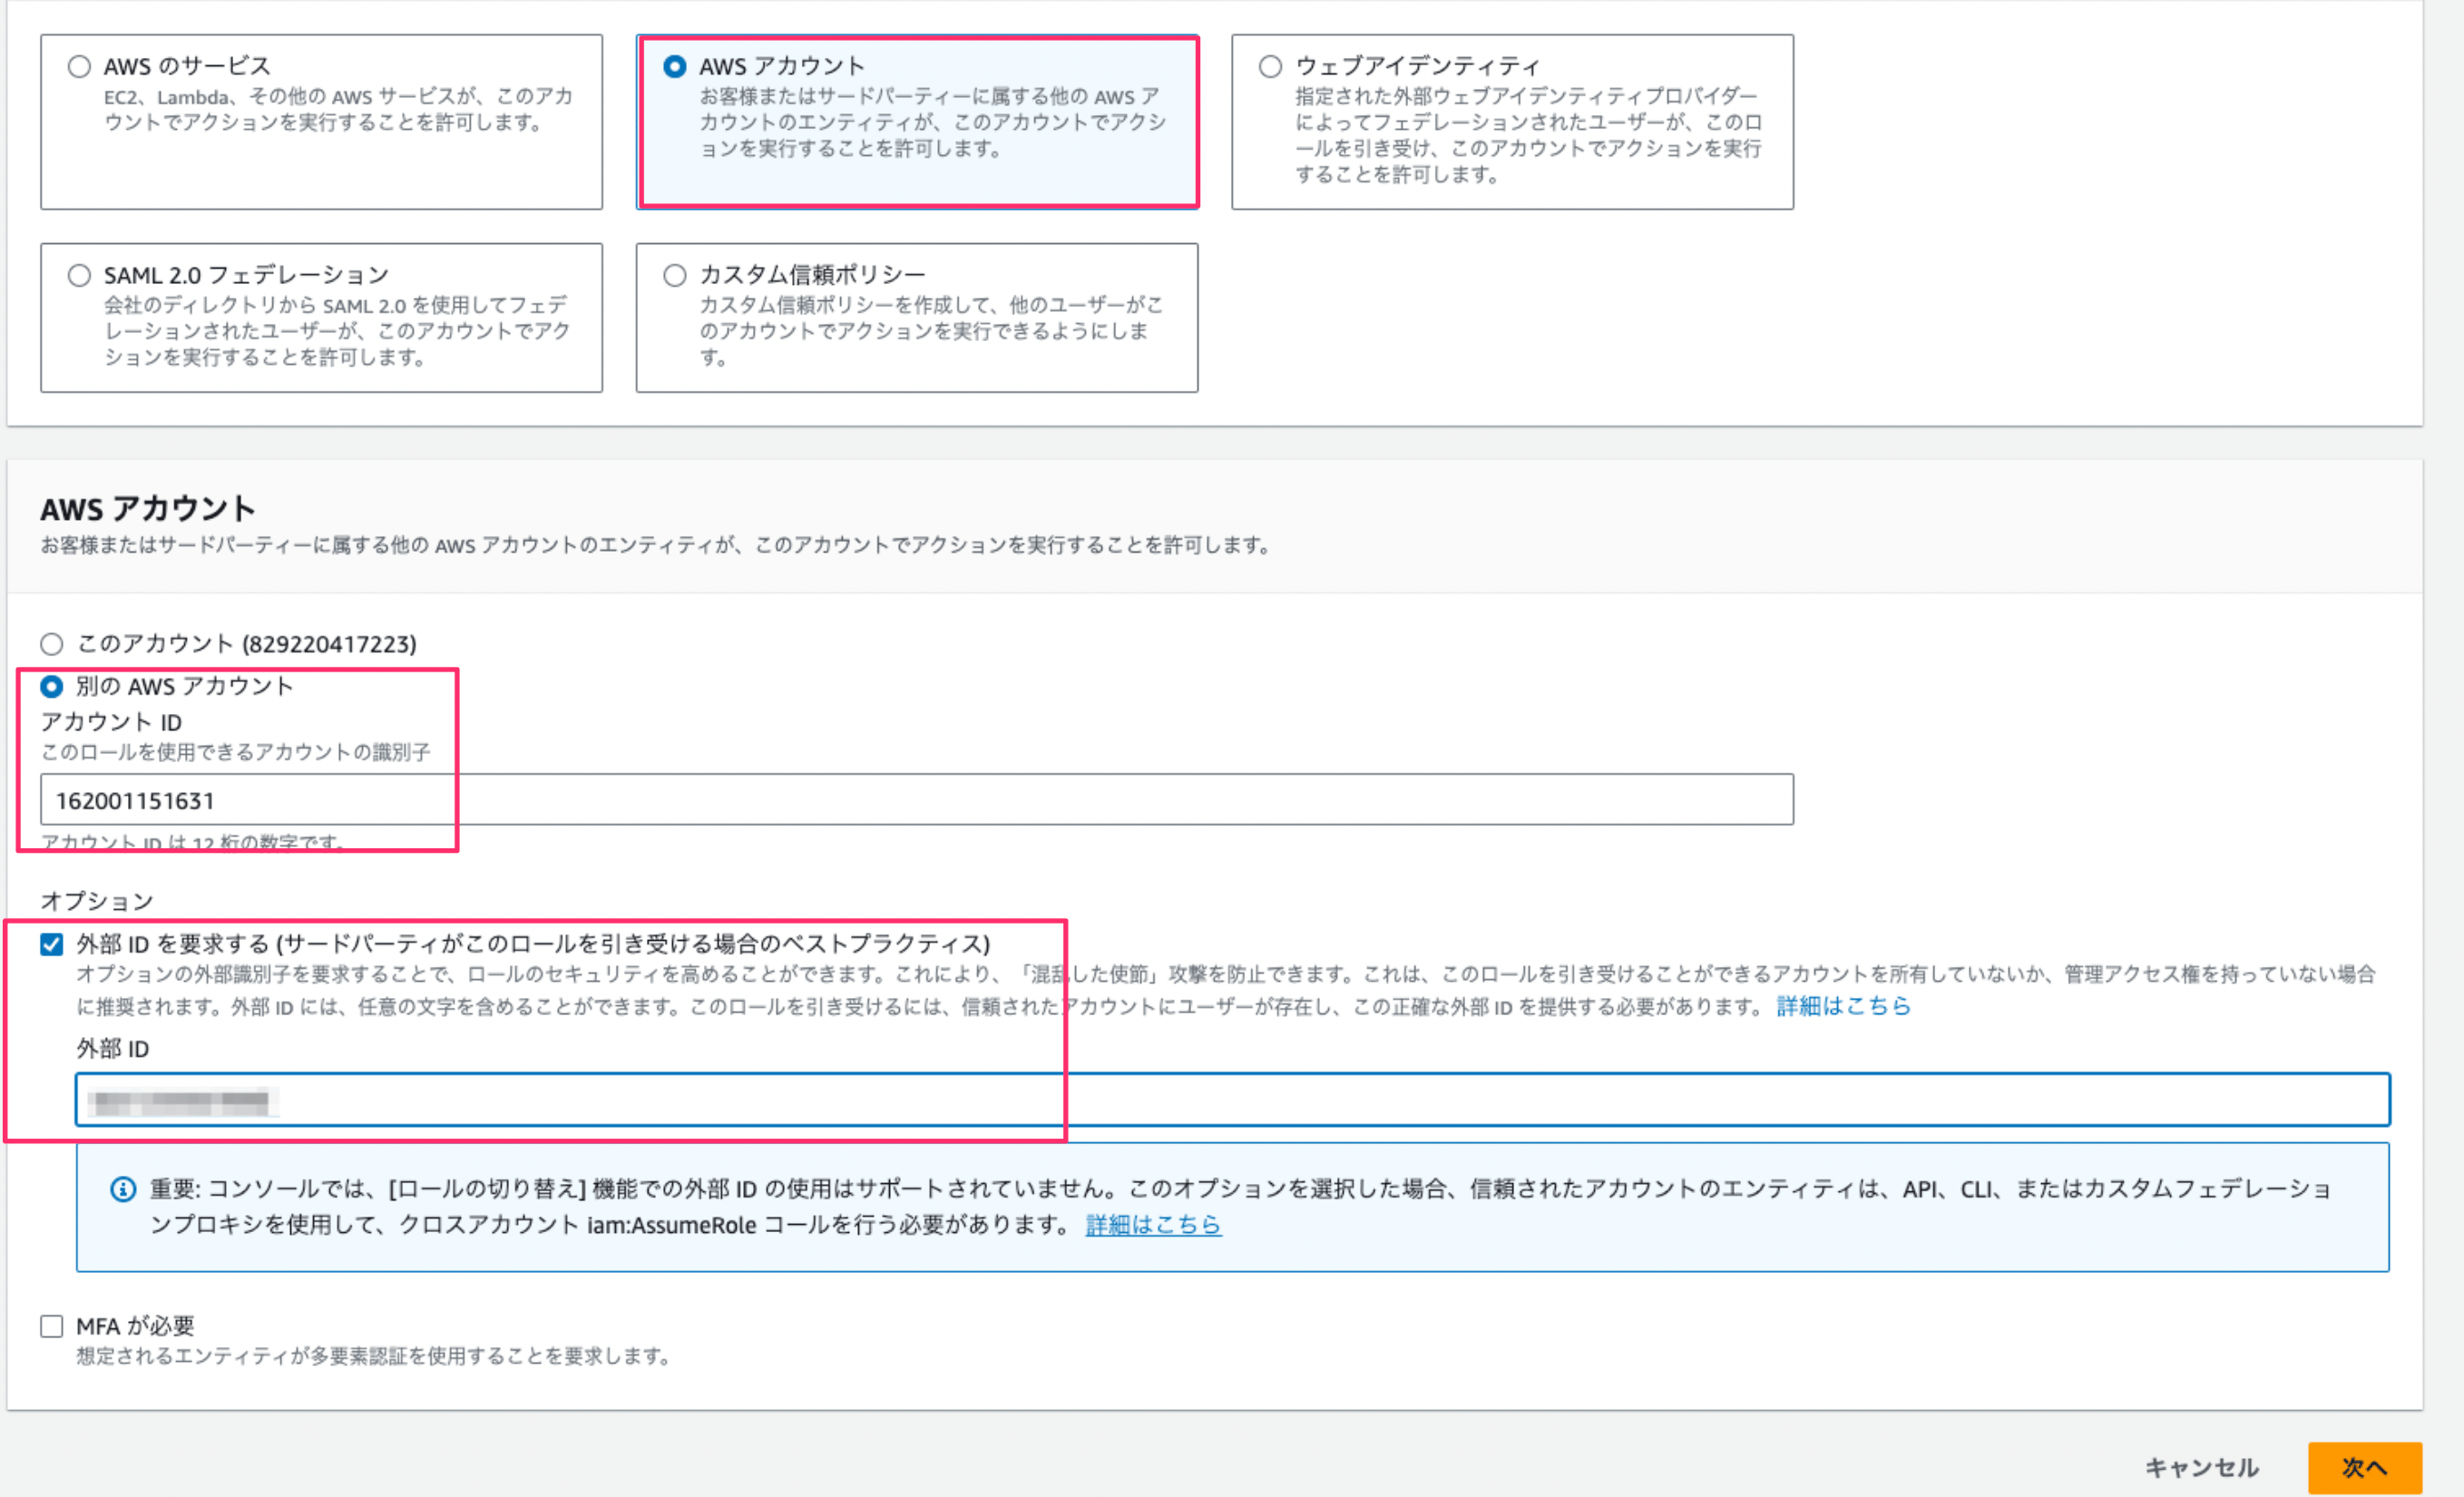
  2. On the Select trusted entity screen, enter the following values. When finished, click [Next].
    • Trusted entity type: Select AWS account
    • AWS account: Select Another AWS account and enter 162001151631 as the account ID.
    • Check Require an external ID (Best practice when a third party will assume this role)
    • For External ID, enter a random alphanumeric string (no symbols, 24+ characters recommended).
    • Uncheck Require MFA.
    • To add or remove users, grant these permissions to the role.
    Role settings screen
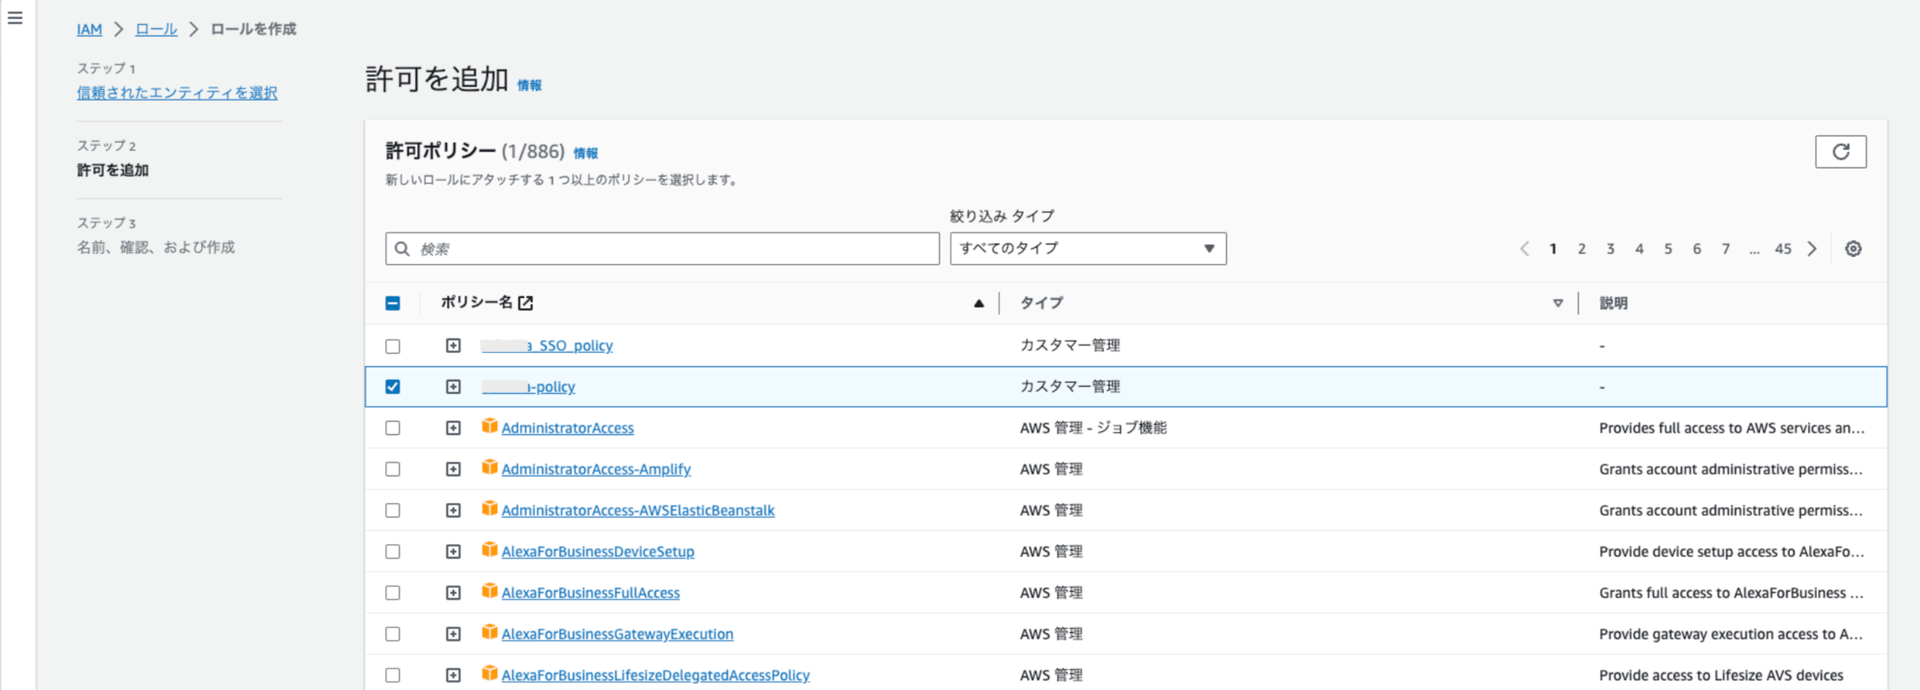
  3. Select the policy created in Step 1, then click Next. Policy selection screen
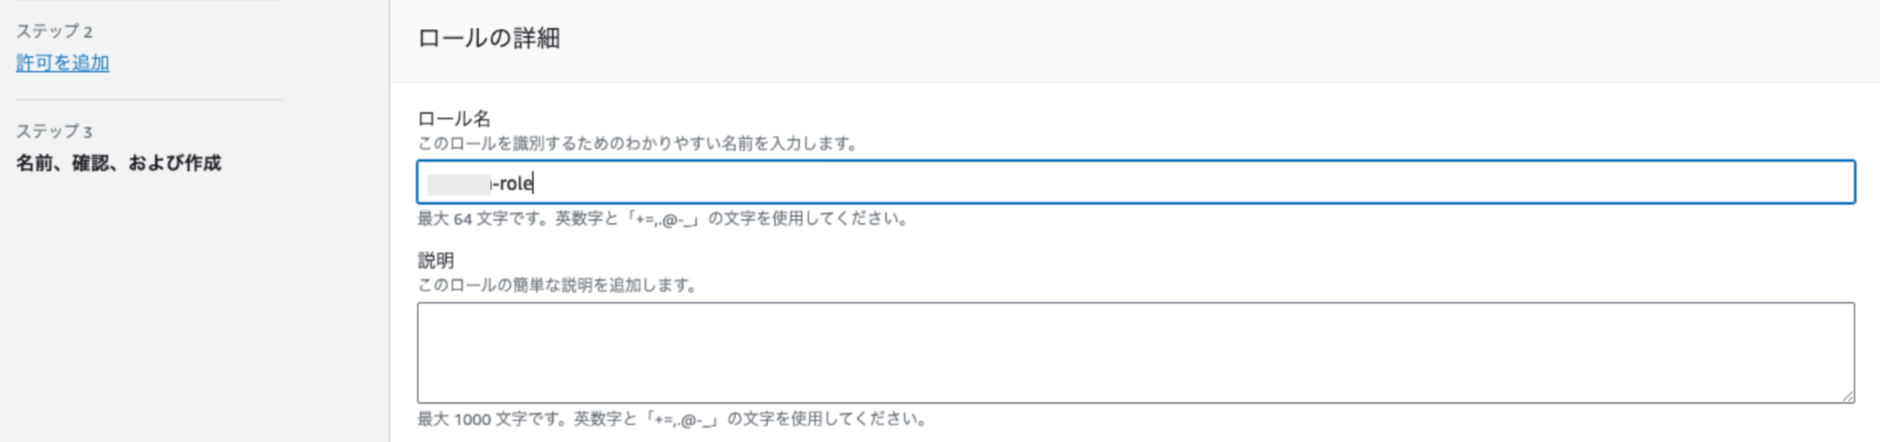
  4. Set any role name and click [Create role]. (No other fields need to be edited.) Role name settings screen

Setting Permissions to Create and Delete Customer-Managed Policies

To add or remove users, grant the following permissions to the role. For details, see the following resource. Controlling access to policies for creating, updating, and deleting customer-managed policies (external site).

Step 3: Confirming the Role ARN

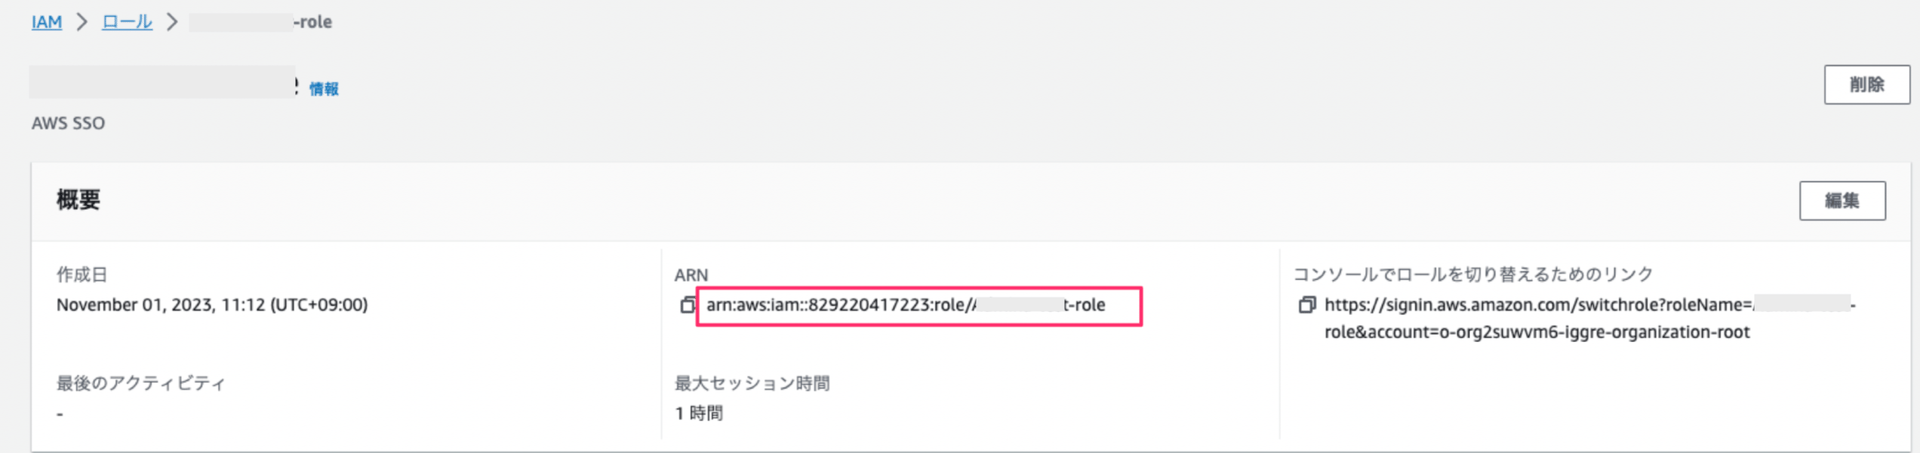
  1. Search for and open the role you created on the Roles screen.
  2. The Role ARN will be displayed. Copy and save it. Role ARN confirmation screen

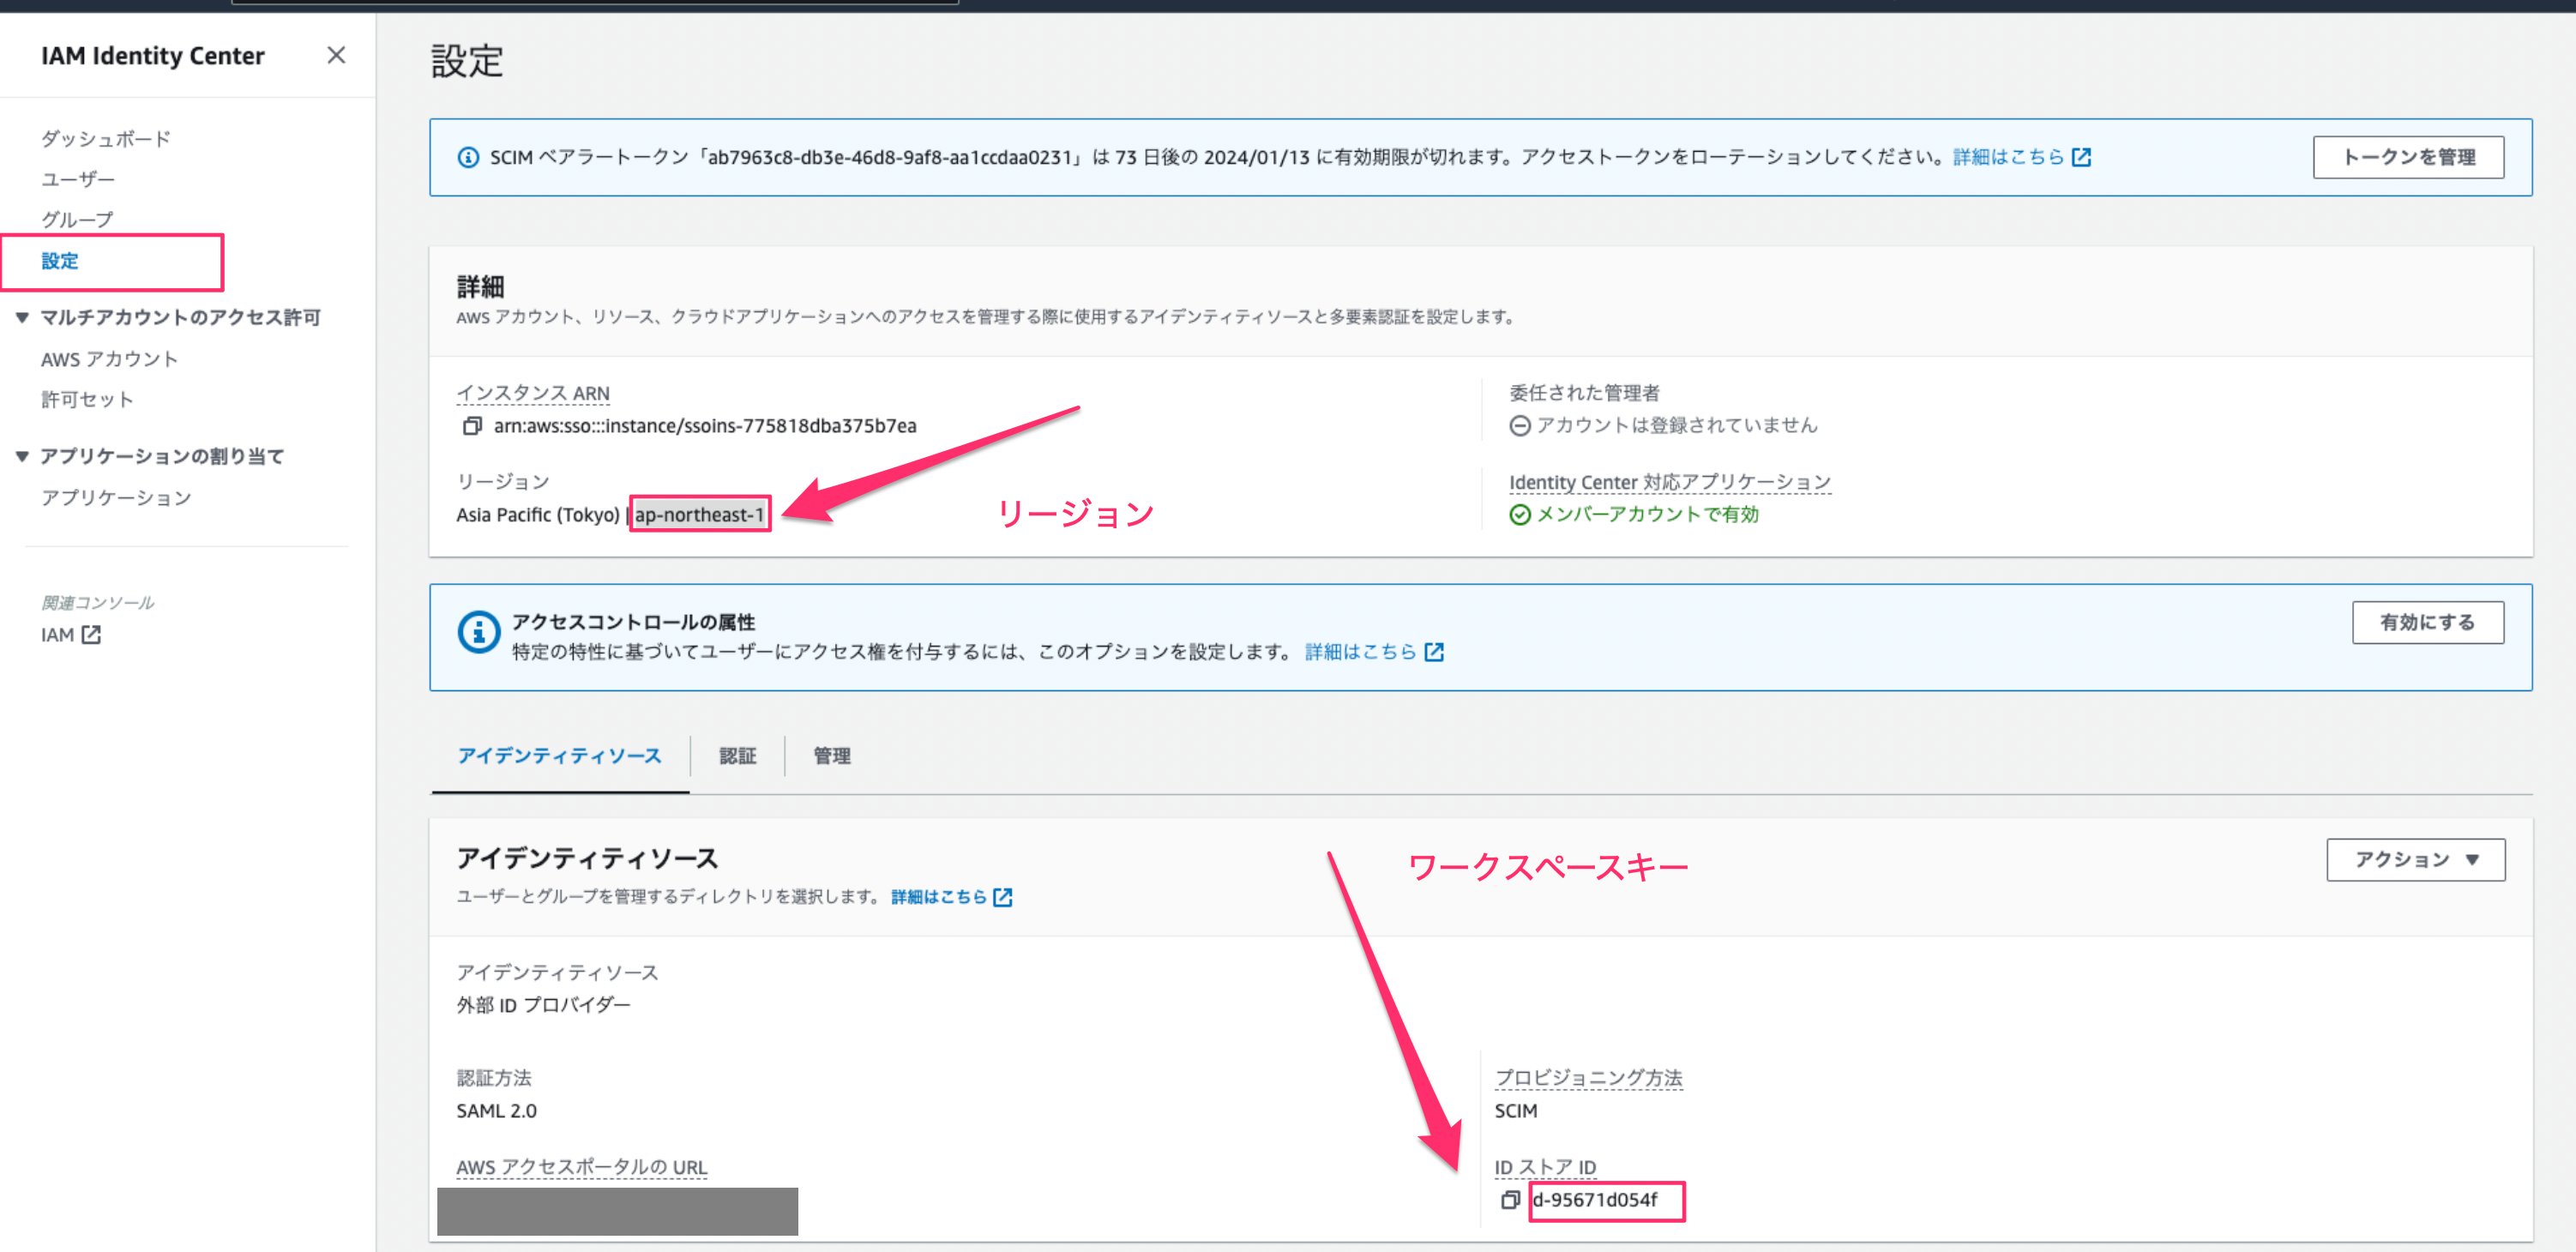
Step 4: Confirming the Region and Workspace Key

Go to IAM Identity Center > Settings and copy and save the Region and Identity store ID. IAM Identity Center settings screen

Integration Setup

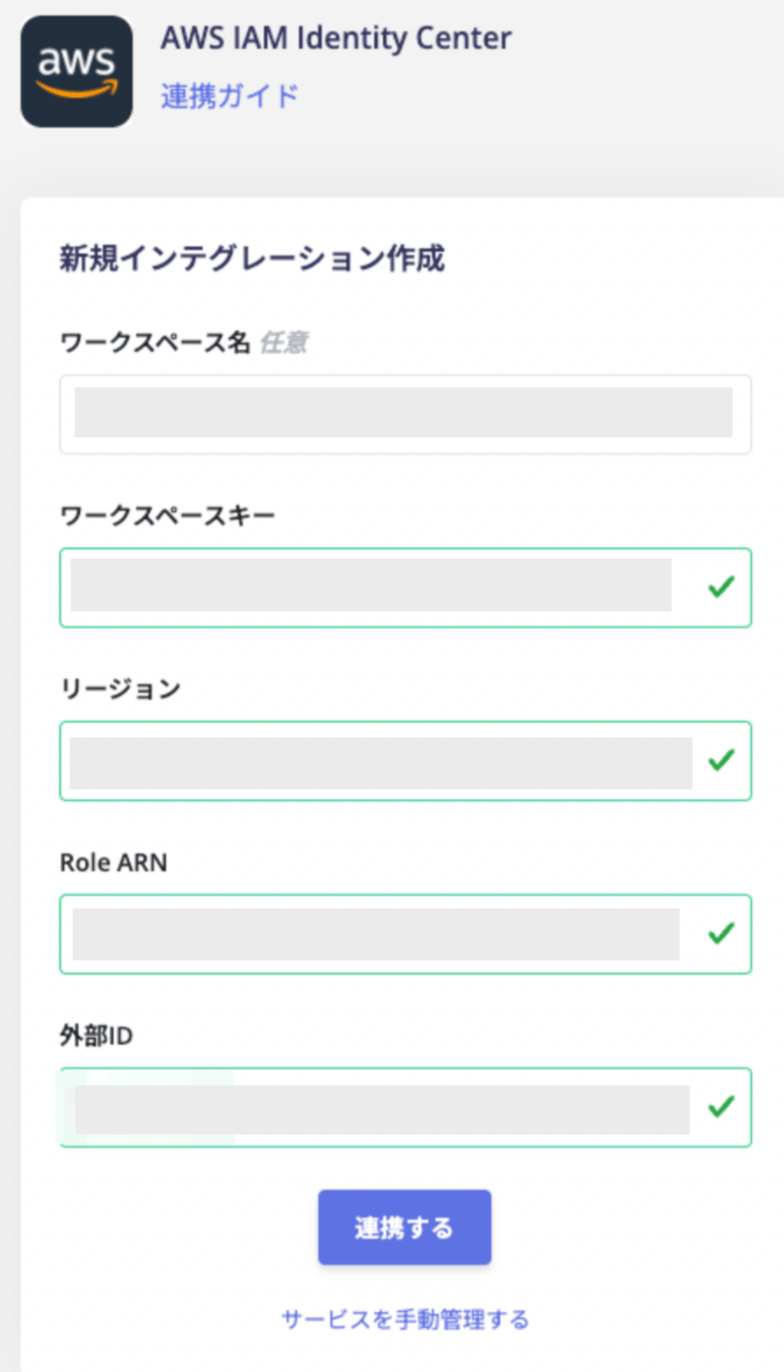
  1. Go to Integrations > Integrations and search for AWS IAM Identity Center.
  2. Enter the workspace key, region, Role ARN, and external ID obtained in the previous steps. These are the values set during role creation. Then click Connect. Integration details input screen
  3. Once the AWS IAM Identity Center integration succeeds, registered user information will appear in the account list.
If it does not complete successfully, click Edit from the Status tab on the integrations screen and try again. If the issue persists, please contact us via chat.

Manual Account Matching for SaaS Services Where Email Address Cannot Be Retrieved

Email addresses cannot be retrieved for this service. As a result, user types are identified as “Unknown ID” in Directory > ID type. If needed, manually match (merge) accounts with other accounts. For configuration details, see Manually link (merge) a SaaS account to another account.
Last modified on July 22, 2026